Materials Cost: 1
Difficulty Level: 2

Introduction

Use caulking and spray foam to flash and air seal piping and wiring that comes through exterior walls. 

Why

Electricians, plumbers, and HVAC (heating, ventilation, and air conditioning) technicians don’t always seal the holes they drill into exterior walls to run wiring, plumbing, and piping. Rainwater can enter the walls through these holes and damage building materials. Pests like rodents, squirrels, bats, and bugs can also use these holes in exterior walls, attics, and foundations to get into the home and cause extensive damage. Thus, as a homeowner, it is worth checking for unsealed holes in your exterior walls and sealing them yourself before they lead to bigger problems. 

What You'll Need

  • Spray foam
  • Spray foam gun
  • Spray foam cleaner
  • Caulk 
  • Caulk gun
  • Steel wool – to deter pest intrusion
  • Disposable nitrile gloves
  • Coverall protective suit, if you’ll be entering a crawlspace or attic 
  • N95 or better dust mask, if you’ll be entering a crawlspace or attic
  • Ladder, to reach an attic access hatch in the ceiling or penetration high on an exterior wall
  • Headlamp, if entering dark places

1. Locate piping and wiring in exterior walls.

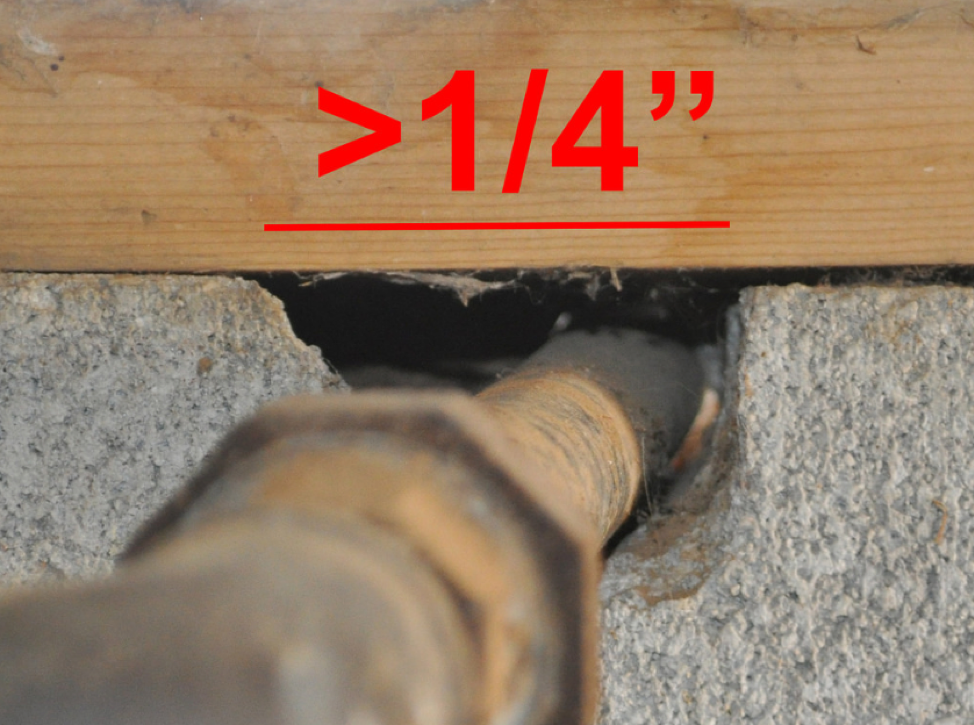
Look for any instance of piping and wiring running through the exterior walls of your home. Check for gaps around the pipe or wiring that have not been sealed. The goal is to air seal pipes, wiring, and other penetrations through exterior walls from the interior and the exterior if accessible (Figure 1).  Some holes may be at ground level and easy to reach from the exterior of the home, but most holes are likely in hard-to-reach places such as in the crawlspace, basement rim joist area, inside a cabinet, behind a tub or shower enclosure, inside an attic, or high above the ground in a soffit or gable wall. Use a ladder and proper personal protective equipment as needed to reach the location.

Seal plumbing penetrations in exterior walls with caulk or a gasket
Source
Author(s)
Baechler Michael C,
et al.
Organization(s)
Pacific Northwest National Laboratory,
PNNL,
Oak Ridge National Laboratory,
ORNL,
U.S. Department of Energy,
DOE
Description

Guide describing measures that builders in the cold and very cold climates can take to build homes that have whole-house energy savings of 40% over the Building America benchmark with no added overall costs for consumers.

Figure 1. Seal pipes and other penetrations through the exterior wall from both the interior and the exterior, where possible (Source: PNNL).

Figure 12 shows a hole that was cut into the concrete foundation wall to run a pipe; the hole was not filled in.

Wrong - This plumbing penetration through the foundation wall has not been sealed; the seam between the sill plate and the foundation wall is also unsealed
Source
Figure 2. The hole that was cut in the foundation wall for this gas pipe has not been sealed (Source: PNNL).

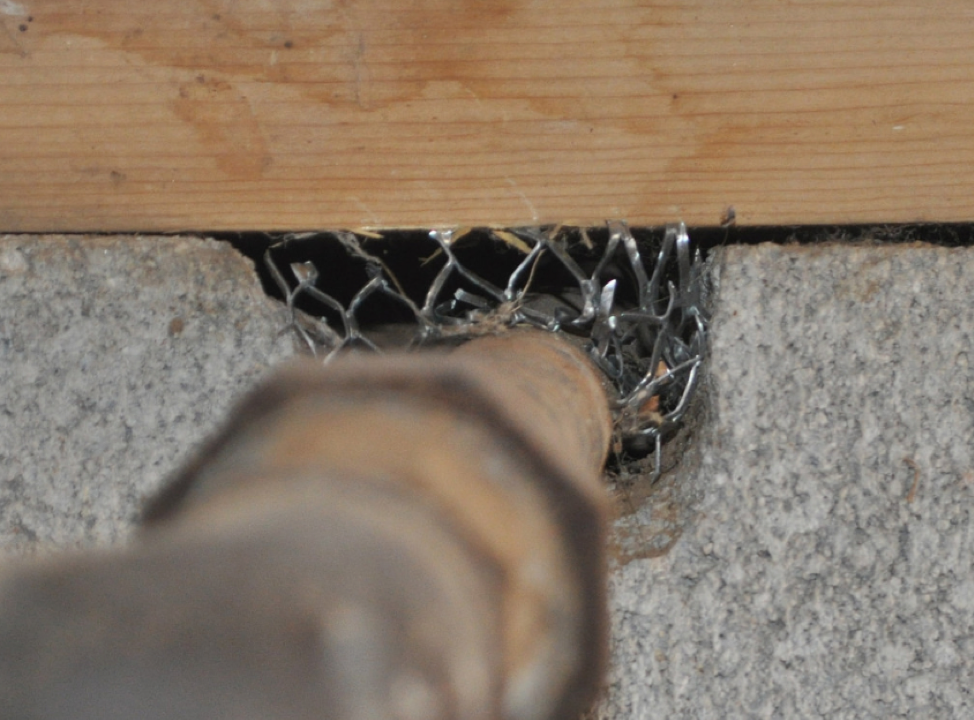
2. Install metal screening in holes.

Push some steel wool or metal screening or metal hardware cloth into the gap around the pipe or wiring to keep out rodents (Figure 3).

Wrong - The opening in the foundation wall around this pipe has not been sealed allowing entry for rodents and bugs
Source
Figure 3. To keep out rodents, push some steel wool or steel screening material into the gap around pipes or wires that go through the home’s exterior wall (Source: PNNL).

3. Air seal.

Cover the metal screening with canned spray foam or caulk to air seal the hole from inside the attic, basement, or crawlspace (Figure 4).

Right - This opening in the foundation wall around this pipe was filled with wire mesh then sealed with spray foam to prevent rodent and insect entry
Source
Figure 4. Install canned spray foam over wire mesh to air seal and rodent-proof the gaps around pipes that go through the home’s exterior walls (Source: PNNL).

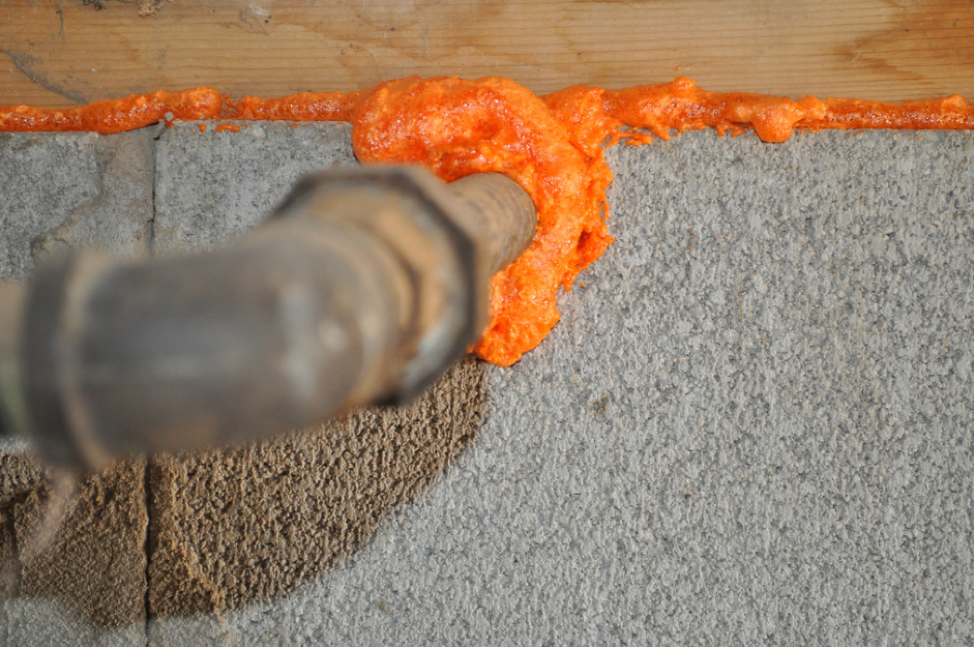
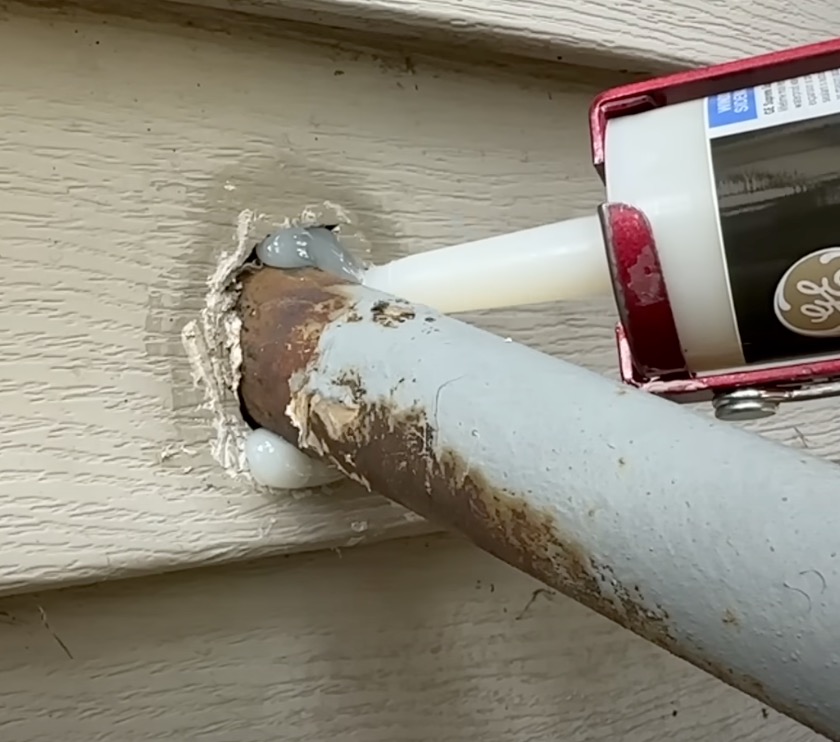
4. Seal pipes and wires from outside.

Seal the gap around the pipe or wiring from outside with a water-resistant caulk or foam to keep out water. For smaller gaps use caulking like that shown in Figure 5. For larger gaps, use canned spray foam like that shown in Figure 6. Note that spray foams formulated with pest-resistant chemicals are available.

Figure 5. Seal gaps around pipes and wiring with caulk or spray foam from the outside to prevent water and air from entering (Source: PNNL).
Figure 6. Canned spray foam is used here to seal the gap around a pipe that enters the house through the brick foundation wall (Source: PNNL).

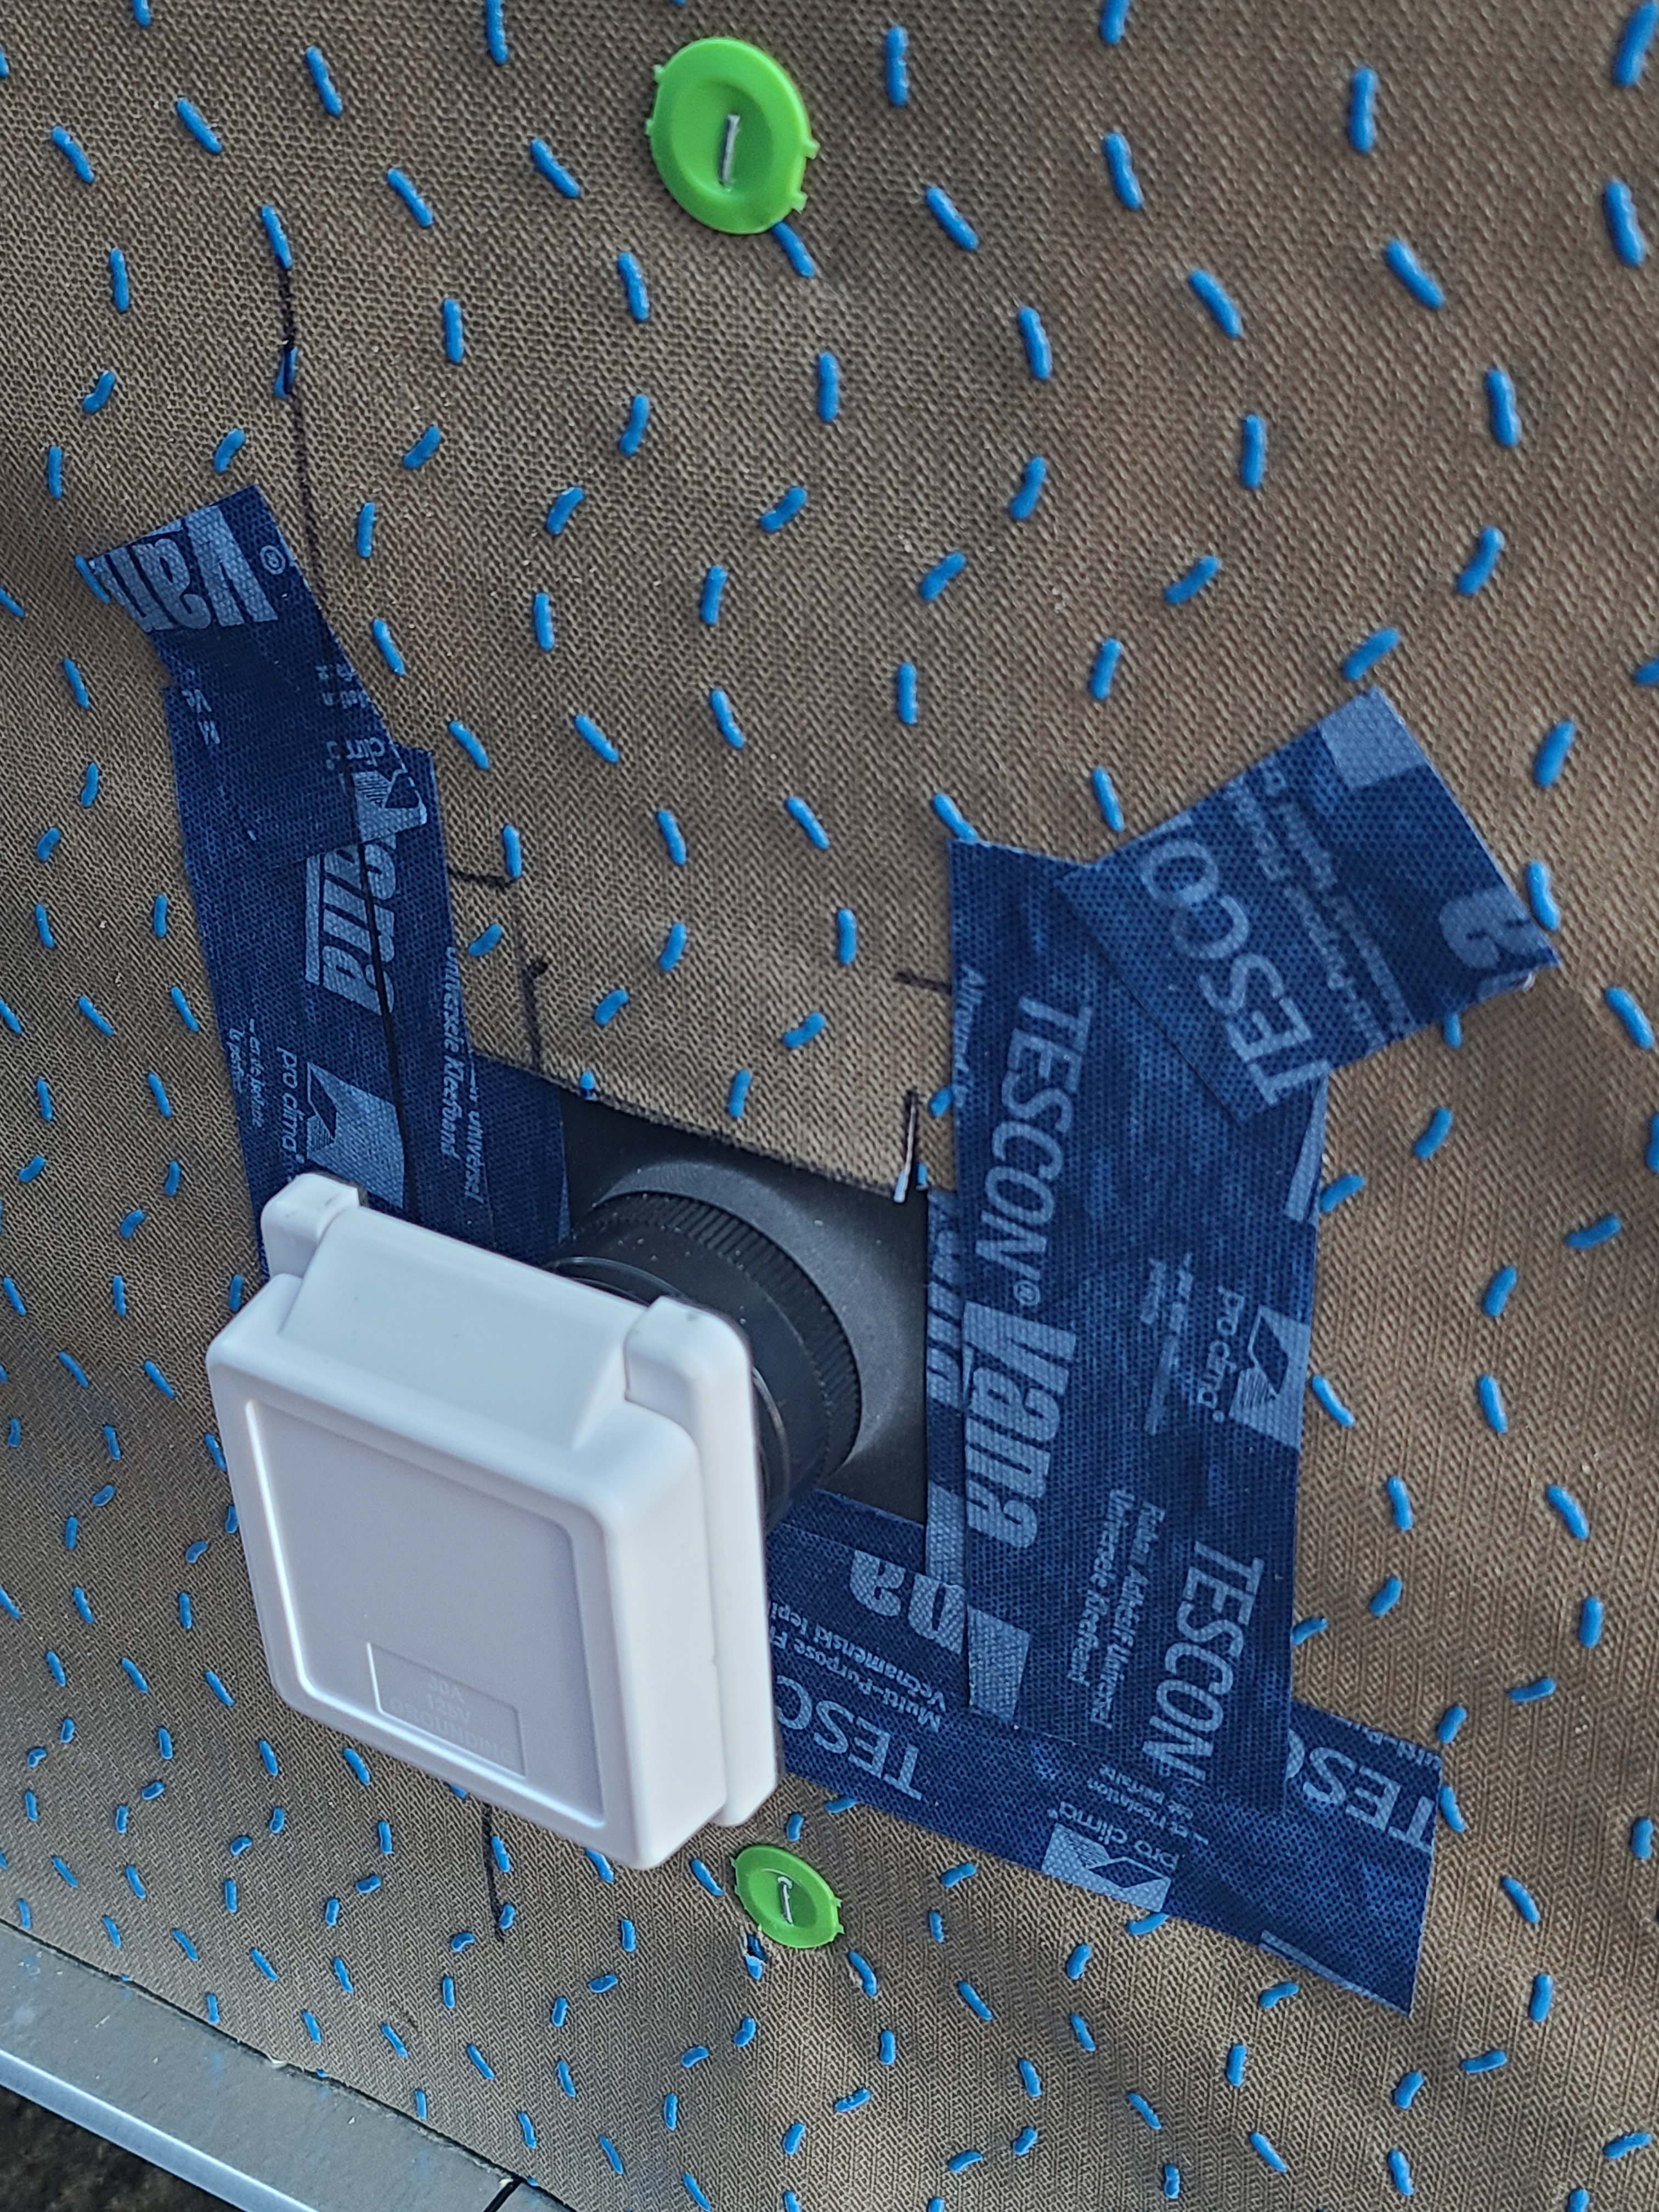
5. If you are re-siding, ensure proper sealing details.

If the siding is being removed for replacement or repairs, that is a good chance to check that water and air barriers are layered and detailed correctly, especially around pipes, wiring, windows, and doors. Figure 7 shows a good example of how a pre-made pipe flashing gasket, flashing tape, and house wrap are integrated around a vent pipe to direct water down and out of the wall.

Right - External outlet wall penetration is flashed with tape that is properly layered with house wrap.
Source
Figure 7. The flashing layers are correctly installed around this vent pipe including a pre-made rubber gasket, flashing tape, and draining house wrap to direct water out and away from the wall (Source: PNNL).

Additional Info

Last Updated

Related Guides

Disclaimer

This content is a work created with funding provided by the United States Department of Energy under Contract no DE-AC05-076RL01830 for the operation of Pacific Northwest National Laboratory. The information and guidance provided by Pacific Northwest National Laboratory (PNNL) in the content are intended solely for educational purposes only and do not constitute formal training or certification. It is provided with the explicit understanding that neither the United States Government nor the United States Department of Energy, nor the Contractor, nor any or their employees, nor any jurisdiction or organization that has cooperated in the development of these materials, makes any warranty, express or implied, or assumes any legal liability or responsibility for the accuracy, completeness, or usefulness or any information, apparatus, product, software, or process disclosed, or represents that its use would not infringe privately owned rights. Reference herein to any specific commercial product, process, or service by trade name, trademark, manufacturer, or otherwise does not constitute or imply its endorsement, recommendation, or favoring by the United States Government or any agency thereof, or Battelle Memorial Institute. The views and opinions of authors expressed herein do not necessarily state or reflect those of the United States Government or any agency thereof. Viewers assumes full responsibility for all actions that they may take from information provided in this content including ensuring the safety, code compliance, and proper functionality of any products they choose to install. Installation and use of such products should be performed in accordance with local regulations and manufacturer instructions.