Introduction
Look at the condition of the insulation on the refrigerant pipe from the house to the outdoor unit of the home’s air conditioning or heat pump system and replace or hire an HVAC contractor to replace if needed.
Why
Air conditioners and heat pumps use a refrigerant like freon to move heat out of the home in cooling mode. For heat pumps, this cycle is reversed in winter to bring heat into the home. This refrigerant moves from the evaporator coil in the air handler located inside the home to the outside compressor/condenser unit and back again. The exposed portion of the refrigerant line should be insulated to protect it from damage and improve the efficiency of the system. The pipe insulation keeps the refrigerant in the correct state or phase, minimizes energy losses, and prevents condensation. The condition of the pipe insulation should be examined annually to make sure it is not worn, cracked, or damaged.
What You'll Need
- Camera/phone to take pictures
- Pipe insulation or refrigerant line insulation kit
- Zip ties or tape
- Weather-resistant tape or vapor barrier “jacket”
- Utility knife
1. Locate the refrigerant line.
If you have central air conditioning or a heat pump, the system has an indoor unit and an outdoor unit. The indoor unit has a fan to blow the conditioned air into the ducts that distribute the cooled (or heated) air throughout your home. The outdoor unit contains the compressor, condenser, and condenser fan. Locate this outdoor unit and you'll see two refrigerant pipes coming from it to the house – a thicker line encased in insulation and a thinner copper line that typically has no insulation. The large line carries cool gas refrigerant and is called the suction line, return line, or vapor line. The thinner line carries hot liquid and is called the liquid line or discharge line. Air conditioning or heat pump systems that have an expansion valve in the indoor unit (this includes most “central air” ducted systems) only need the thicker pipe insulated. However, systems that have the expansion valve in the outdoor unit (this includes most ductless “mini-split” heat pumps) need to have both the thicker pipe and the narrow pipe insulated, because on these systems the narrower pipe gets colder potentially leading to condensation wherever the narrow pipe goes through walls, crawlspaces, or attics if that pipe is not insulated.
2. Look at the pipe insulation.
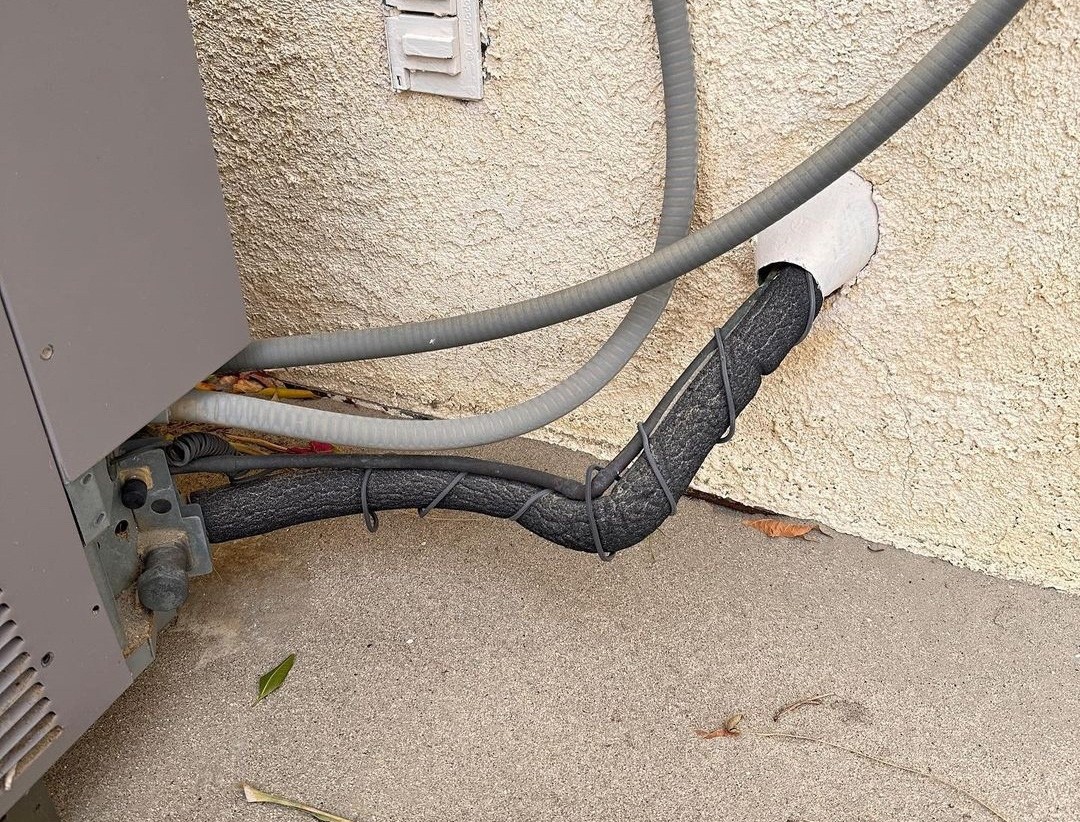
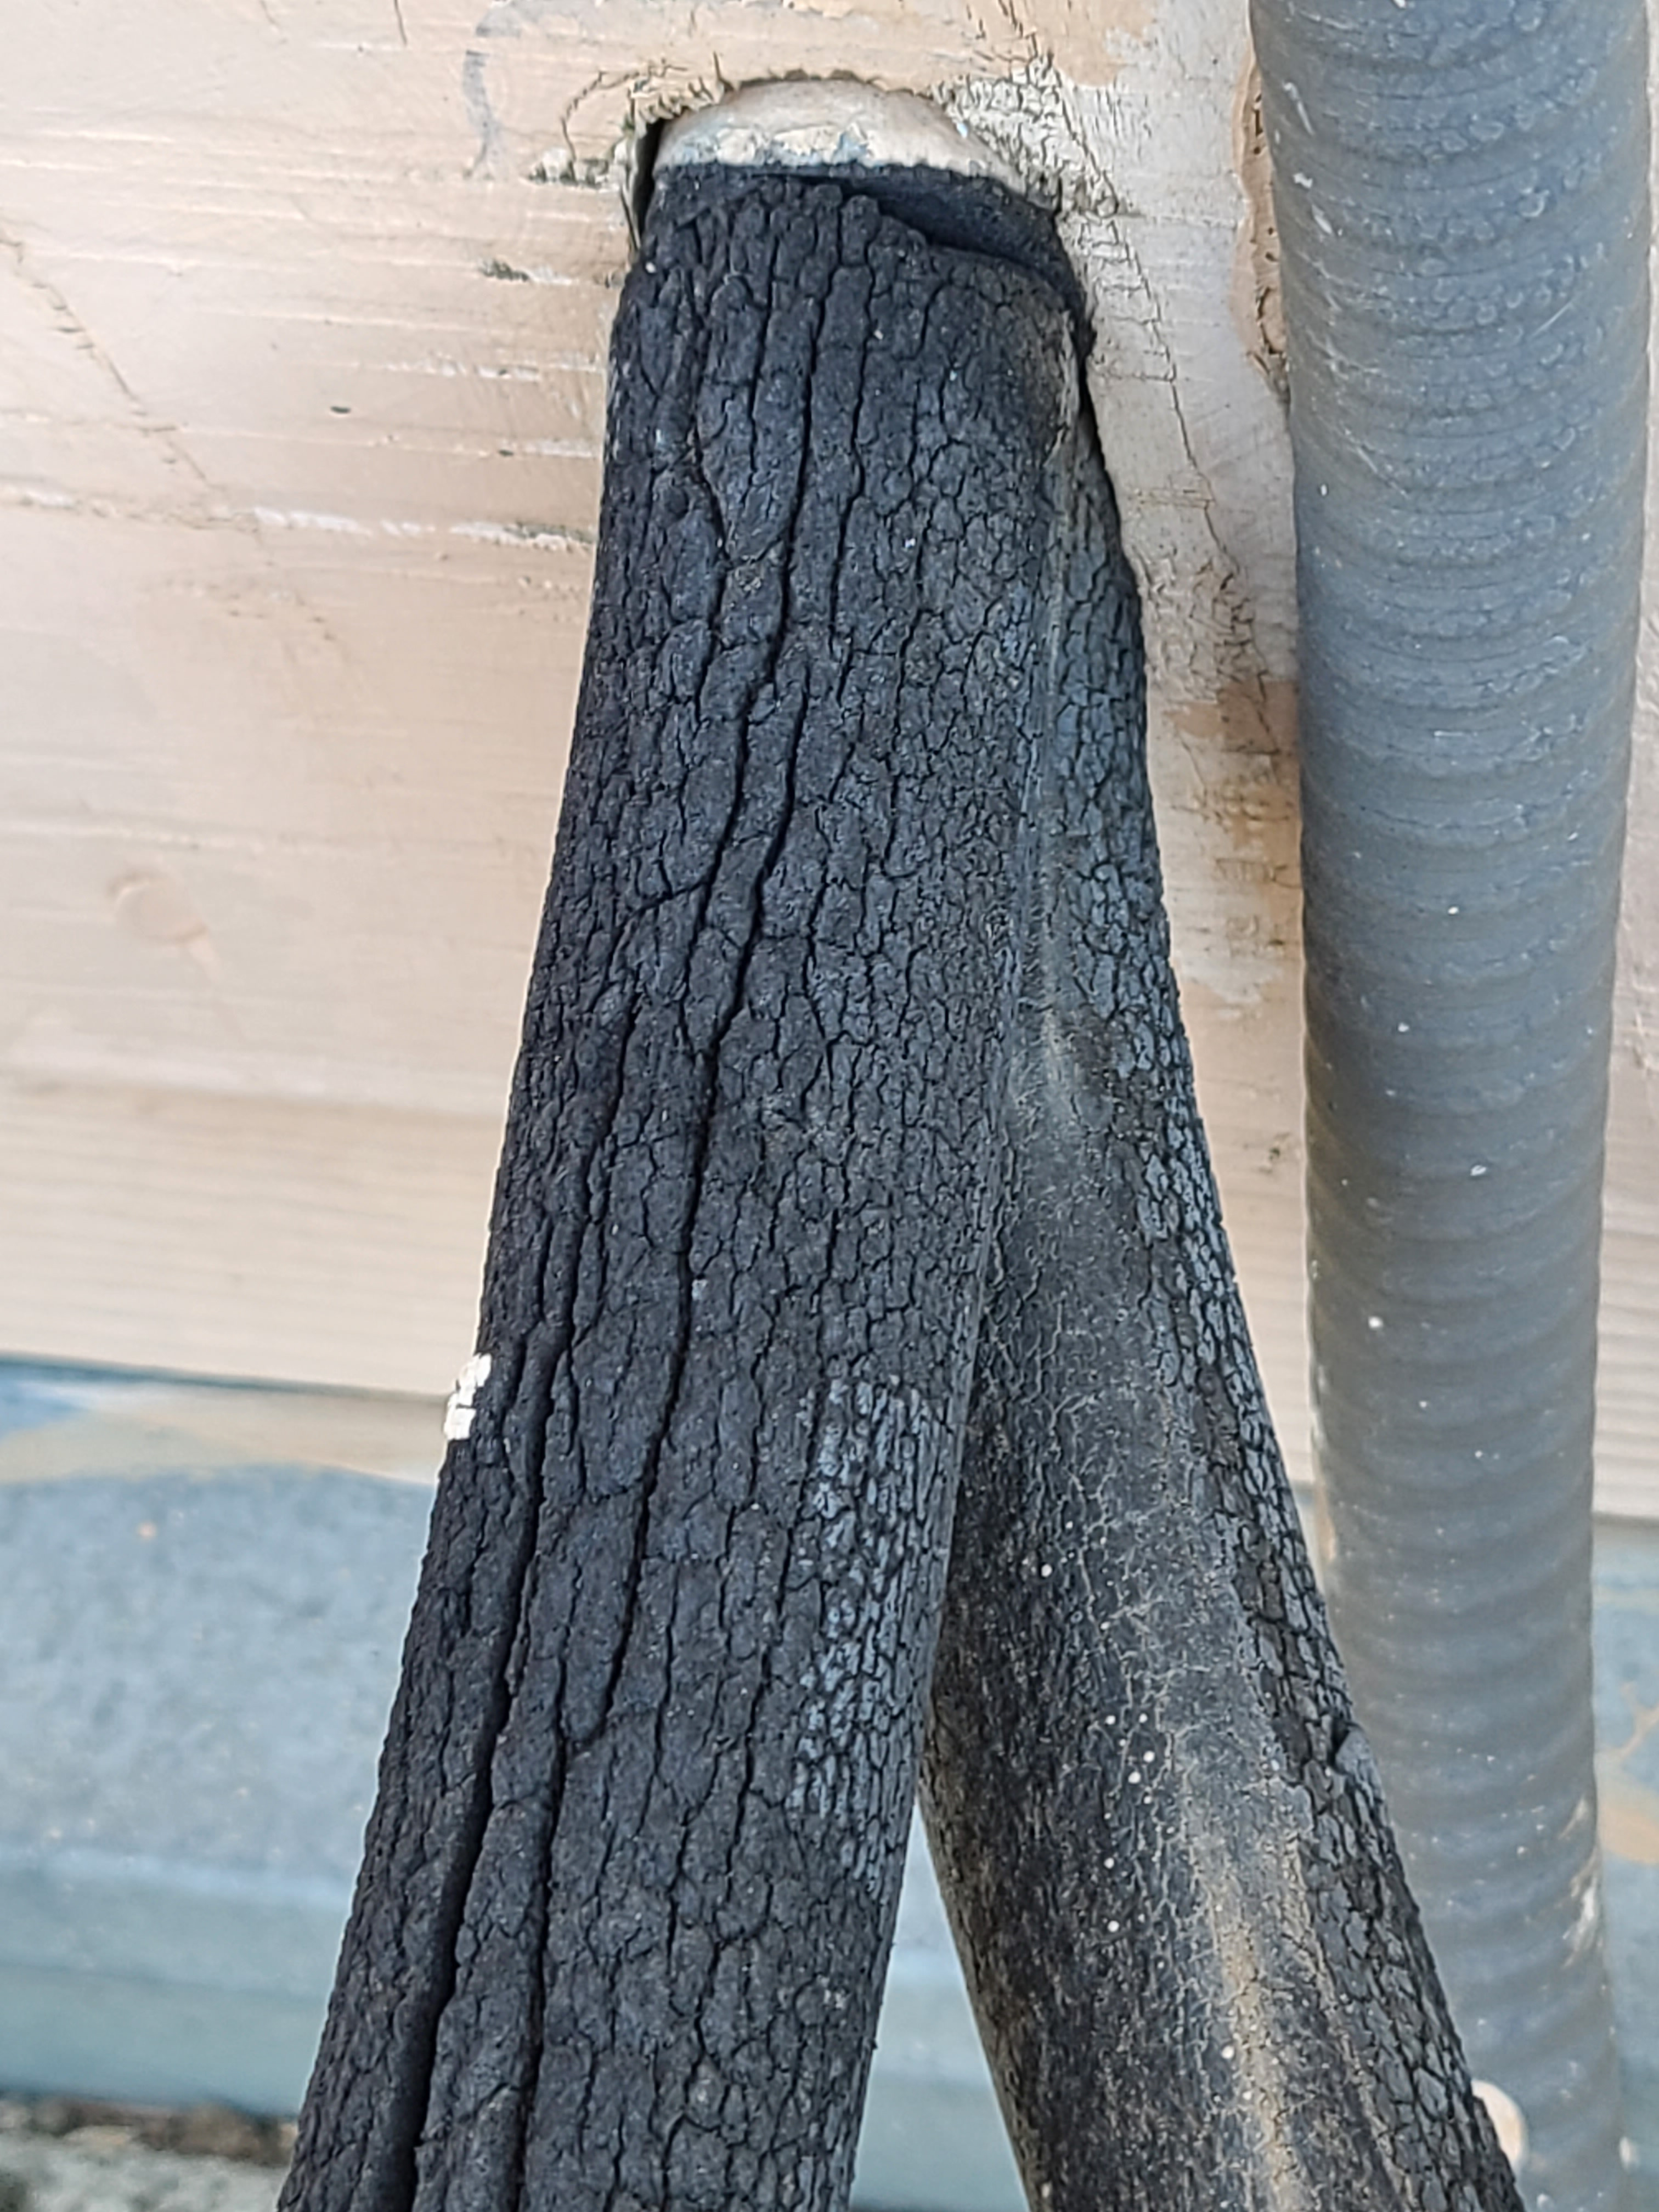
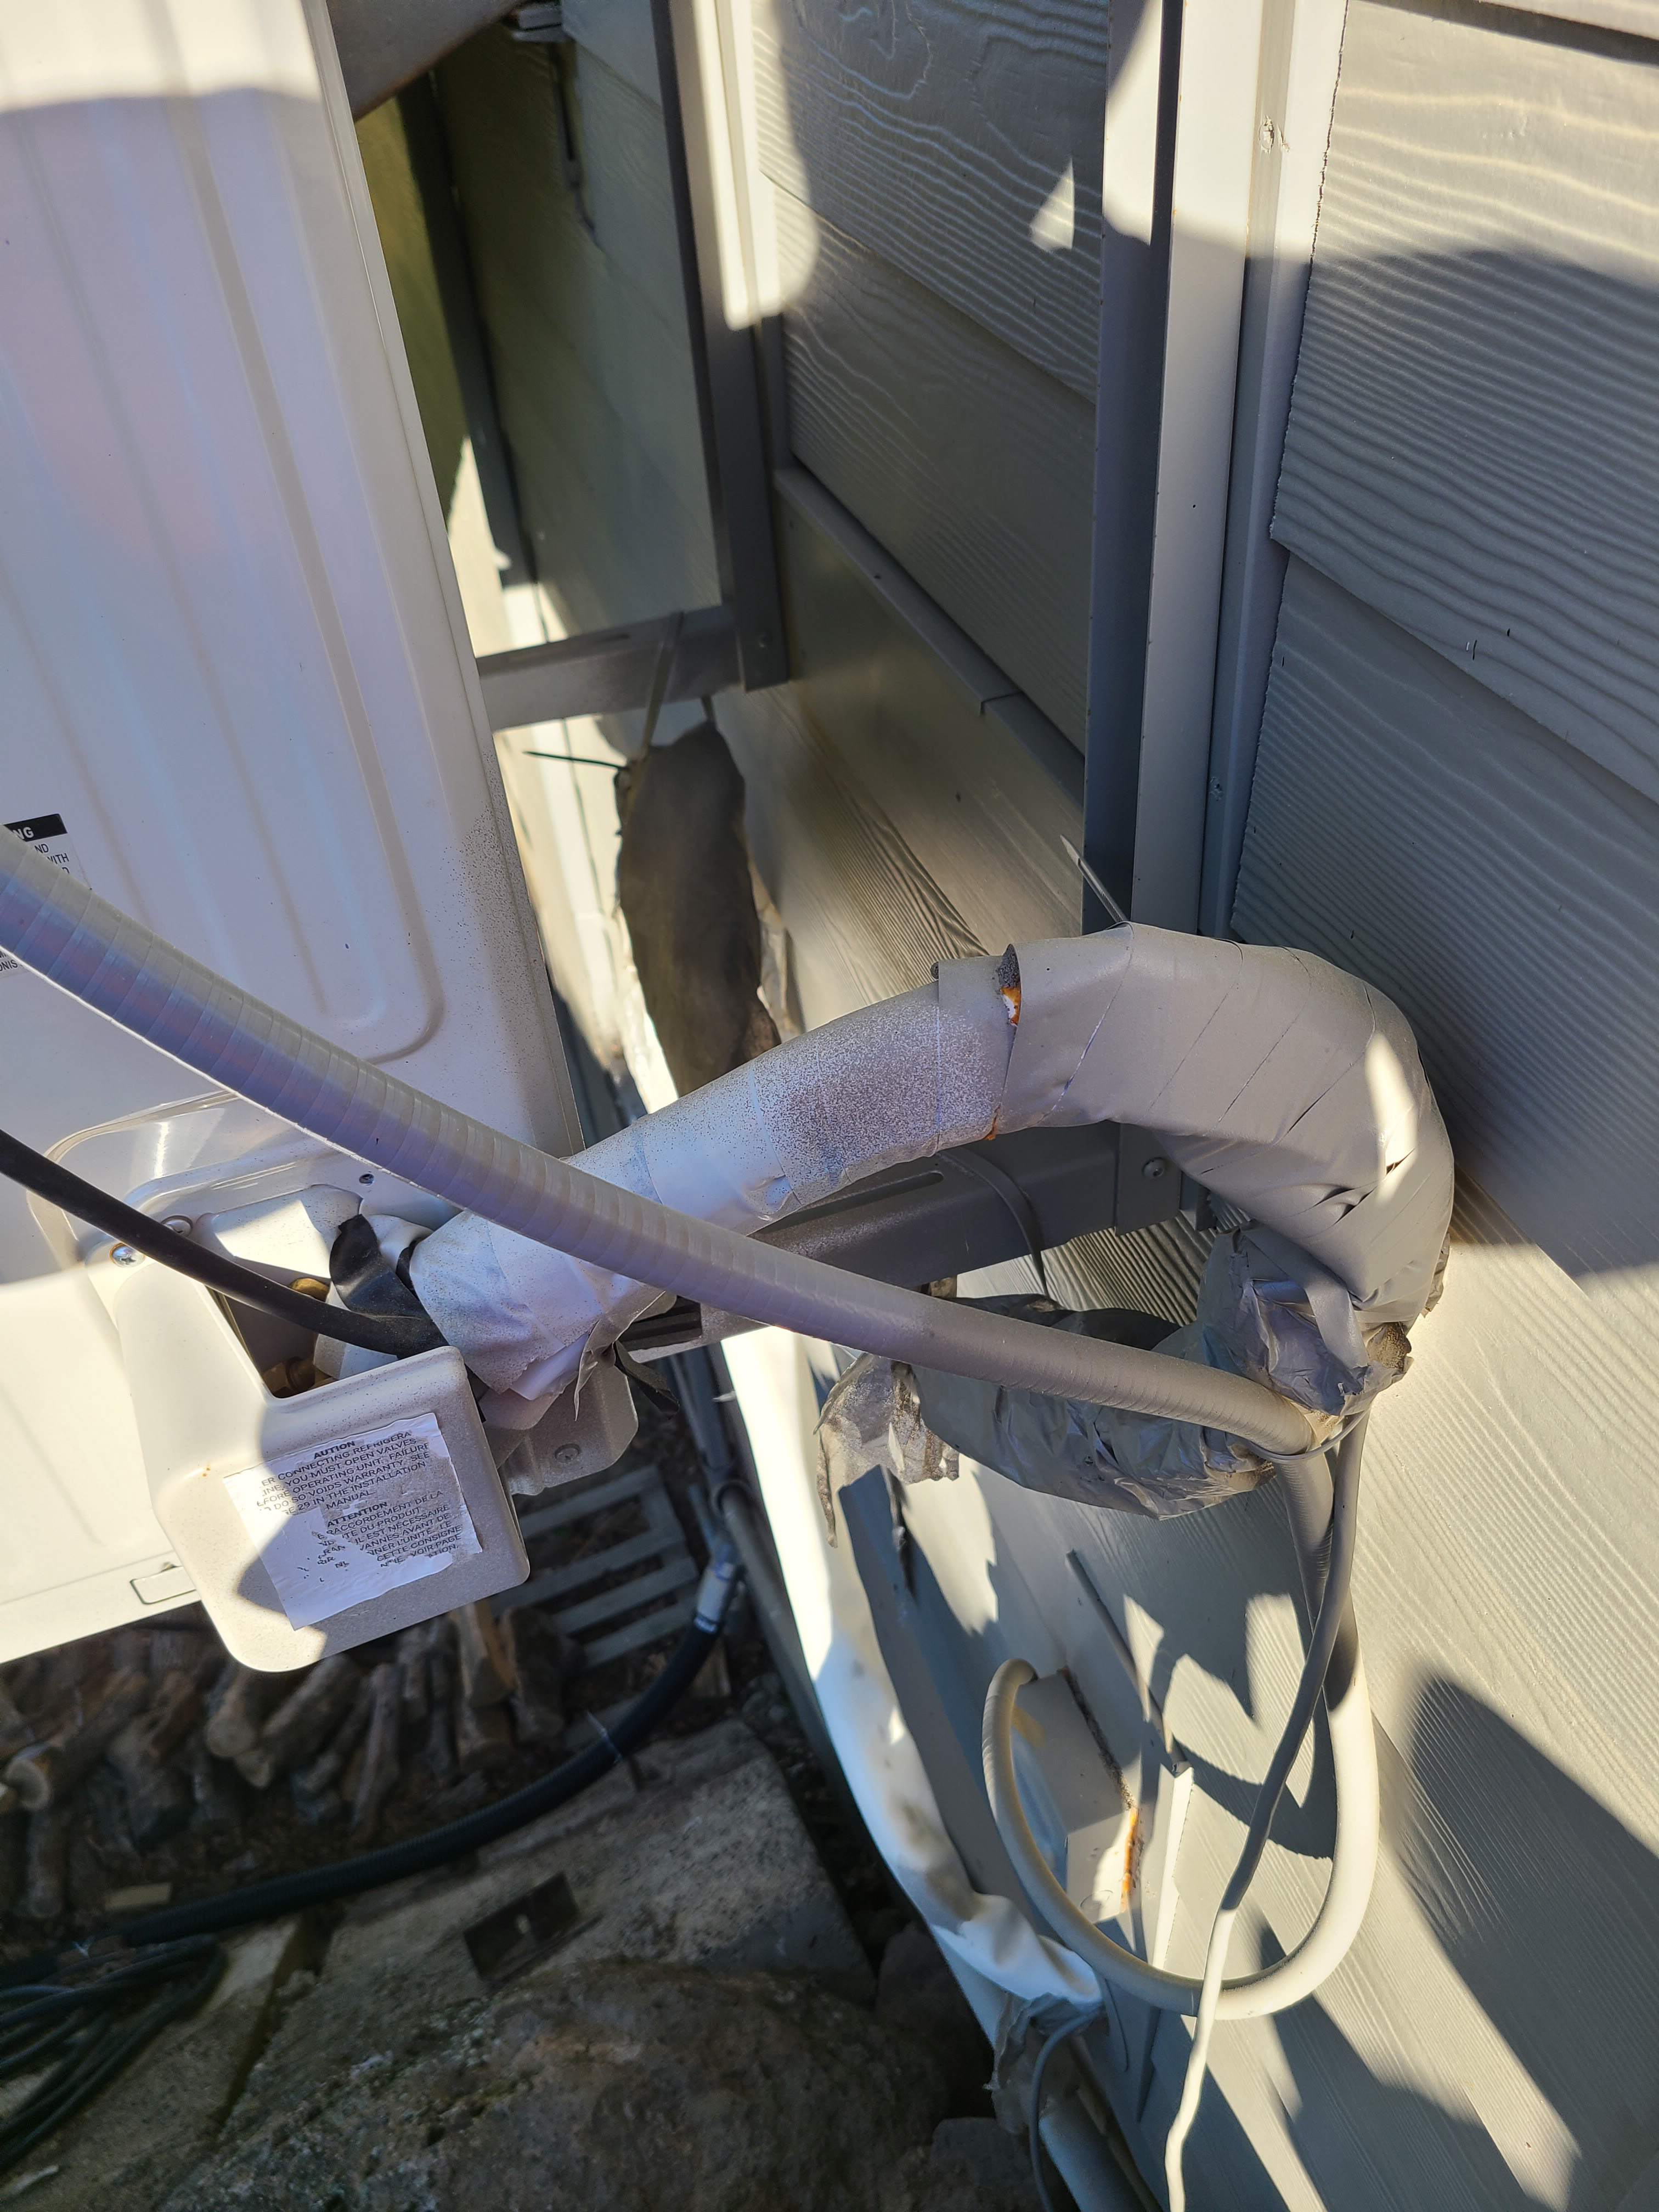
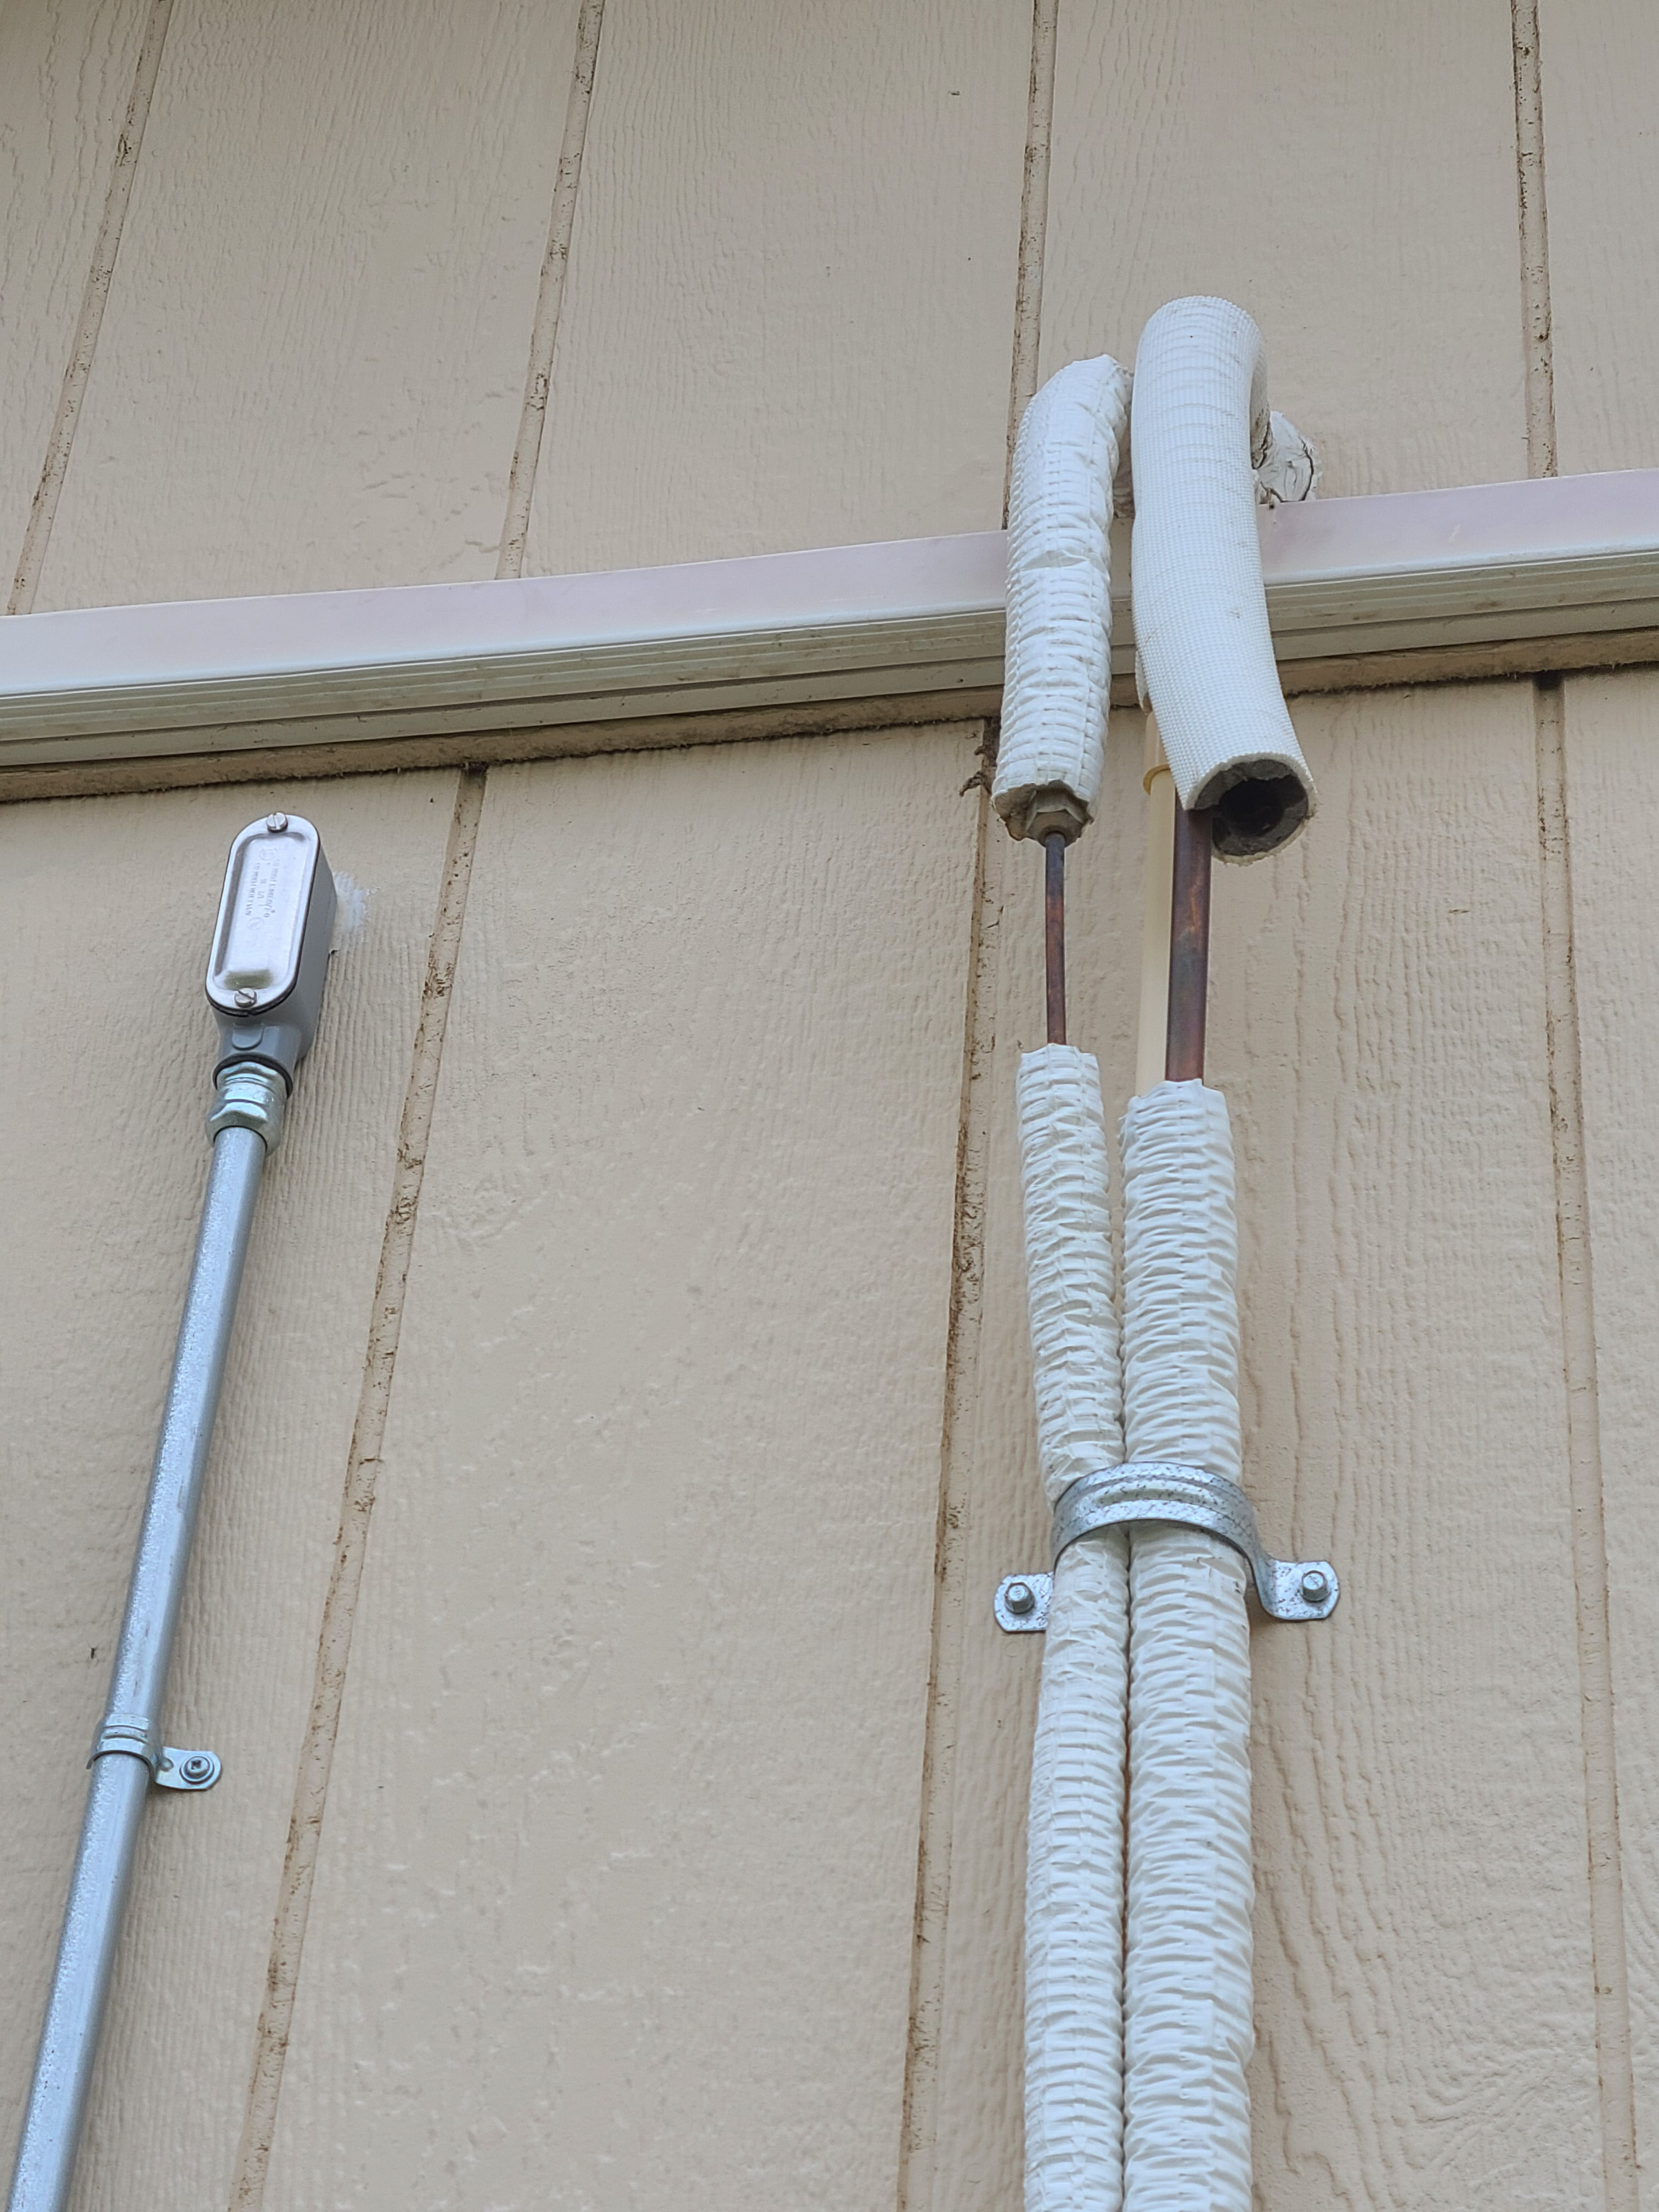
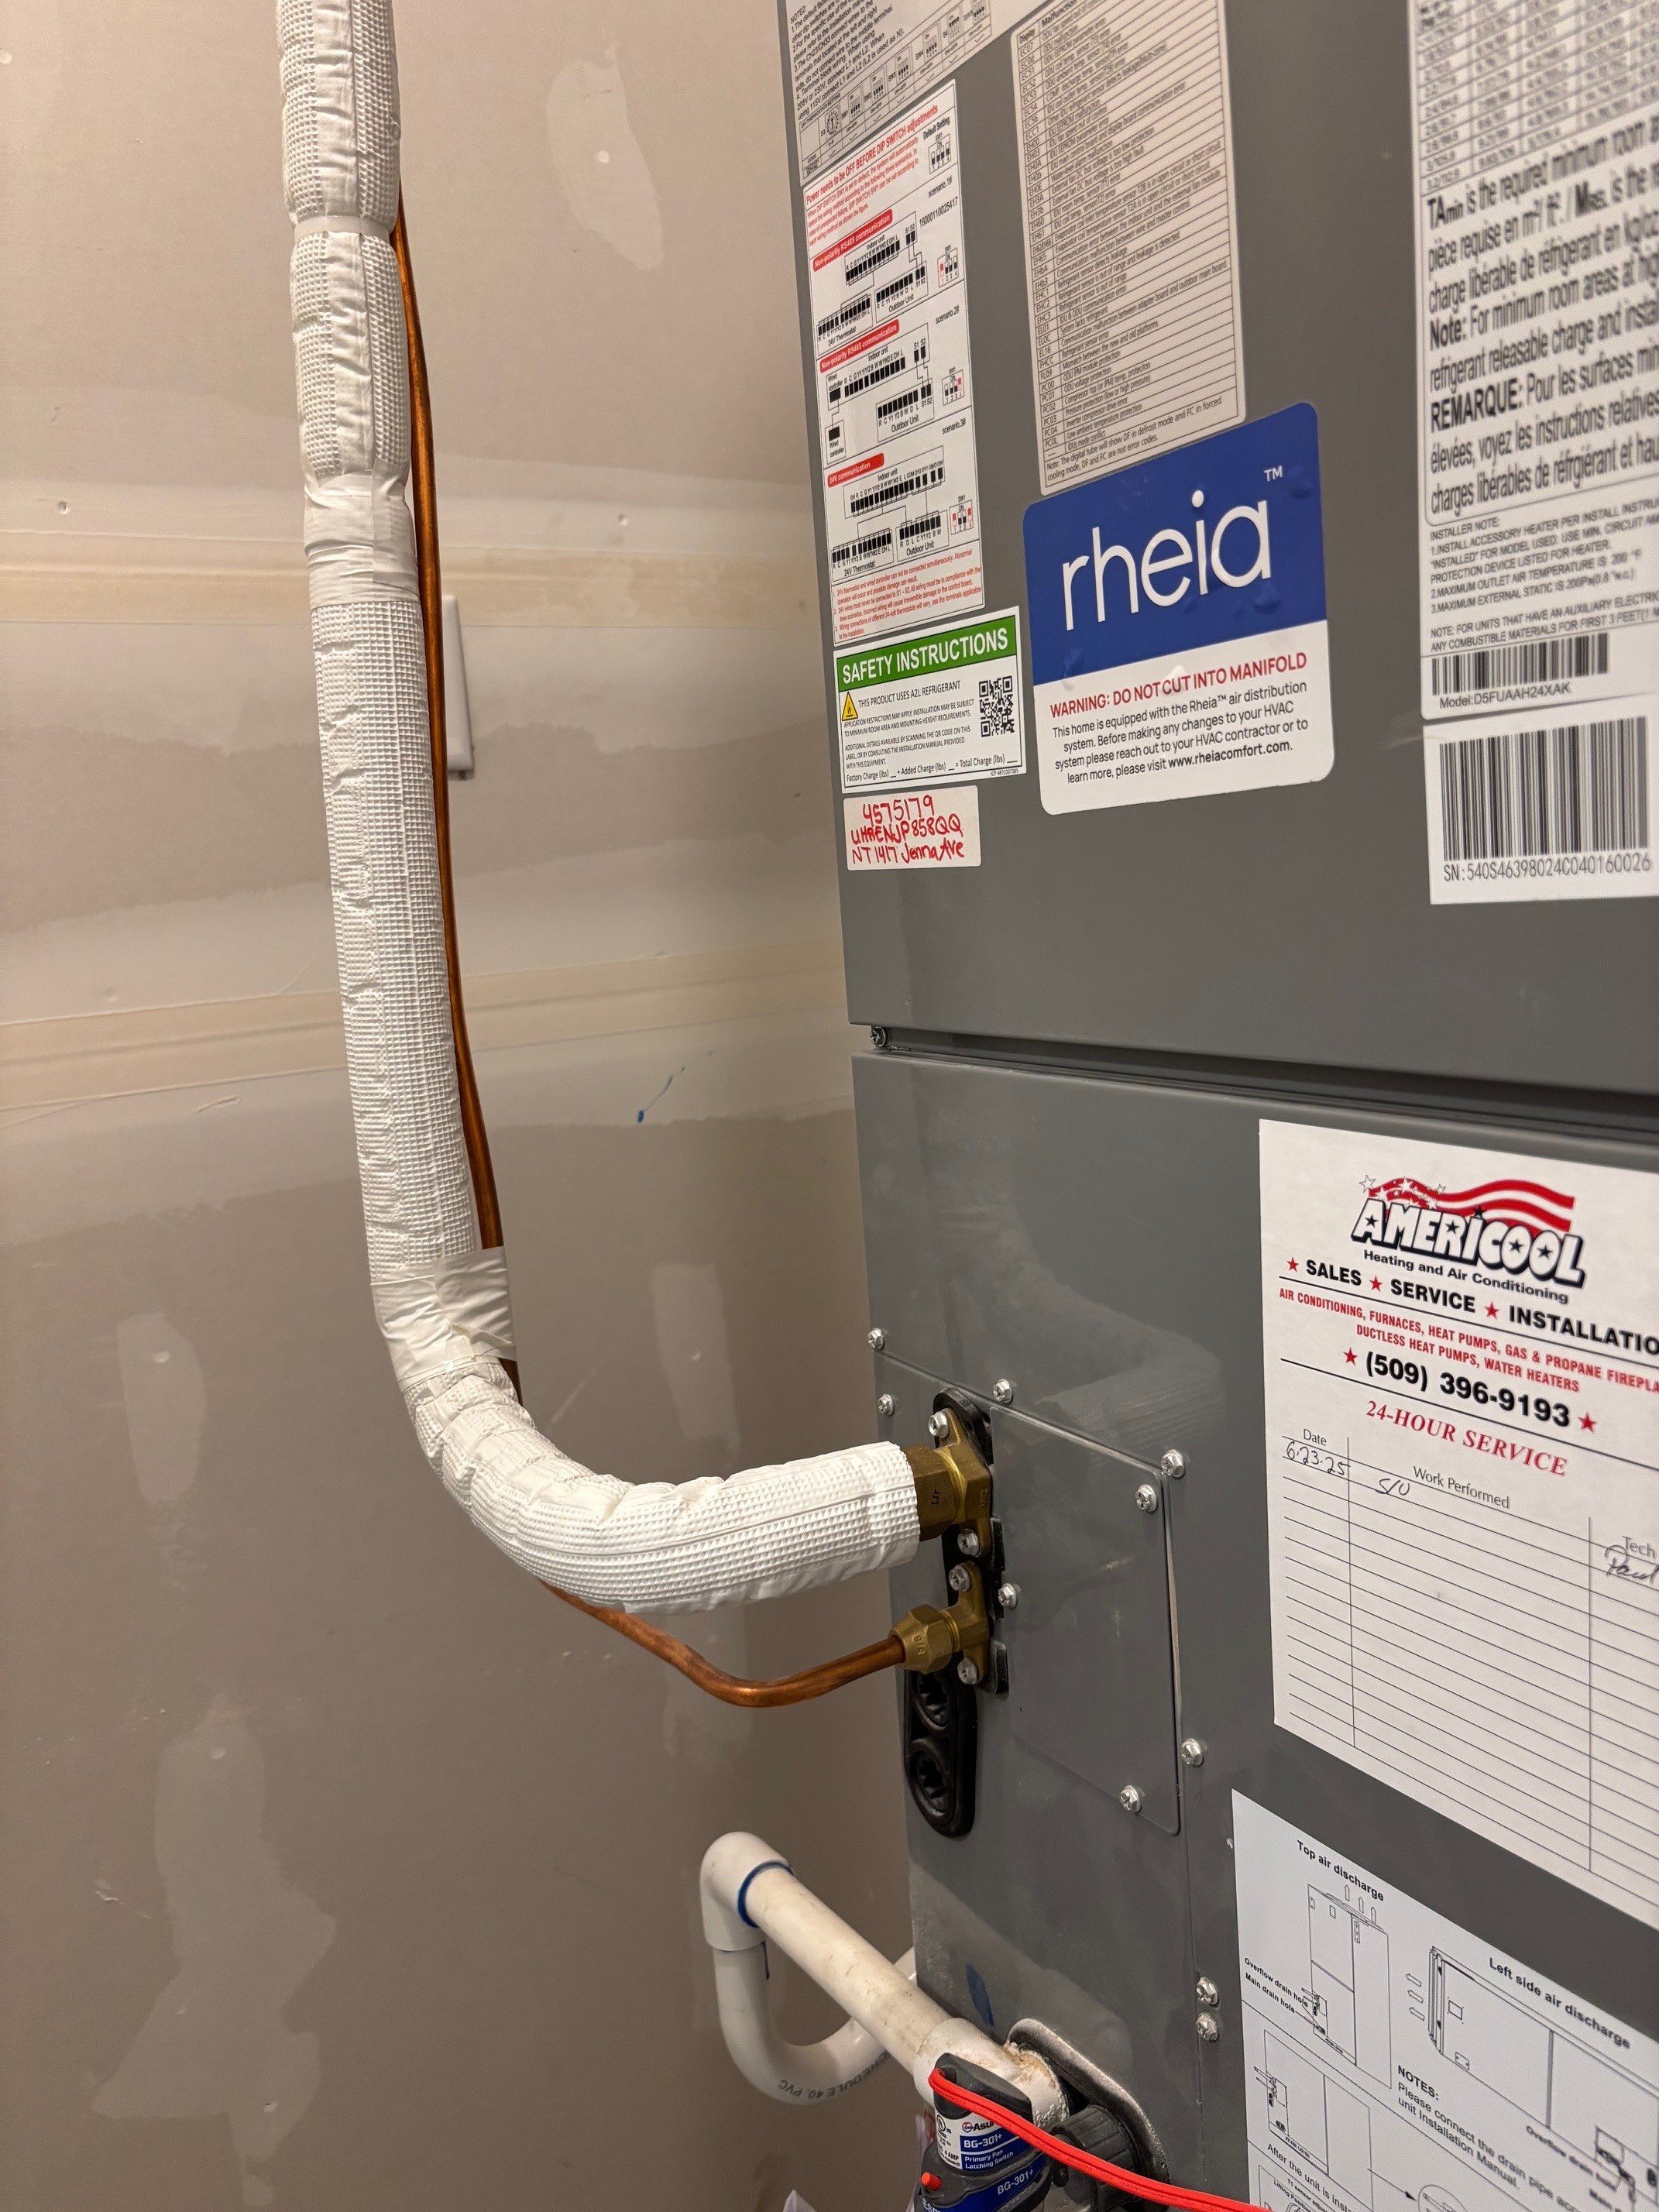
Look at the condition of the pipe insulation on the larger line. Because this refrigerant pipe insulation is located outside, it can degrade quickly, depending on how much exposure it gets to sunlight and extreme weather conditions. Check the lines annually to make sure the insulation is still in place and to look for damage and wear (Figures 2 through 5). You can also check to make sure the inside refrigerant line going from the HVAC unit to the wall is insulated (Figure 6). That refrigerant line is not likely to be subject to harsh weather conditions but it should still be insulated to reduce the incidence of condensation and to improve system efficiency.
If the insulation on the exterior refrigerant lines is cracked or missing (like we see in Figures 2 through 5), call an HVAC contractor to replace the refrigerant line insulation with a durable solution or replace it yourself using the following the steps.
If you choose to replace the insulation yourself, you will need to find pipe insulation of the correct diameter. Pipe insulation for ½-inch, ¾-inch, and 1-inch diameter pipe is readily available at hardware stores since these are also common sizes for water pipes. However, the refrigerant lines on air conditioners and heat pumps might be in other sizes such as ¼”, 3/8", 5/8", or 7/8" sizes. Also, most pipe insulation available at home improvement stores is not outdoor- or UV-rated and thus must be wrapped with line set tape. HVAC professionals shop at supply distributors that stock pipe insulation specifically for refrigerant lines so they can easily access pipe insulation that perfectly fits all of these refrigerant pipe sizes and that comes with a UV-resistant outer jacket. For this reason, it might be easier to ask an HVAC contractor to handle this project.
Source
Source
Source
Source
Source
3. Remove the old pipe insulation.
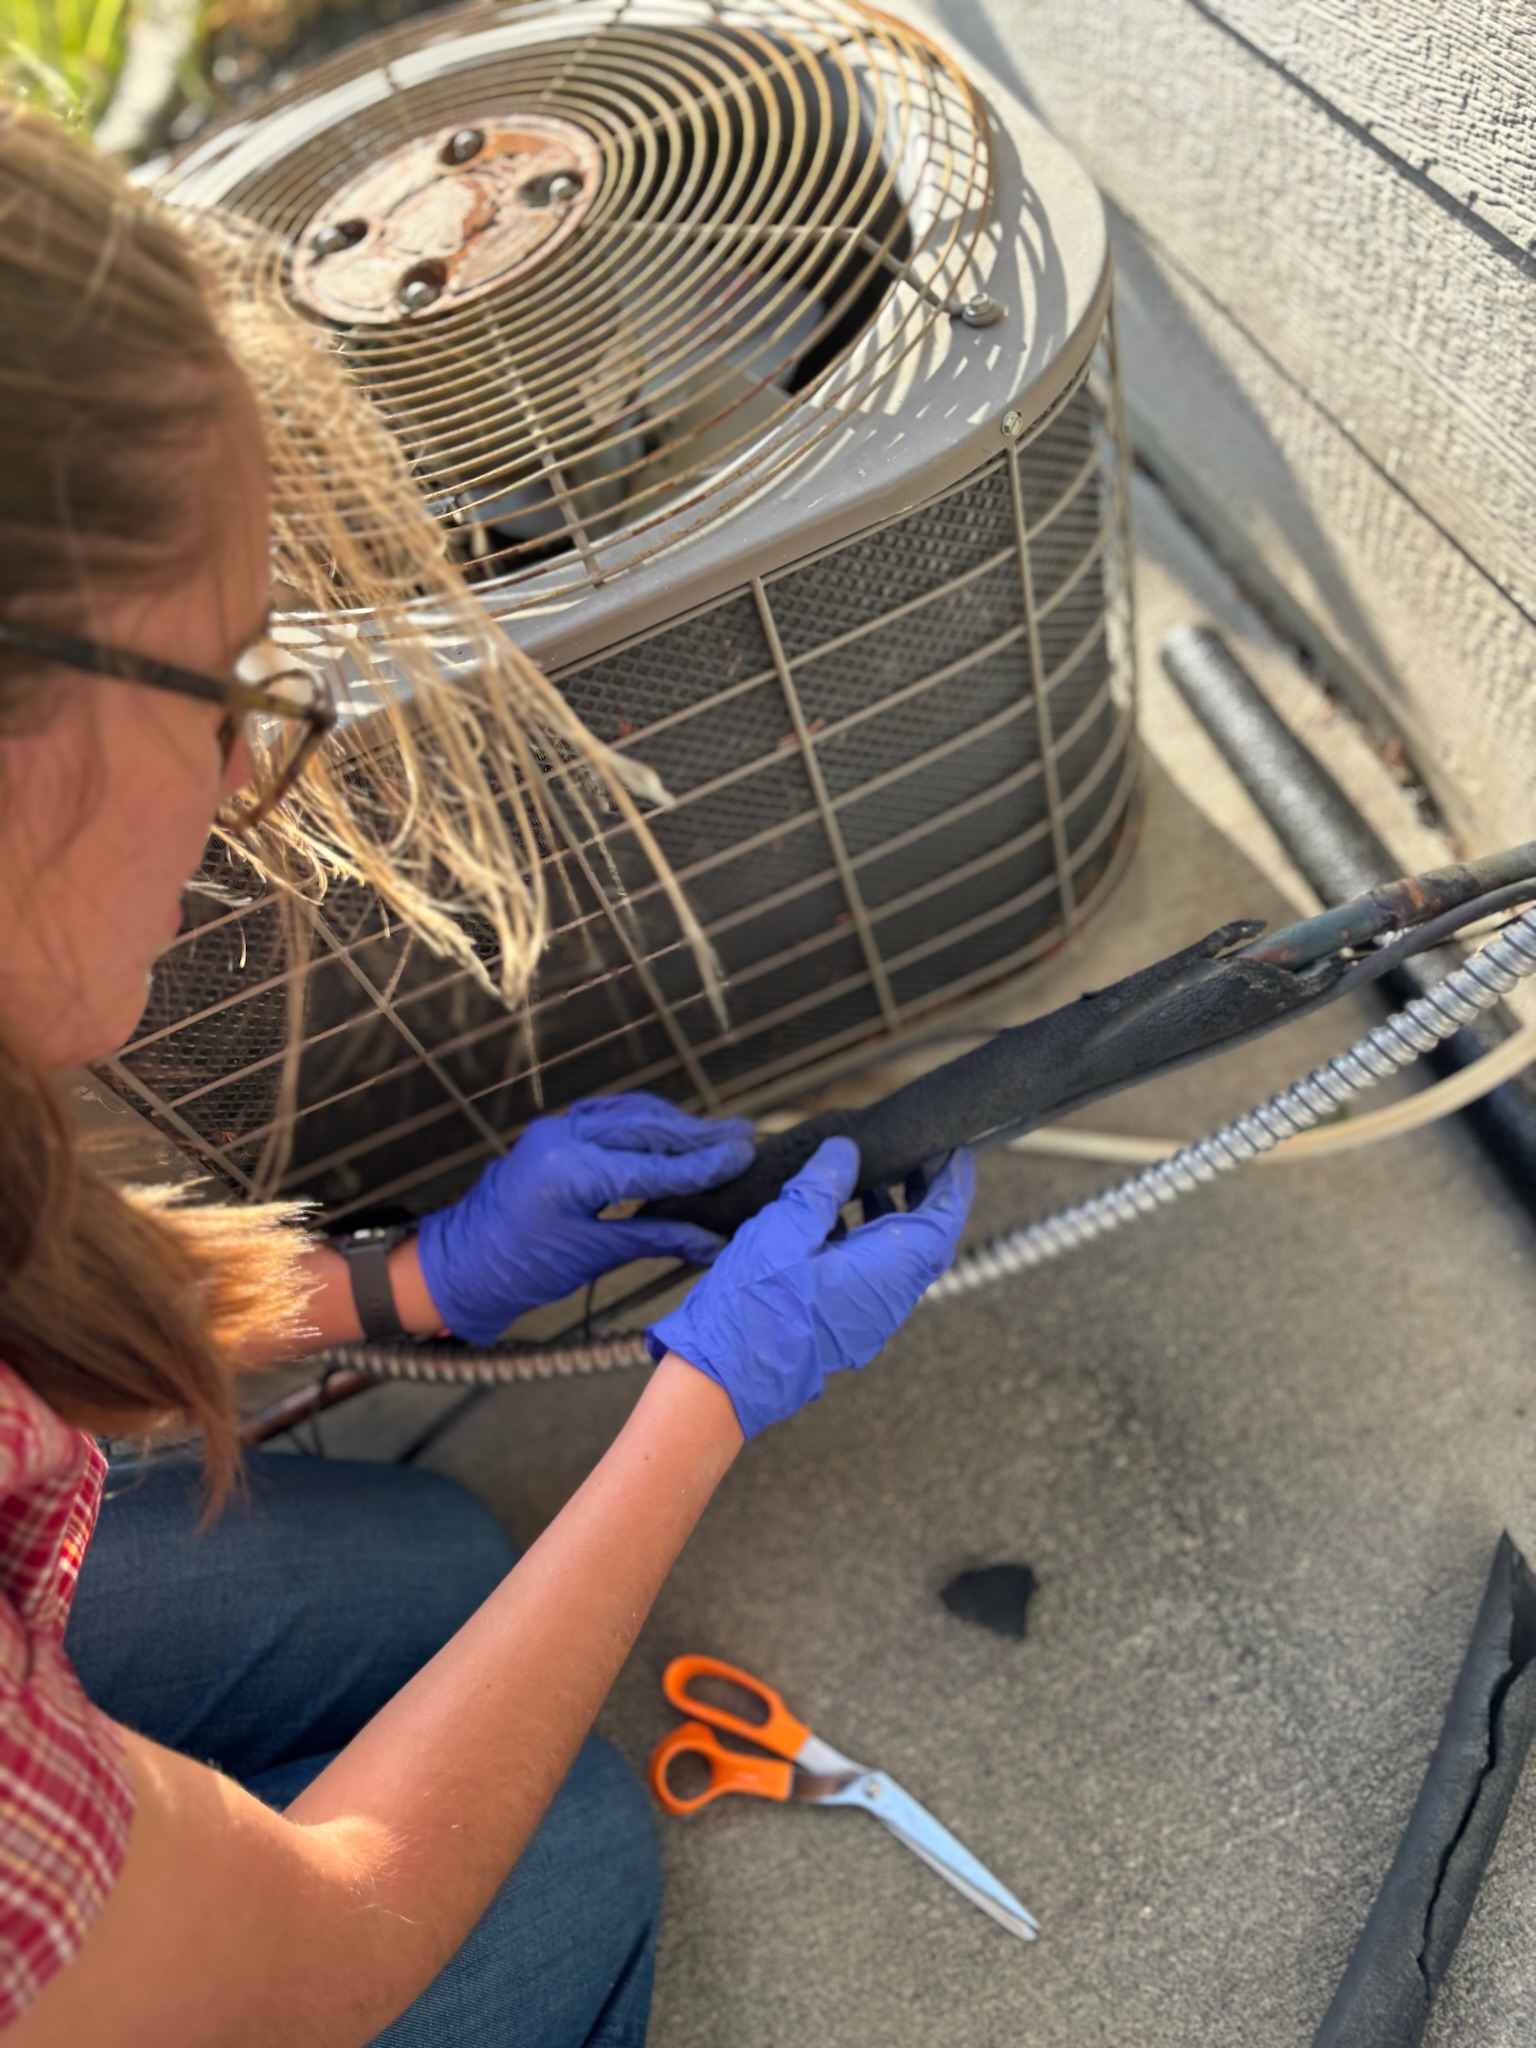
Using a utility knife and scissors, remove the old insulation (Figure 6). Be careful not to cut, bend, or twist the refrigerant line or any electrical wiring wrapped around it.
Source
4. Install new pipe insulation.
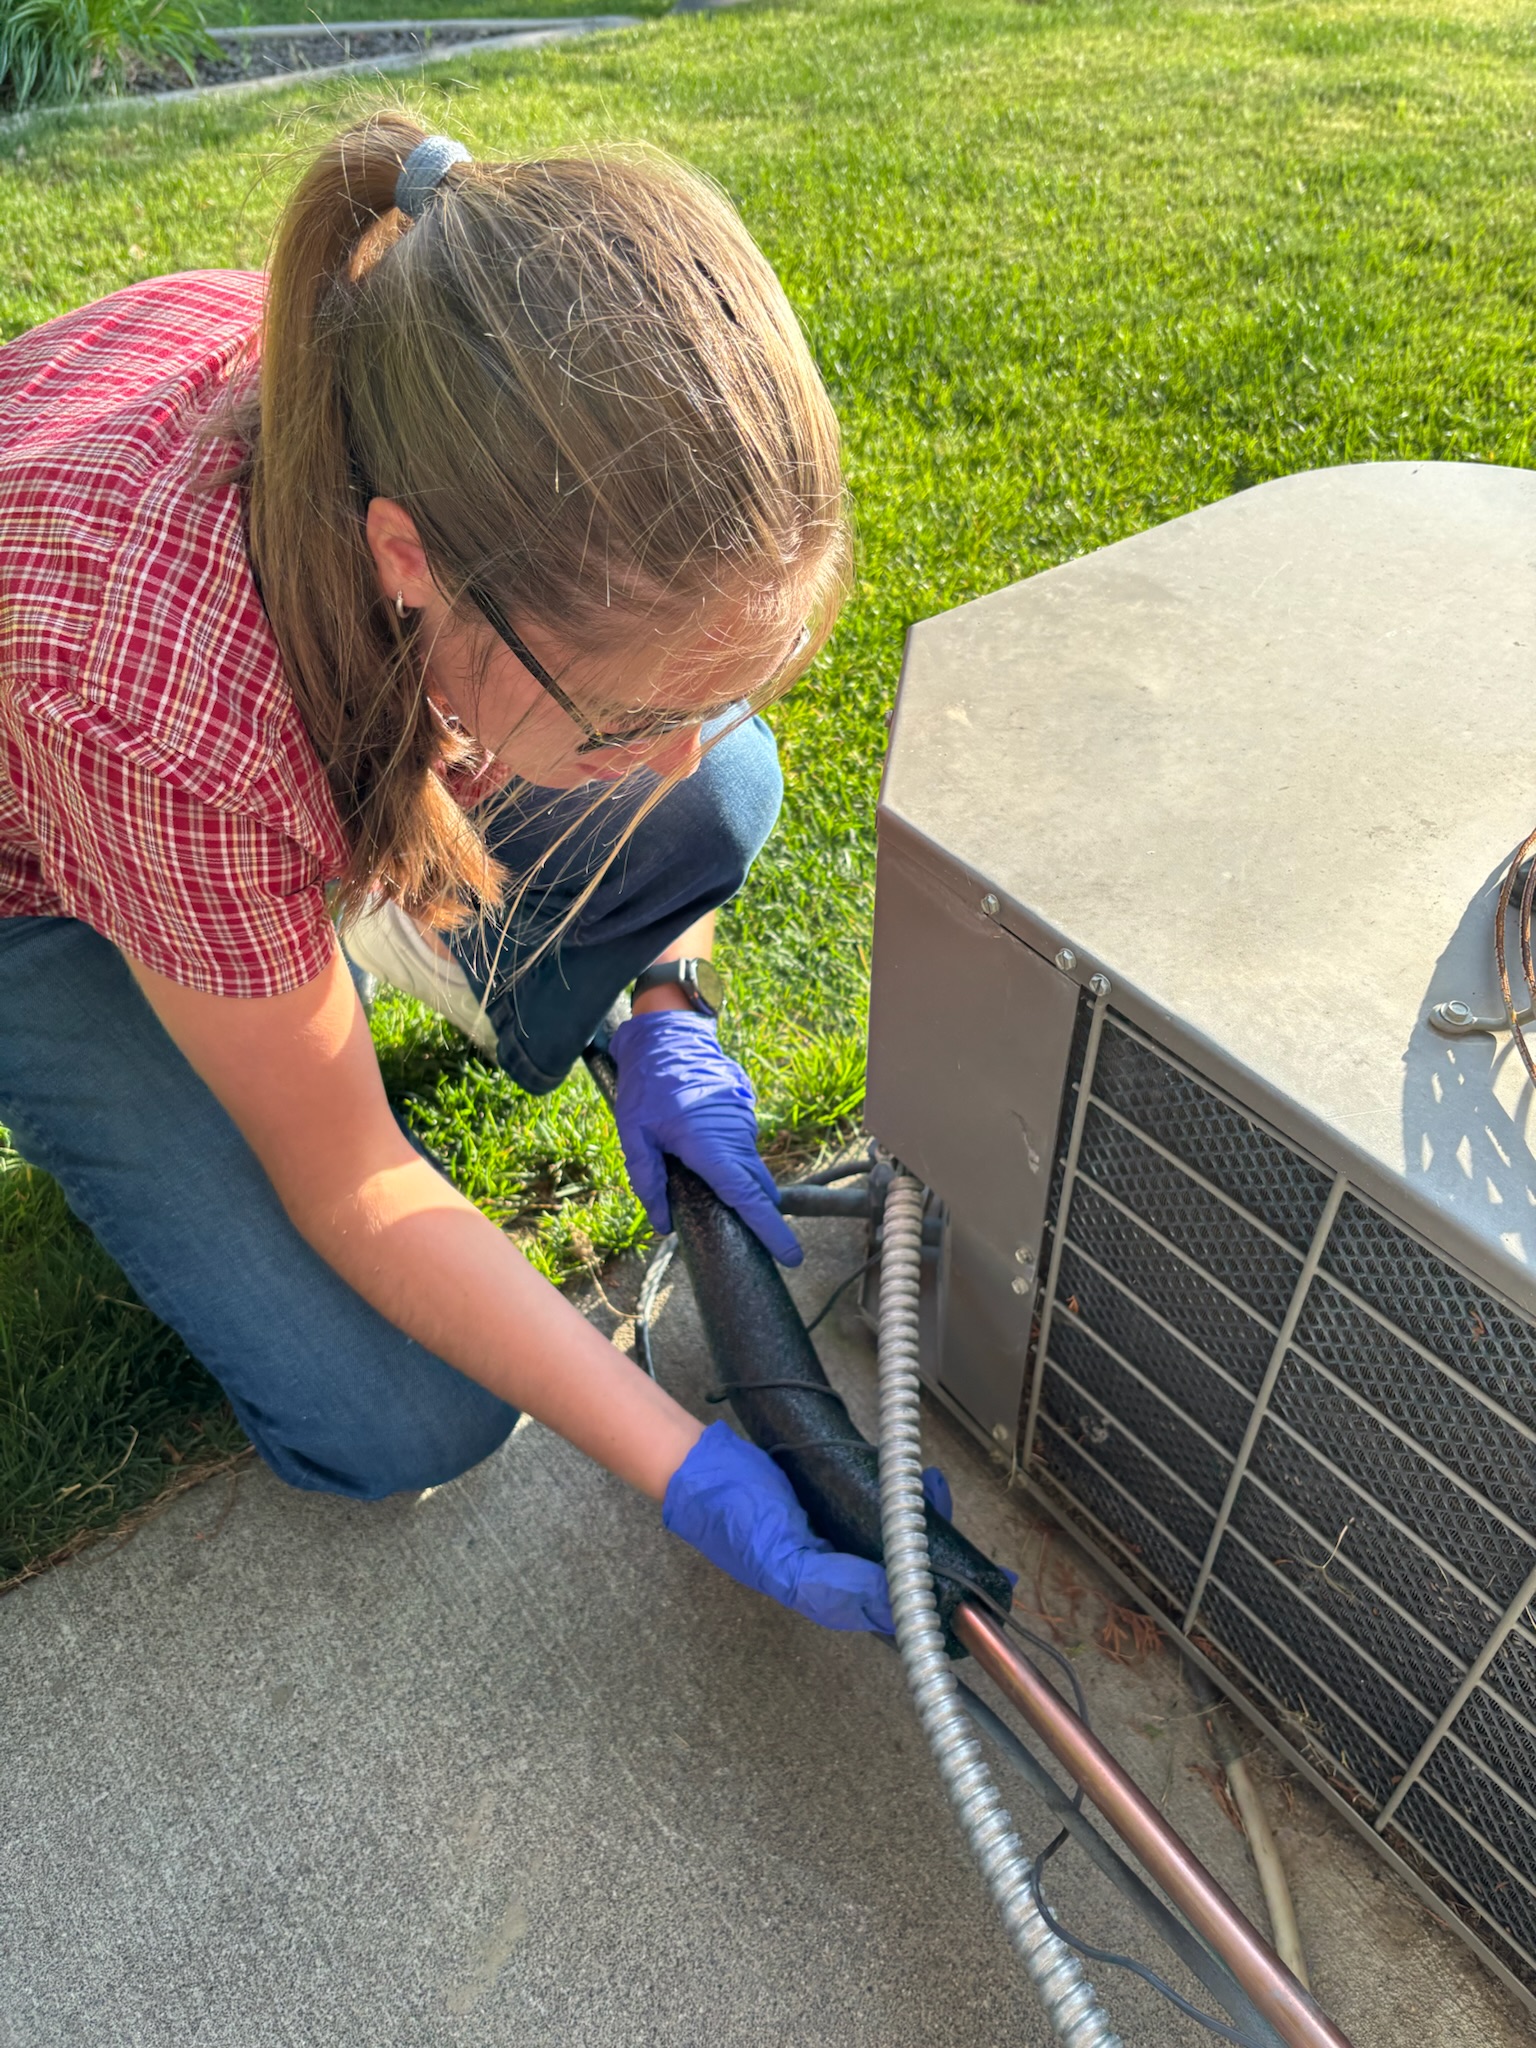
Install new pipe insulation on the refrigerant pipe. Measure the pipe diameter to determine what size insulation you will need. You can use ordinary foam pipe insulation which is made of closed-cell foam and manufactured with a lengthwise slit for easier installation, if you can find the right size, or you can use a pipe insulation with a UV-resistant covering specifically made for exterior refrigerant lines as described in Step 5. This product may come with self-adhesive strips on each side of the slit. After sliding the pipe insulation into place, peel off the plastic protecting the adhesive strips and press the edges together. (Figure 7).
Source
5. Cover pipe insulation with UV protection.
In addition to insulation, the refrigerant pipe needs a UV- and weather-resistant covering for additional protection against the sun and harsh weather. You have several options.
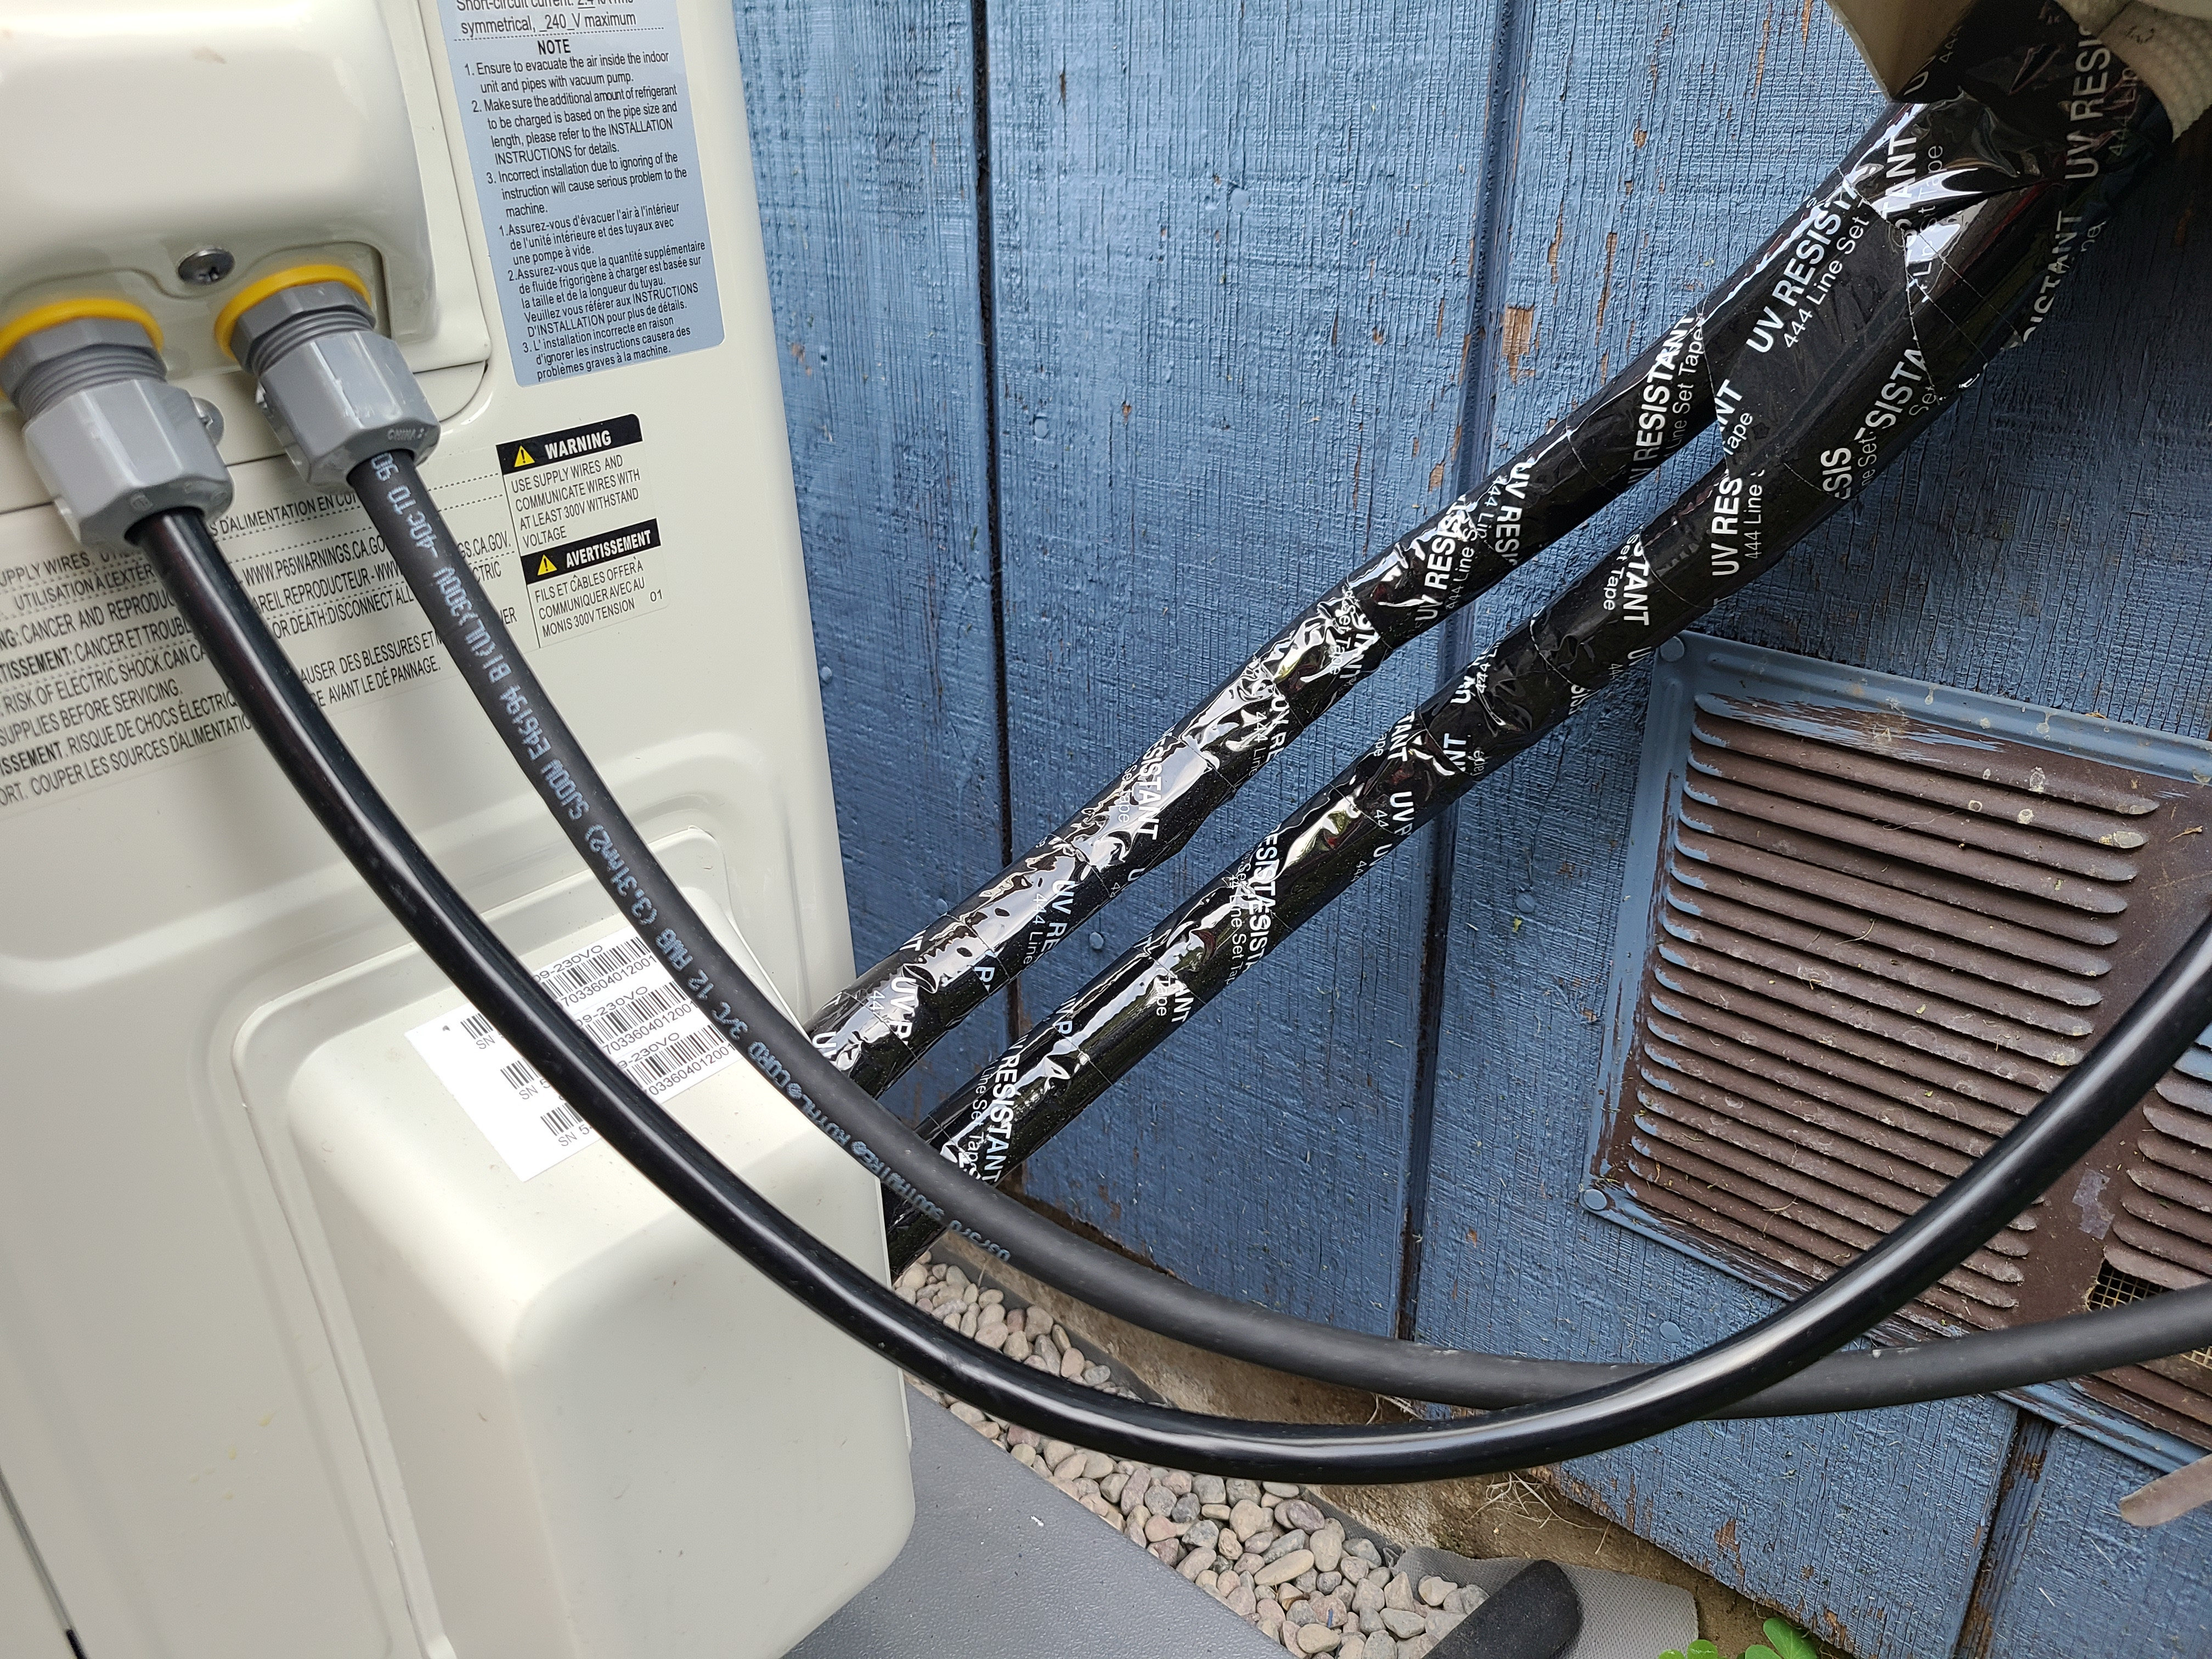
You can wrap the pipe insulation with a weather-resistant and UV-resistant tape (Figure 8). Start at the lowest end of the pipe and work your way up in overlapping wraps so that any rainwater that hits the pipe will roll off the tape and not work its way under the tape.
Source
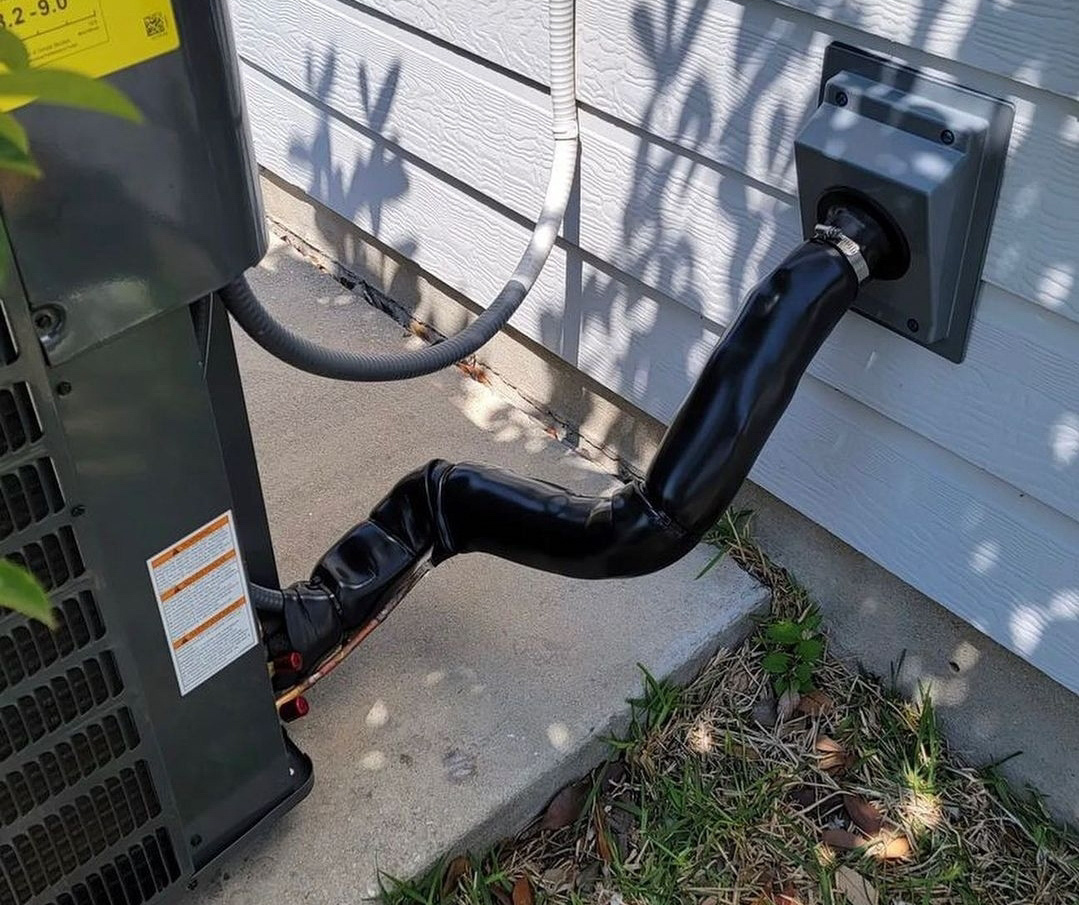
Rather than covering the entire exposed length of pipe with tape, one option is to purchase and install a ready-made UV-resistant vapor-barrier jacket specifically made for refrigerant line sets (Figure 9).
Source
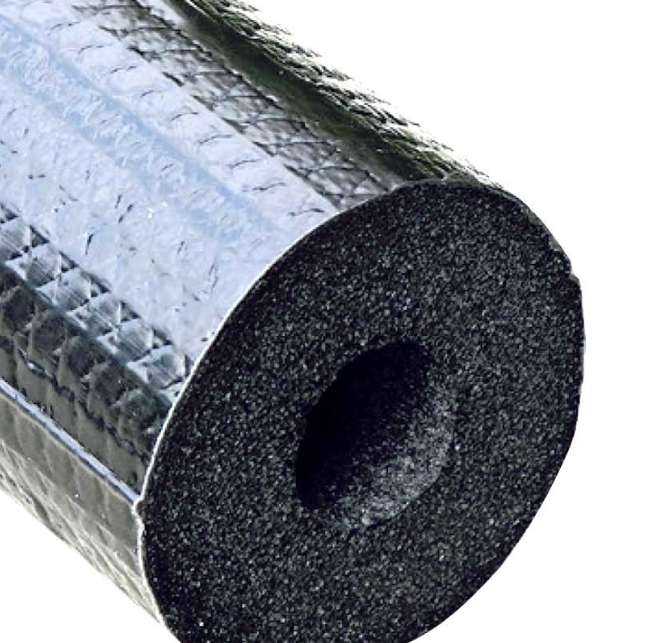
Another option is to buy a pipe insulation that comes with an integrated vapor barrier layer on the outside of it (Figure 10). Install per manufacturer’s instructions.