

Introduction
Missing flashing around doors and windows can lead to water infiltration and major damage and rot that is hidden inside of the wall.
Why
Missing window flashing can let water infiltrate the walls of your home, causing hundreds or thousands of dollars worth of damage if left unchecked. Window flashing in the form of waterproof tape and metal strips should be installed around windows at installation to create a barrier against water intrusion at vulnerable junctions around doors and windows. If the flashing is missing or incorrectly installed, water can enter the wall assembly causing mold and rotting of wall sheathing, framing, and insulation.
What You'll Need
- Ladder or step stool
- Gloves (optional)
- Exterior-grade caulk
- Flathead screwdriver (optional)
1. Examine tops of windows and doors.
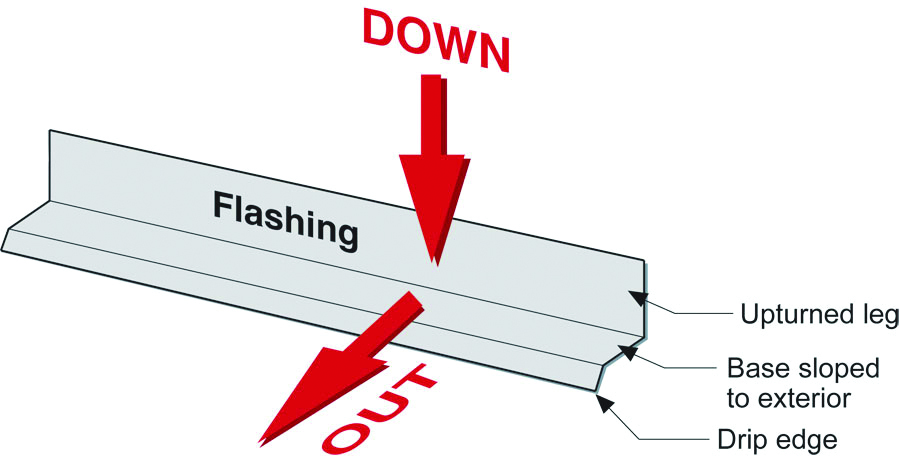
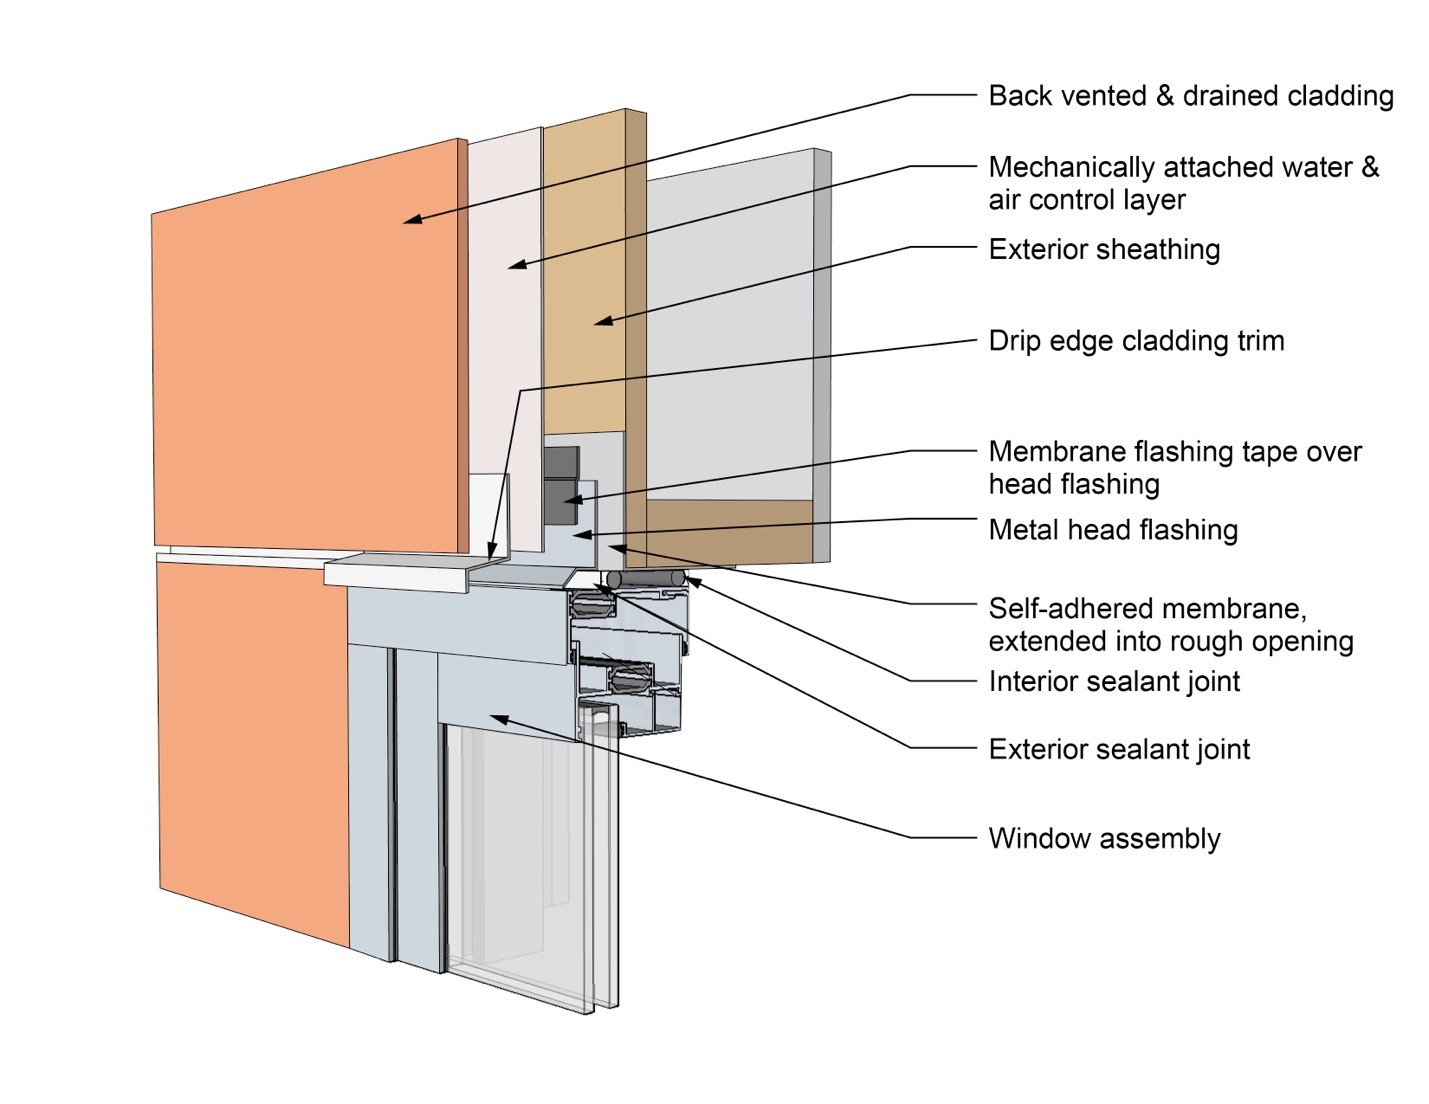
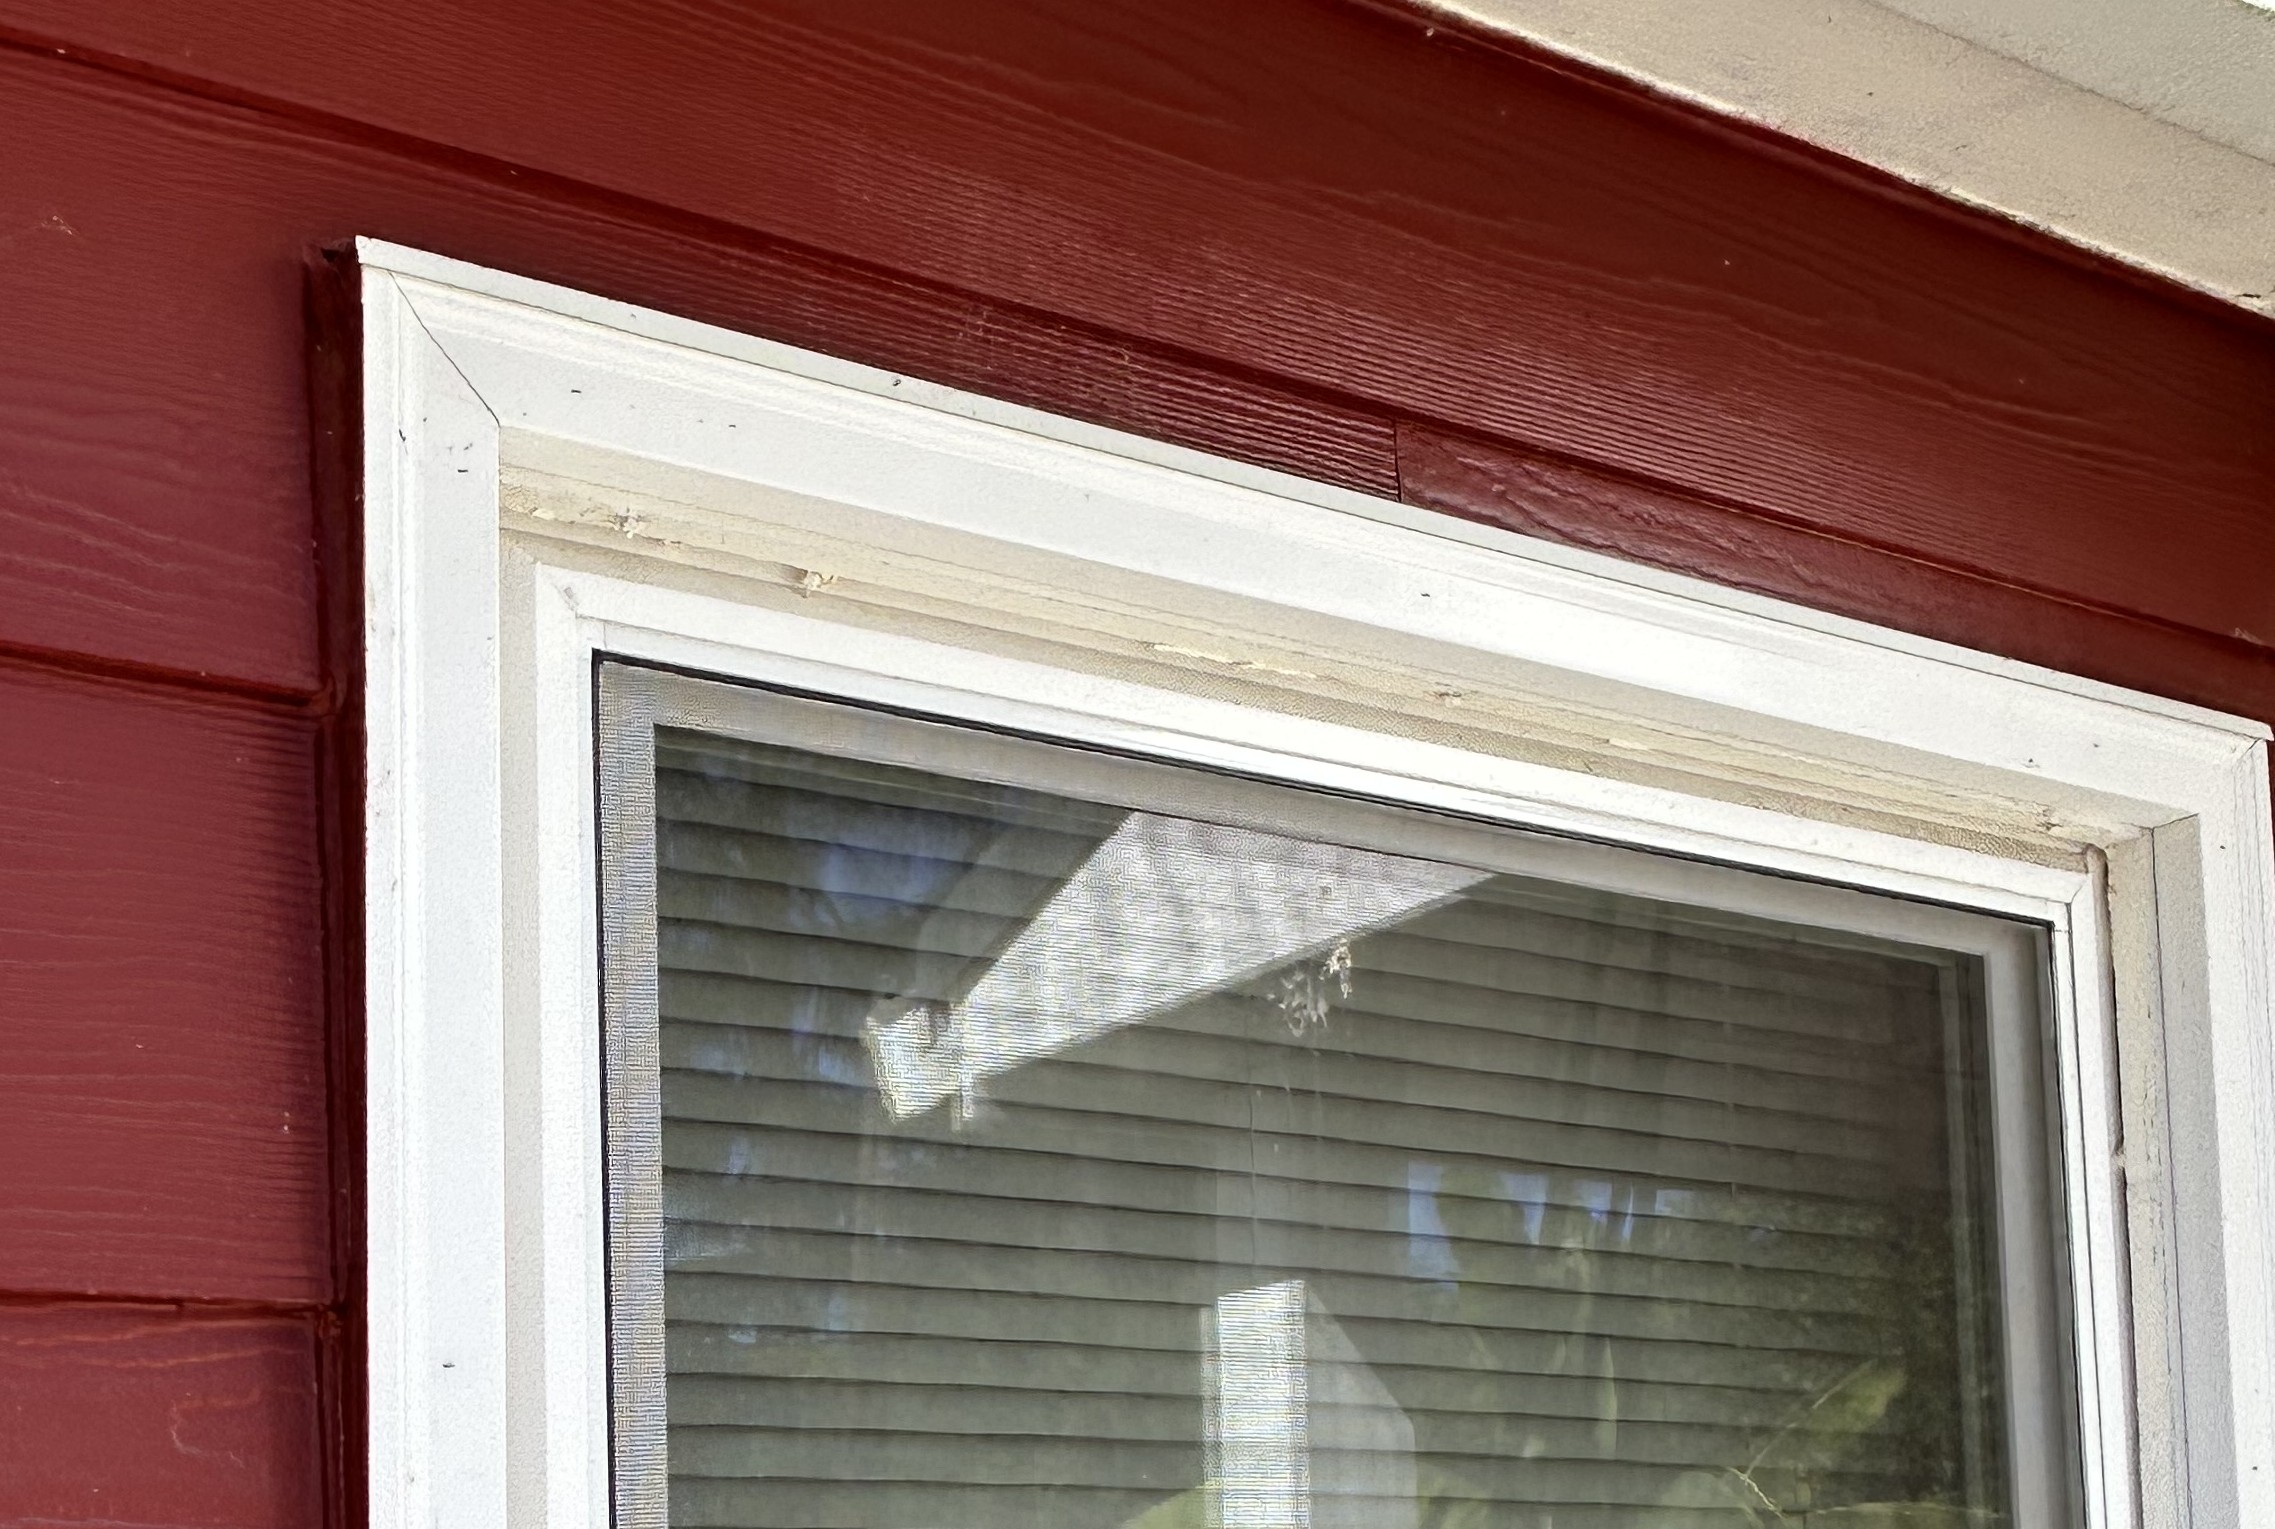
The job of flashing is to direct any water that gets past the siding down and out of the walls of your home before it can cause damage (Figure 1). A properly installed window or door will have numerous layers of flashing under and over the house wrap layer to help direct water out of the wall (Figure 2). Unfortunately, without taking off the window trim or cutting into the siding, it’s hard to see whether or not flashing has been installed. The only flashing you can usually see on an installed window is the metal head flashing (in Figure 3 it is the strip along the very top of the window trim, painted white to match the trim). Note it’s preferable if the metal head flashing sticks out slightly to the left and right of the top of the window trim, the horizontal part of the flashing should angle down slightly, and the vertical “tail” should angle out away from the window frame to provide a drip edge for rain water away from the face of the window. Aside from looking for this metal head flashing, there are some signs you can look for which may indicate water leaks and deterioration beneath the siding.
Source
Guide providing information about controlling rainwater through use of drainage planes.
Source
Source
2. Examine the window and door trim.
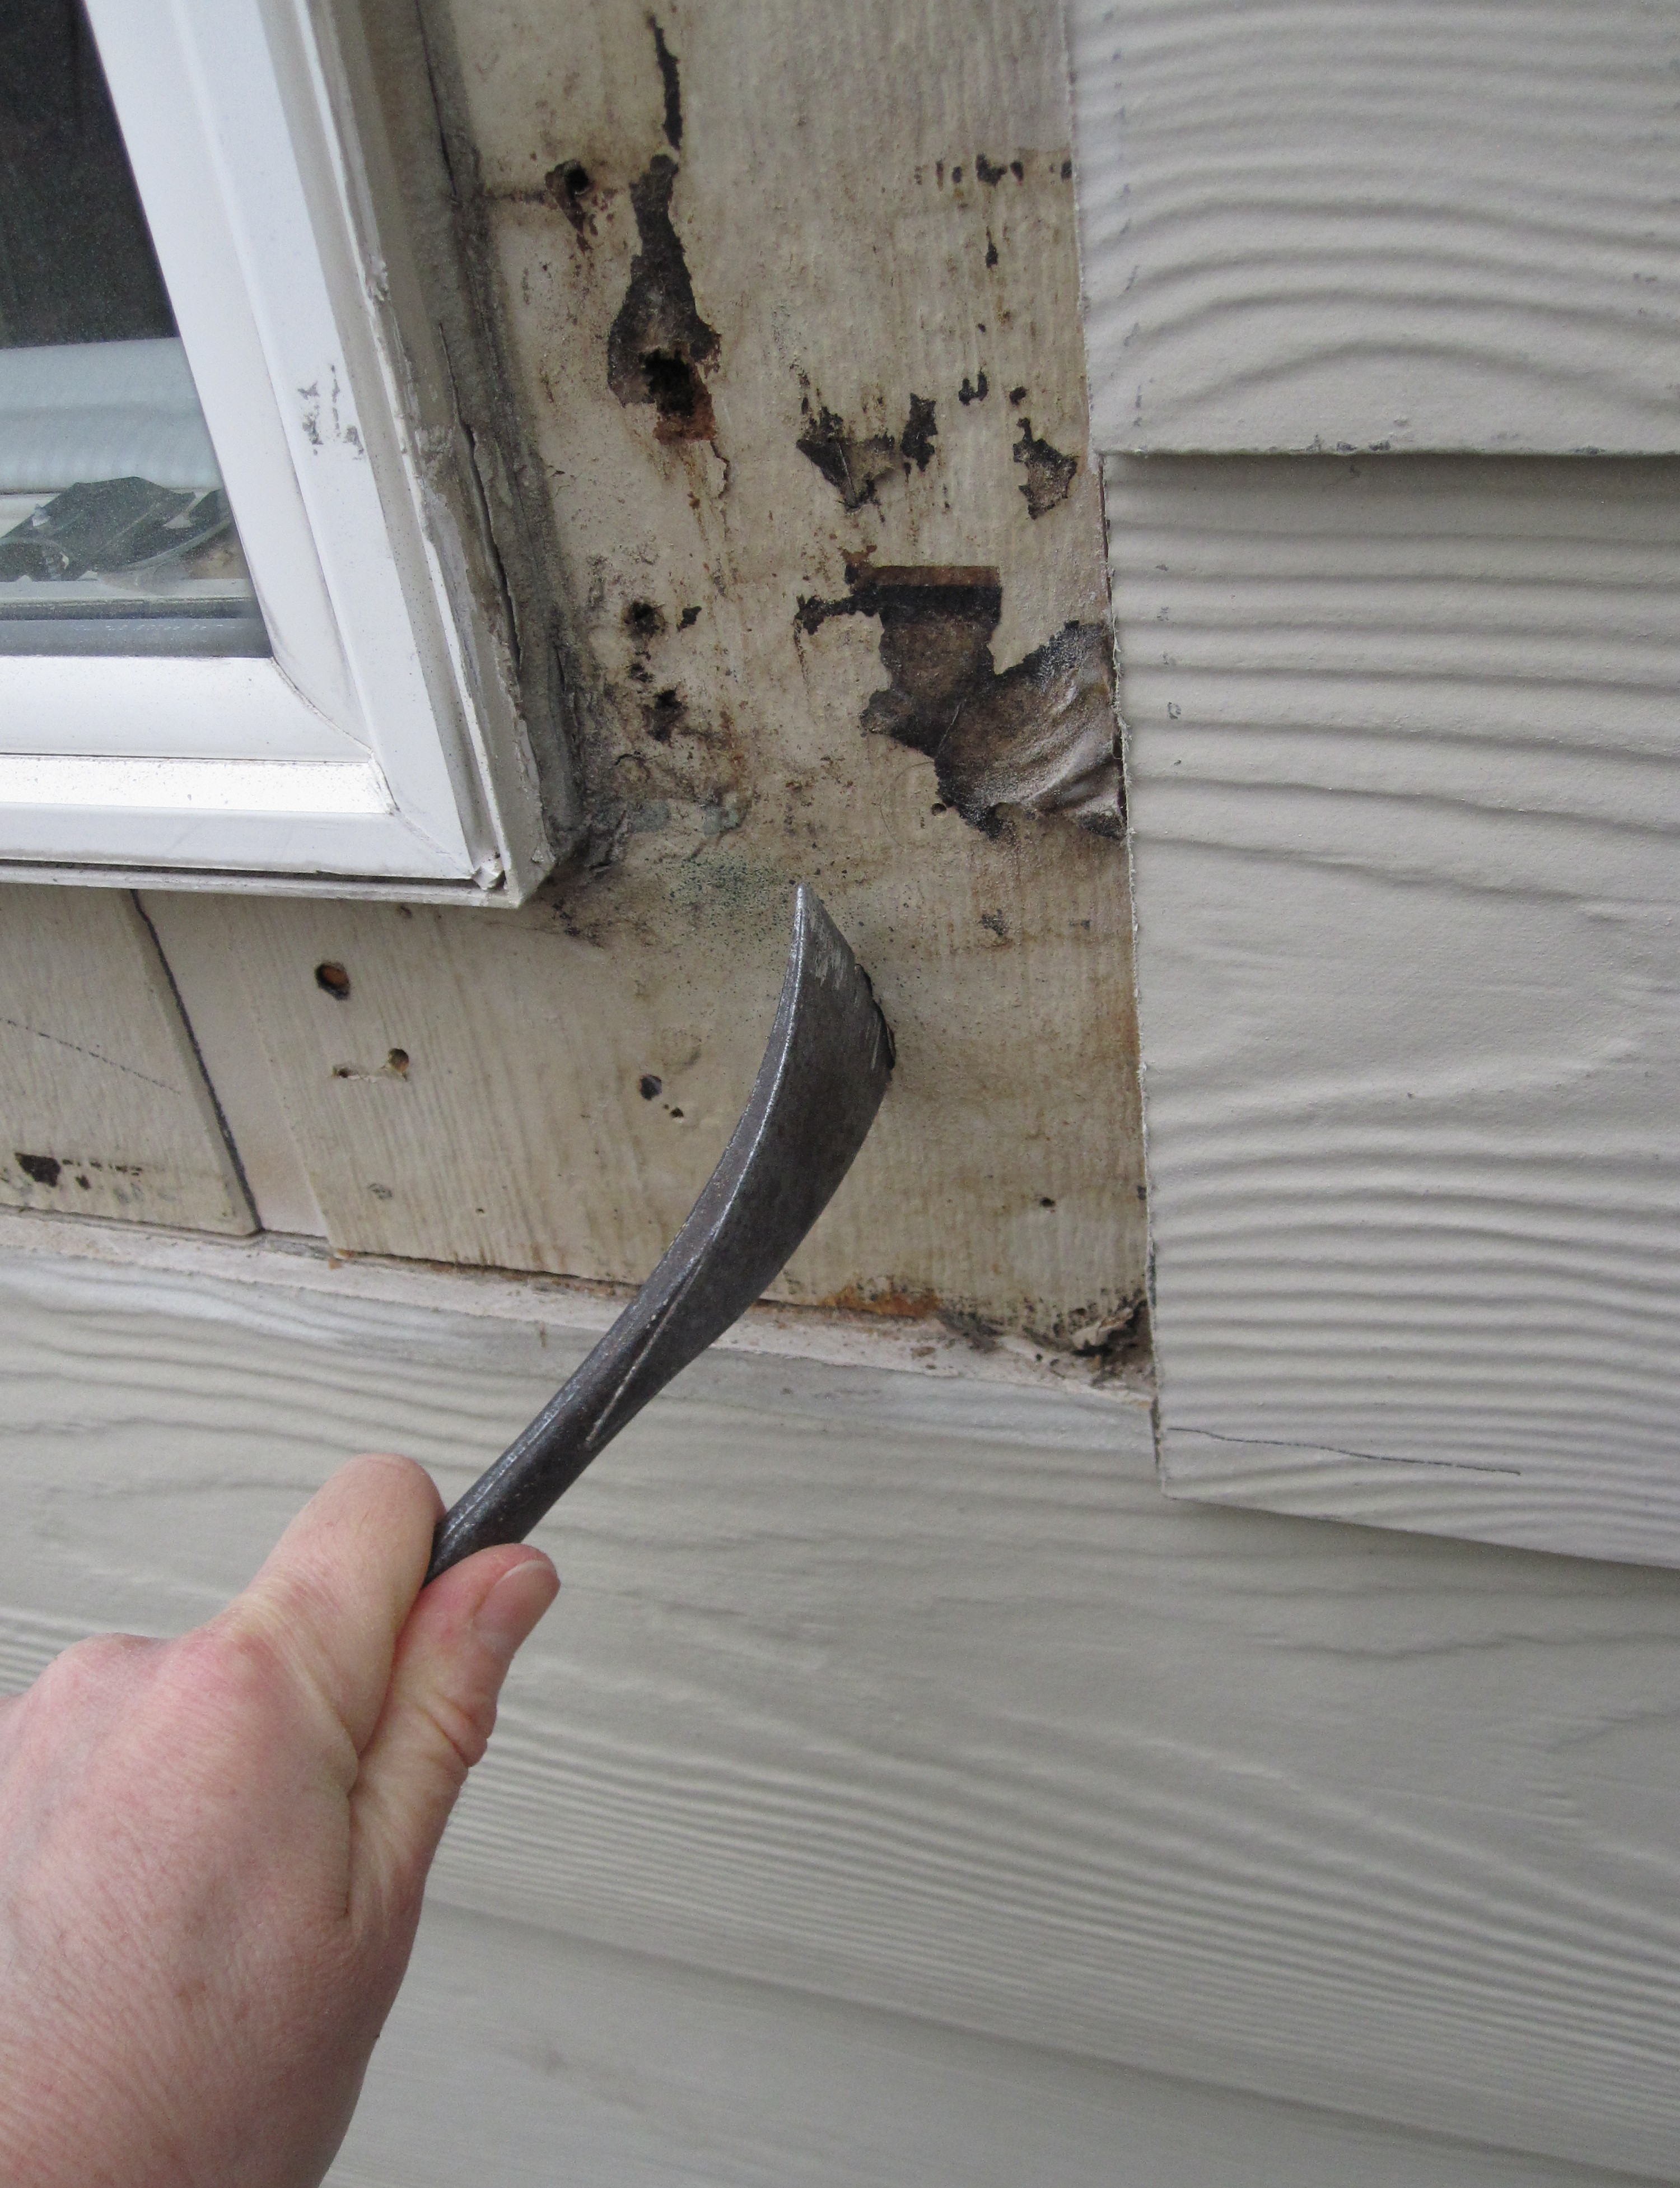
If the window trim is showing signs of rot or peeling paint, a poorly draining window may be the cause. Check to make sure the weep holes in the bottom frame of the window have not been caulked or painted over. A lack of flashing around and above the window could also contribute to the deterioration of the trim. To check your trim, take a screwdriver or your thumbnail and push into the wood. The wood should be firm. If you can easily press into the wood, that is a good indication of dry rot and water issues beneath. Figure 4 shows a situation where water damage was suspected so newer siding that had been installed over old siding was cut away revealing that no flashing had been installed and the old siding beneath had become saturated from repeated exposure to rainwater that had leaked in around the window.
Source
Peeling paint on the trim around an exterior door, especially just at the base of the door, could indicate water entering the wall from above or around the door due to lack of flashing, or be due to splash-back from rain (if there are no gutters overhead) or snow build up in that spot that continually saturates the wood trim. A related issue is door trim that was installed without priming or painting the cut ends at the base of the side trim. If these ends have ground contact, the bare wood on the grain end can pull water up into the lumber through capillary action. Then, when the wood dries in the sun, the water vapor coming out of the wood can lift the paint right off the wood’s surface.
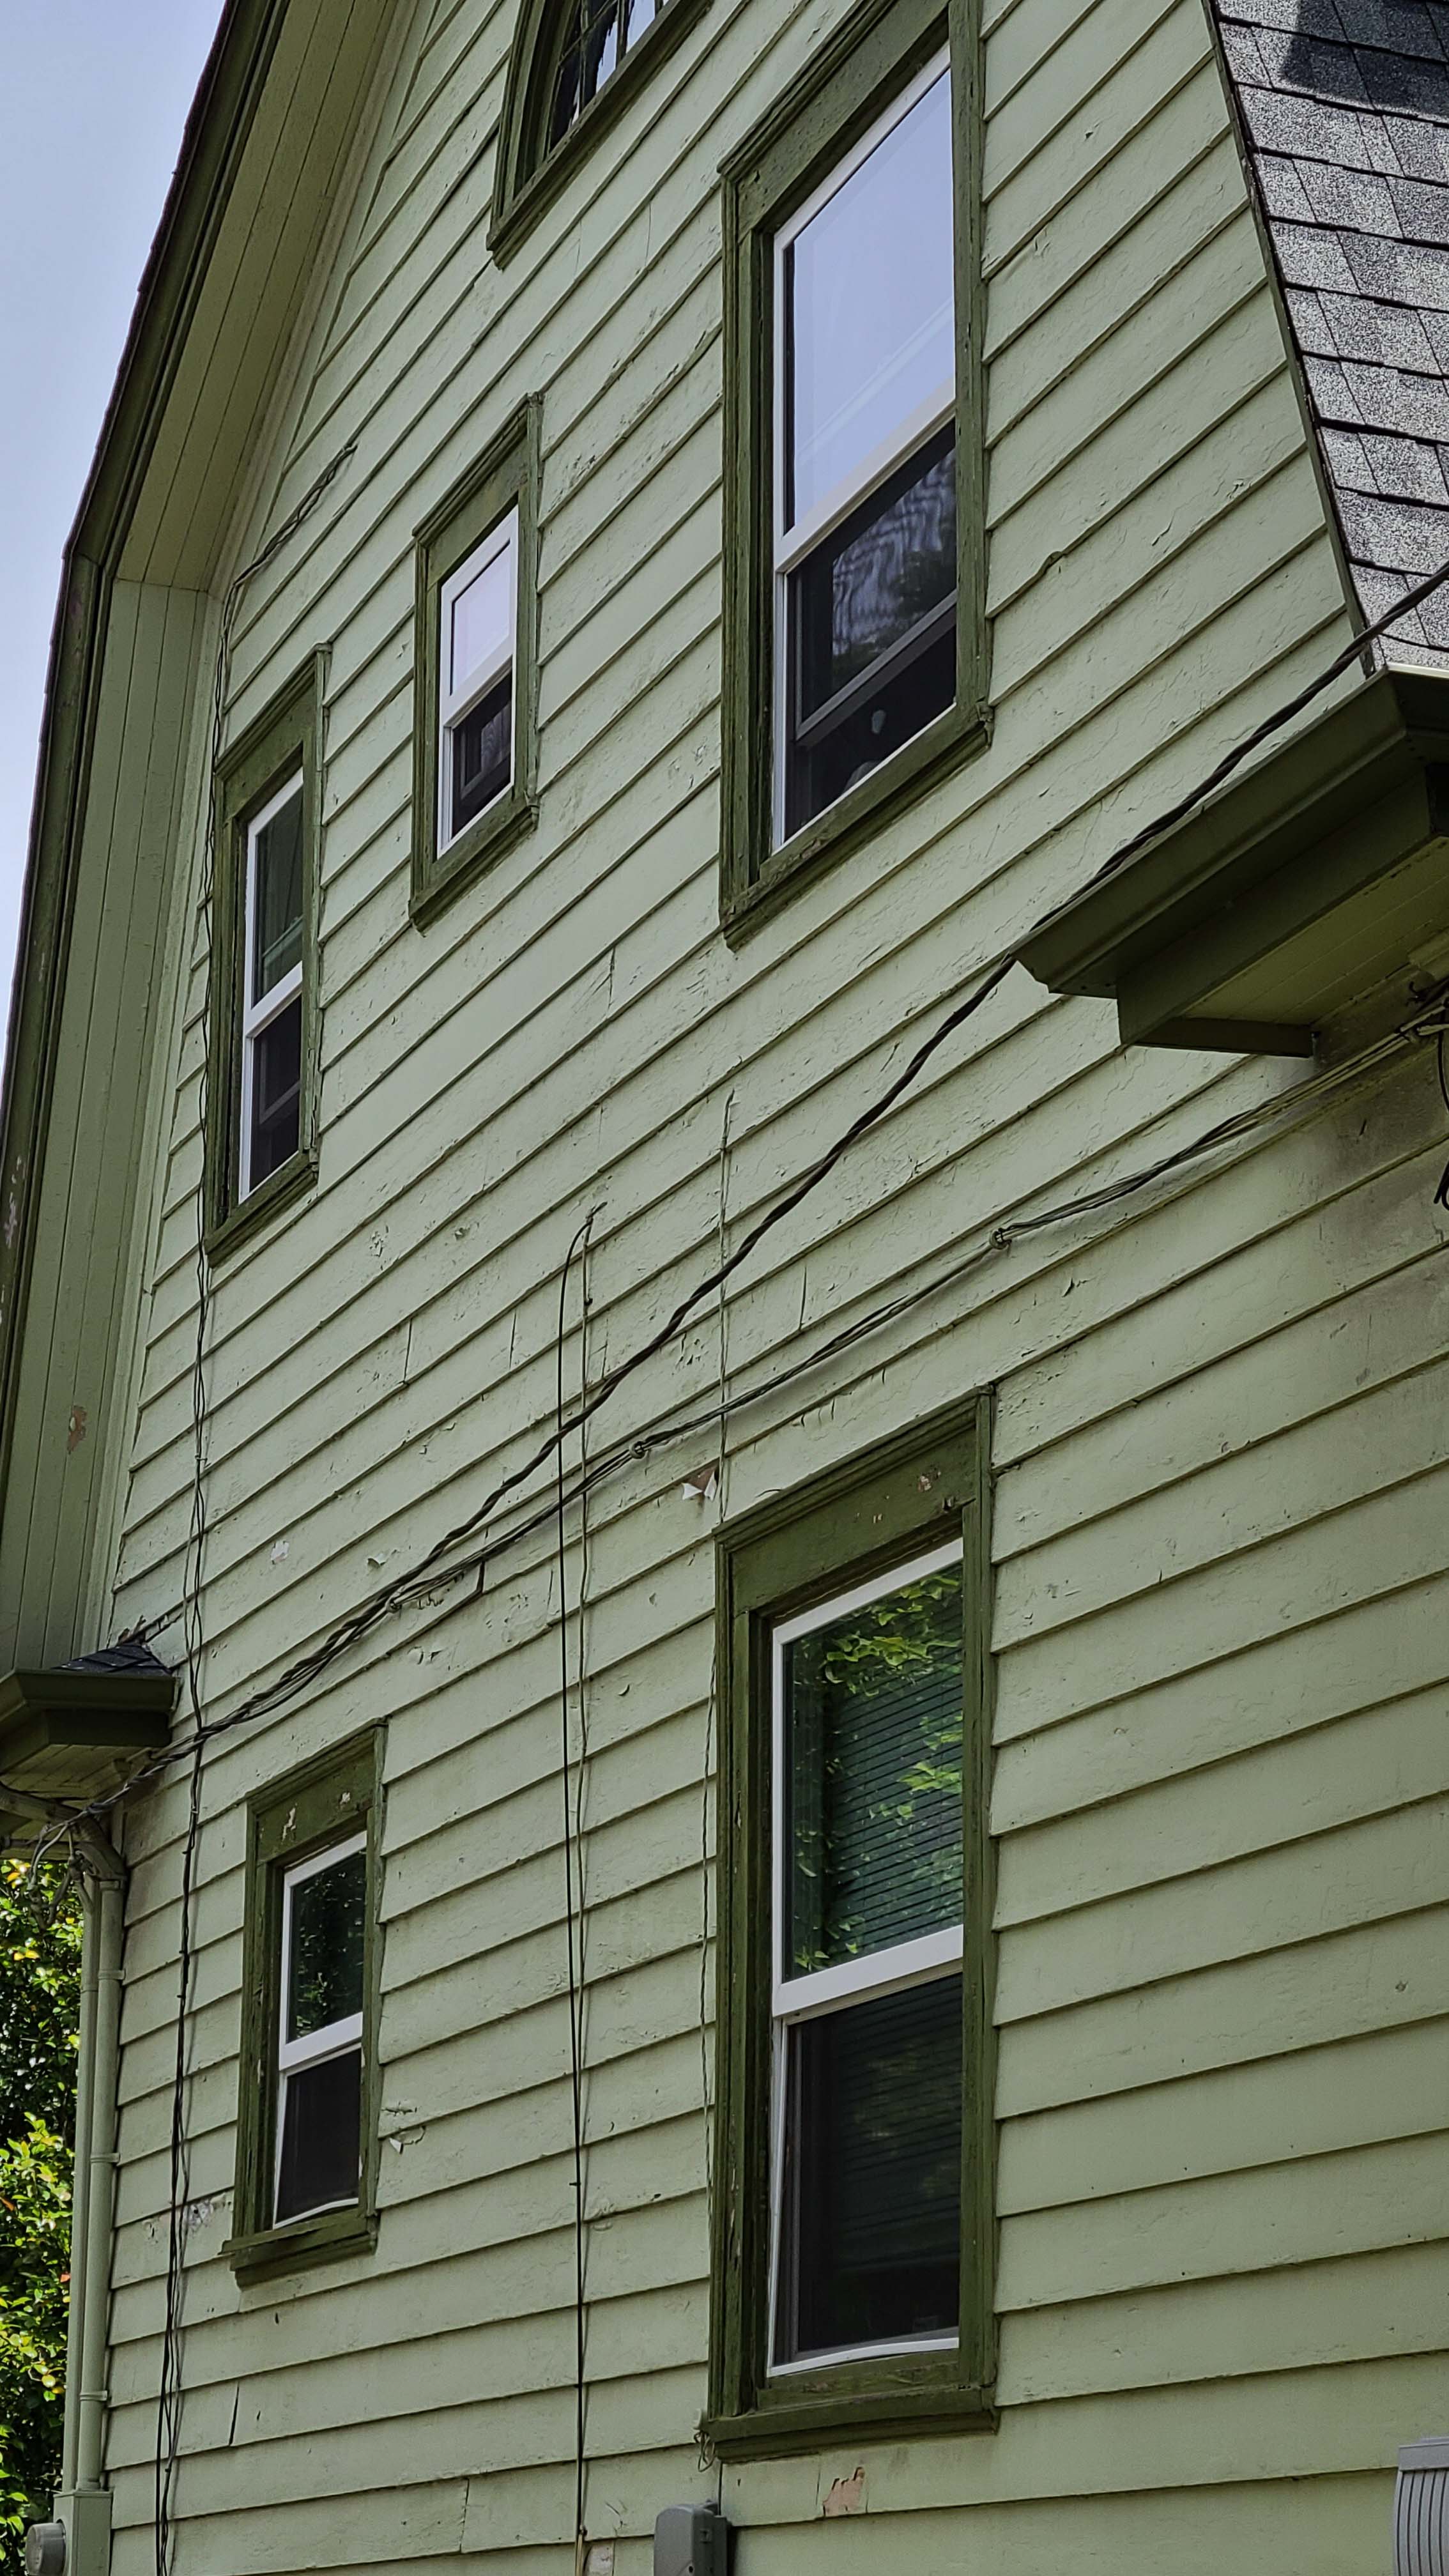
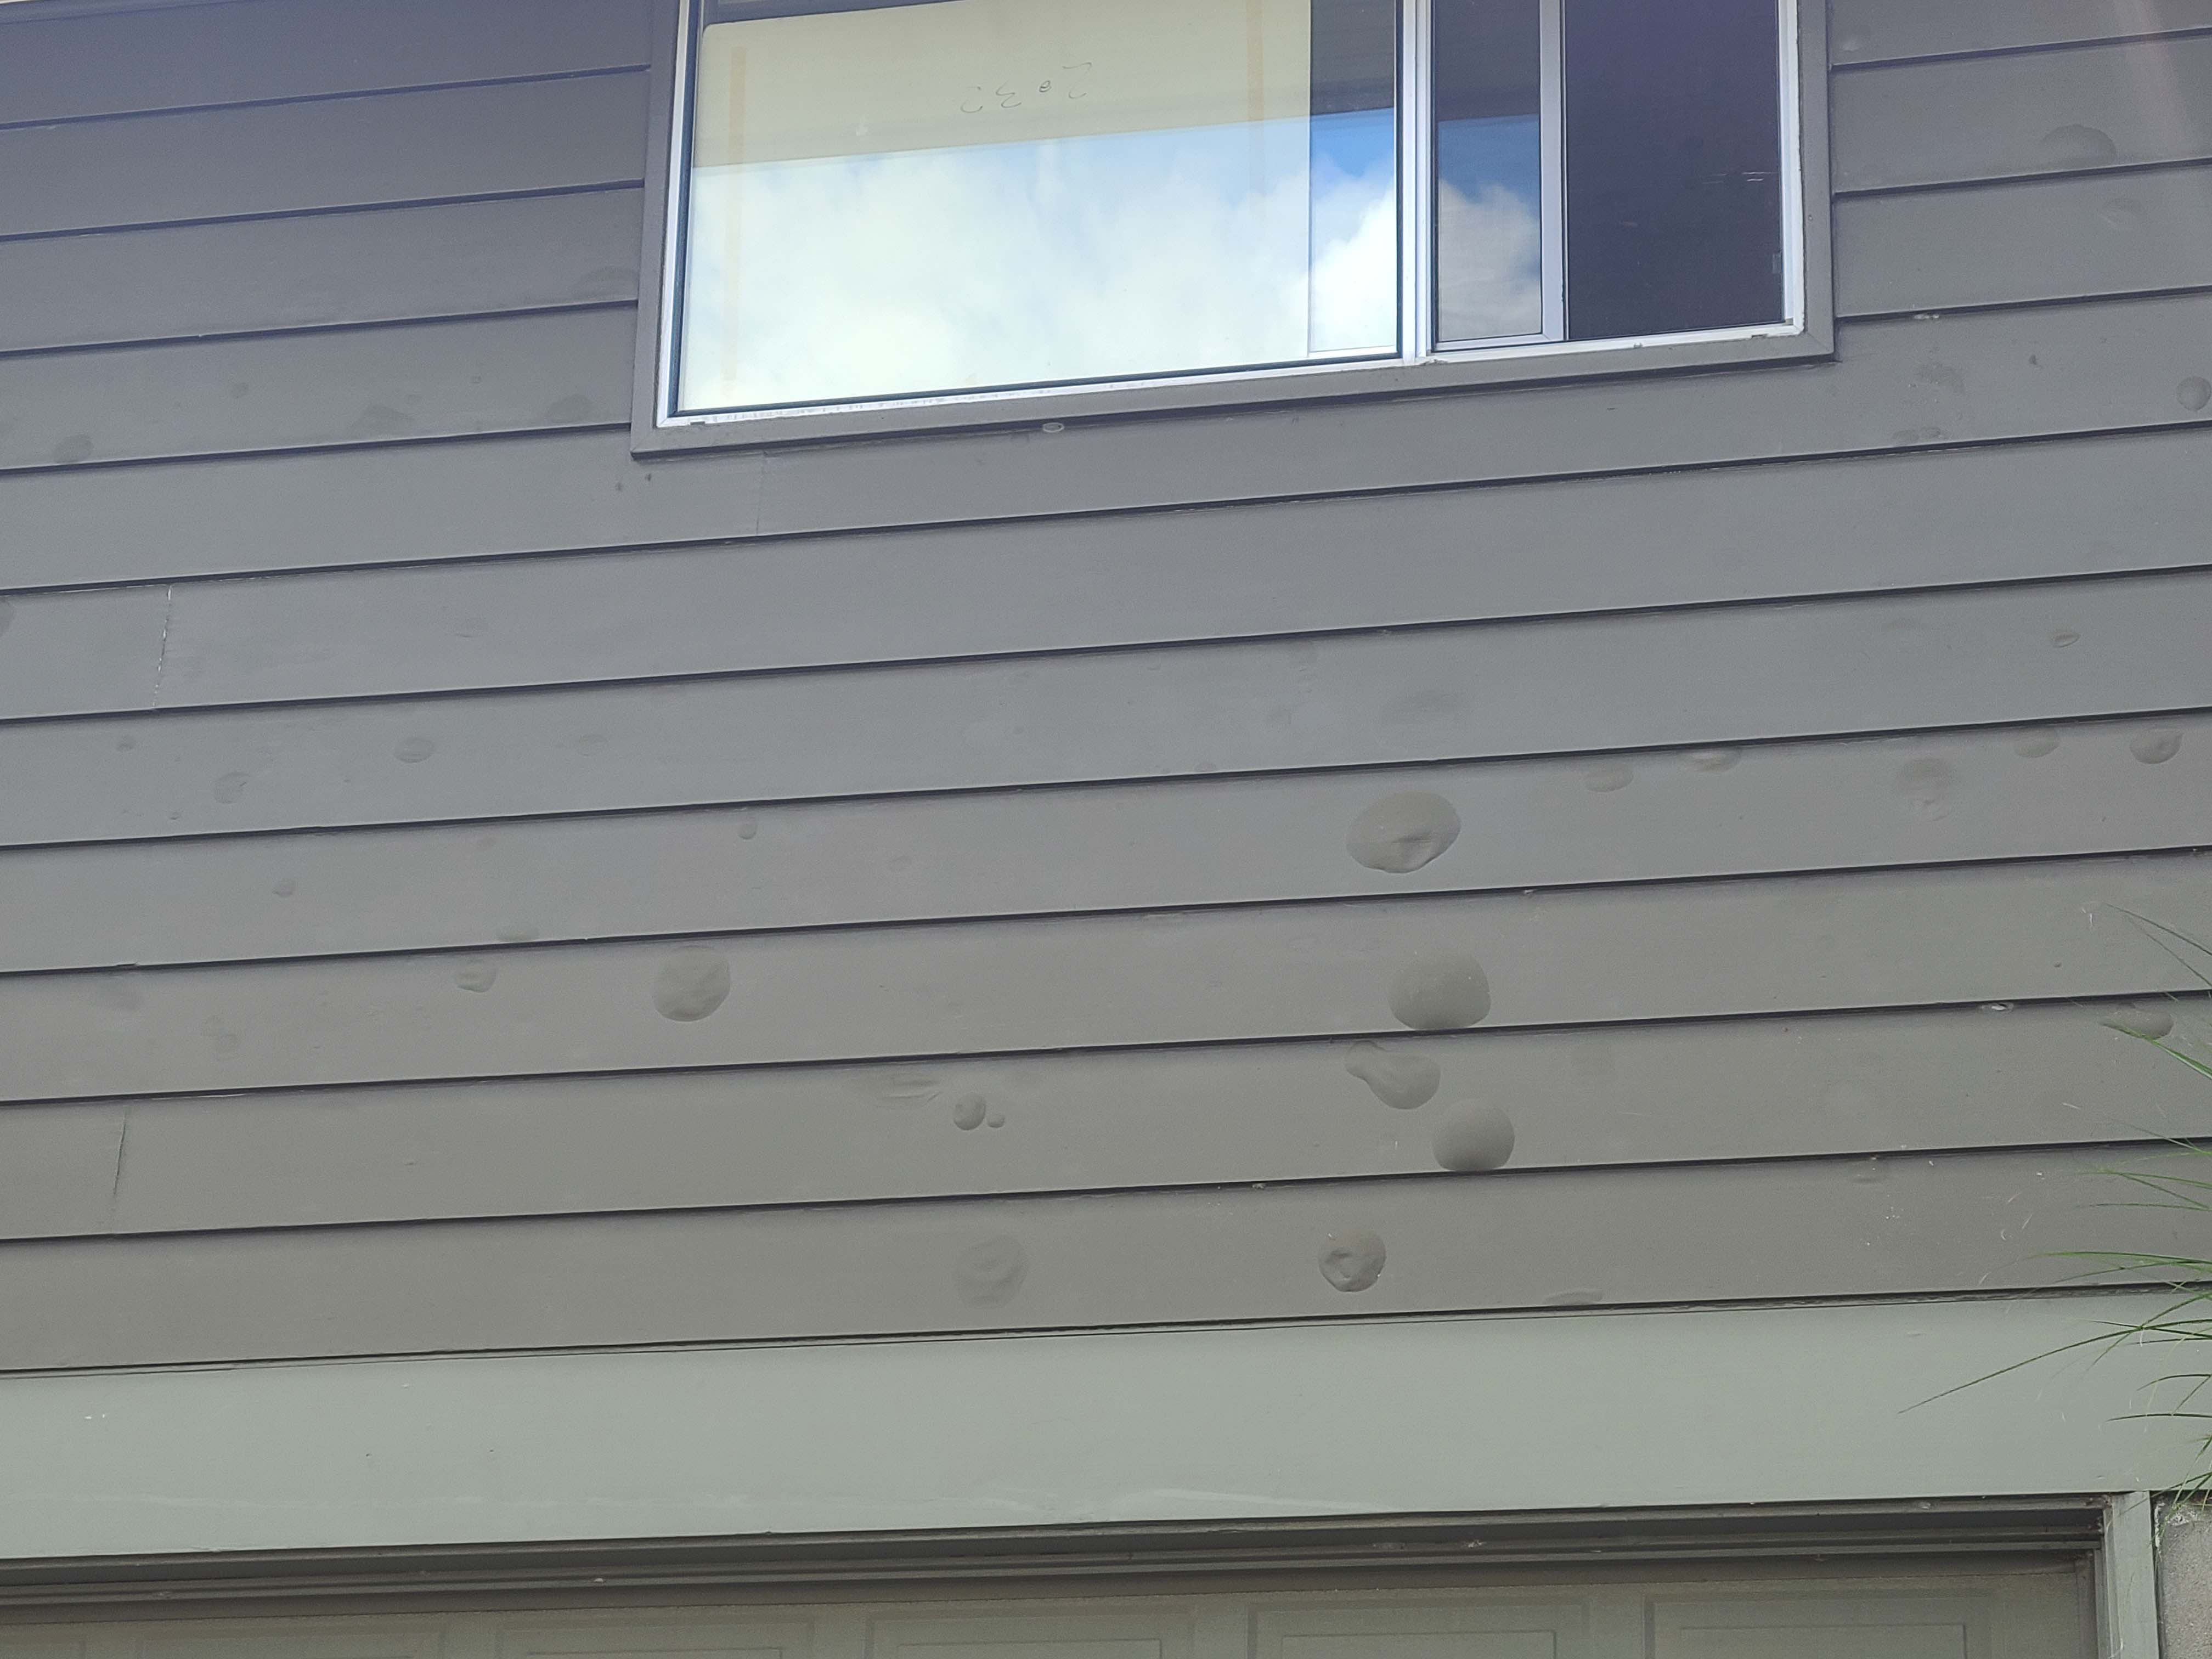
3. Examine the siding.
Examine siding under or around windows and doors. Look for cracks, warping, peeling paint, discoloration, rotting, algae, or mold formation. All of these could be signs of water damage underneath the siding (Figures 5, 6, 7, and 8).
Source

Source
Source

Source
4. Check inside the home.
Visible water stains on walls or ceilings are obvious signs of water leaks. Also look for cracking or bubbling of paint beneath windows. Look for unexplained dampness in carpets along exterior walls. Carpenter ants inside the home can be another indication of damp wood somewhere in the home. Visible mold on walls or a moldy or mildew smell can also indicate a moisture problem somewhere in the walls. The cause of moisture issues like these should be investigated – it could be rainwater intrusion due to lack of flashing or poor wall or roof detailing, or it could be due to a plumbing leak, foundation water management issues, or a significant need for ventilation and dehumidification.
5. If re-siding or replacing windows, check the sheathing and framing behind the siding and trim.
If all or part of your house is being re-sided, or if windows are being replaced and the trim is off, then it is an optimal time to check for signs of moisture issues around your windows.
- Look for the window and door flashing before new siding is installed to ensure that flashing is present, correctly installed, and properly integrated with house wrap to direct water out and away from wall cavities.
- Check for pan or sill flashing at the bottom of window openings (note the sill flashing should be angled to drain water out of the window).
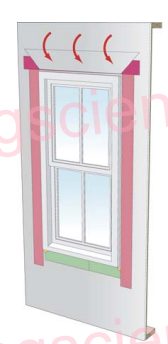
- Ensure flashing tape is installed vertically along the edges of the window or door opening (the jambs) and properly lapped under the head flashing, and over the sill (pan) flashing. (Figure 9).
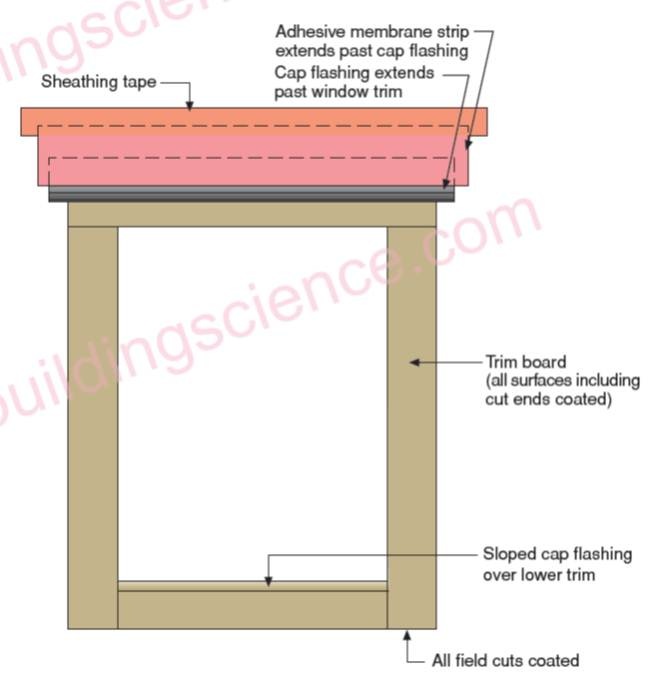
- Ensure flashing tape (or metal for older construction) at the top of the opening (head flashing) is layered over the drip-cap flashing and over the jamb tape (or metal) along the sides of the opening (Figure 10).
- Do NOT seal “weep holes” at the bottom of windows, as these are designed to allow moisture out of the window if it gets behind the glass.
- Install new house wrap if needed. The house wrap should be underneath flashing at sides and bottom of windows and overlap door and window tape flashing at the tops. Proper integration of the house wrap with the windows is best achieved by removing and reinstalling the windows.
- Do not ignore signs of moisture damage (mold, deteriorating lumber or sheathing, wet insulation, etc.) Work with a contractor to identify and fix the source of the water leaks in addition to just repairing the damage.
Source
Source
Document with important building science considerations, designed for members of the residential construction and remodeling industries, as well as owners and managers who work in affordable housing.