

Introduction
Insulating your electric resistance water heater is a simple, inexpensive method to reduce standby heat losses and improve energy efficiency.
Why
Electric water heaters account for about 18% of annual energy consumption in your home. If you own an older electric resistance water heater without insulation, adding a water heater blanket can significantly decrease heat loss and improve performance. While most modern water heaters are constructed with insulated tanks, older models may have no insulation. You can look up the R-value (insulation level) of your water heater’s tank by the model number. It may also be listed in the owners’ manual. The insulation level should be at least R-24. You can also easily check if a blanket is needed by placing the back of your hand on the water heater. If it is warm to the touch, this indicates heat is being lost to the environment and an insulation blanket will help.
What You'll Need
- Water heater insulating blanket kit or vinyl-faced fiberglass or foil-faced insulation blanket material
- Tape measure
- Scissors
- Gloves and a dust mask
- Electrical tape (often tape will be included with the kit)
- Marker
- String (optional)
1. Turn off water heater.
Turn off your water heater using either the power switch or by locating and turning off the breaker line connected to the water heater. Put on gloves and a dust mask before handling the insulation blanket. Remove seismic straps if they are installed and set them aside.
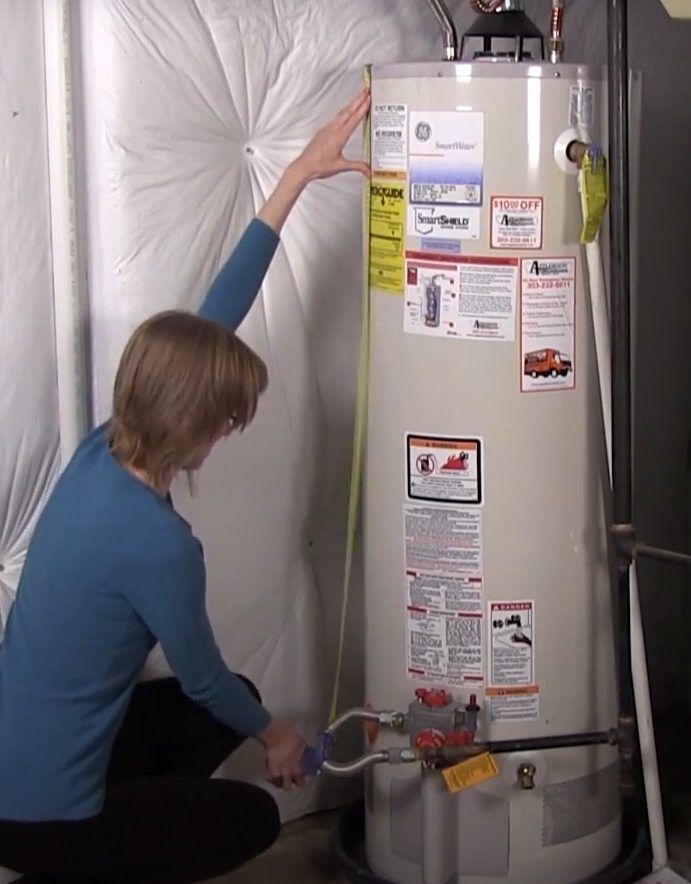
2. Measure water heater.
Measure the height and circumference of the water heater (Figure 1). One way to measure the circumference is to wrap the water heater with a piece of string, then use the string length as a measure of circumference. Use the marker and measuring tape and string to mark these dimensions on the blanket.
Source
3. Cut blanket.
Cut the insulation blanket to fit with a few inches of overlap around the circumference. Take care not to cut off any tape that may be pre-installed with the kit. If you have extra insulation, it can be used for the top of the heater.
4. Mark controls on blanket.
Wrap the water heater blanket around the water heater. Identify the location of the pressure relief valve and position the blanket to align the overlap seam with the valve and pipe. Secure the blanket temporarily using electrical tape or have someone else hold the blanket in place. Identify the locations of the control and access panels and pressure relief valves, etc. Mark the panels, pipes, etc. with an X matching the corners of the panels, etc. If there is a significant amount of overlap of the blanket, you can also mark where the blanket should be trimmed.
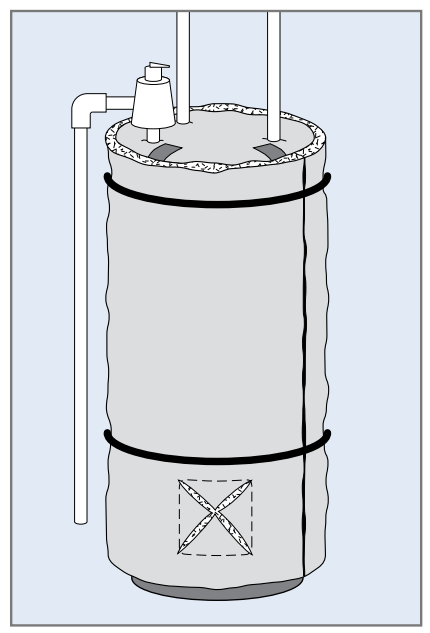
5. Make cutouts for panels.
Lay the blanket on the floor or a table or cut in place if space allows. For the panels, follow your marks and use heavy scissors to make an X-shaped cut over the panel extending to the corners of the panels (Figure 2). Fold the flaps of the X in the insulation inward. This allows the panels to be exposed without compromising the insulation blanket.
Source
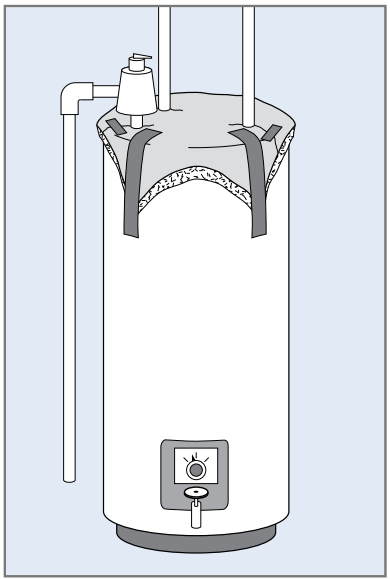
6. Insulate top.
If you have enough insulation left over to cover the top of the tank, place a piece of insulation on top and mark pipe locations, then cut slits to fit around the piping on the top of the tank. Place the insulation over the top of the tank and fit around the pipes, then use tape to seal the slits closed around the pipes. Tape the corners of the tank-top insulation down to the sides of the tank with heat-resistant tape (Figure 3).
Source
7. Install the blanket.
Water heater insulating blanket kits may include either tape or belts. Wrap the blanket around the water heater and align the holes with the panels. Position the belts so that they do not cover access panels. Don’t overtighten the belts; the blanket should not be compressed. Tape should be placed horizontally at the seam to hold the blanket in place, then applied vertically on the seam to seal it.
8. Re-install seismic strapping.
Seismic strapping is required on hot water tanks in California and Alaska, and areas of Nevada, Idaho, Wyoming, Montana, Oregon, Washington, and Hawaii that are within the Uniform Codes' seismic zones 3 and 4, where water heaters are specifically required to be anchored. Install or re-install seismic strapping, if required by code. Install the seismic strapping over, not under, the insulating blanket. Seismic strap kits are available or you can use heavy-gauge metal straps and 3-inch lag screws anchored in 2x4s attached to the wall studs. Use two straps - one within the top 1/3 of the tank, one within the bottom 1/3 of the tank (Figure 4). See the Building America Solution Center guide, Water Heater Elevated and Secured, for more information.
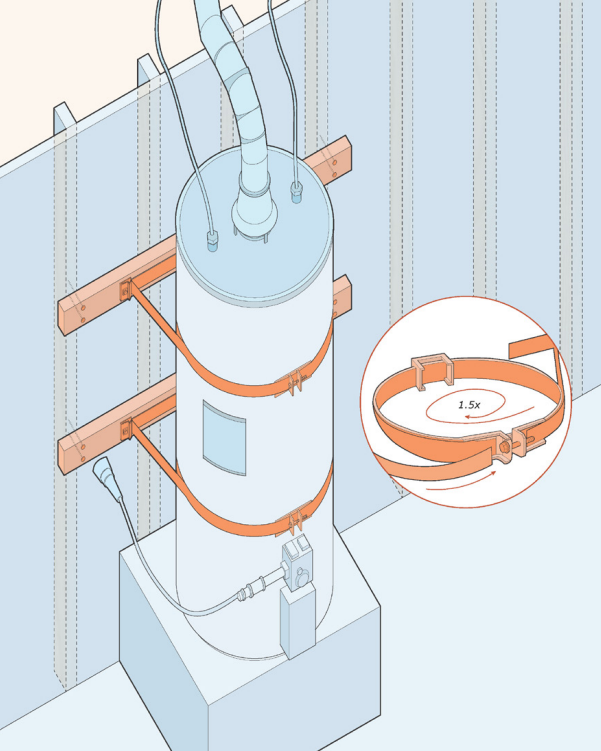
Source
Factsheet describing how to secure water heaters to resist seismic activity.
9. Turn on water heater.
Turn the water heater back on. Do not set the thermostat above 130°F as the wiring may overheat. The U.S. Environmental Protection Agency (EPA) recommends setting your water heater to 120°F (49°C). This setting balances energy efficiency with safety and effectiveness, reducing the risk of scalding.
