Introduction
Install a ventless heat pump clothes dryer or combination washer/dryer for energy savings and space savings.
Why
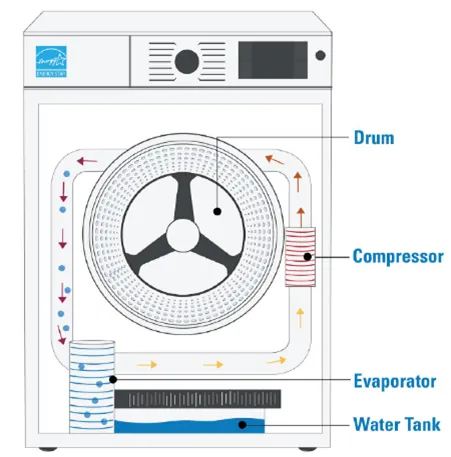
If you want to install a clothes dryer in a spot where you don’t have a vent to the outside or if you want to install a combination washer-dryer unit, consider a heat pump clothes dryer or combo washer-dryer. Heat pump clothes dryers use less than half the energy of a conventional electric dryer (<300 kWh per year versus 600 kWh per year) and don’t require a vent to the outside. They also save on heating and cooling energy. Because these ventless clothes dryers don’t exhaust conditioned air to the outside, they also save on heating and cooling costs. When these energy savings are taken into account, a heat pump dryer uses one-third of the energy of a conventional electric dryer, or about $100 in annual energy savings. So, while a heat pump dryer typically costs about one-third more than a conventional electric dryer, the energy savings will cover the added costs in approximately 5 years; often utilities and states offer rebates that reduce the cost further, bringing the upfront cost to the same or less than the cost of a conventional electric or gas clothes dryer.
ENERGY STAR maintains a list of rated heat pump clothes dryers. You can find them by going to the ENERGY STAR product finder, or looking at the certified clothes dryers webpage and filtering for “heat pump technology.”
Many models of combination all-in-one washer-dryers are ventless models that use heat pump technology for the drying portion of the cycle. They can be plugged into a standard 120-volt circuit instead of requiring a 240-volt line, making conversion from a gas dryer to a heat pump dryer easy. In addition to being ventless, these models take less space than a side-by-side washer-dryer set and offer the convenience of not needing to transfer laundry from the washer to the dryer. You can find certified all-in-one washer-dryers by going to the ENERGY STAR certified clothes washer webpage and filtering for combination all-in-one washer-dryers, or via search in the ENERGY STAR product finder.
What You'll Need
- Furniture-moving sliding pads
- Adjustable pliers
- Adjustable wrench
- 4-inch round duct cap
- Foil mastic duct tape
- ½-inch flare brass cap if you’re removing a gas clothes dryer
- Gas pipe dope and/or gas pipe thread tape if you’re removing a gas clothes dryer
- A few nylon cable ties or clamps
- A washer drip pan, if you’re getting a combination all-in-one washer-dryer
1. Select a new, energy-efficient ventless clothes dryer.
- Use the ENERGY STAR Product Finder to find condensing clothes dryer models (Figure 1).
- Check the Database of State Incentives for Renewables & Efficiency® or the ENERGY STAR Rebate Finder to determine whether a condensing clothes dryer model is eligible for a rebate or incentive in your area.
- Before choosing a new clothes dryer, use a tape measure to determine the space constraints in the spot designated for the clothes dryer. Use a tape measure to determine the space constraints of doorways and hallways to ensure that the new model can be moved to its installation location. Verify the size of the model you are considering, it may be larger than the dryer you are replacing.
- Choose a condensing clothes dryer model that meets the needs of the household. Some heat pump clothes dryers have smaller capacity than a conventional clothes dryer. Some models may take longer to dry a load of clothes.
- Heat pump clothes dryers produce condensate that can be either drained through a drain hose to the same drain as the clothes washer or that is collected in a condensate tank that needs to be emptied after each load.
- Heat pump clothes dryers have more than one lint trap. Note their locations to ensure they can be accessed easily for routine maintenance.
- Choose a location that maintains a temperature of at least 40°F for the condensing dryer to work properly. The dryer will release heat into the room where it is located so it should not be located next to a refrigerator. The room should have some airflow (if in a small room, the door should be kept open when the dryer is running, or install a door with louvers to provide consistent airflow).
Source
Article explaining the energy cost reduction and other benefits associated with installing a heat pump clothes dryer
2. Remove the existing clothes dryer.
- If you are replacing an existing dryer, tip the old dryer back to install moving pads to reduce friction and protect the floor when pulling the old dyer out.
- Unplug the clothes dryer from electricity. Disconnect the vent/exhaust duct from the dyer.
- If the existing clothes dryer has a water connection (steam feature), shut off the water using the washing machine shutoff valve and use adjustable pliers to disconnect the water supply hose.
- If the existing clothes dryer is gas, shut off the gas using the gas valve, disconnect the flexible gas line, and cap the end. Do this with a window open and ventilate the area well. The most common cap for this application is a ½-inch flare brass cap. Remember to use pipe dope or pipe thread tape that is stated to work with gas pipes. Pipe dope and pipe thread tape for water pipes is generally not suitable for gas pipes. Depending on the condition of the end stub, you might need to use a ½-inch brass pipe plug or a black iron pipe cap instead of a flare brass cap (Figure 2).

Source
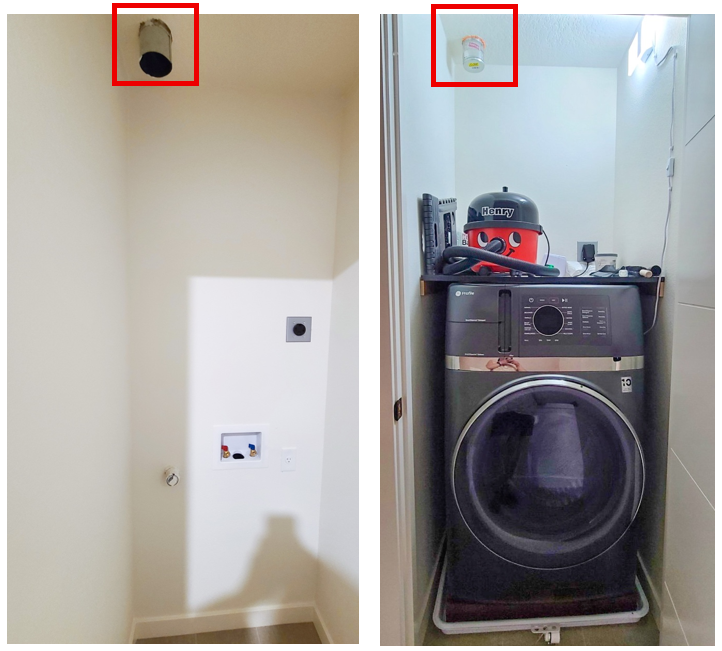
3. Cap off the dryer vent.
- If you removed a dryer that had a vent, disconnect and remove the dryer exhaust duct from the wall or ceiling.
- Clean off the duct end in the wall or ceiling with a damp rag, then cover the open end with foil mastic duct tape (Figure 3).
- Caulk or seal any gaps around the vent duct with caulk or canned spray foam.
Source
4. Install the new heat pump clothes dryer.
- Plug in the dryer.
- Heat pump dryers produce condensate that must be drained. The easiest way to drain the condensate is to route the drain line into the clothes washer drain. Secure the hose with nylon cable ties. It could also be routed to a floor drain or utility sink. If there is no drain within reach, many heat pump dryers have a condensate storage drawer that can be manually emptied into a sink every load or every few loads.
- Push the dryer into place.
- Adjust the leveling feet as needed. Leave at least a 3/8-inch gap between the floor and bottom of the dryer.
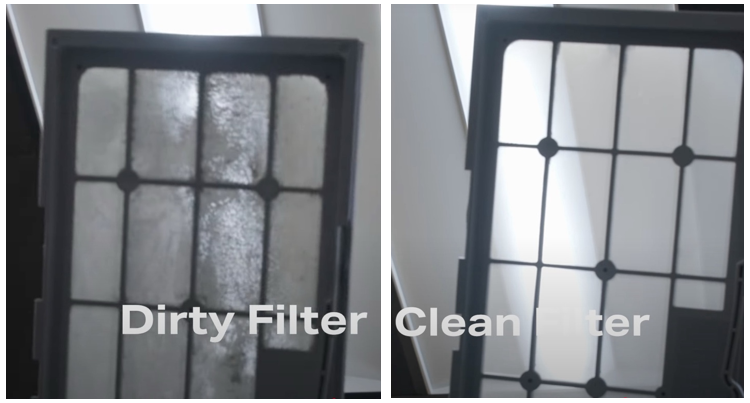
5. Clean the lint filter.
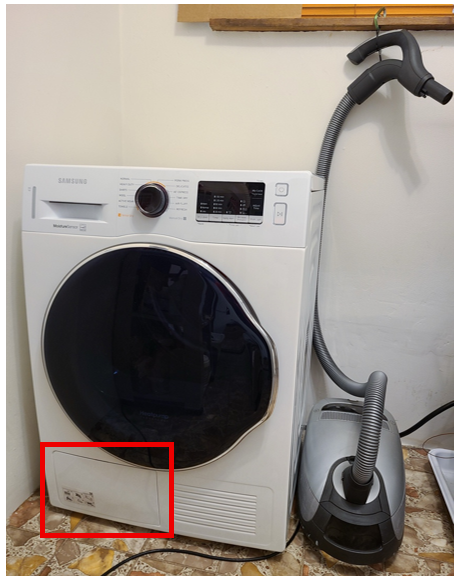
- Remove the lint after every load. This is very important for the performance and longevity of heat pump dryers. Consider storing a vacuum cleaner near the heat pump dryer for cleaning the lint filter (Figure 4).
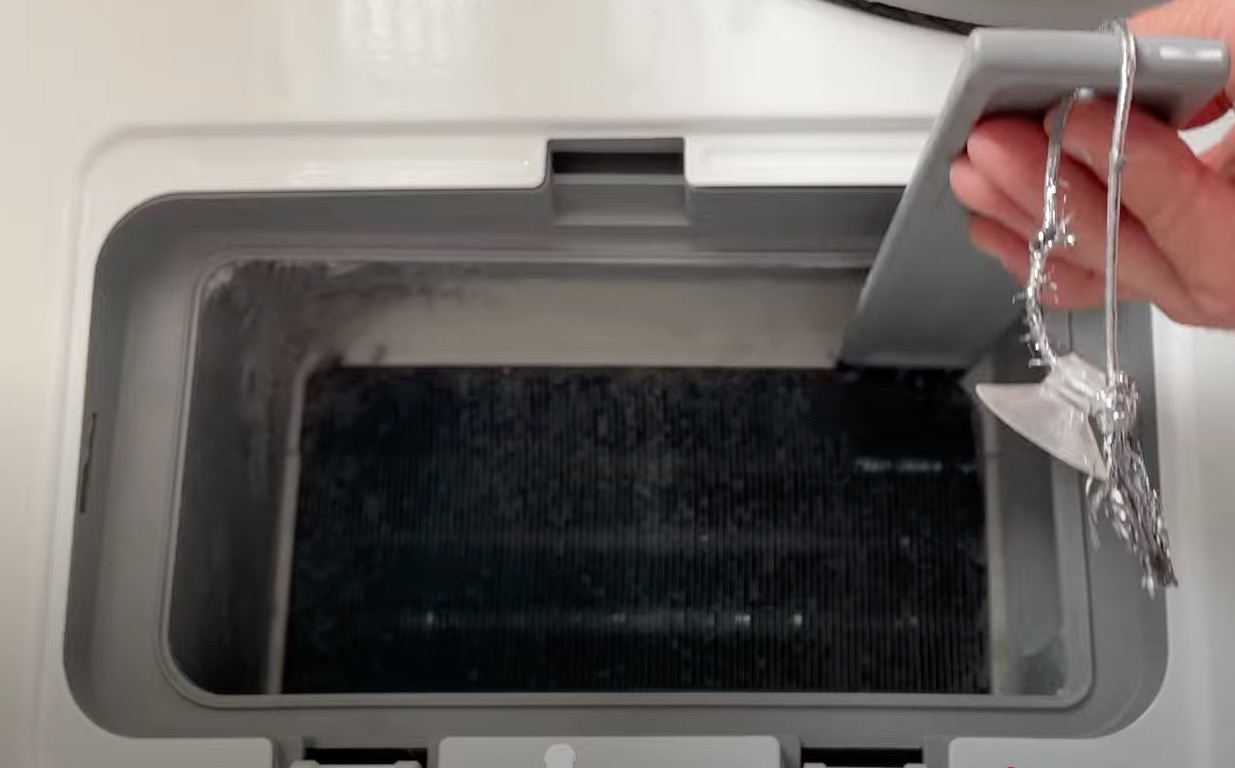
- The secondary lint traps should be emptied monthly or when indicated by an indicator light on the control panel (Figure 5).
- Every 30-40 loads, the condenser should be cleaned and the lint filter should be washed to remove fabric softener and dryer sheet residue (Figure 6). Refer to your specific heat pump dryer for specific instructions on cleaning/maintenance.
Source
Source