Introduction
Awnings protect the outdoor compressor unit of your heat pump or air conditioner from snow, rain, and hail.
Why
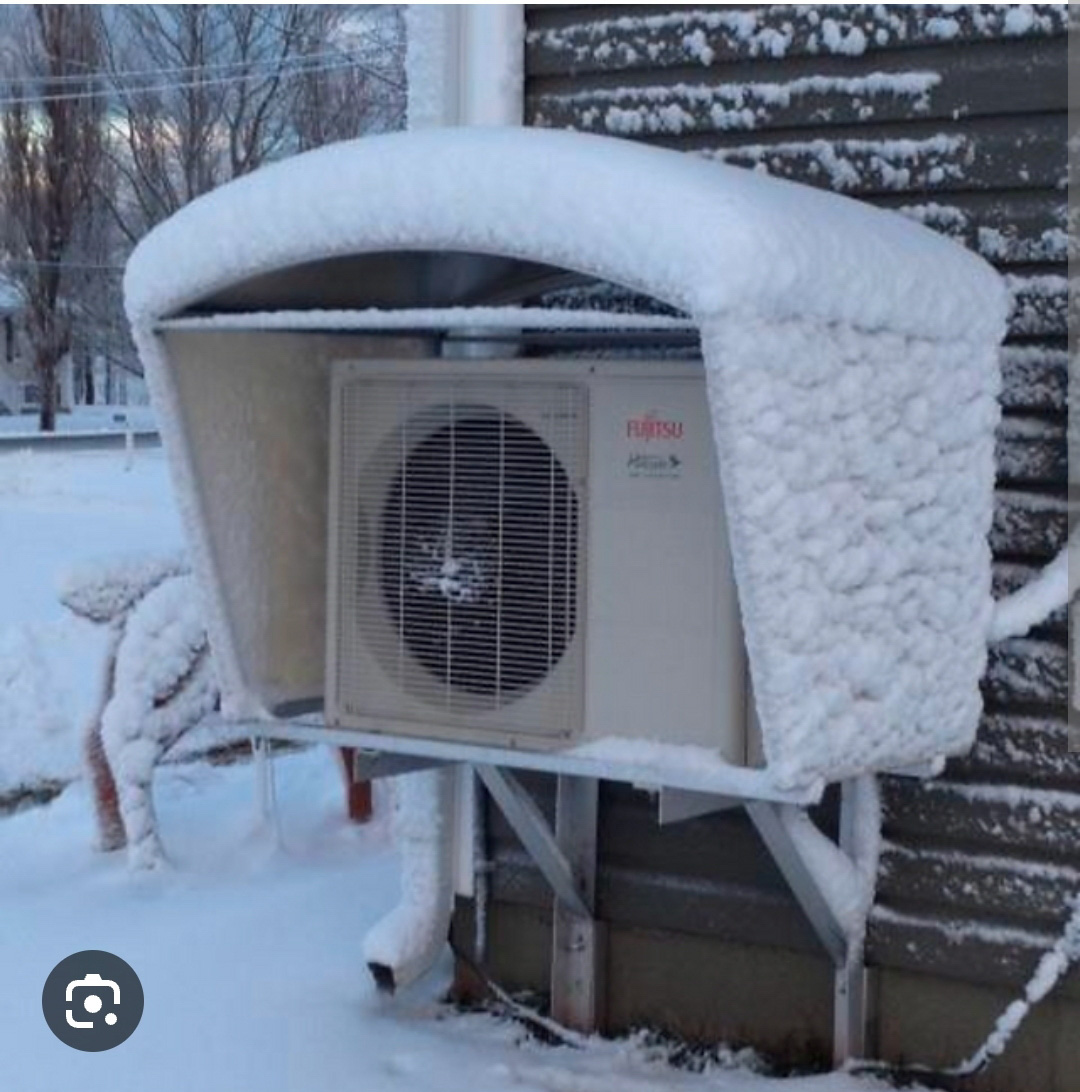
Air conditioners and heat pumps have an inside component and an outside component – the outside component is exposed to environmental hazards including snow, ice, hail, and rain, which can damage the system. You can protect the outdoor unit by elevating it above expected snow levels and by installing a protective awning over it. If you have a heat pump, the shade provided by the awning might also help the heat pump perform better when it is providing summertime cooling to the home (Figure 1).
Source
What You'll Need
- Awning kit, or framing (e.g., lumber or PVC pipe), sheathing, and roofing materials to build an awning
- Level
- Eye and ear protection
- L-flashing
- Ladder for taller awnings
- Saw
- Hammer and nails
- Screwdriver and wood screws
1. See if you need a permit.
Installing an awning over your outdoor HVAC (heating, ventilation, and air conditioning) unit does not typically require a permit but it’s best to check with your local building department before you start. If you live in a neighborhood with a Homeowners Association and/or CC&Rs (Covenants, Conditions, and Restrictions) in place, check with them before beginning construction.
2. Choose a design.
Awnings for HVAC units can be purchased as a kit (Figure 2) or can be built from scratch (Figures 3 and 4).
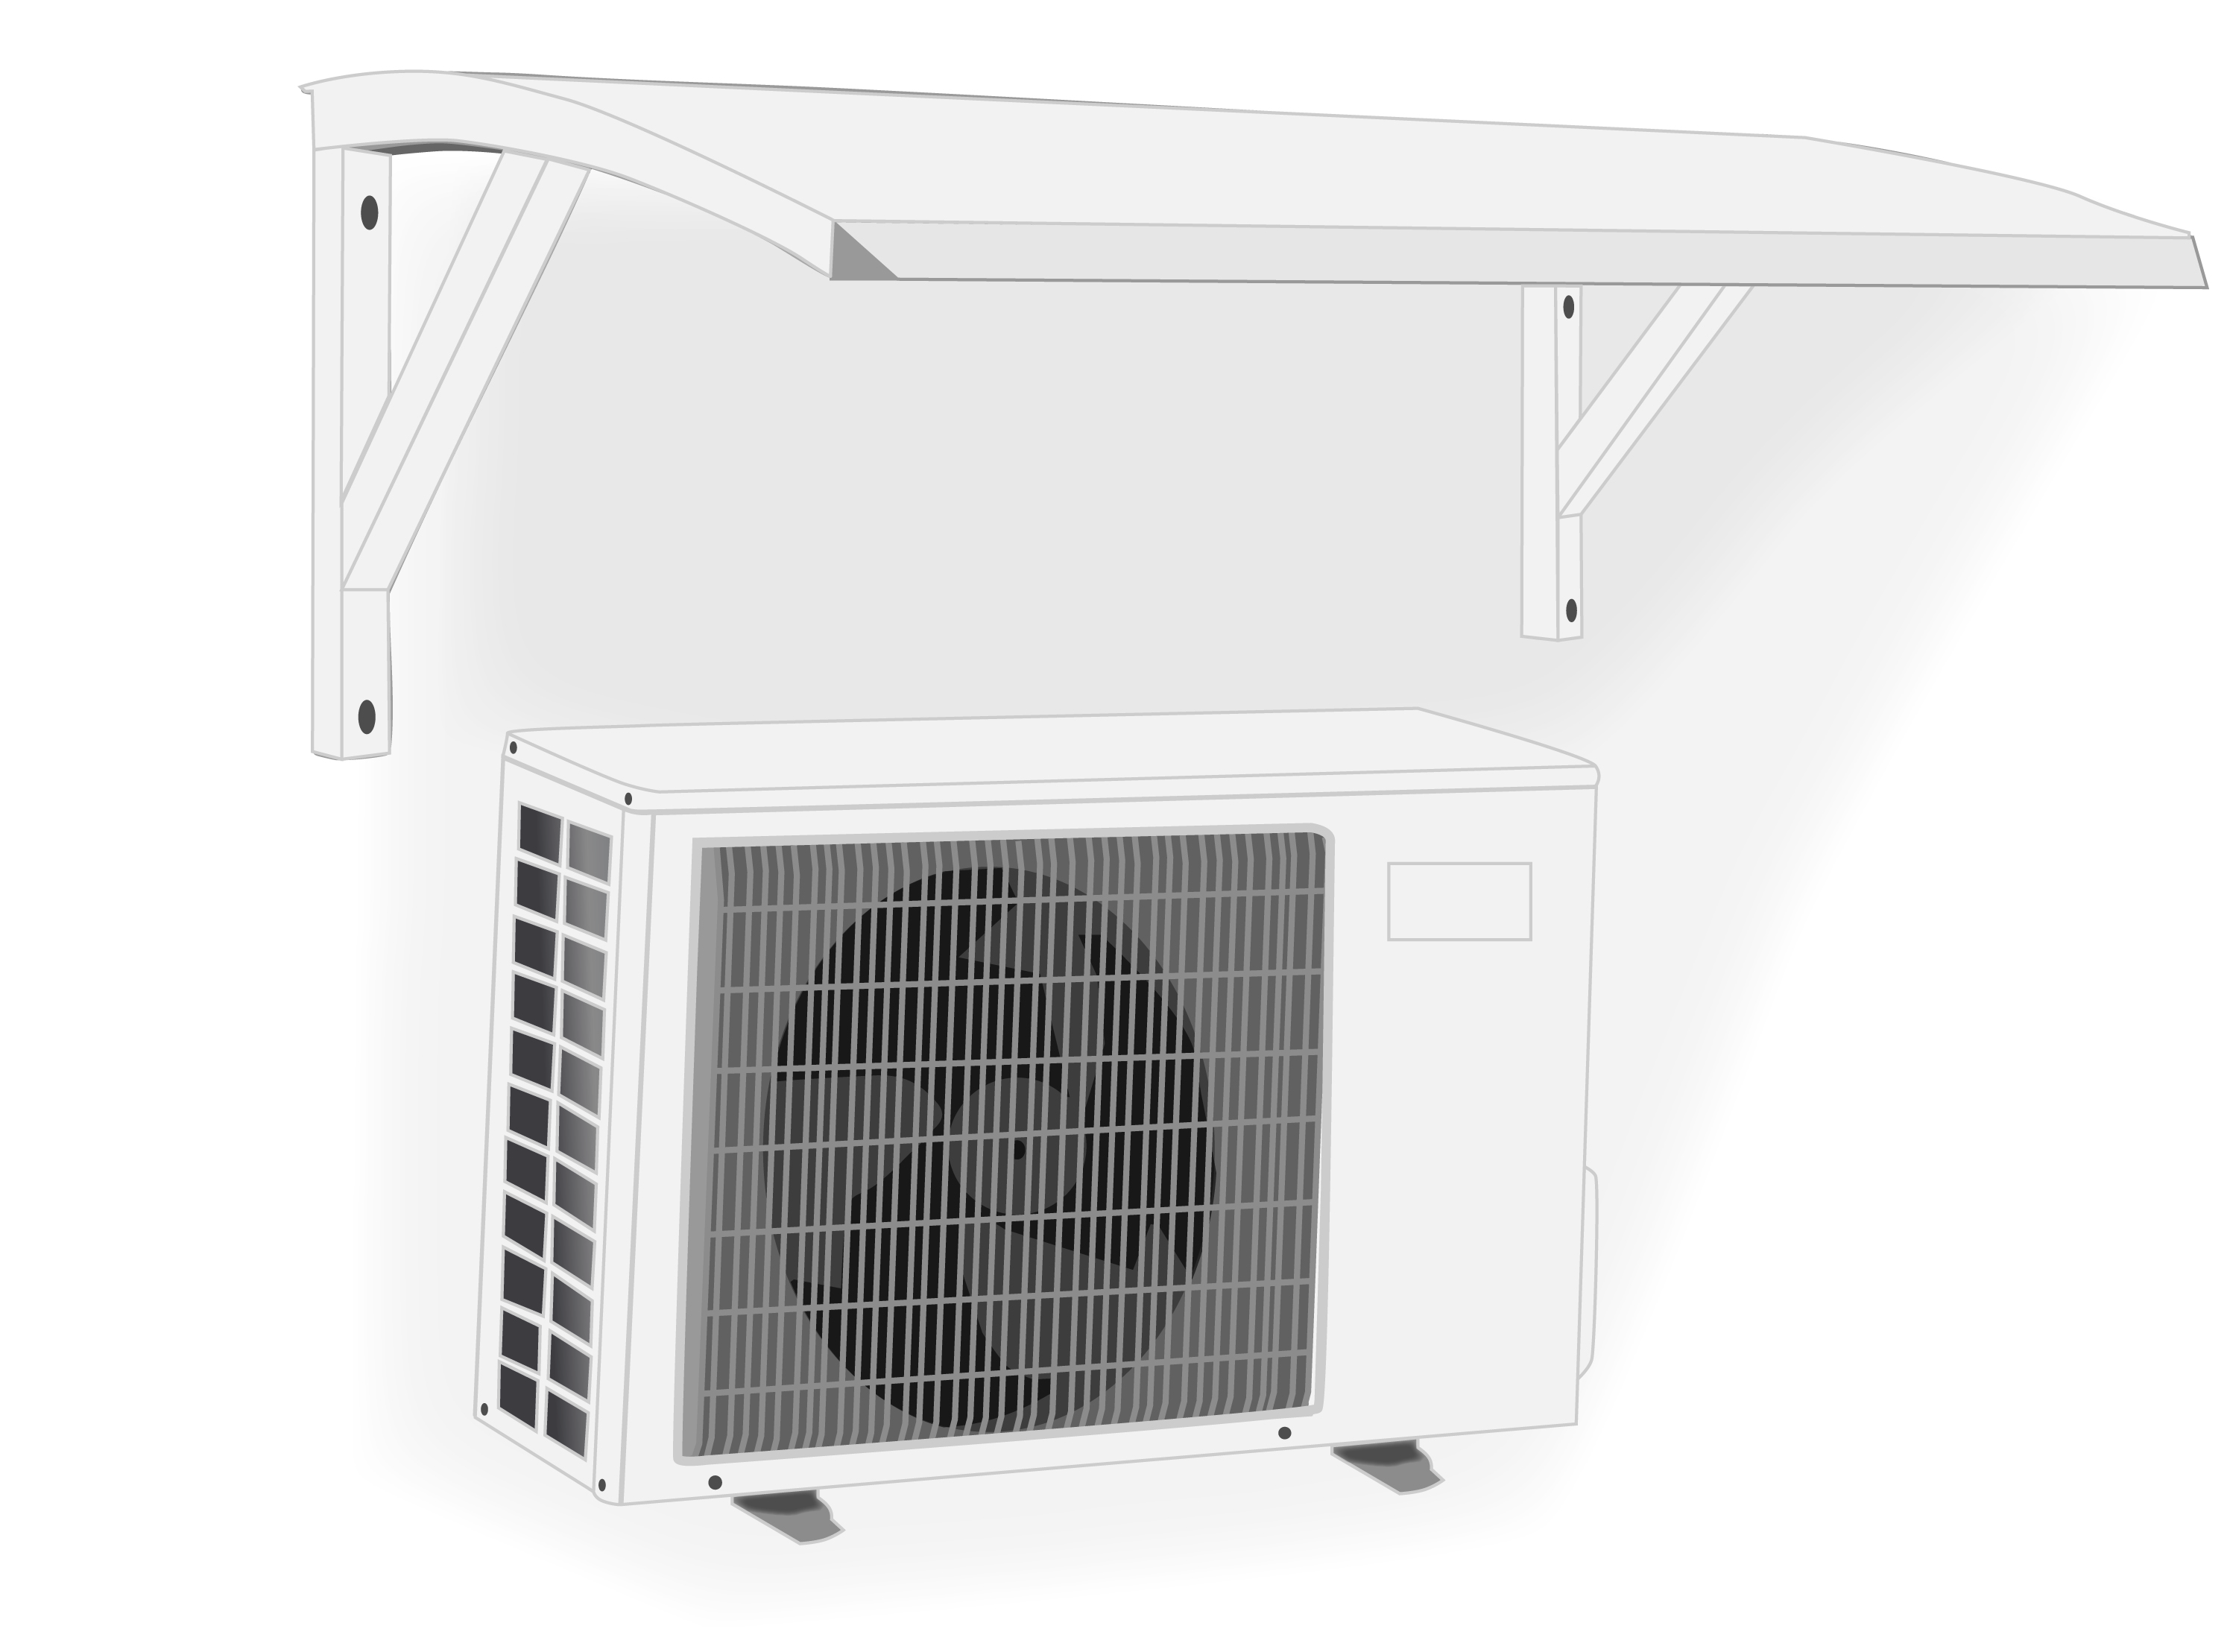
Kit Awnings – There are several versions of pre-made awnings and awning kits available for purchase at hardware stores and online (Figure 2). These are often made of aluminum and plastic and are typically screwed into the wall. Look for a model that is large enough to extend beyond the HVAC unit on all sides. Recommendations vary considerably on how high above the top of the heat pump the awning should be installed; 6 feet is a commonly recommended distance. While protecting the heat pump’s compressor from falling ice and snow is a good idea, it’s also very important to allow airflow around the unit since, when it is operating, a large fan is constantly pulling air through the unit. The awning should be open on the sides. The kit shown in Figure 3 is not a recommended design because it may restrict airflow too much. Check the owner’s manual for your heat pump for specific guidance.
Source
Source
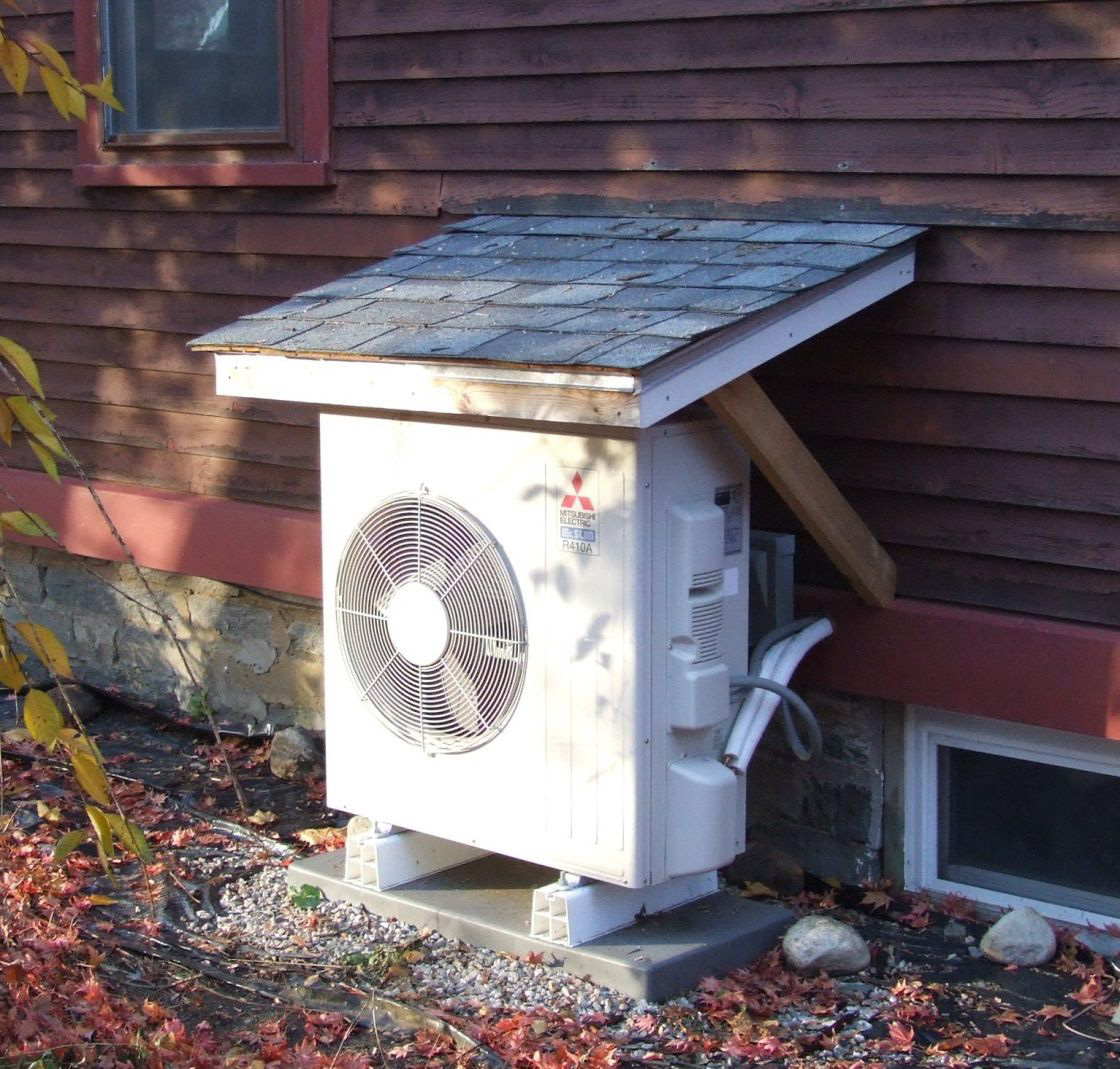
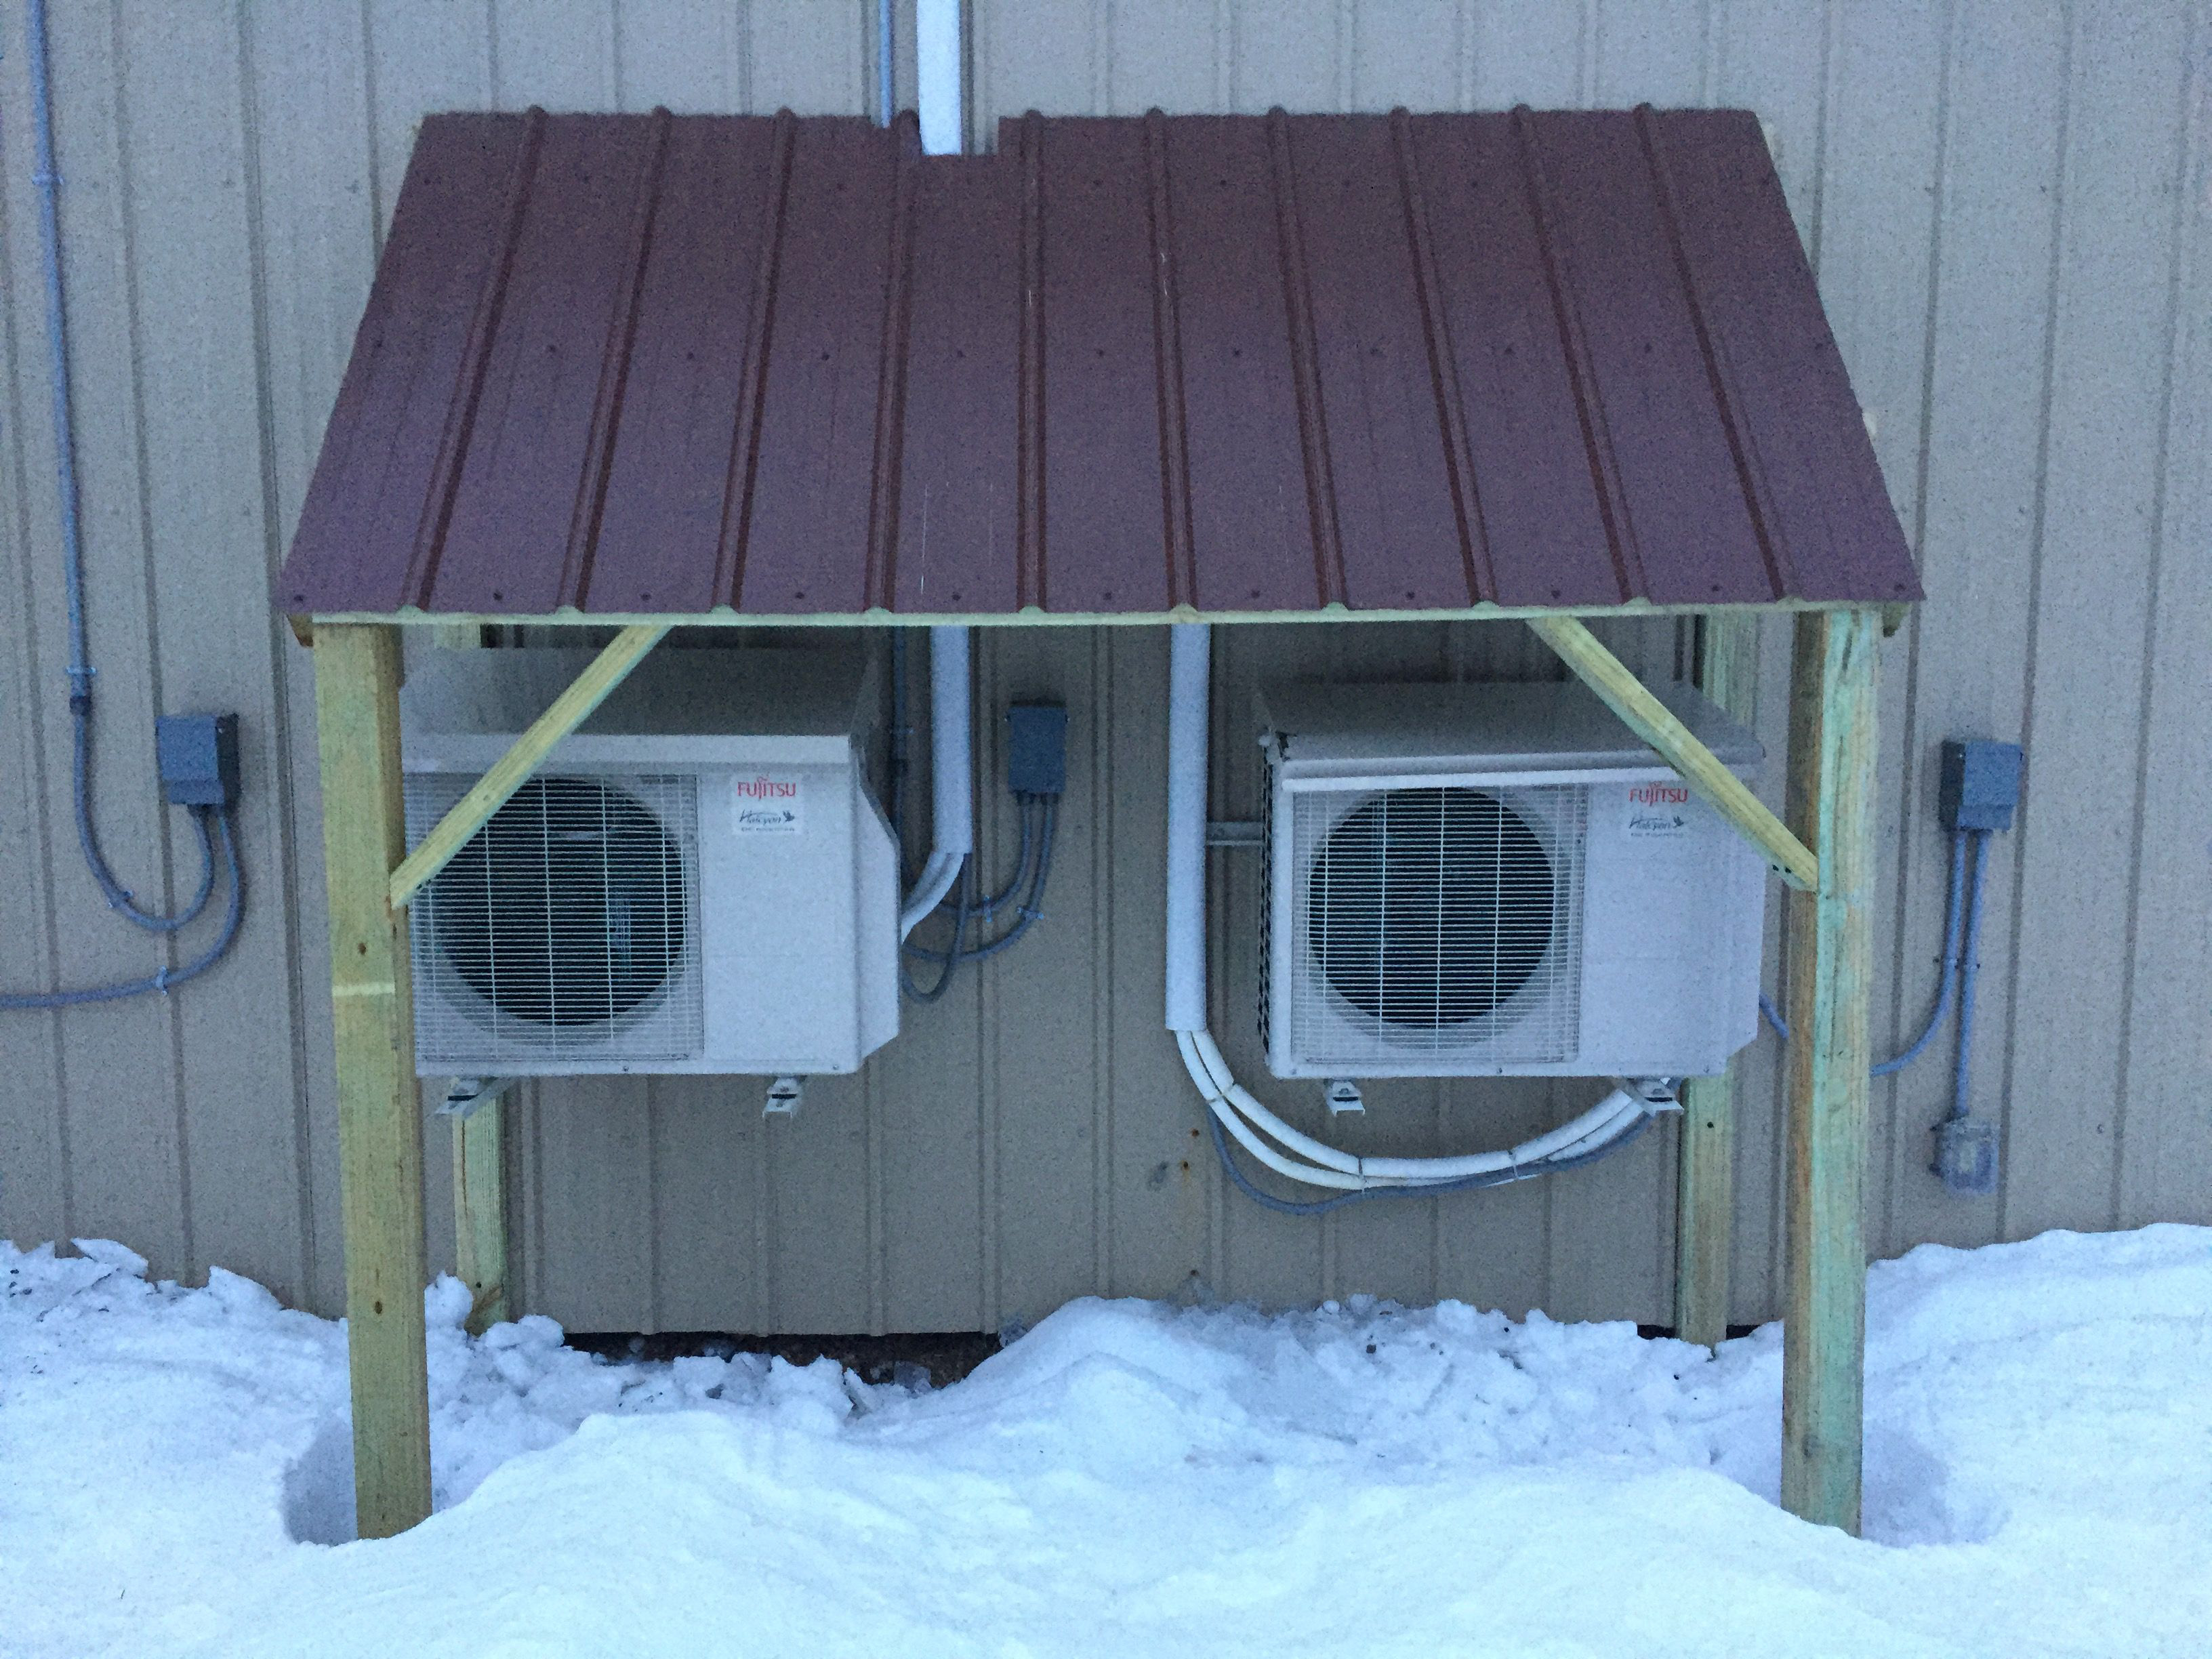
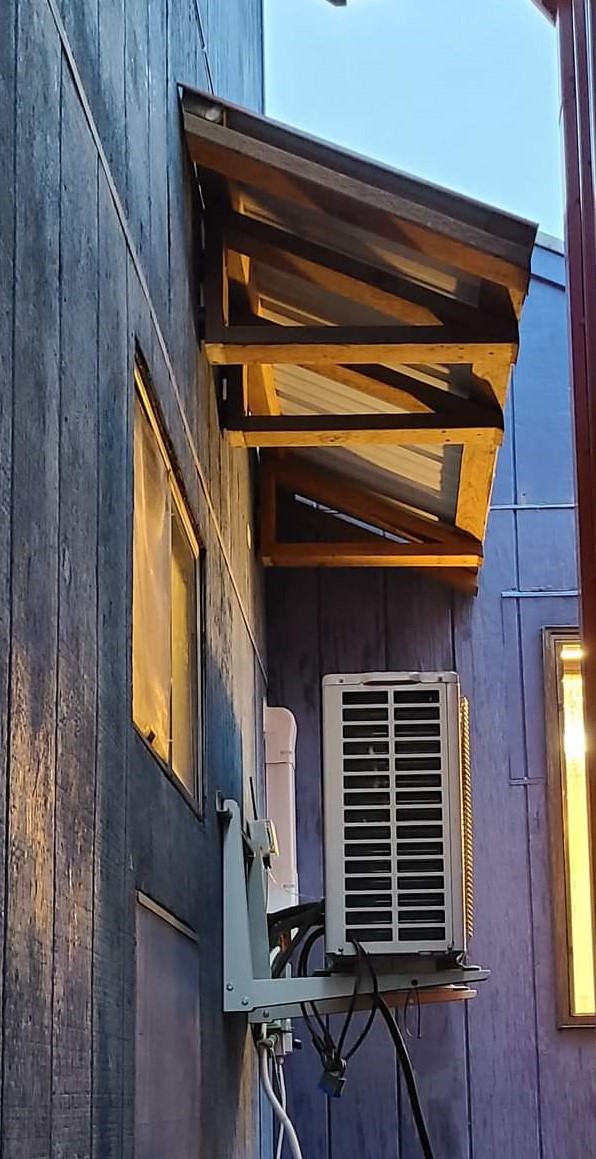
Home-Made Awnings – Home-made awnings can be constructed out of a variety of materials (Figures 4 and 5). The most typical are 2x4 framing lumber and metal roofing (without sheathing) or plywood or OSB sheathing and asphalt roofing. Note the metal drip edge along the front edge of the awning’s fascia. The awning shown in Figure 4 is a simple design that keeps rain, snow, and leaves from collecting on the HVAC unit. However, note that there should be more space a few more feet of space between the awning and the top of the heat pump to ensure adequate air flow. Also there should be metal L-flashing and a gap separating the wood siding from the roofing material to keep water from wicking up into the siding and causing water damage. Figure 5 is another simple design that uses metal roofing and lumber framing. The metal roofing panel does not need sheathing underneath. Because the wood supports rest on the ground, they should consist of pressure-treated lumber.
Source
Source
Regardless of what design you choose, here are some things to consider:
- Determine an adequate width and depth that is slightly larger than the compressor to fully shield the unit.
- Choose an adequate angle to shed snow. For snowy areas, design a roof with a pitch between 6/12 (26.5 in.) and 12/12 (45 in.); these slopes allow snow to slide off easily while maintaining structural stability.
- If your awning will have a wood fascia, install a metal drip edge under the roofing at the front edge of the awning.
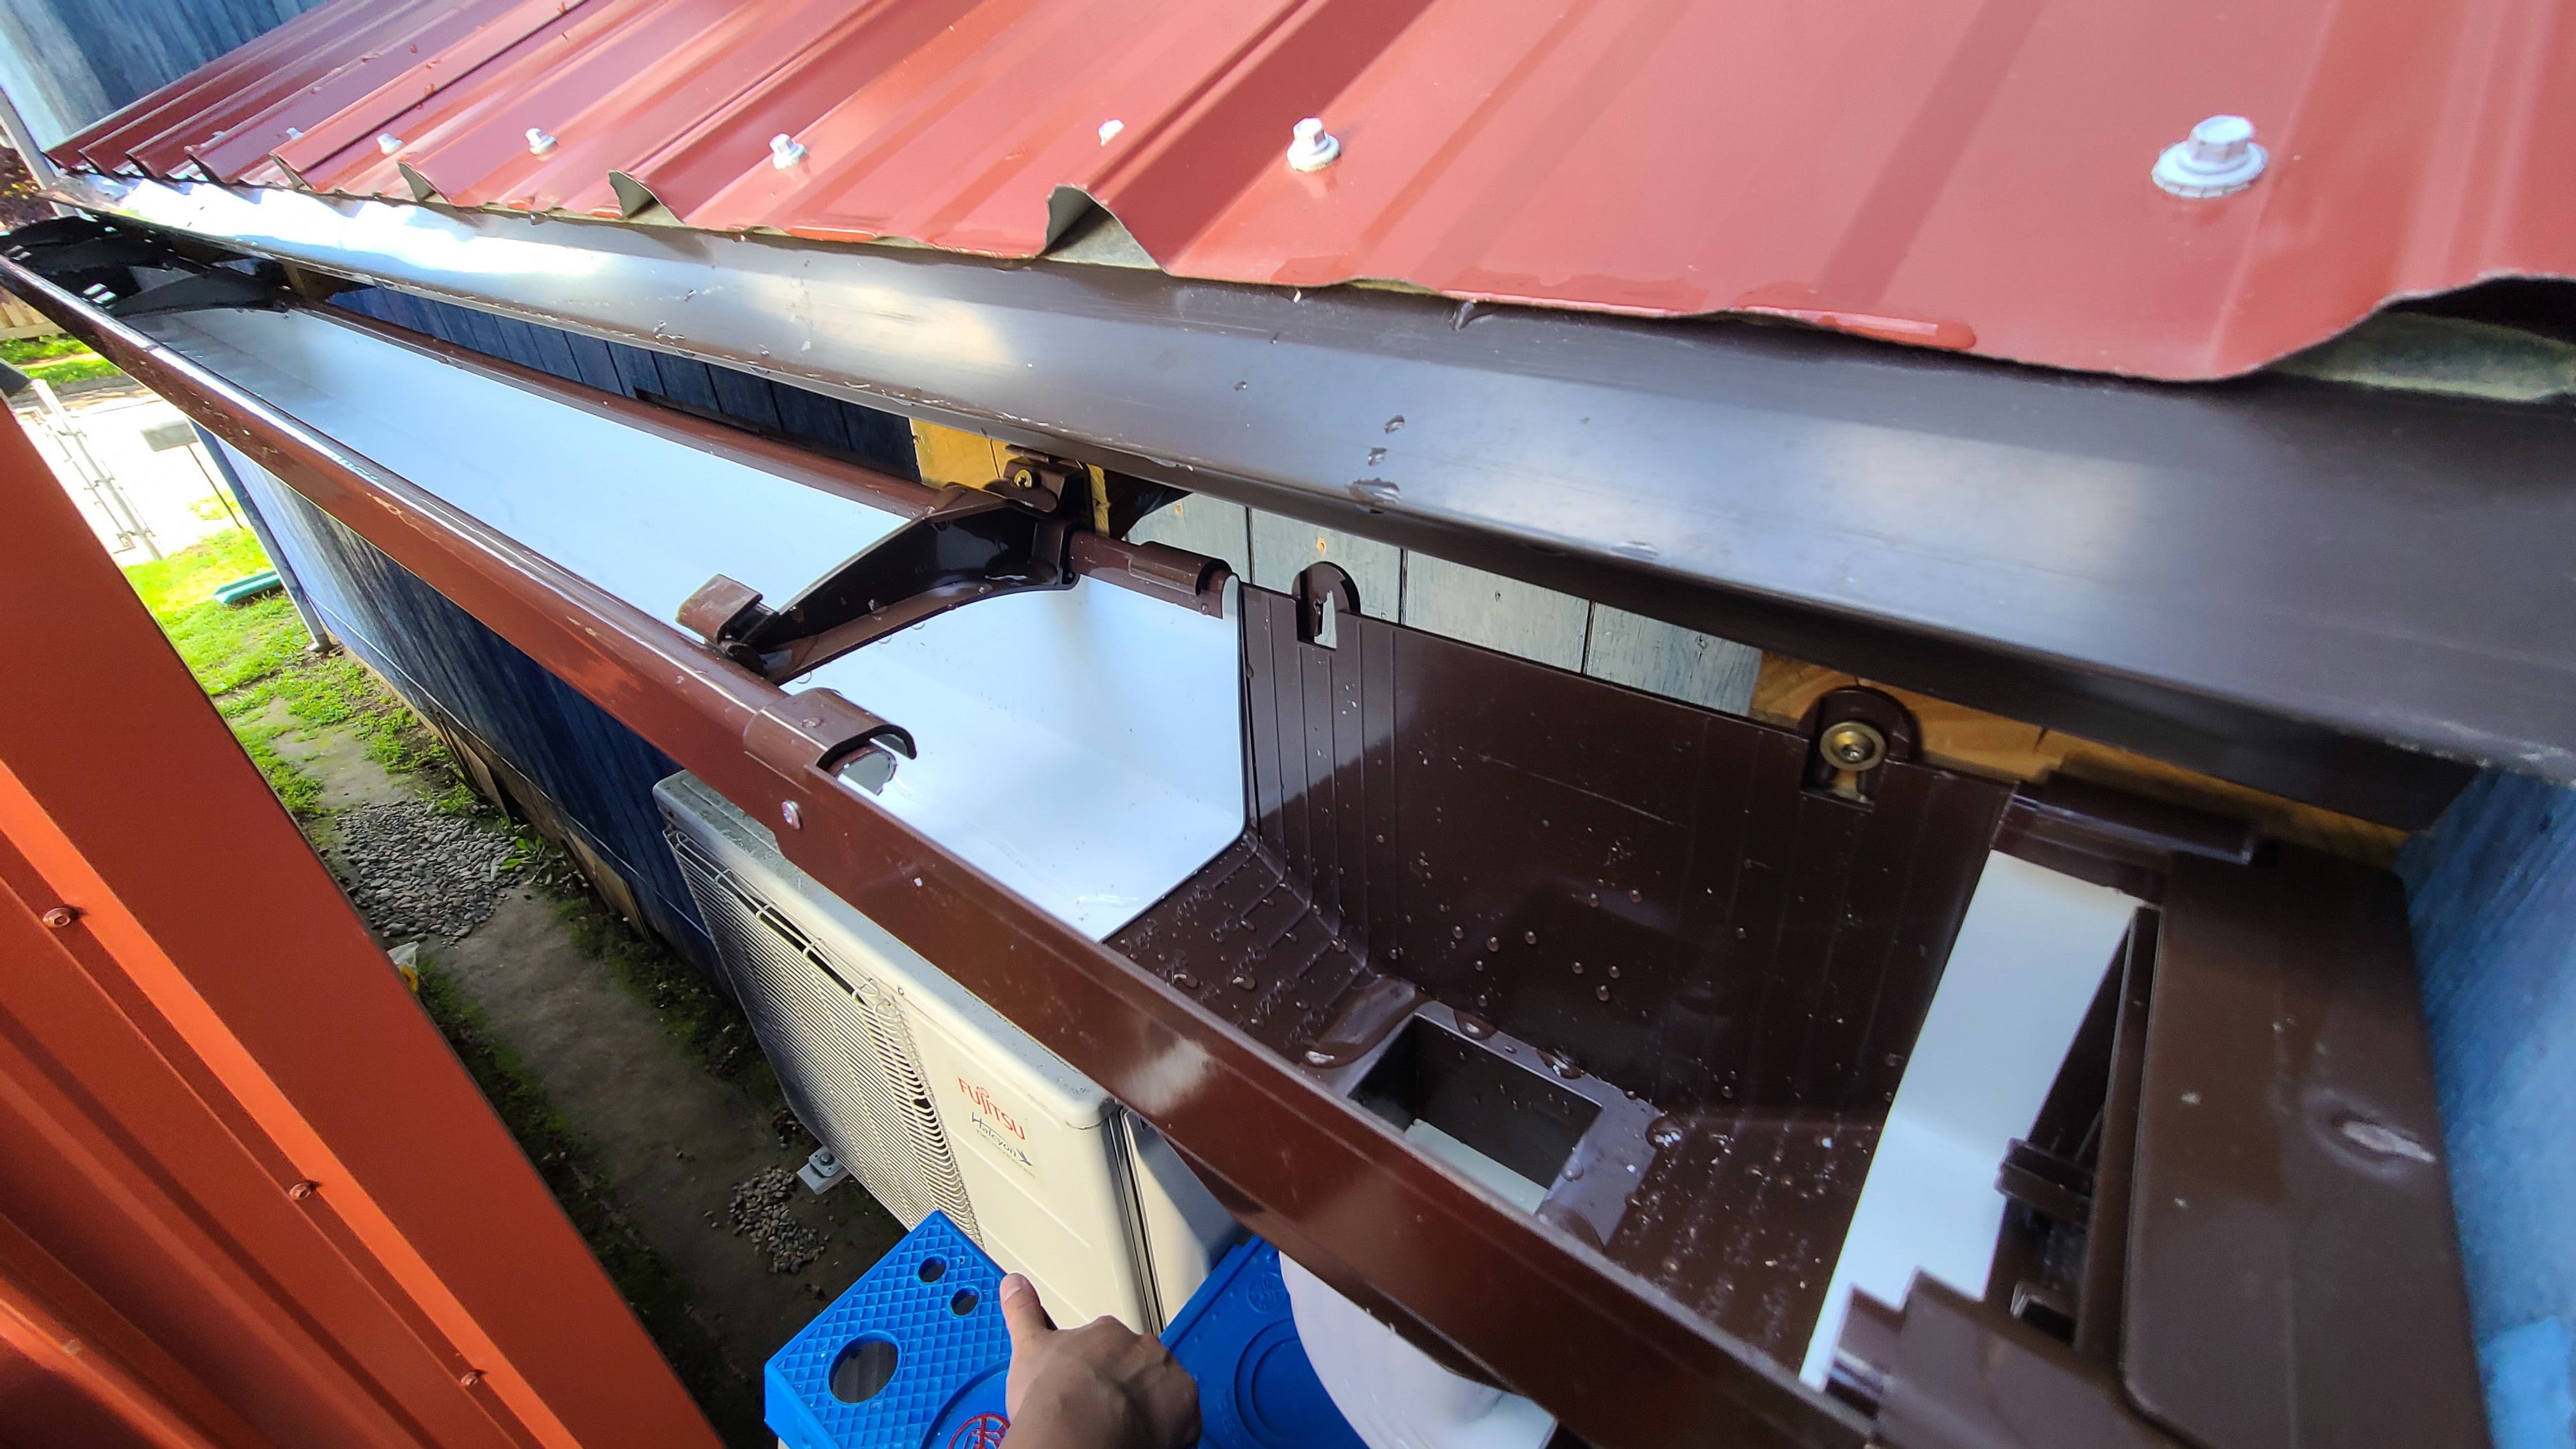
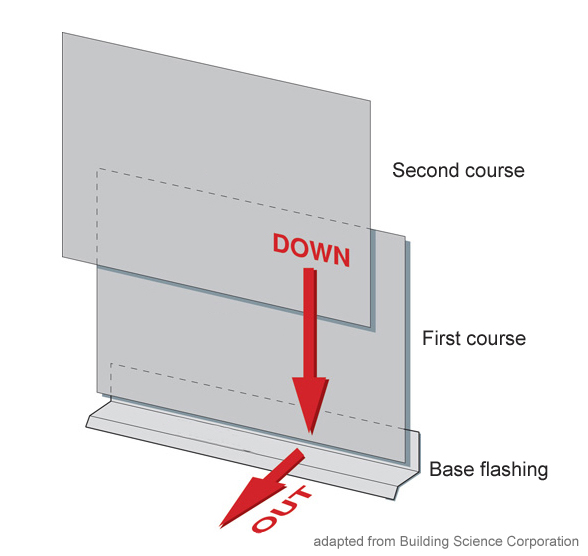
- Where the top edge of the roofing meets the siding, if you have lap siding that will accept L flashing, insert a strip of L flashing to direct water over the juncture and onto the awning roof and install the awning so that there is about an inch of gap from the lowest course of siding above the awning to the top of the awning (so that the siding is not at risk of sitting in wet debris where the awning meets the wall) (See Figure 6).
- Anchor your awning supports to studs in the exterior wall.
- Do not include sides on the awning unless they are ventilated.
- Check the owner’s manual for your heat pump or air conditioner for specific guidance on how high above the compressor unit the awning should be installed – at least two feet.
Source
Document providing guidance on water management concepts and applications for residential buildings.
3. Locate wall studs.
Depending on what design you choose, you will likely be anchoring it to an exterior wall of your home. Locate the studs in that wall to provide a secure point of attachment. Wall studs are typically spaced 16 inches on center or 24 inches on center (that means the studs are spaced 16 or 24 inches apart when measuring from the center of one stud to the center of the next stud). To locate the studs:
- Option one: use a stud finder to locate the studs from inside the house. Take measurements, such as the distance from a window or corner, and transfer those measurements to the outside wall, taking into account the width of the wall at the corners.
- Option two: look for nails that might be visible in the siding on the exterior or use a magnet to find the location. If the nails align vertically, there could be a stud behind them. External electrical outlets are also typically attached to the side of a stud and would be a good indicator of stud locations.
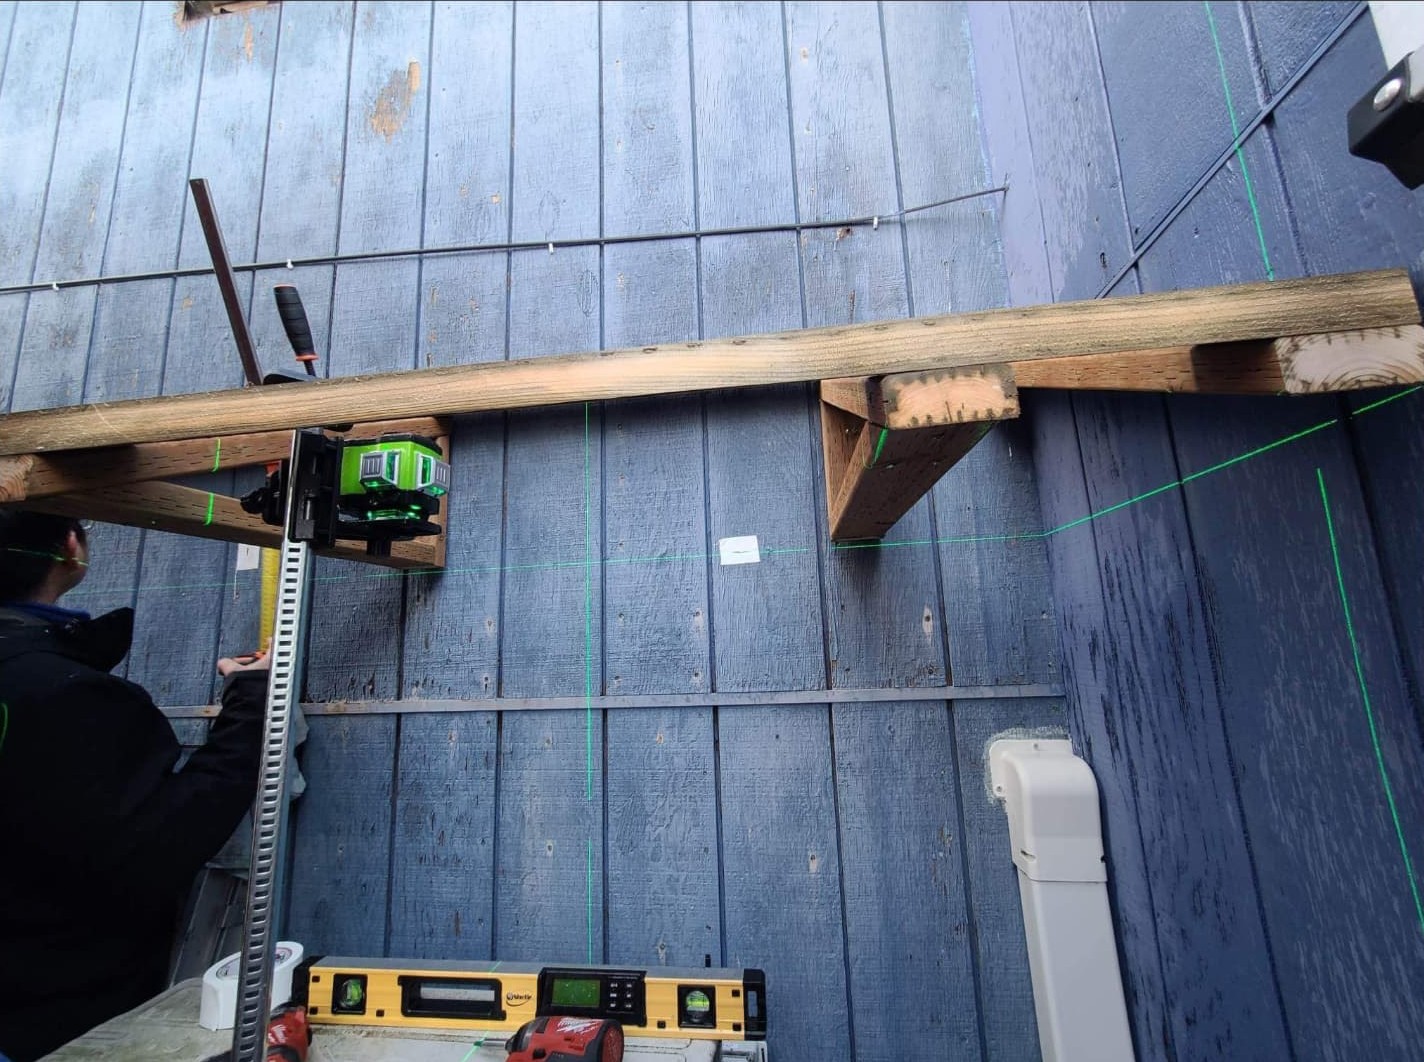
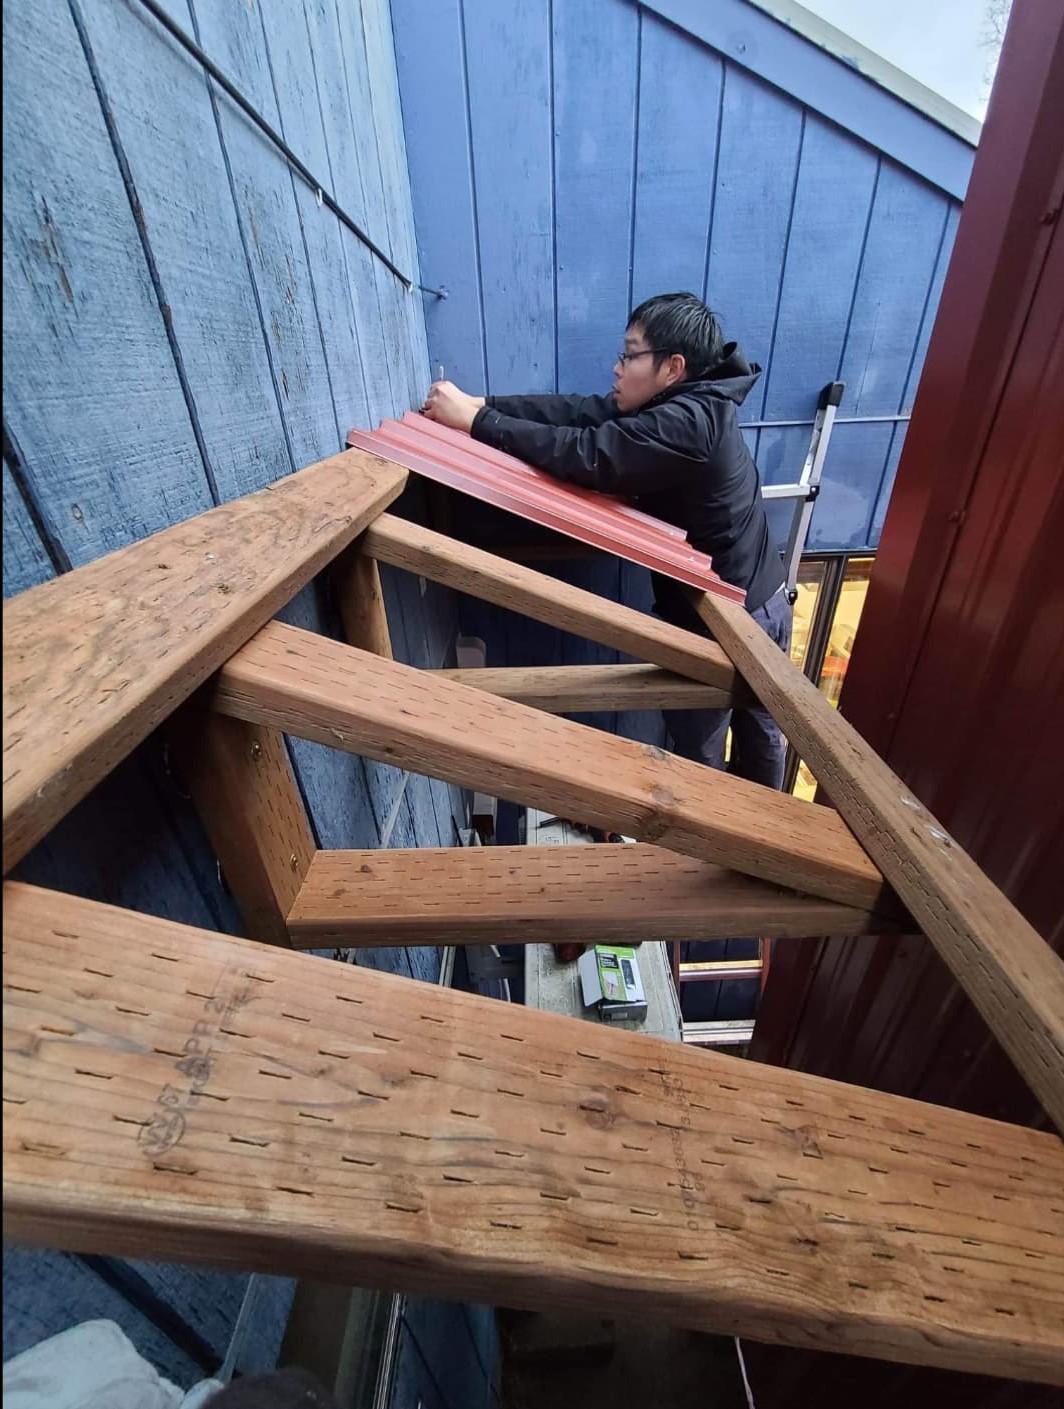
4. Construct the awning.
Your awning design will vary depending on how large it needs to be, how high it needs to be, the expected snow load, and what architectural style you might be trying to match. Figures 7 through 10 show examples of how one awning was constructed.
Source
Source
Source