Introduction
Use caulking and metal flashing to seal around kitchen or bath vents in roof or exterior walls.
Why
In homes where the vent for the kitchen range hood or bathroom exhaust fans was installed after the roof or siding was installed, the vent may not have been properly flashed when it was installed and the installer may have relied on caulk as the only thing keeping out the rain (it’s possible they didn’t even install caulk). If your vents were installed after the fact, you’ll want to check that the vent was caulked then recheck the condition of the caulk every one to two years to look for cracking, peeling, or shrinking of the caulk. You should also check the area around the vent for signs of water leakage – look for water stains inside the home on the walls or ceiling near the vent. When the budget allows and/or the need arises, flashing can be installed around the vents. The ideal time to flash the vents or install new vents with flashing is when reroofing or re-siding your home.
What You'll Need
- Sealant rated for roof application if there are vents on the roof (typically this sealant is black in color)
- Sealant rated for exterior wall application for vents on the wall
- Caulk gun
- Ladder of sufficient length to reach
- Roof safety harness, if going onto a roof
- Disposable gloves
1. Locate and look at kitchen and bath fan vents.
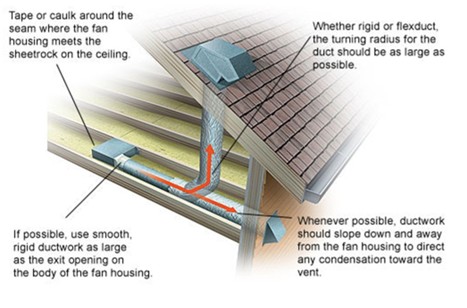
The kitchen and bath fans will vent out either through the roof or through an exterior wall. Figures 1 and 2 show both options. Examine the kitchen range hood or bath fan vent to see how the vent was installed and whether it was integrated into the siding or roofing or attached after the fact and just caulked.
Source
Source
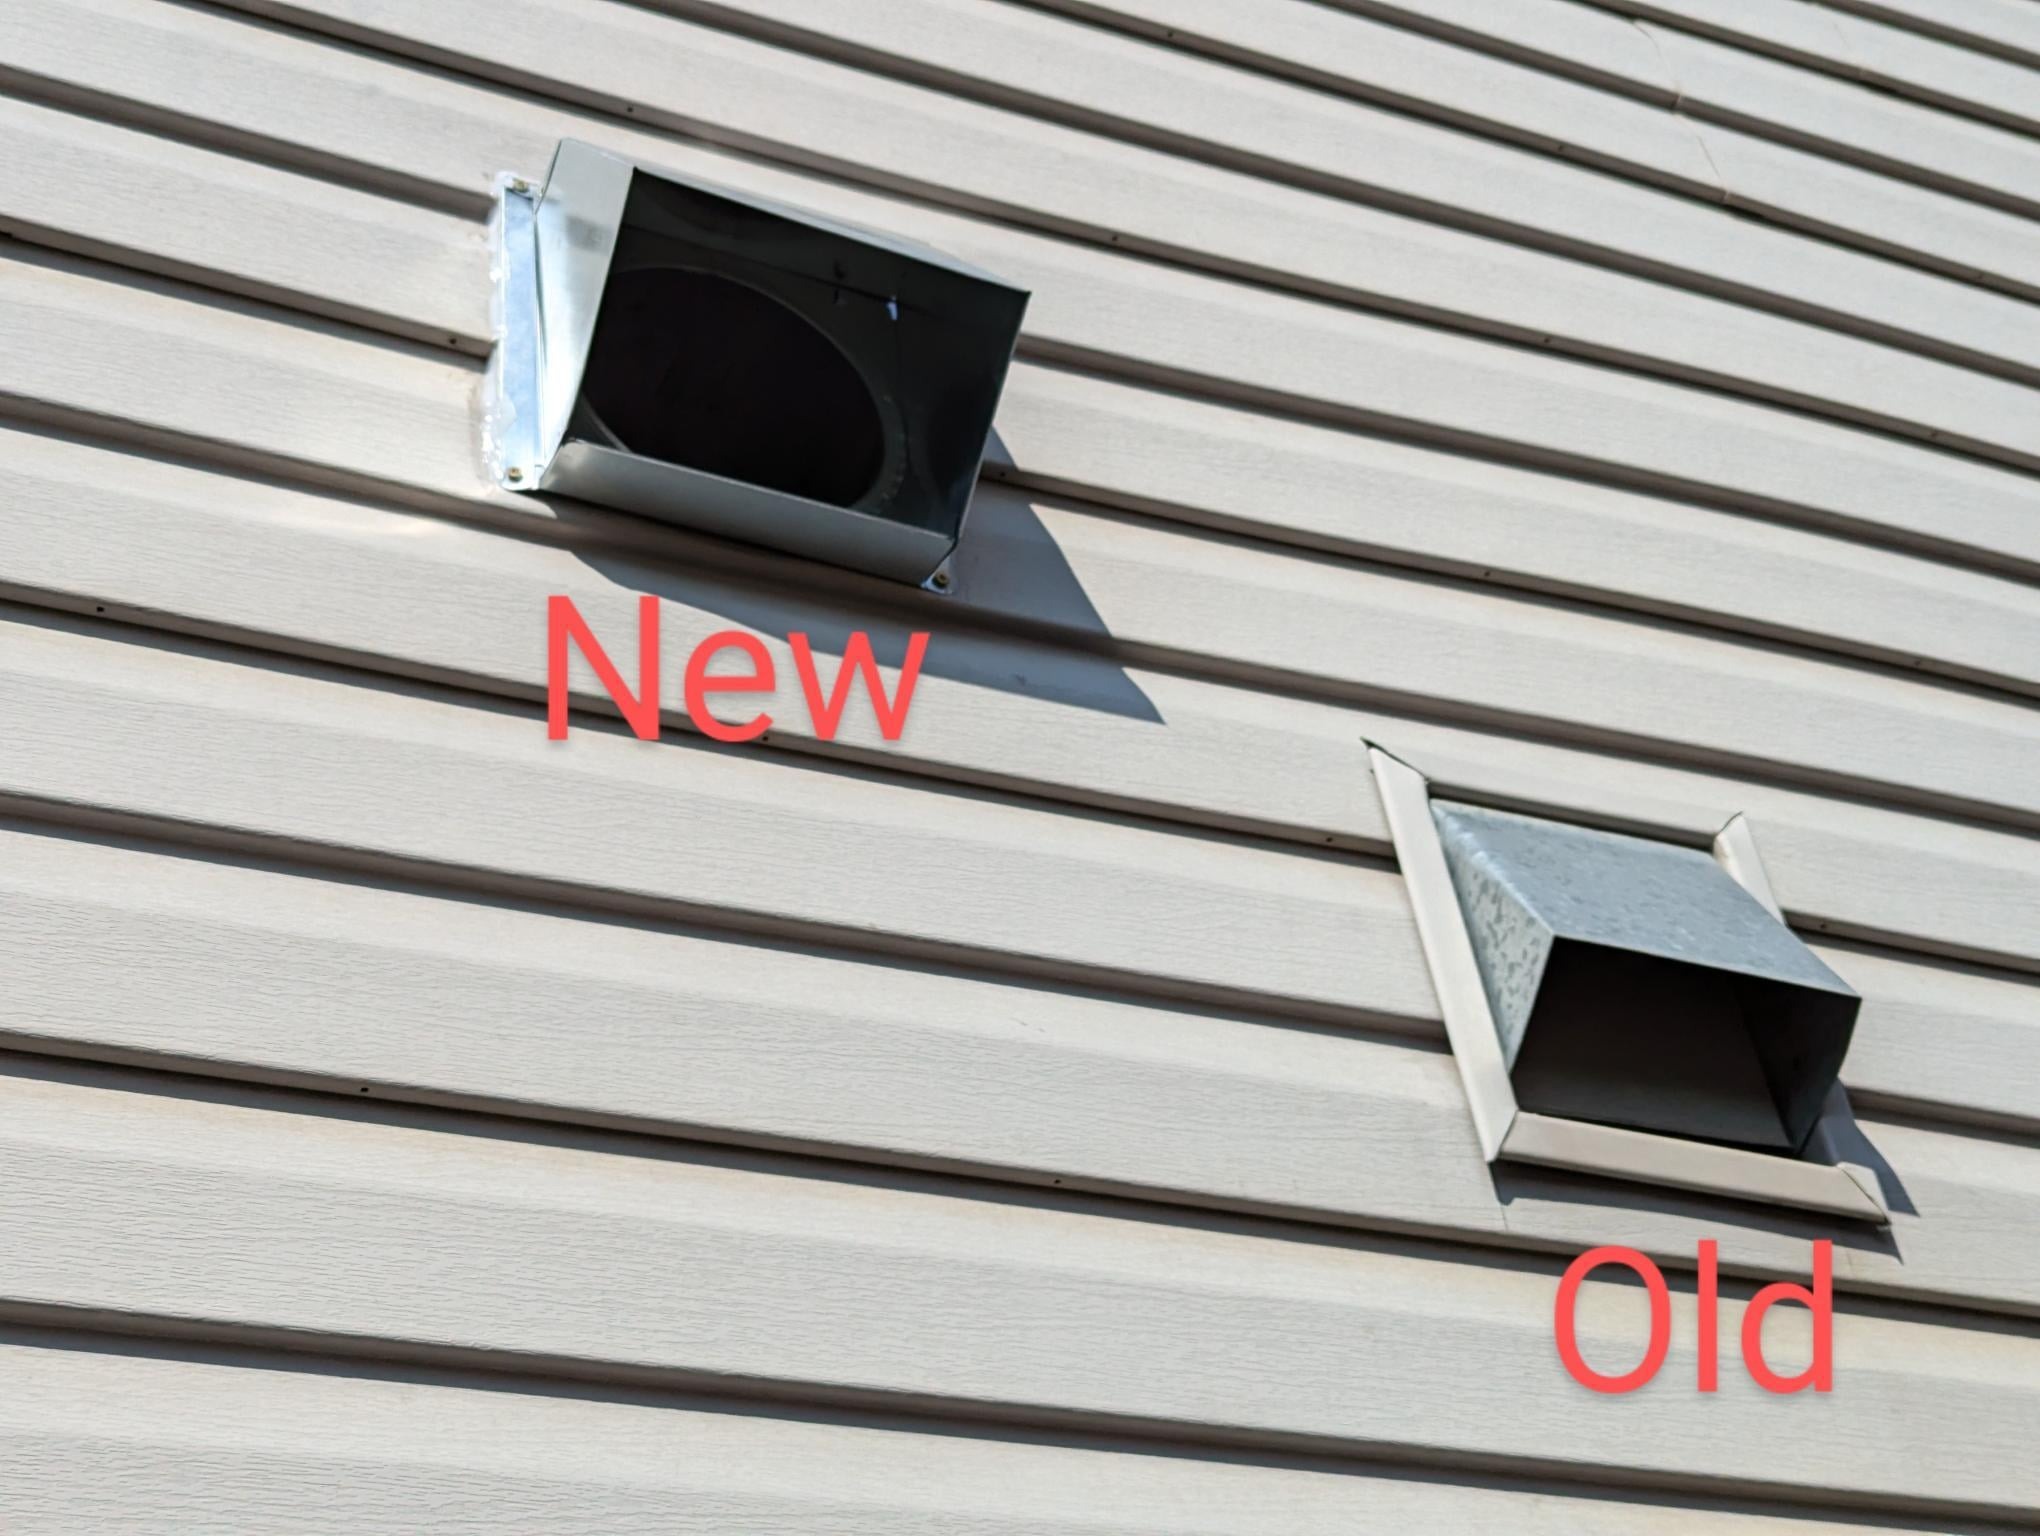
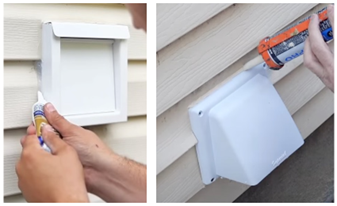
Figure 3 shows two bath fan vents going through an exterior wall covered with vinyl siding. The “old” vent on the right was installed before the vinyl siding was installed so it is properly integrated with the siding and was likely properly flashed behind the siding. The “new” vent on the left was installed after the home was sided. The person who installed it wasn’t a vinyl siding installer and thus didn’t have the materials or skills needed to cut into the vinyl siding and install a mounting block for the bath fan vent and install properly flashed J channel trim around the opening. So, the left bath fan vent is fully dependent on caulking to prevent water entry. The homeowner will need to check the condition of the caulking for the “new” fan vent every few years and reapply caulking when the original caulking cracks due to age, while the “old” fan vent should not need maintenance to maintain its waterproofing.
Source
2. Caulk or re-caulk the wall vent as needed.
Apply or reapply caulking as needed to a wall vent that was installed using a method that needs caulking to remain waterproof, as shown in Figure 4.
Source
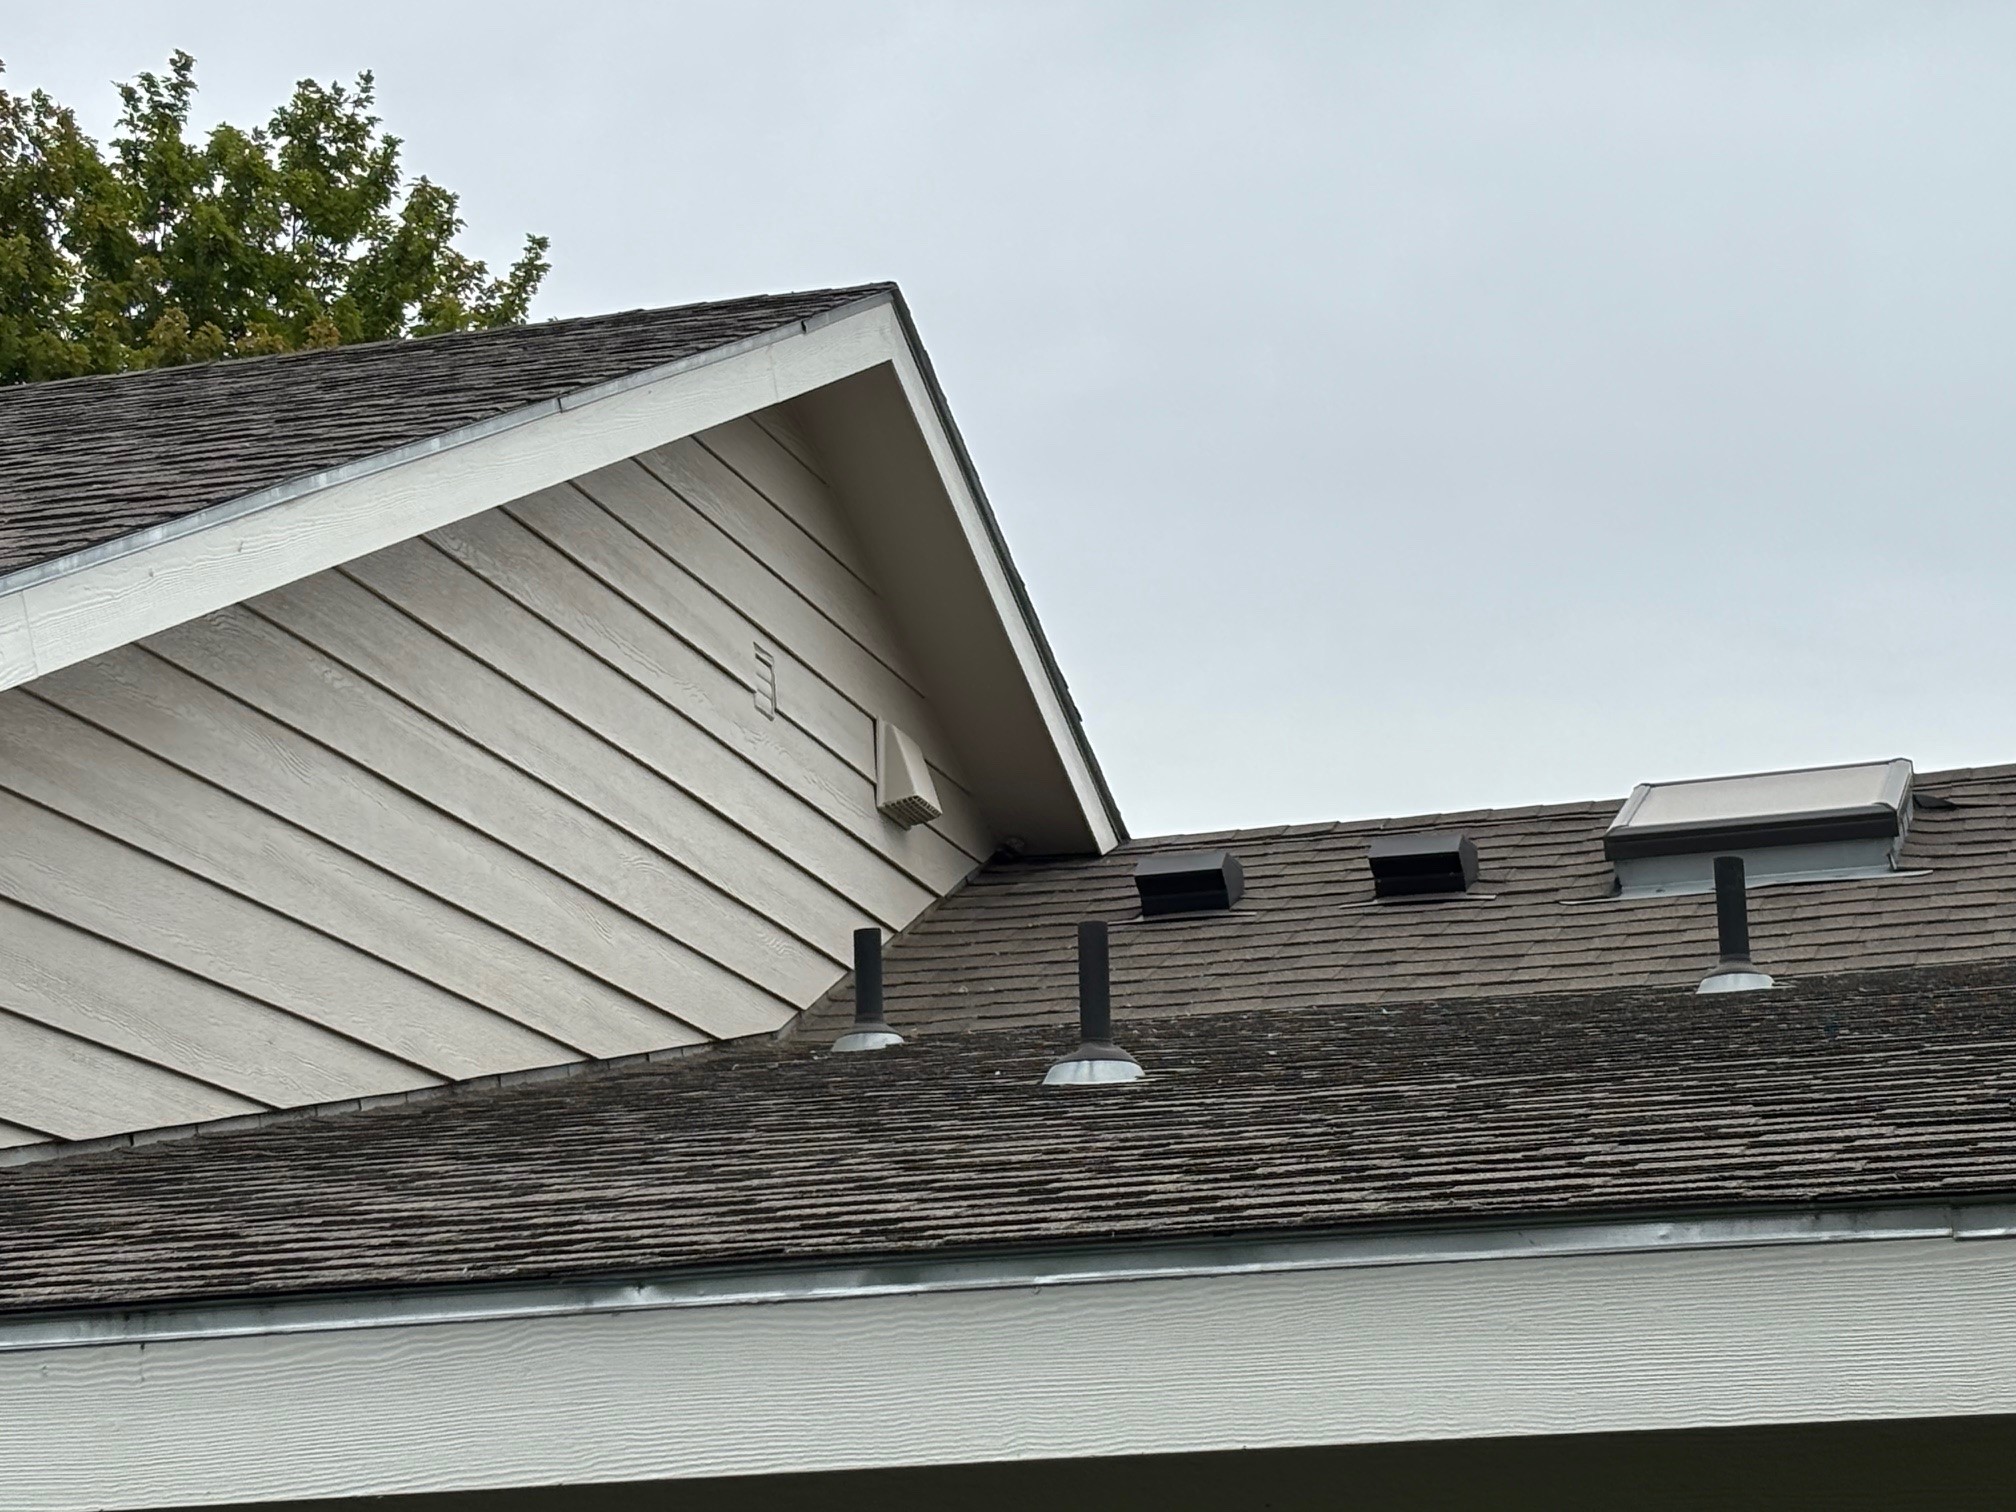
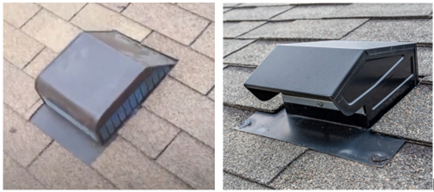
3. Look at exhaust fans that vent through the roof.
If your kitchen range hood fan or bath exhaust fans are not vented through an exterior wall, then check the roof. If an exhaust fan was installed after the roofing was installed and/or the vent was installed by someone who isn’t a professional roofer, there is a good chance the vent wasn’t properly flashed and integrated into the roofing. Identify where the exhaust fans are venting through the roof then go into your attic and look on the underside of the roof sheathing for any signs of water leaks (water stains on framing or sheathing or wet insulation). If there are no signs of leakage below and a visual look at the vent on the roof shows flashing (see the vent on the left in Figure 5) then no action is required. If there are signs of leaks or if there is no flashing visible, or if flashing is visible but not in good shape, or if there is caulking but it has dried or cracked, or if there are nails that have not been sealed (as seen with the vent on the right in Figure 5), then sealant should be installed.
Source
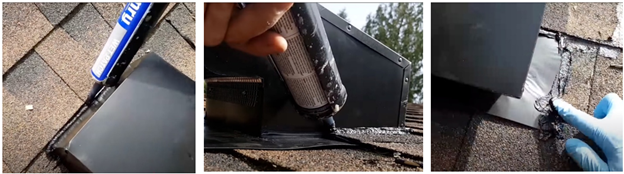
4. Apply/reapply roof sealant around roof vents.
Apply/reapply roof sealant around the roof vent to maintain the waterproofing if the original roof vent installation relies on sealant for water proofing. Use a caulk or sealant made for roofs (the product is usually black). Use sealant along the sides and top edge of the vent and add a dab of sealant over the heads of each of the exposed roof nails (Figure 6).
Source
If this doesn’t address the leak, hire a professional roofer to install a new roof vent that is properly flashed and does not rely on sealant alone to remain waterproof.
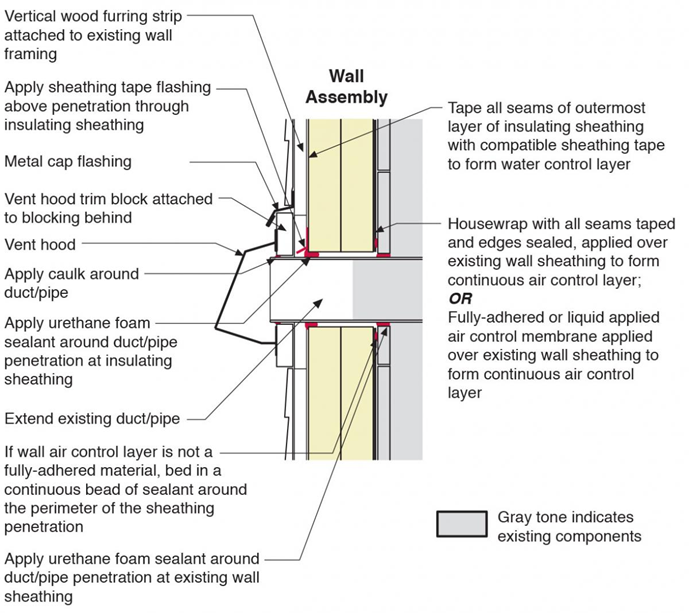
5. Check/replace vents when re-roofing or re-siding.
Next time you re-roof or re-side your home, ask the contractor to check the flashing on the exhaust vents and replace the vents or flash them properly as part of the re-roofing or re-siding job. Figure 7 shows good flashing and air sealing details for a through-the-wall exhaust vent duct. In this drawing, two layers of rigid foam insulation (the yellow layers) were added over the wall’s existing sheathing before installing new siding, but regardless of the rigid insulation, most of the flashing and air sealing details are the same.