

Introduction
Air seal and insulate your crawlspace hatch to prevent air flow and heat transfer between the crawlspace and the living space of your home.
Why
If your crawlspace is not sealed and insulated, and you have an access hatch or door to it from the living space of your home, you should air seal and insulate the crawlspace access hatch or door, because, like the rest of the floor or exterior walls, it is part of the thermal envelope separating the living space inside from the elements outside. Insulating and air sealing the crawlspace access hatch keeps your home warmer and less drafty. It can also help keep soil gases and pests that are in your crawlspace from entering your home. If your crawlspace is sealed and insulated (i.e., there are no open crawlspace vents in the walls, the crawlspace walls are covered with rigid foam or spray foam insulation, and the floor of the crawlspace is covered with a plastic vapor barrier, possibly topped with a concrete slab), then you don’t need to insulate the crawlspace floor hatch or door. You may still want to air seal the access hatch or door to further reduce the possibility of soil gases like radon entering your home.
What You'll Need
- Clean tarp
- Weatherstripping
- Batt and/or rigid foam insulation
- Foam board construction adhesive, or twine and heavy stapler
1. Locate the crawlspace access.
Locate your crawlspace access hatch. It may be in a closet, bedroom floor, or hallway, or elsewhere on the ground floor of the home. Lay out a clean piece of tarp to protect your floor or carpet, in case the hatch door already has insulation installed on it or has cobwebs on the underside of it.
Lift the hatch cover and lay it on the tarp. The hatch cover will typically be a piece of plywood or OSB cut to fit the opening and to lay flush with the rest of the floor. If the hatch cover is damaged, warped, or ill-fitting, consider replacing it at this time.
Check for existing weather stripping on the underside of the hatch or on the wood framing that the hatch cover rests on. If there is no weatherstripping or if the weatherstripping is worn or incomplete, you’ll want to install new weatherstripping.
2. Measure the hatch cover.
Measure the perimeter of the hatch cover. Purchase enough weatherstripping to line the entire perimeter of the hatch cover in a continuous line. Types of weatherstripping that work well include the foam tape or flat silicone gasket types with the removable adhesive strip.
3. Install weatherstripping.
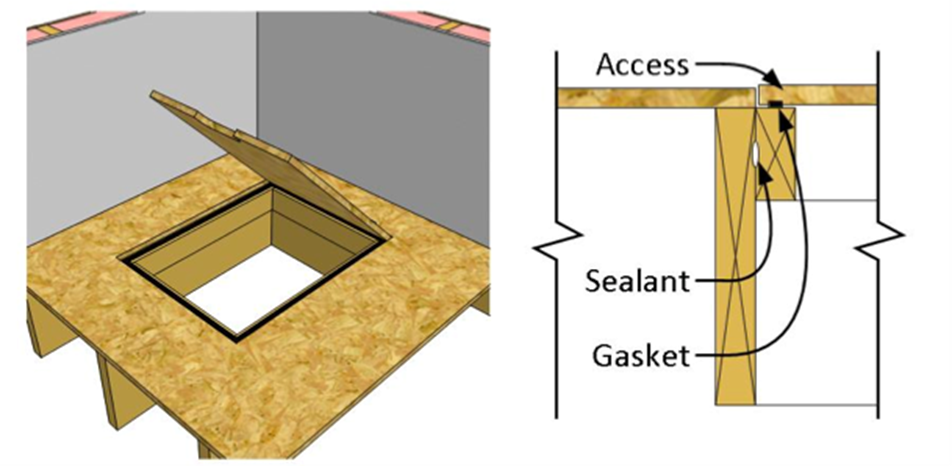
Remove any old weatherstripping. Measure the perimeter of the door and cut the weatherstripping to size. Use a dust brush or rag to clean off the surfaces where you will install the weatherstripping to remove any dust or loose debris to help the adhesive adhere better. Install along the edge on either the underside of the hatch cover or along the framing that the hatch cover will rest on (Figure 1). The weatherstripping should line the entire perimeter with no gaps.
Source
Report explaining the issues and concerns with conventional ventilated crawlspaces and to outline prescriptive measures for improvements that will create healthier and more durable spaces.
4. Install insulation.
Next, install insulation on the crawlspace side of the hatch panel. Either batt insulation or rigid foam insulation can be used. For rigid foam, any type will work. For batt insulation, fiberglass or mineral wool batt are two options. If using faced batt insulation, the kraft paper-facing side should be toward the wood. The insulation should be installed within the weatherstripping perimeter and should not overlap where the weatherstripping is installed.
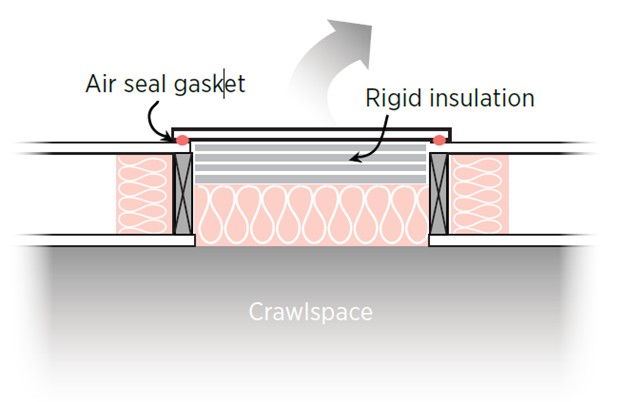
If you are using rigid foam, cut the foam to fit within the perimeter of the weatherstripping, approximately 1 to 2 inches in from the edge all the way around the hatch cover. Attach the foam with an adhesive made for rigid foam. Apply the adhesive to the underside of the board with a caulk gun. Then press the cut foam down on the board. Apply more adhesive to the surface and lay another piece of rigid foam on top. Install enough layers of rigid foam to equal R-10 or more of insulation value (Figure 2). Place a weight on top of the foam and allow the adhesive to cure per the manufacturer’s instructions then flip the hatch over and install it in place in the floor.
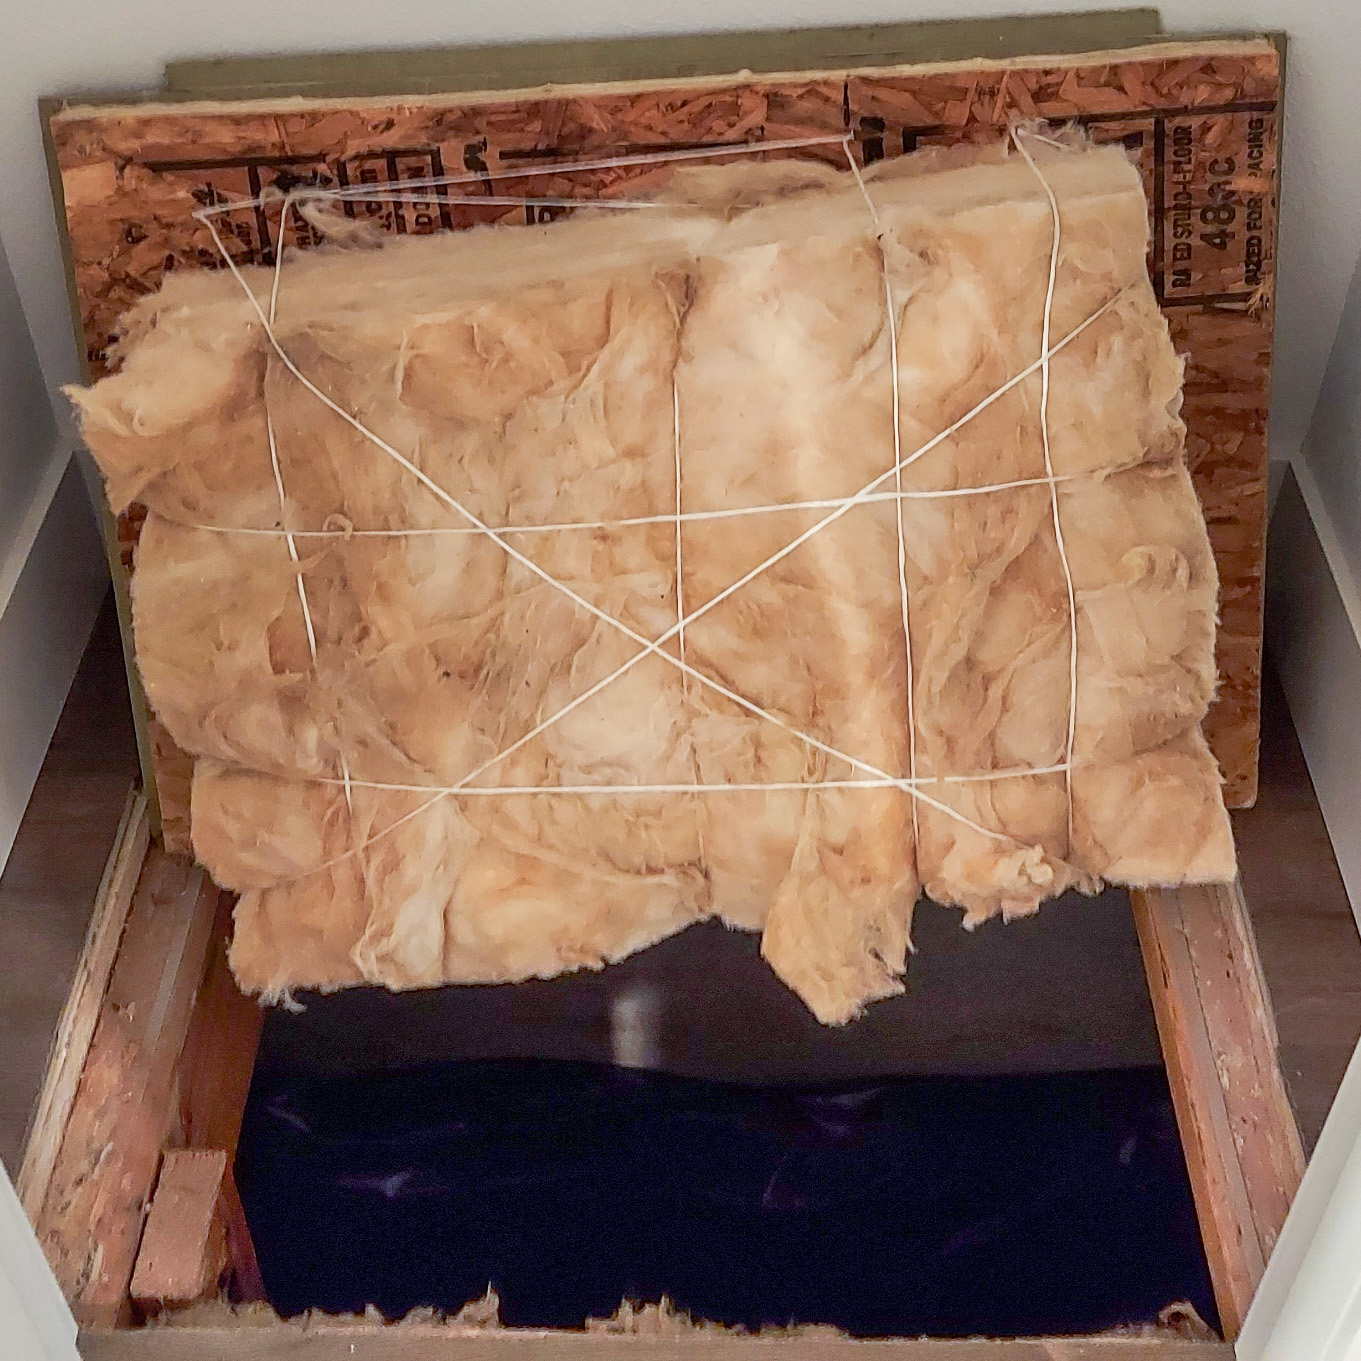
If you are using batt insulation, the batts can be attached with twine that is attached to the board with heavy-duty staples or screws (Figure 3). Again, make sure you leave enough space around the insulation to allow the hatch cover to lay flat when installed. Install staples or screws to the inside of the weatherstripping, not on the weather stripping.
Source
Report identifying the steps to take, with the help of a qualified home performance contractor, to seal unwanted air leaks while ensuring healthy levels of ventilation and avoiding sources of indoor air pollution.
Source
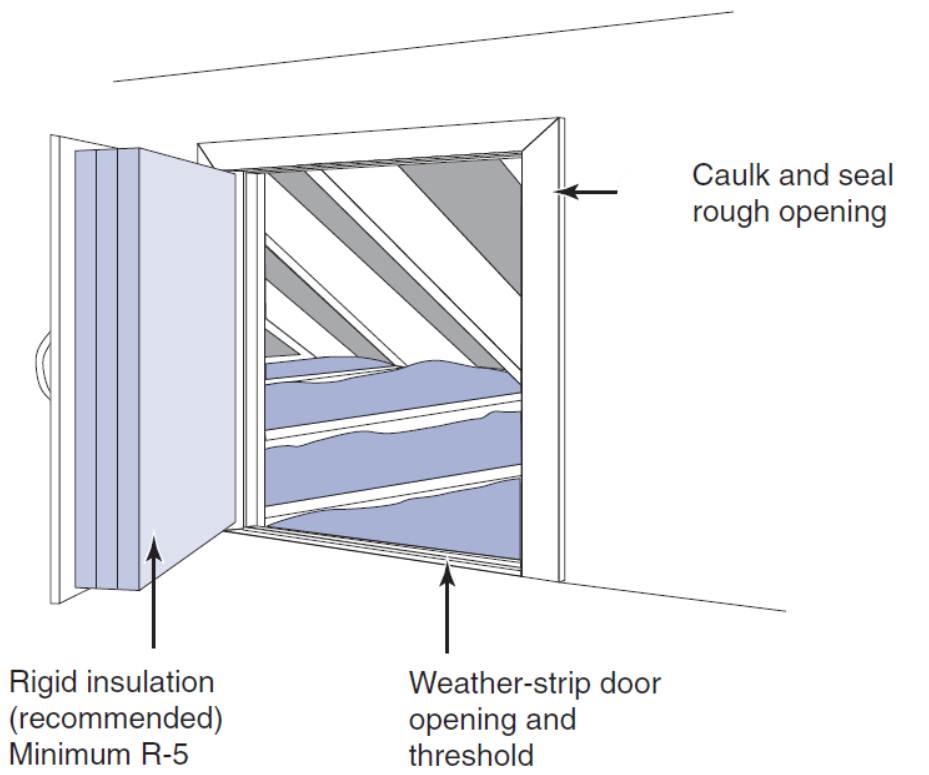
If you have an access door going from living space into a crawlspace, for example from a room in a finished basement into a vented crawlspace, the door should be treated like an exterior door. It should be air sealed with weatherstripping along the frame. It should be insulated (Figure 4). Rigid foam may be preferable to batt insulation because it may be easier to ensure good long-term contact between the insulation and the door panel. The access door should also have a tight-fitting latch to pull the door into the weatherstripping to ensure a more airtight connection since the upright door will not have gravity pulling it into the weatherstripping like a floor hatch does.
Source
Document describing the air leakage provisions of Appendix RA of the 2015 IECC (prepared for the State of Georgia to assist with compliance with their 2019 Energy Code).