



Introduction
Replace an existing recirculating kitchen fan with a kitchen exhaust fan that is ducted to the outside or install a new kitchen exhaust fan that is ducted to the outside.
Why
Having a kitchen exhaust fan located over the stove that ducts to the outside is important for good indoor air quality. Research has shown that cooking generates many of the pollutants found in a home. Exhaust fans that vent outside can remove cooking odors, gas fumes, and moisture from your home.
What You'll Need
- Range hood fan and manual (if new installation)
- Measuring tape
- Pencil
- Level
- UL-181 tape or mastic
- Screwdriver
- Reciprocating saw or hole saw
- An N95 or better mask
- Safety glasses
- Wall cap for ducting
- Rigid metal exhaust fan duct
1. Choose your fan and venting options.
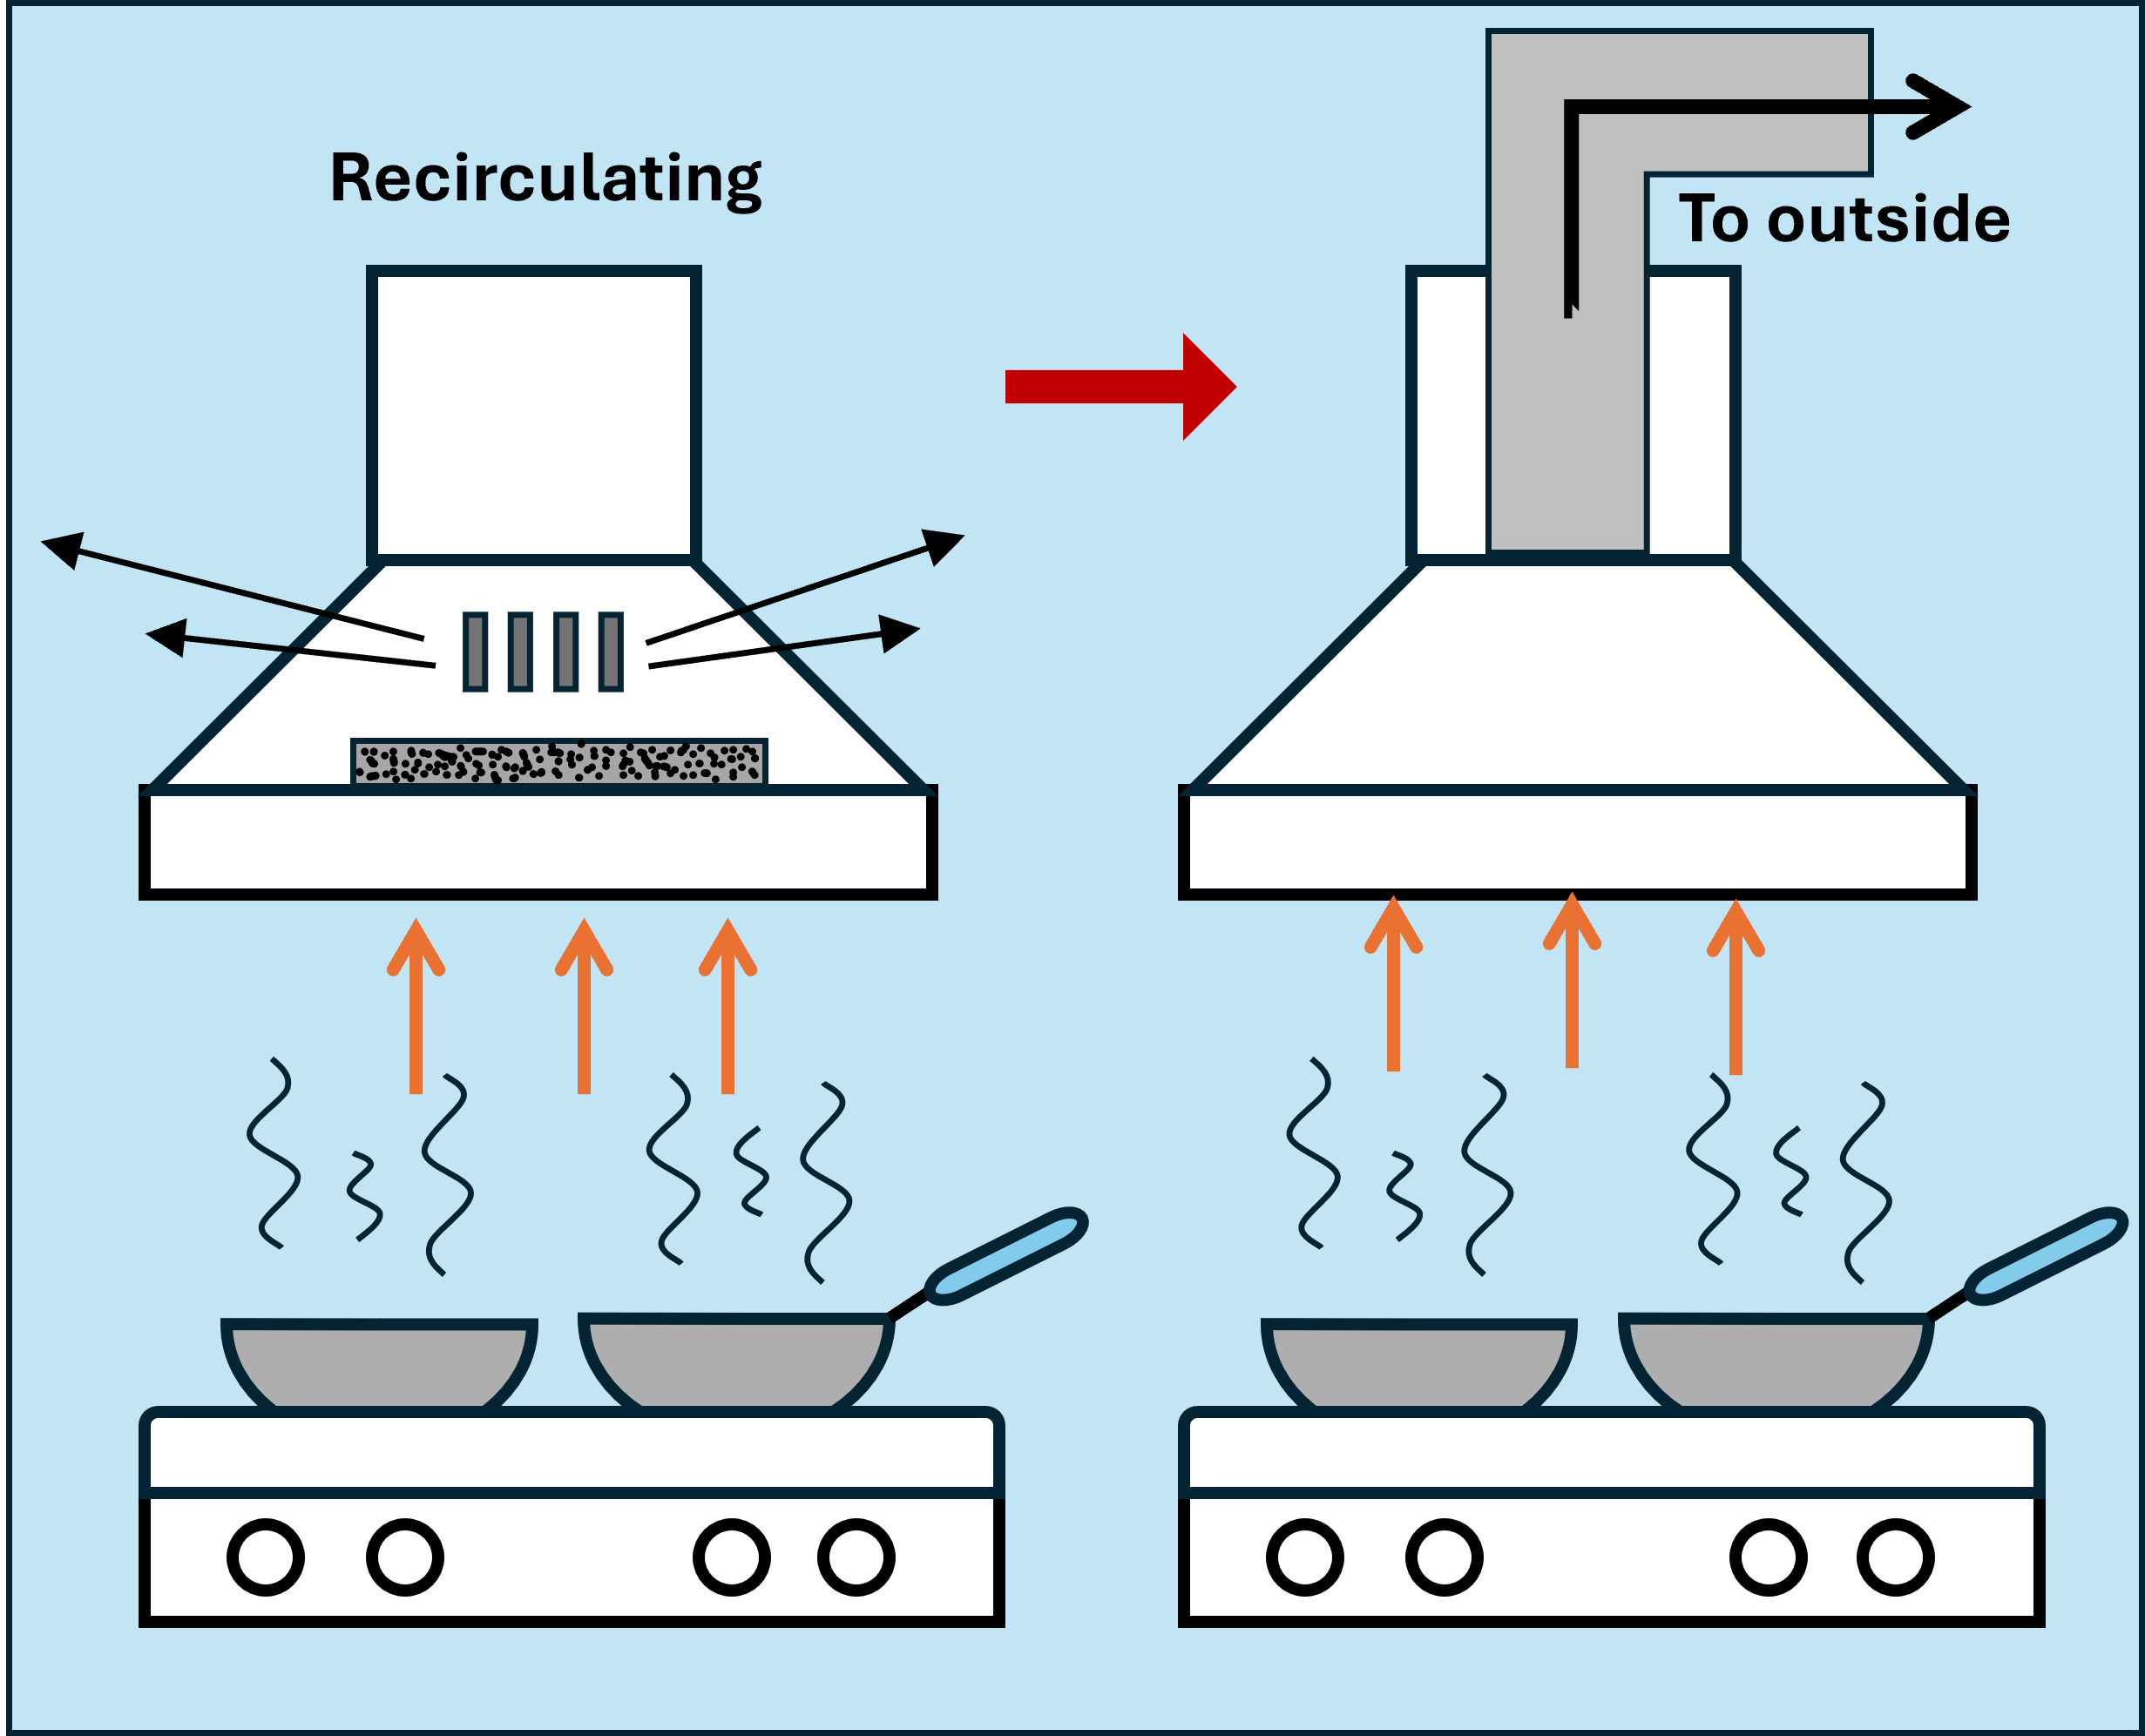
Recirculating range hoods send air through a charcoal filter and reintroduce the air into the home whereas vented range hoods have a duct system to exhaust the air outside (Figure 1 ). If you have a range hood fan over the stove now with a recirculating fan, you may be able to convert the fan to an exhaust fan if your fan model allows that. Look at the users’ manual or search online by your fan’s model number. This process involves taking the range hood fan down, taking out and turning around the fan, adding a diverter, attaching the fan to an exterior duct, and reinstalling the range hood. If the existing fan is not convertible, you can replace it with a new ducted range hood fan or ducted over-the-stove microwave oven-fan combination. In all of these cases, you’ll need to install a duct to vent outside, which involves cutting a hole in the wall or roof, running ductwork, and potentially hiring an electrician for wiring, so consider whether you feel comfortable doing this as a DIY project or whether you’d prefer to hire a contractor.
Source
If you decide to install a new exhaust fan, look for models that are ENERGY STAR rated. Your stove’s location will dictate what type of unit to look for –under-cabinet, wall-mounted, or ceiling-mounted for a cooktop located in an island.
2. Plan ductwork.
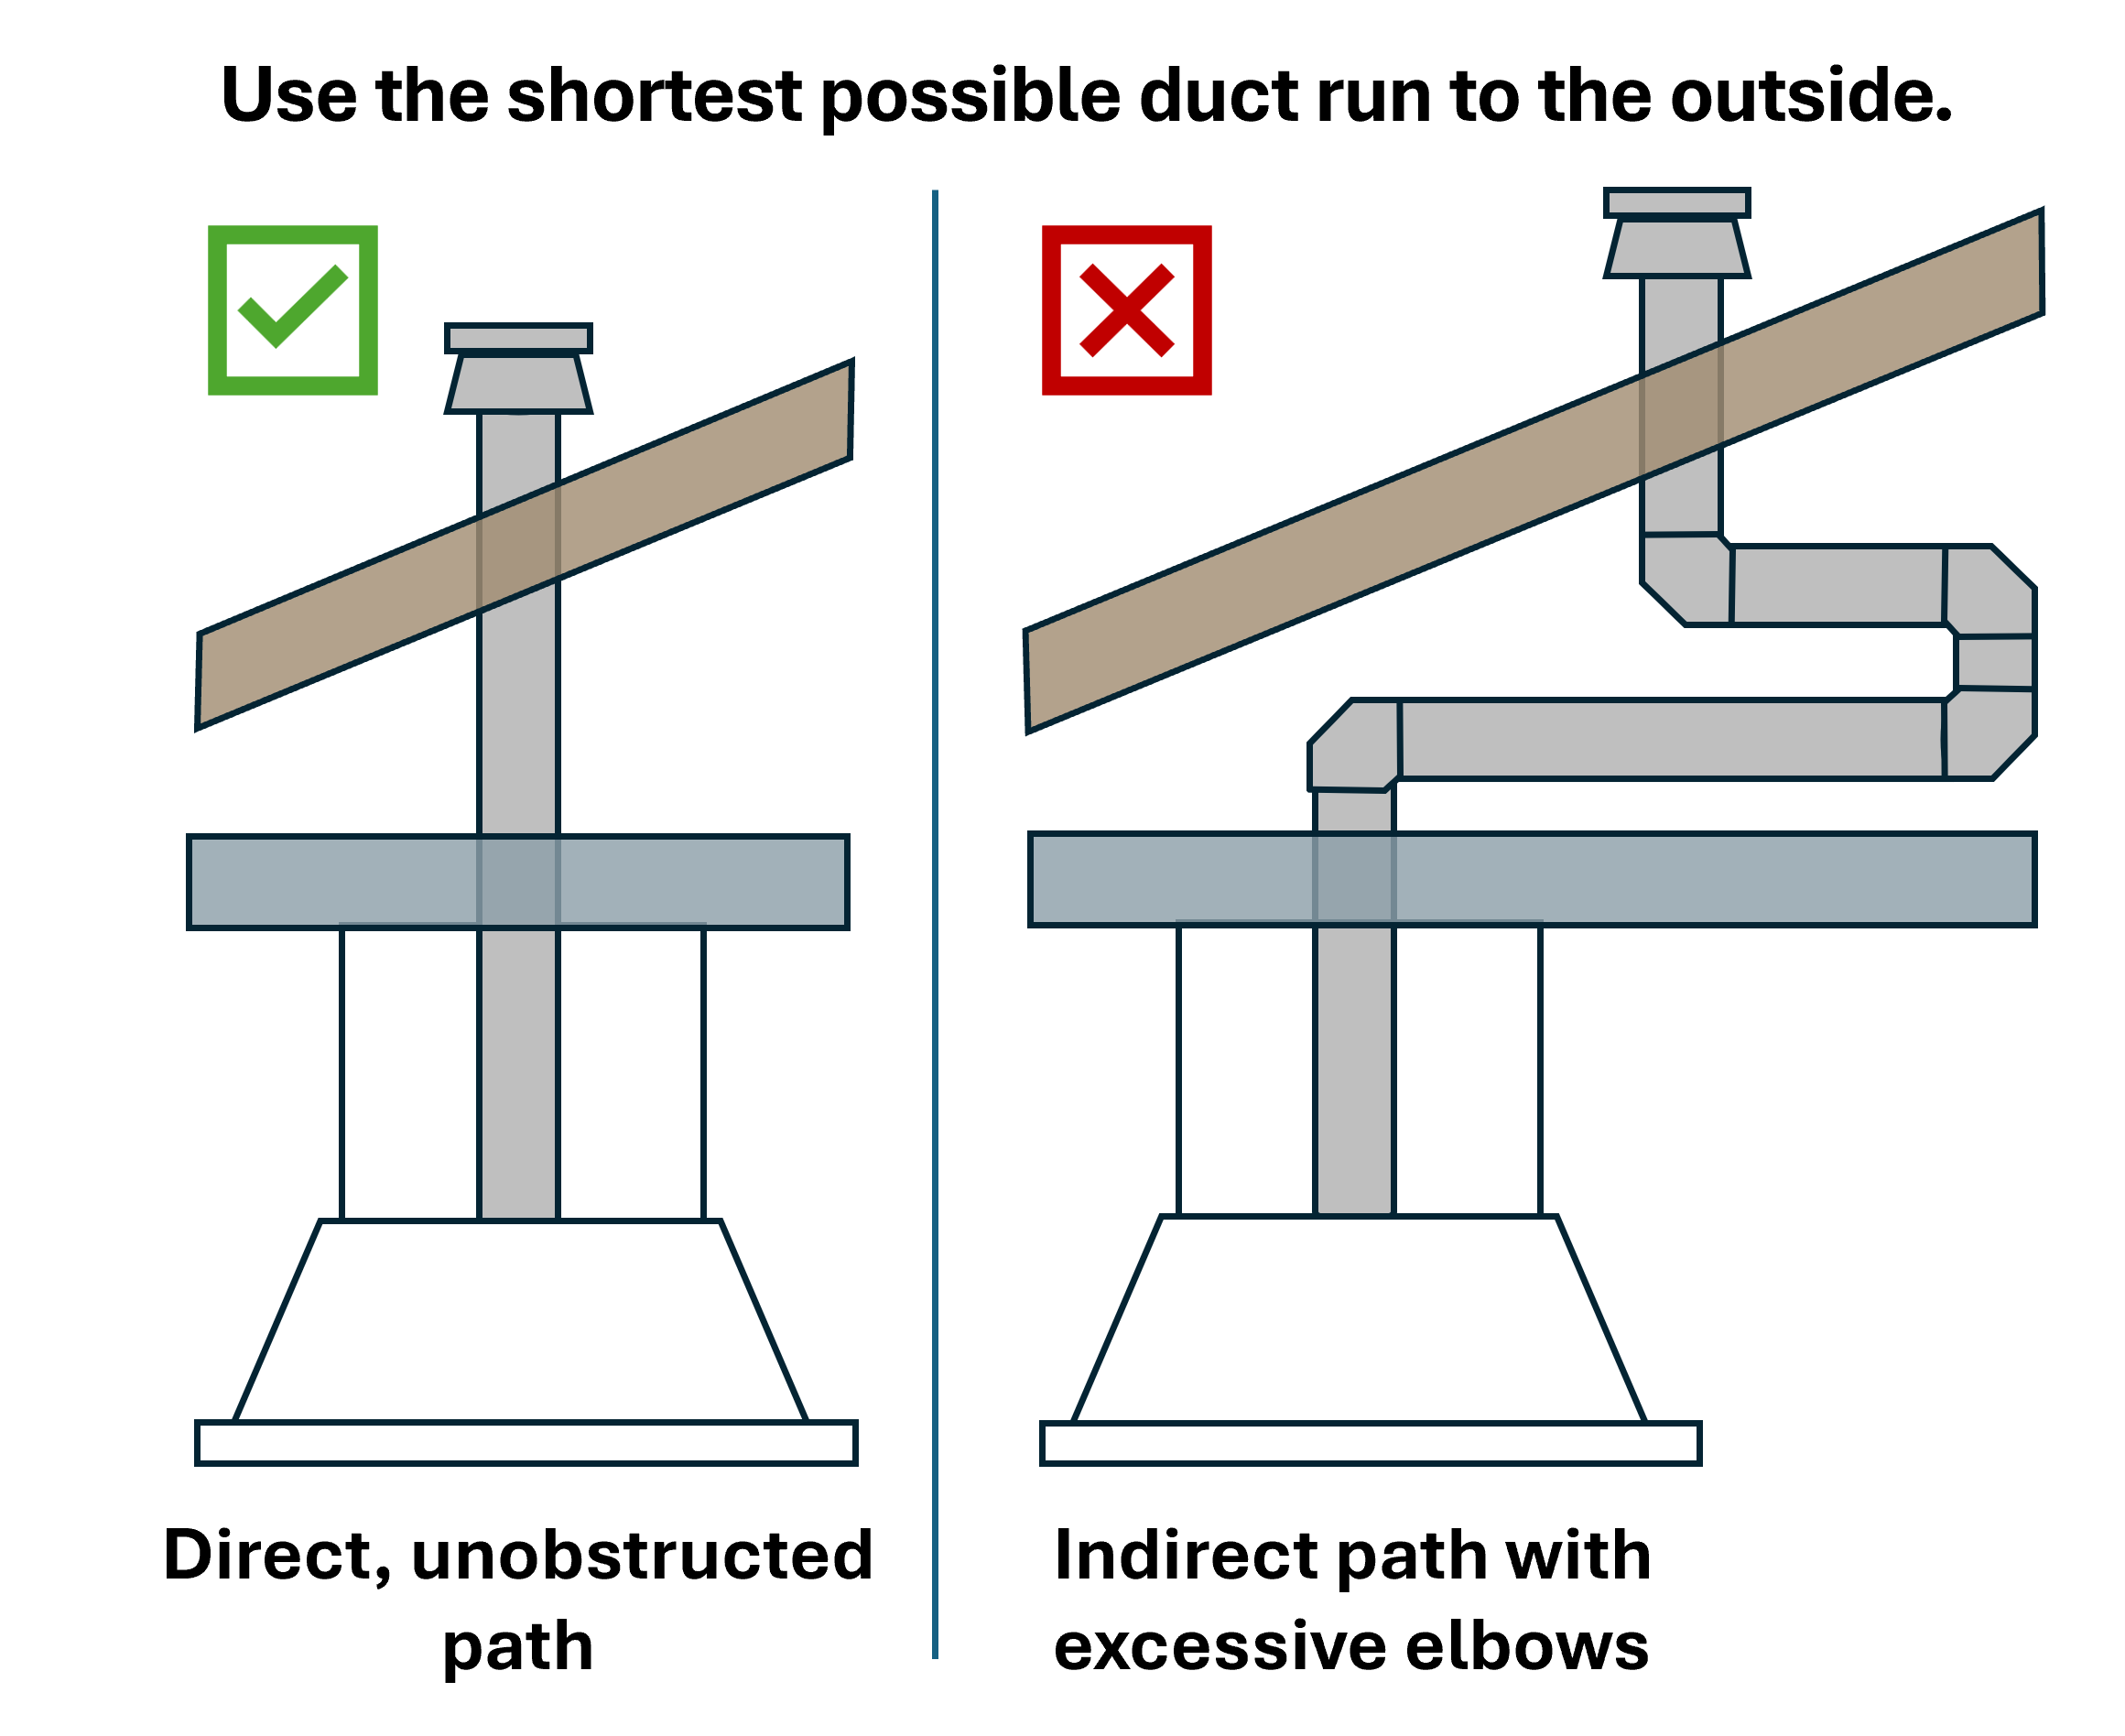
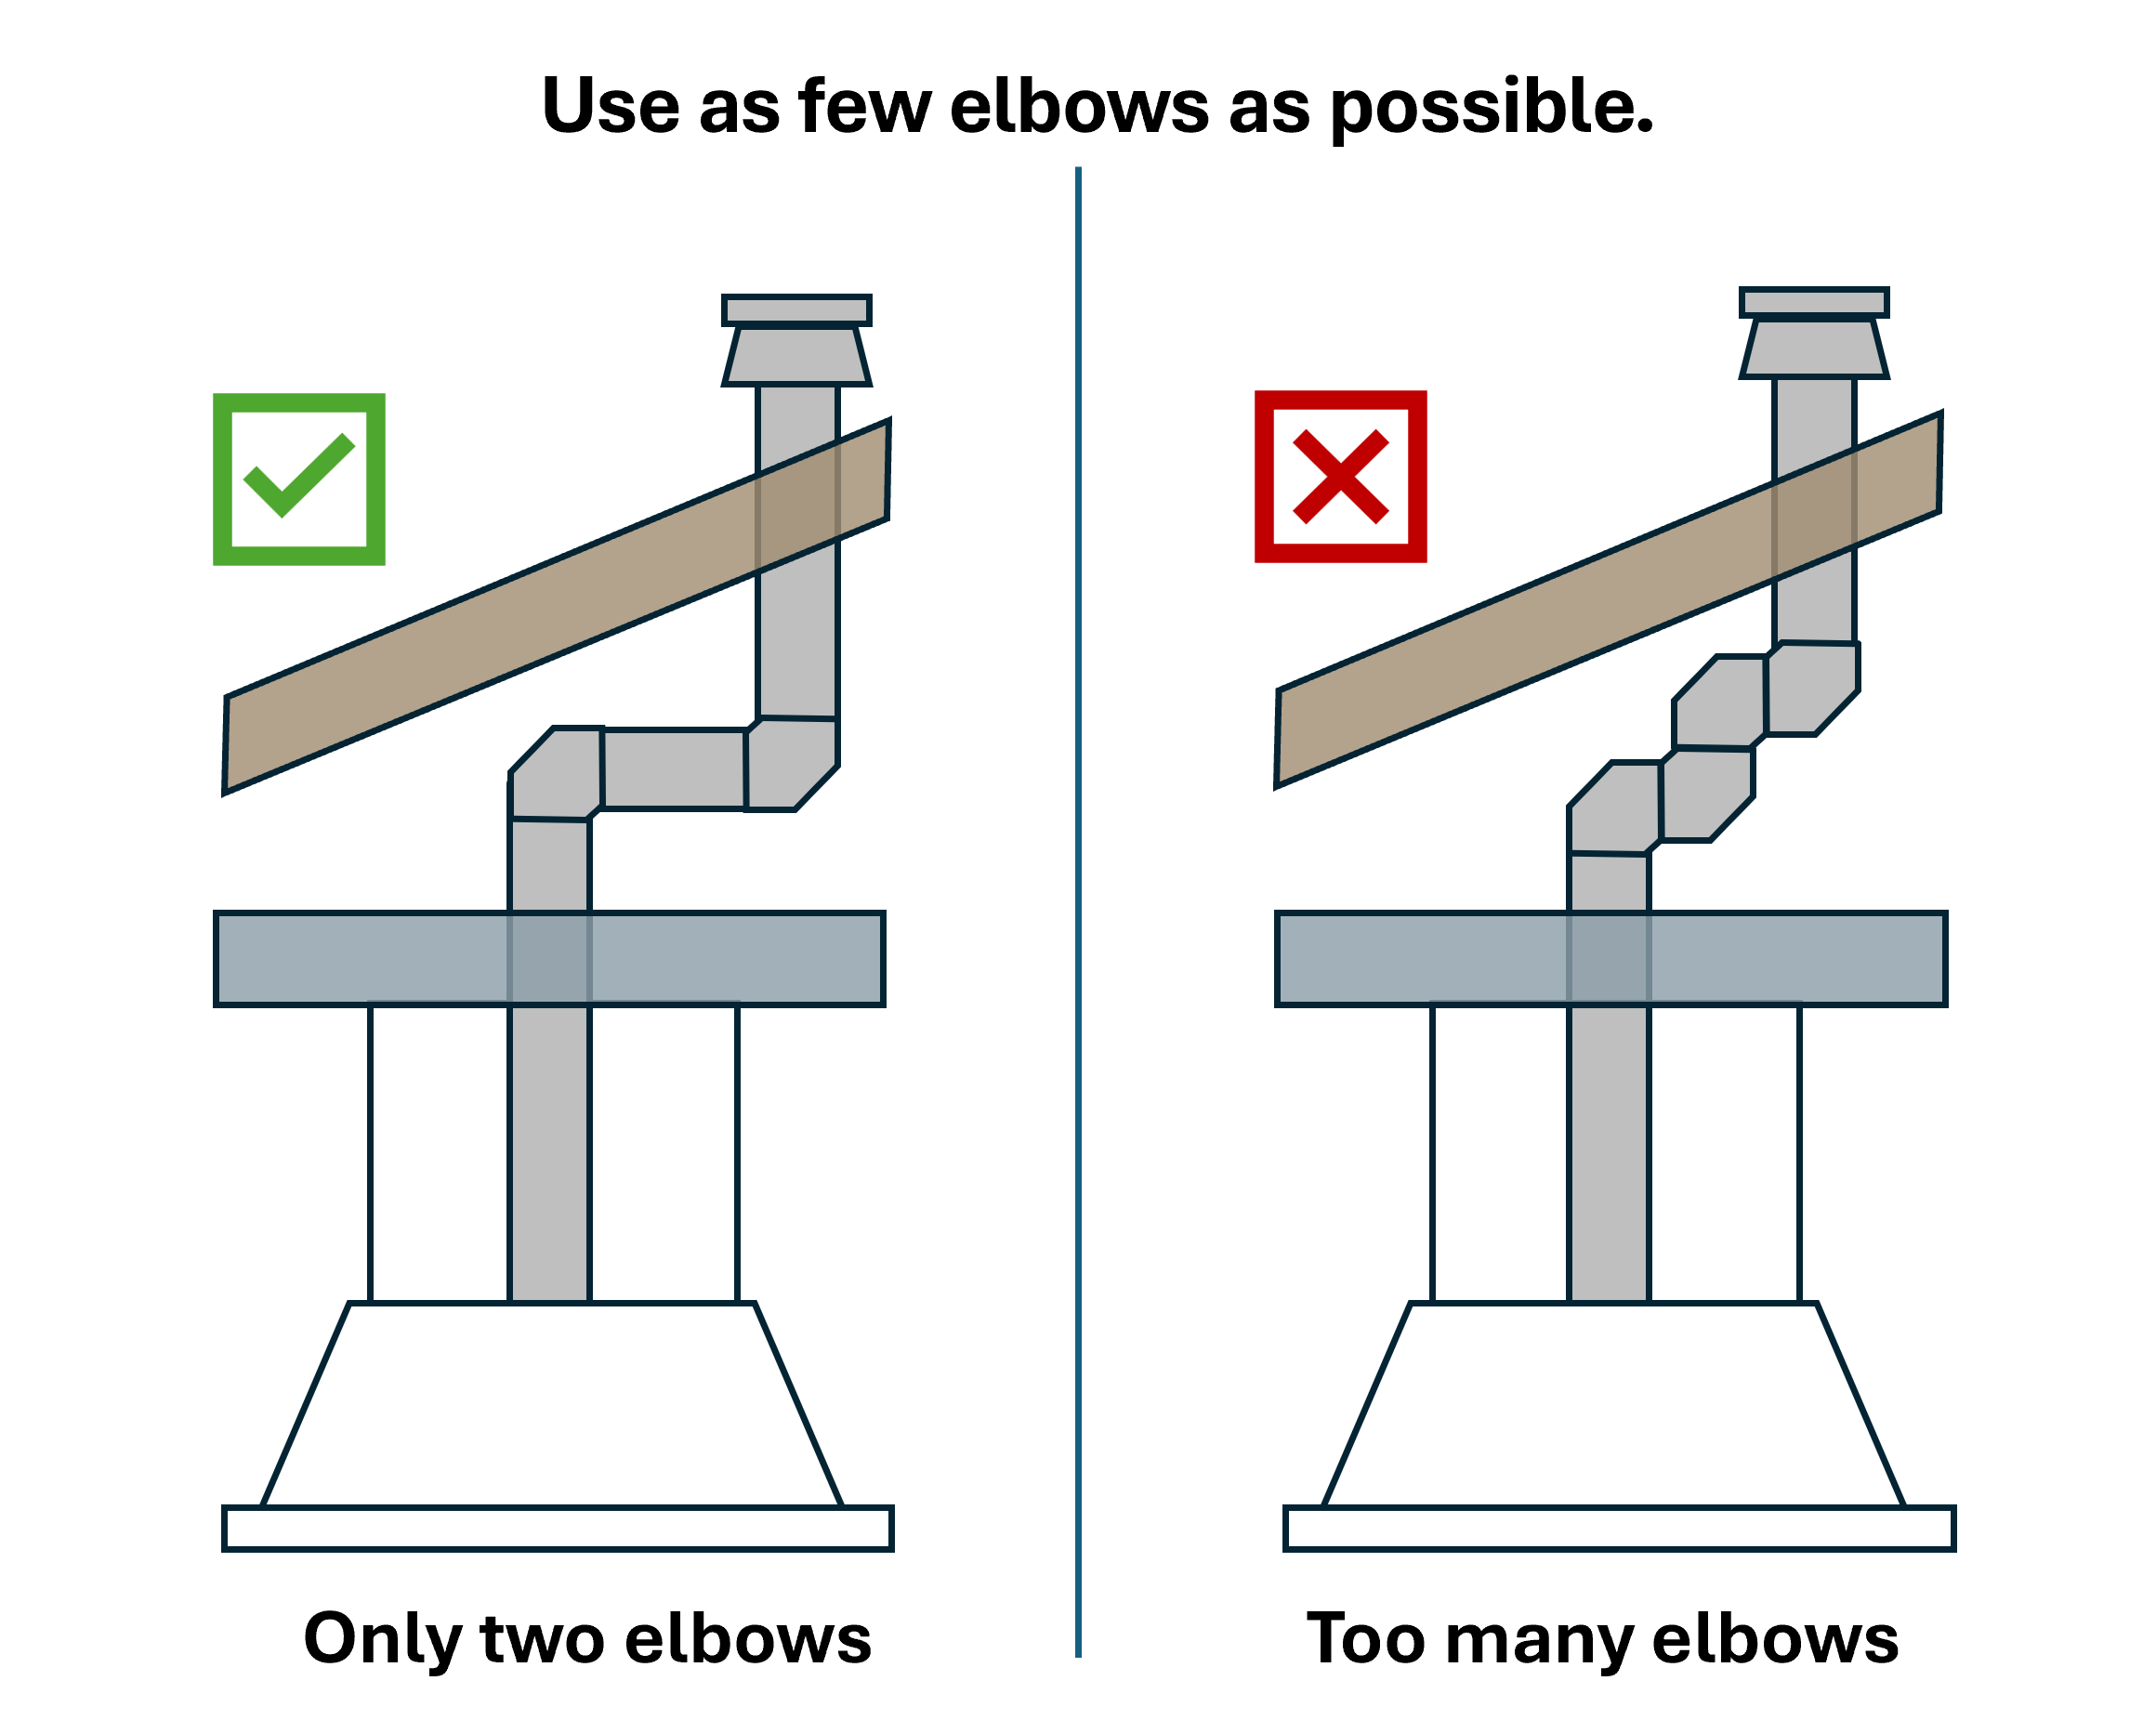
Plan an exhaust duct layout that will vent the kitchen fan exhaust to the outside, not into an attic, crawlspace, or space between floors. The duct pathway should be as direct and short as possible, minimizing duct length and limiting elbows in the duct run (Figures 2 and 3). Consult the manufacturer’s manual to determine what diameter the ductwork should be.
Source
Source
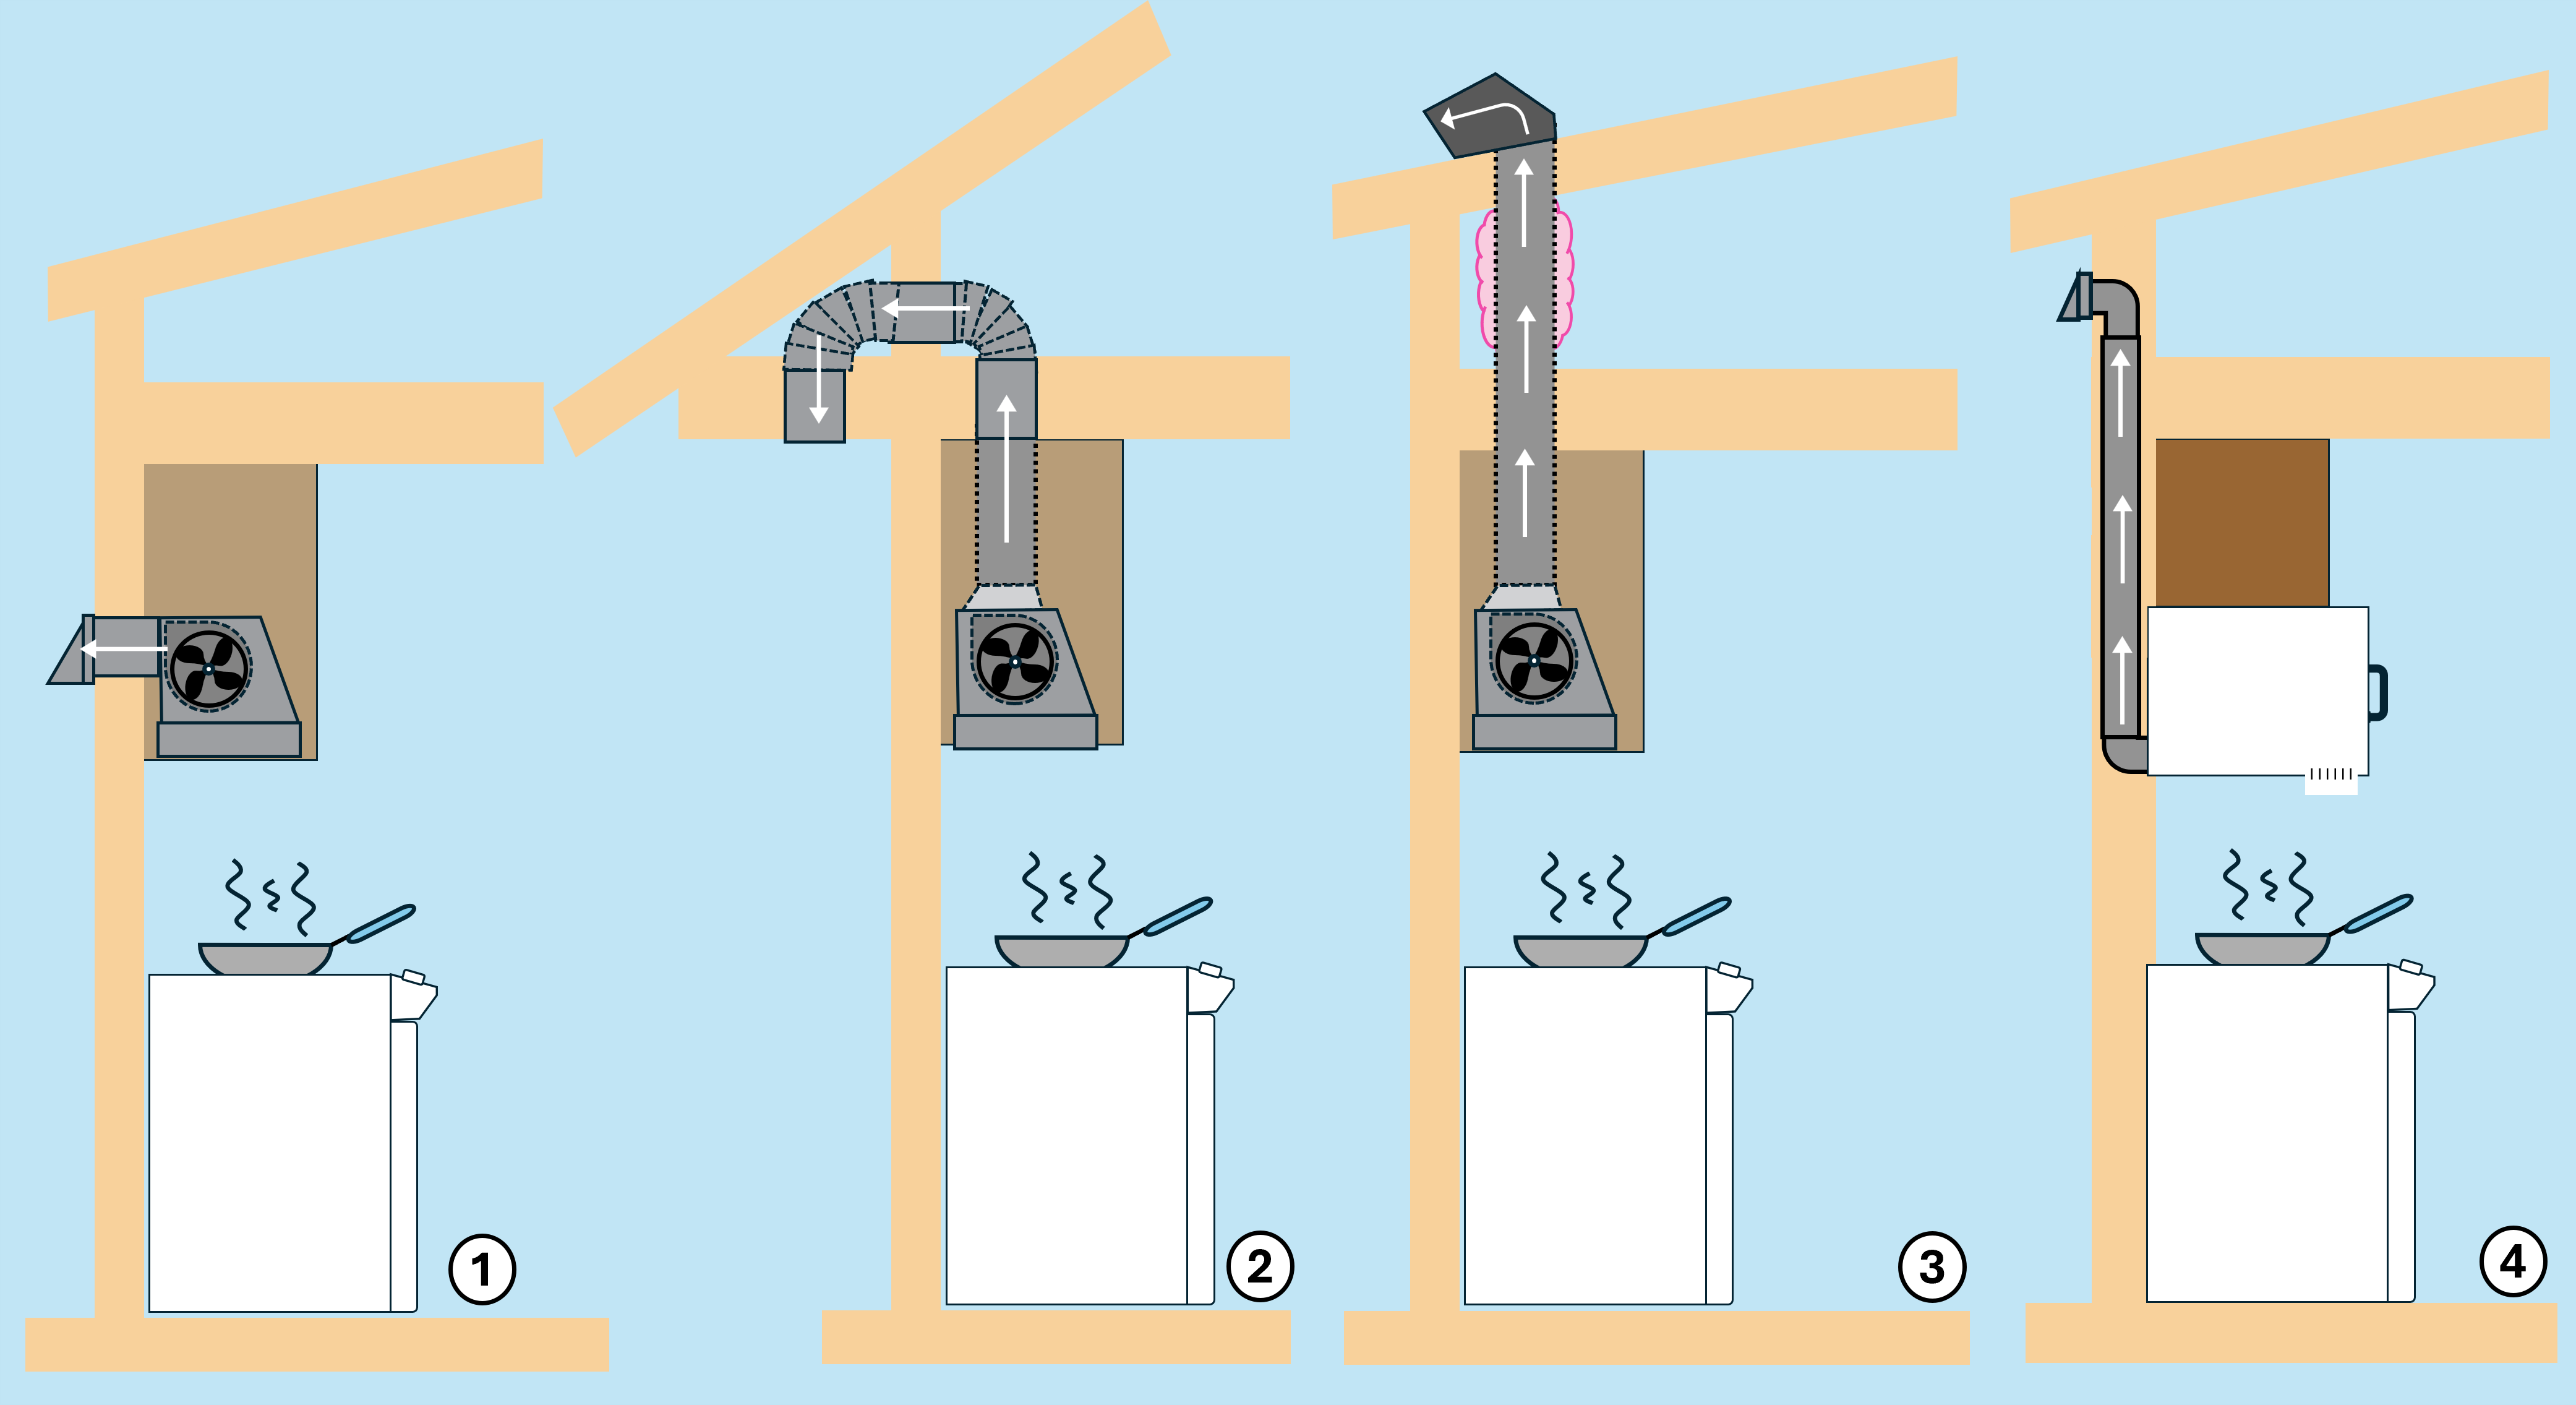
The exit route can either be through the roof or the wall, depending on the location of your kitchen equipment (Figure 4). You’ll want to avoid wiring, piping, and joists. The exhaust vent of the duct should terminate at least 10 feet away from or 3 feet above any air inlet and at least 3 feet away from any operable window, and it can’t exhaust air onto a walkway.
Source
3. Remove the range hood fan.
Whether you are installing a new hood fan or retrofitting an old fan to vent to the outside, you will need to remove the existing kitchen hood fan.
First, disconnect the power by turning off the circuit breaker connected to the kitchen fan. Use a non-contact voltage tester to test the electrical connections on the fixture to make sure there is no electricity travelling to the kitchen fan. Disconnect the electrical wires so that the fan can be removed. Label the connections using masking tape or take a photo so that you can correctly reconnect them when re-installing. Make sure all burners are off and the cooktop is cool, then place a thick blanket or towel on the stove surface to protect it from debris.
Next, with the help of an additional person to support the range hood, remove the screws securing the unit to the wall or the cabinet above it. Lift away the range hood.
4. Mark location of vent.
If you are installing a new range hood fan, hold the new fan in position and mark the locations for where the fan will be secured, vented, and electrically connected. If you are converting a recirculating fan to a vented fan, hold the old fan in place and mark where the vent intersects with the wall or the cabinet above.
To ensure that the hole for the vent is in the correct place, measure the vent location on the fan and transcribe this measurement to the wall or cabinet. Many new range hoods include a template to show locations of holes.
5. Cut hole for vent.
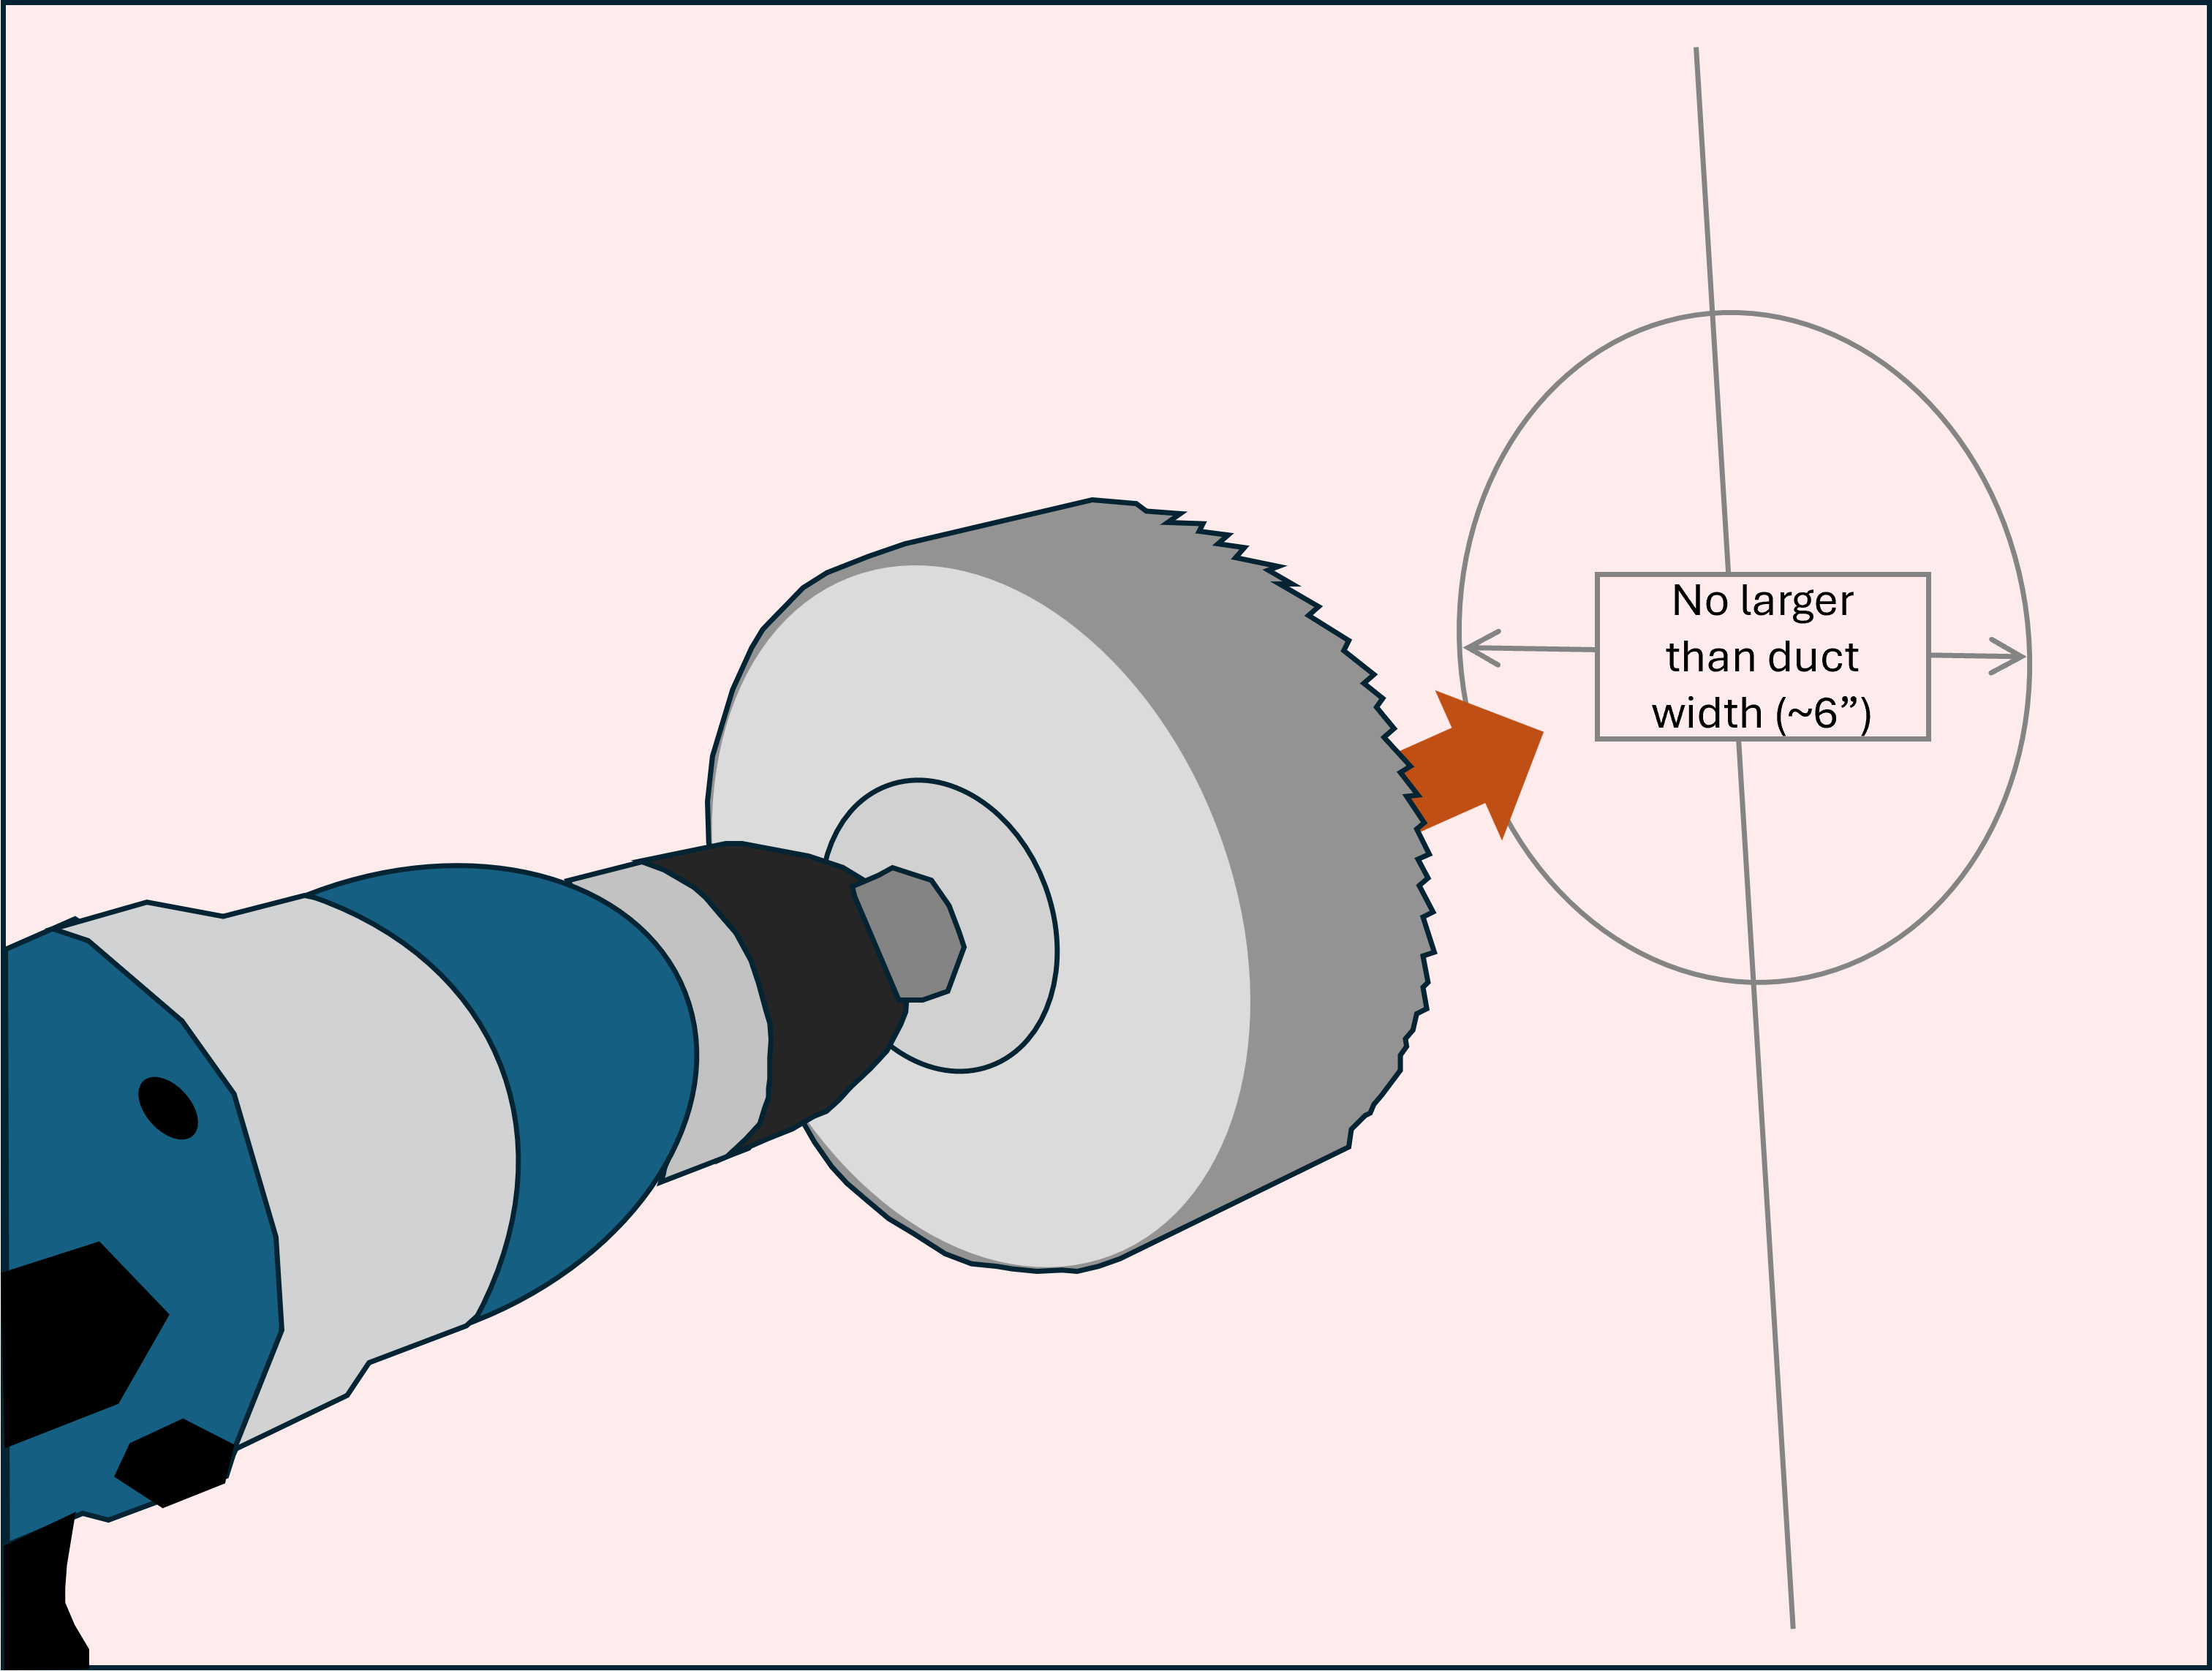
Before drilling any holes, put on eye protection and a dust mask. Using a reciprocating saw or a hole saw, cut a vent hole through the interior drywall or plaster (Figure 5).
Source
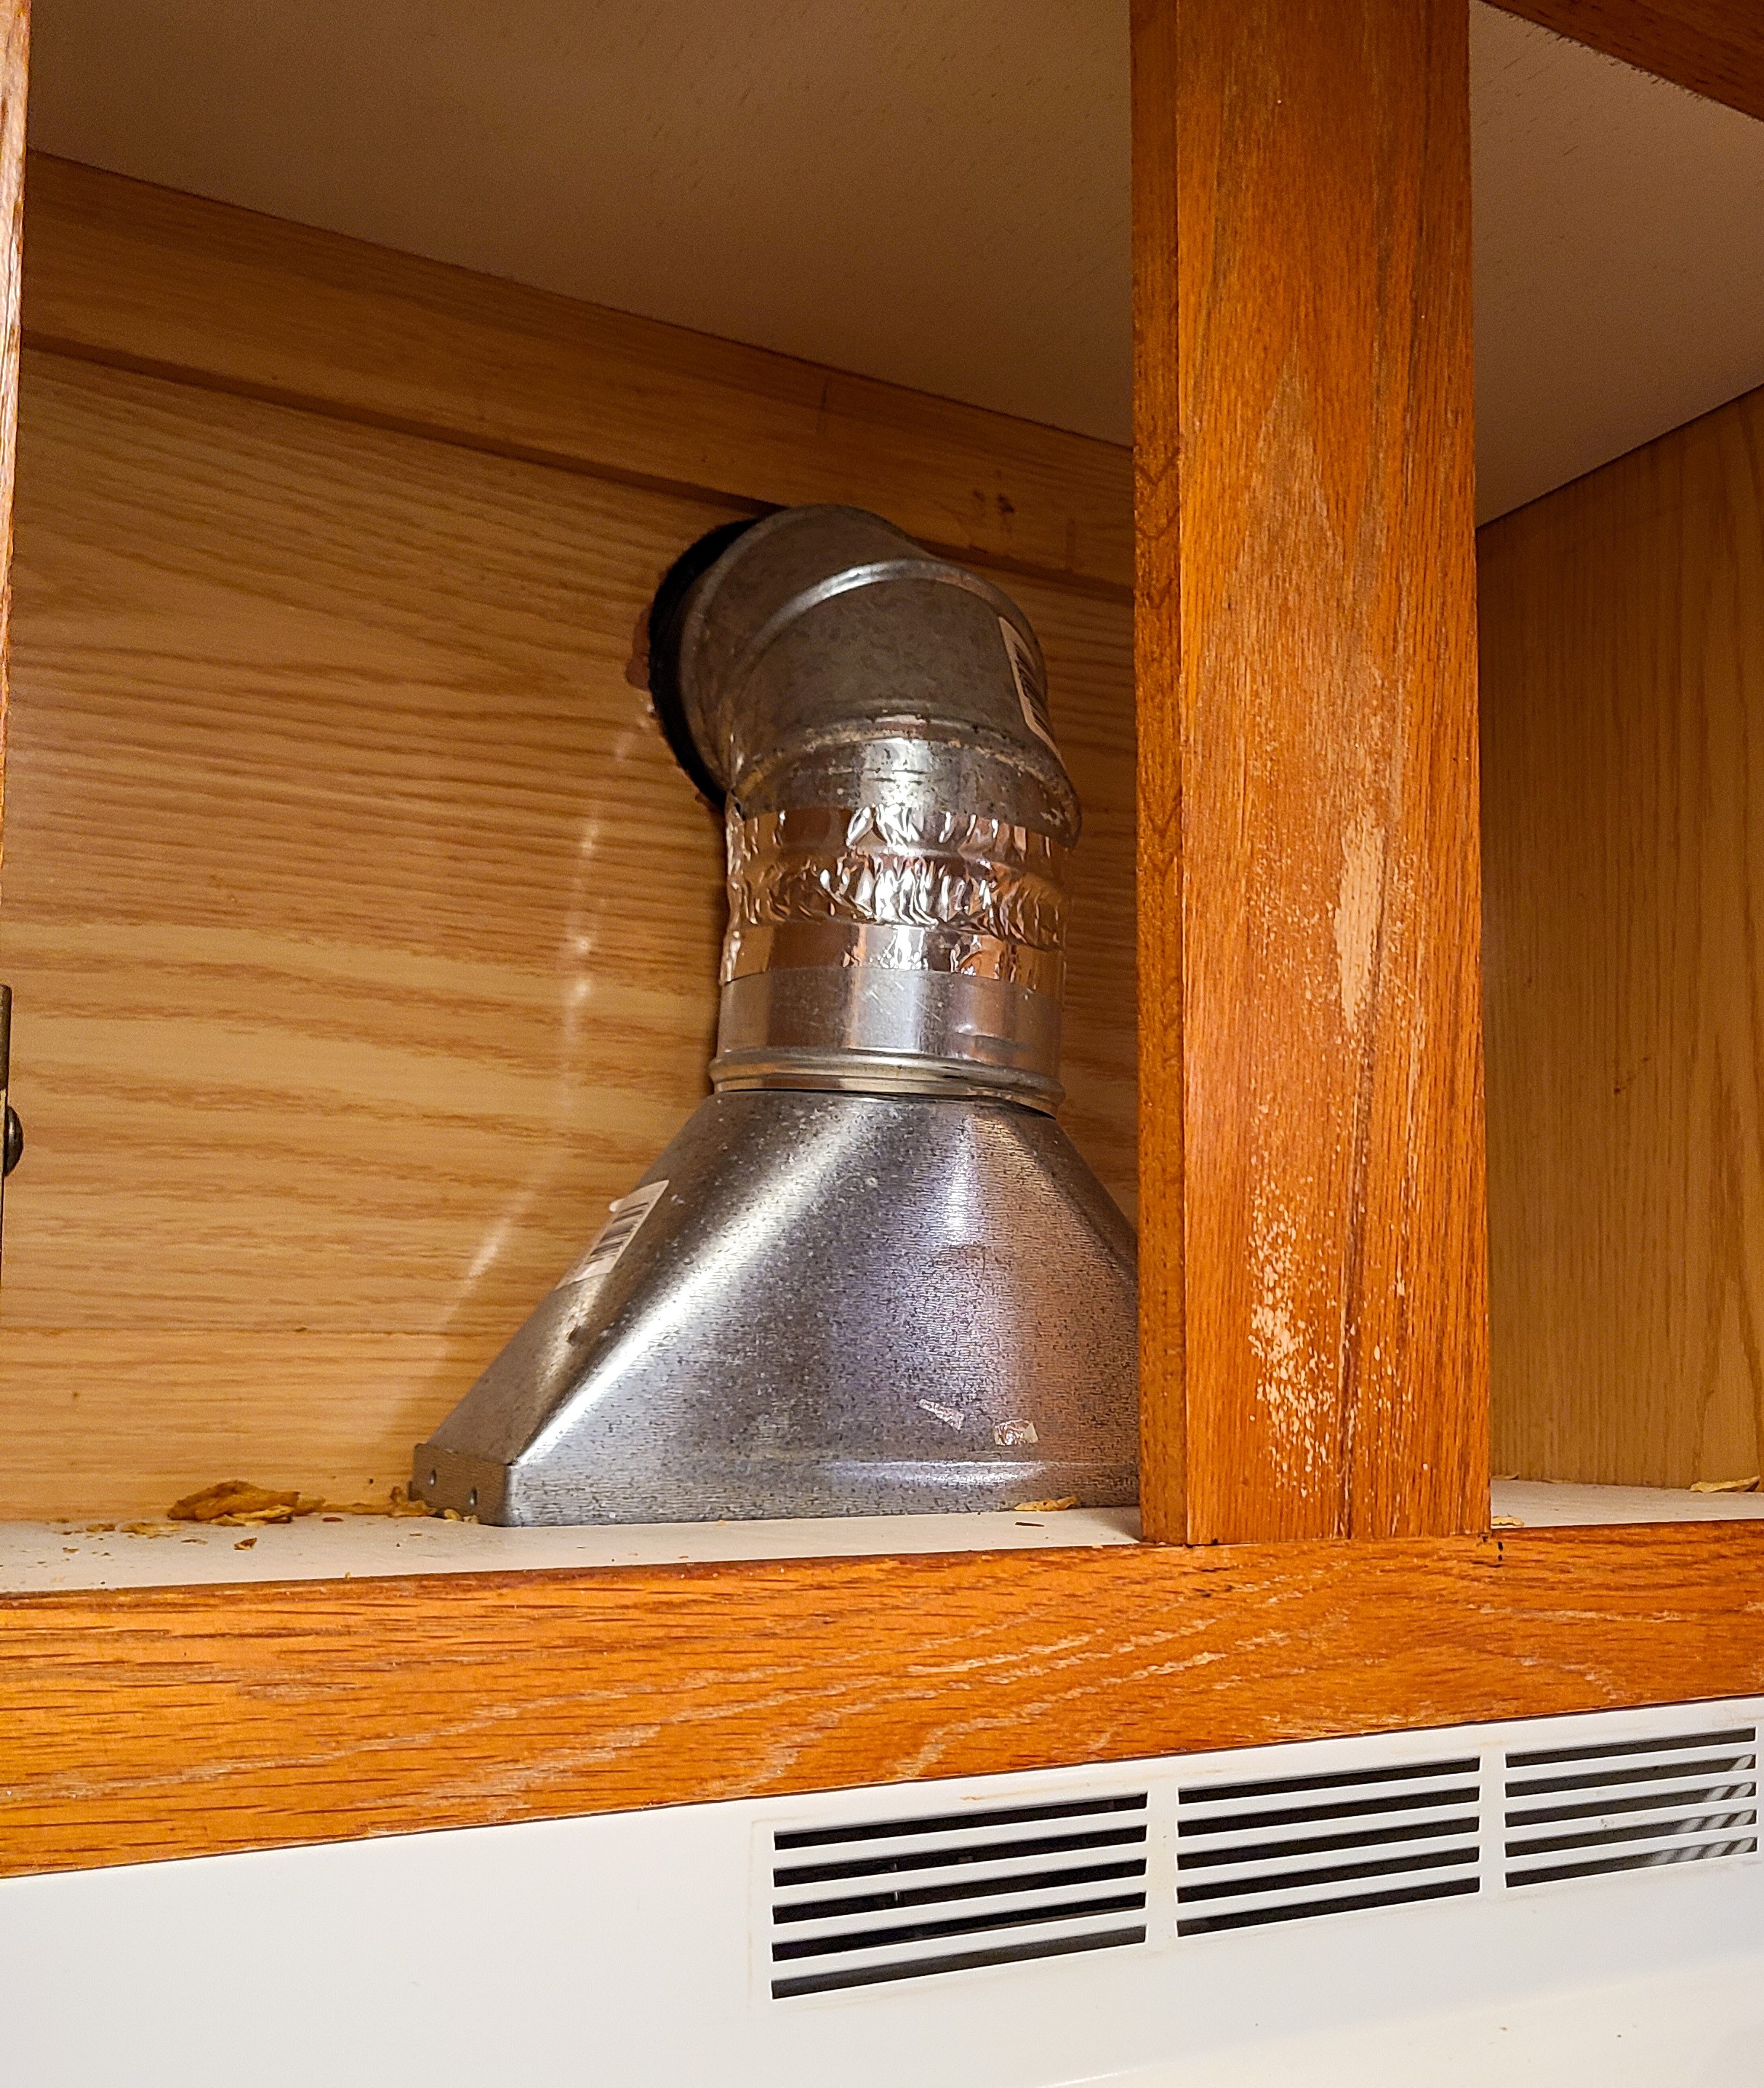
If the vent goes up through the cabinet, cut a hole through the bottom of the cabinet. Figure 6 shows ducting for a range hood vented through a cabinet, where a hole was cut both in the bottom of the cabinet and in the wall. The diameter of the hole should be no wider than needed to fit the duct. Inspect the area where the hole has been initially cut for studs, pipes, or wires which could interfere with ducting. Continue to cut with the hole saw, removing insulation and debris.
Source
6. Cut outside hole.
If you are venting the exhaust fan through the wall, it is best to drill the outside hole directly in-line with the inside hole so that the duct is straight. From the inside, use a long drill bit to make locater hole(s) all the way through the exterior wall to indicate the location of the exterior hole. Avoid cutting through studs.
7. Install ductwork and wall cap.
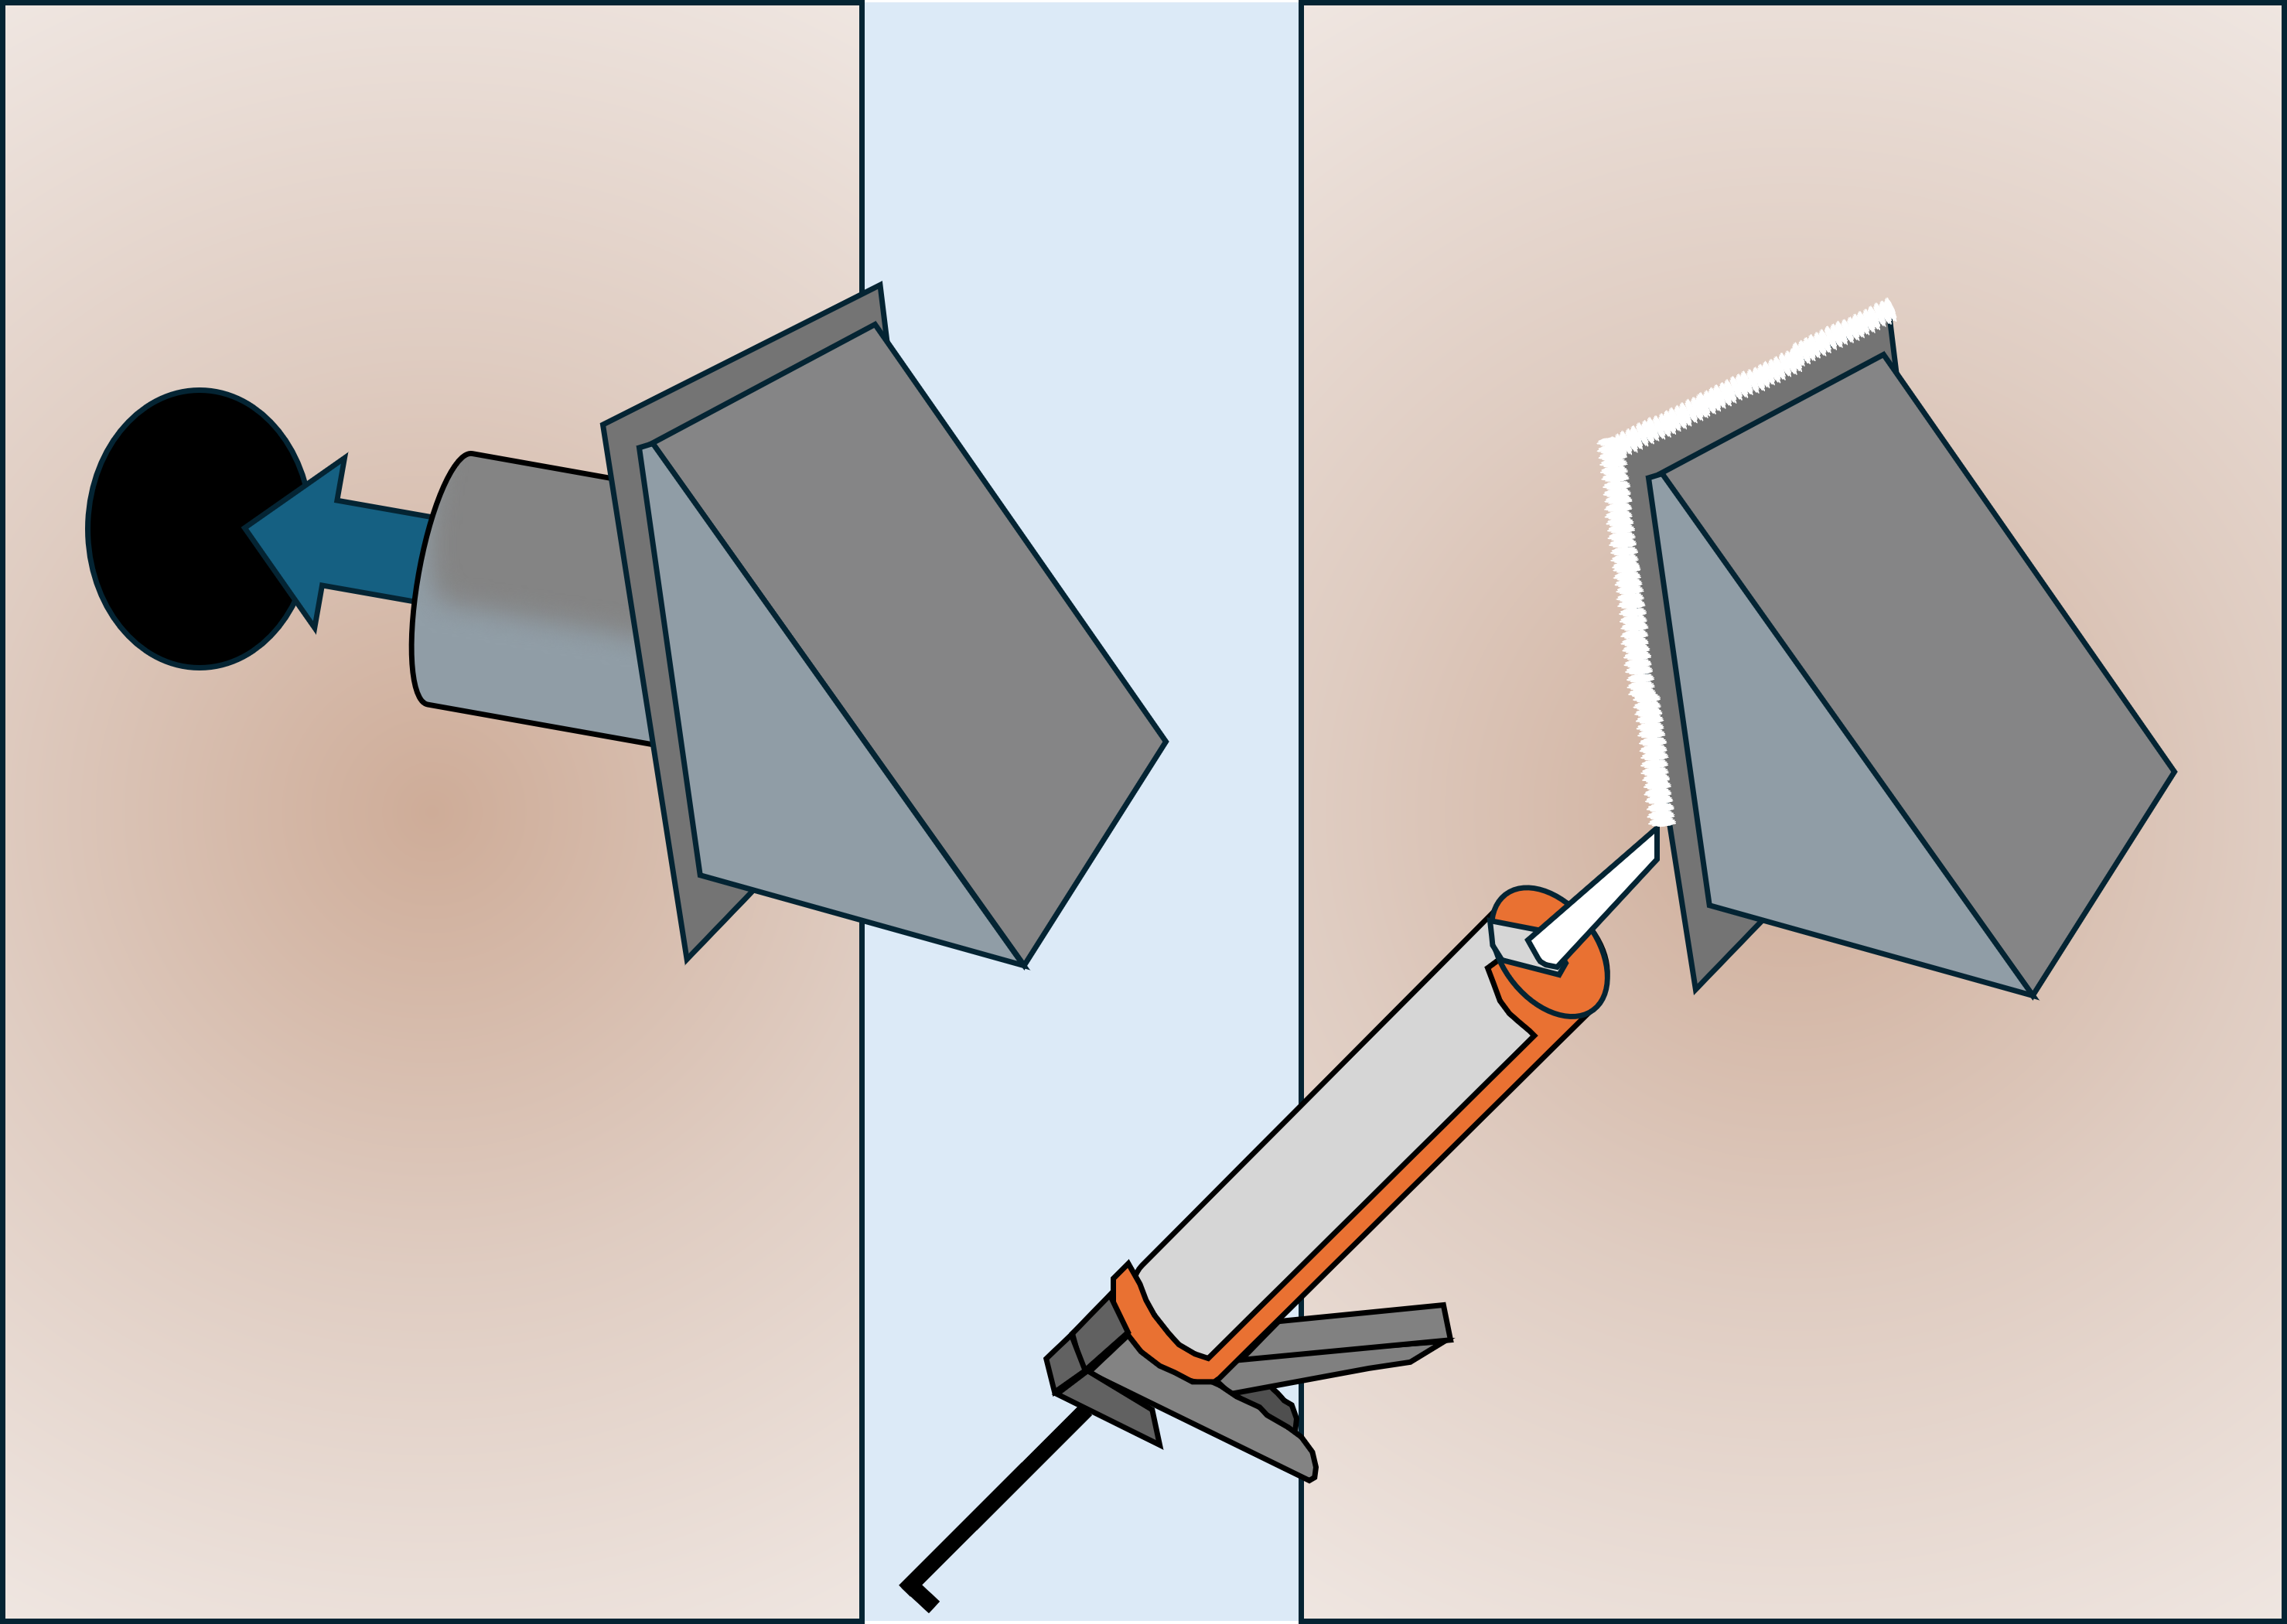
Insert the wall cap into the exterior hole to see if the included duct is long enough to reach the range hood. If not, you will need a duct extension between the range hood and the wall cap. Install the wall cap and apply caulking around the wall cap as an air and water seal (Figure 7).
Source
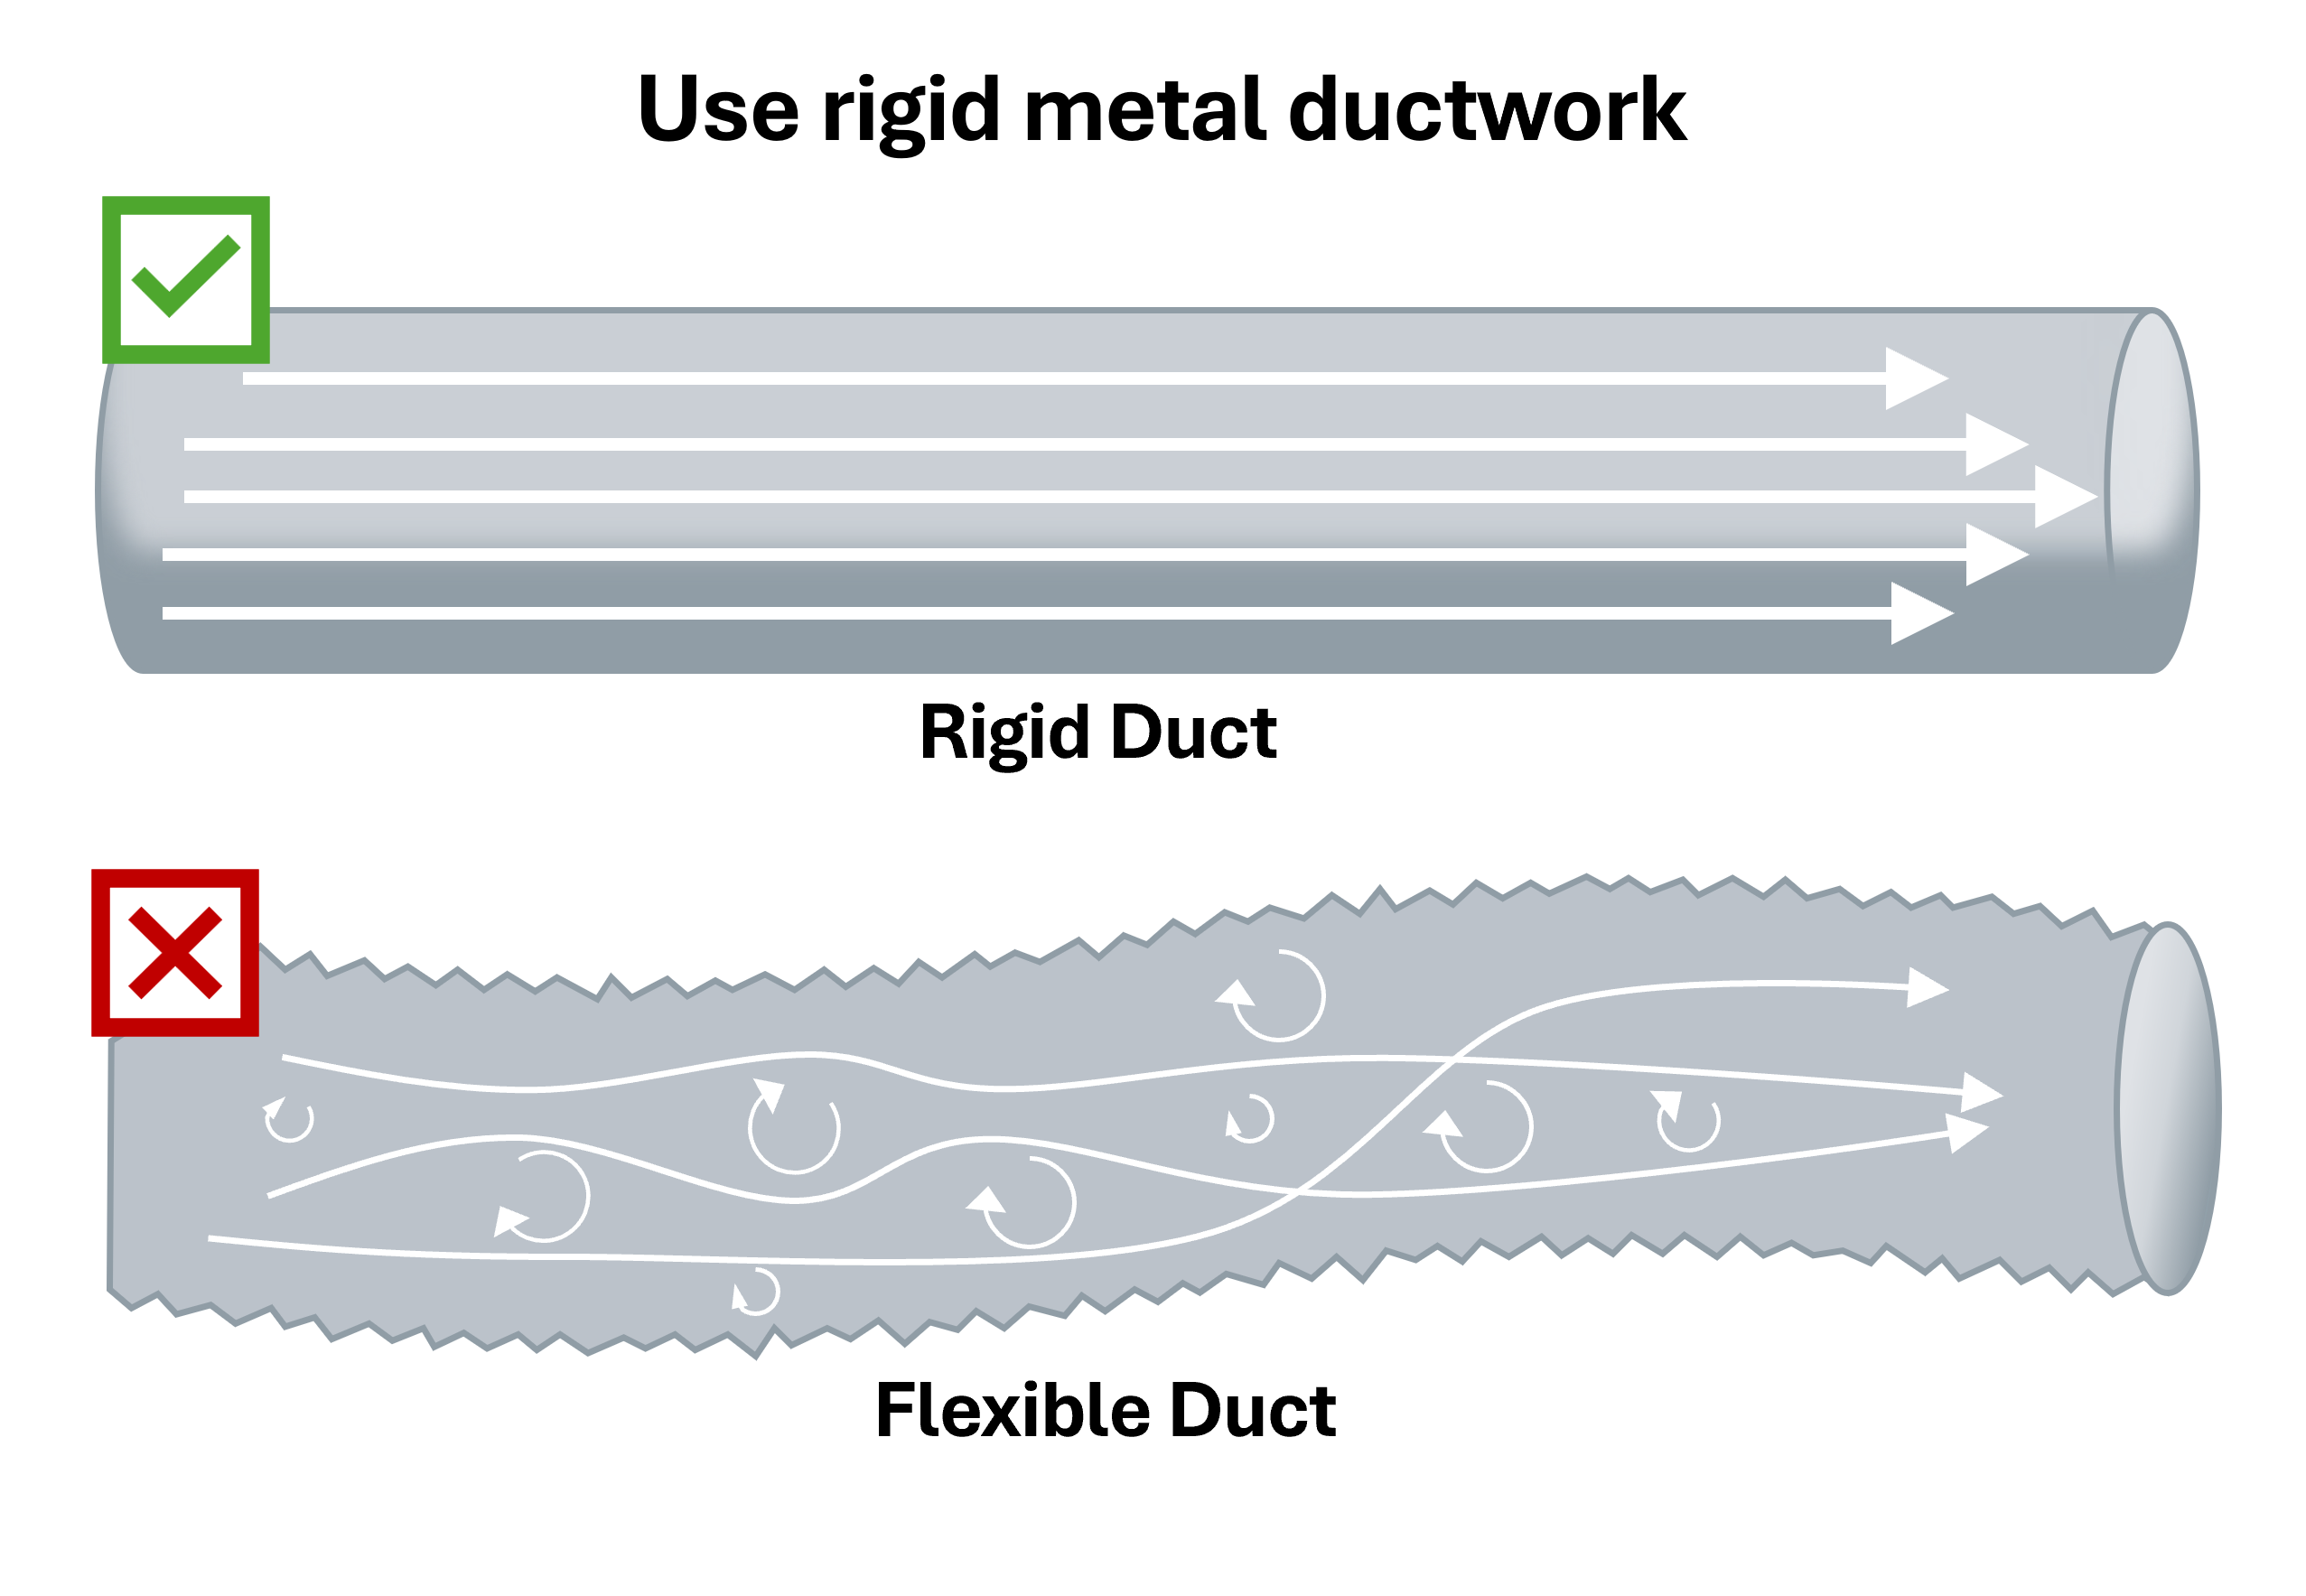
From the inside, install additional ducting using as few elbows as possible. Only rigid metal ducting should be used for venting kitchen exhaust, because flexible ducting can collect grease and other contaminants (Figure 8). Consult the manufacturer’s instructions to determine what diameter of ducting is needed. Using either mastic or UL 181 tape, tape all the connecting seams between ducts.
Place the range hood in position and connect the ducting to the exhaust vent. Tape the connection between the ducting and the range hood.
Source
8. Reinstall range hood.
Reconnect the electrical wiring and screw the range hood into place. Turn the breaker back on and test the exhaust fan. You should be able to feel air coming out of the outdoor wall cap.