

Introduction
Flush your water heater tank to improve performance and longevity.
Why
Sediment can collect in your water heater tank over time, potentially causing mineral deposits on the heating element, reducing its effectiveness in transferring heat to the water.
What You'll Need
- Garden hose
- Flat head screwdriver (depending on water heater valve type)
- Rags
1. Consult your water heater manual.
If you have access to the owner’s manual for your water heater, follow the instructions given there for flushing your water heater. If the instructions are unclear or incomplete, refer to the steps below.
2. Turn off the water heater, shut off the power or shut off the gas.
If the water heater turns on when it is empty or partially empty, it can be quickly damaged. Consult your user’s manual for the recommended way to shut off your water heater. Below are typical options.
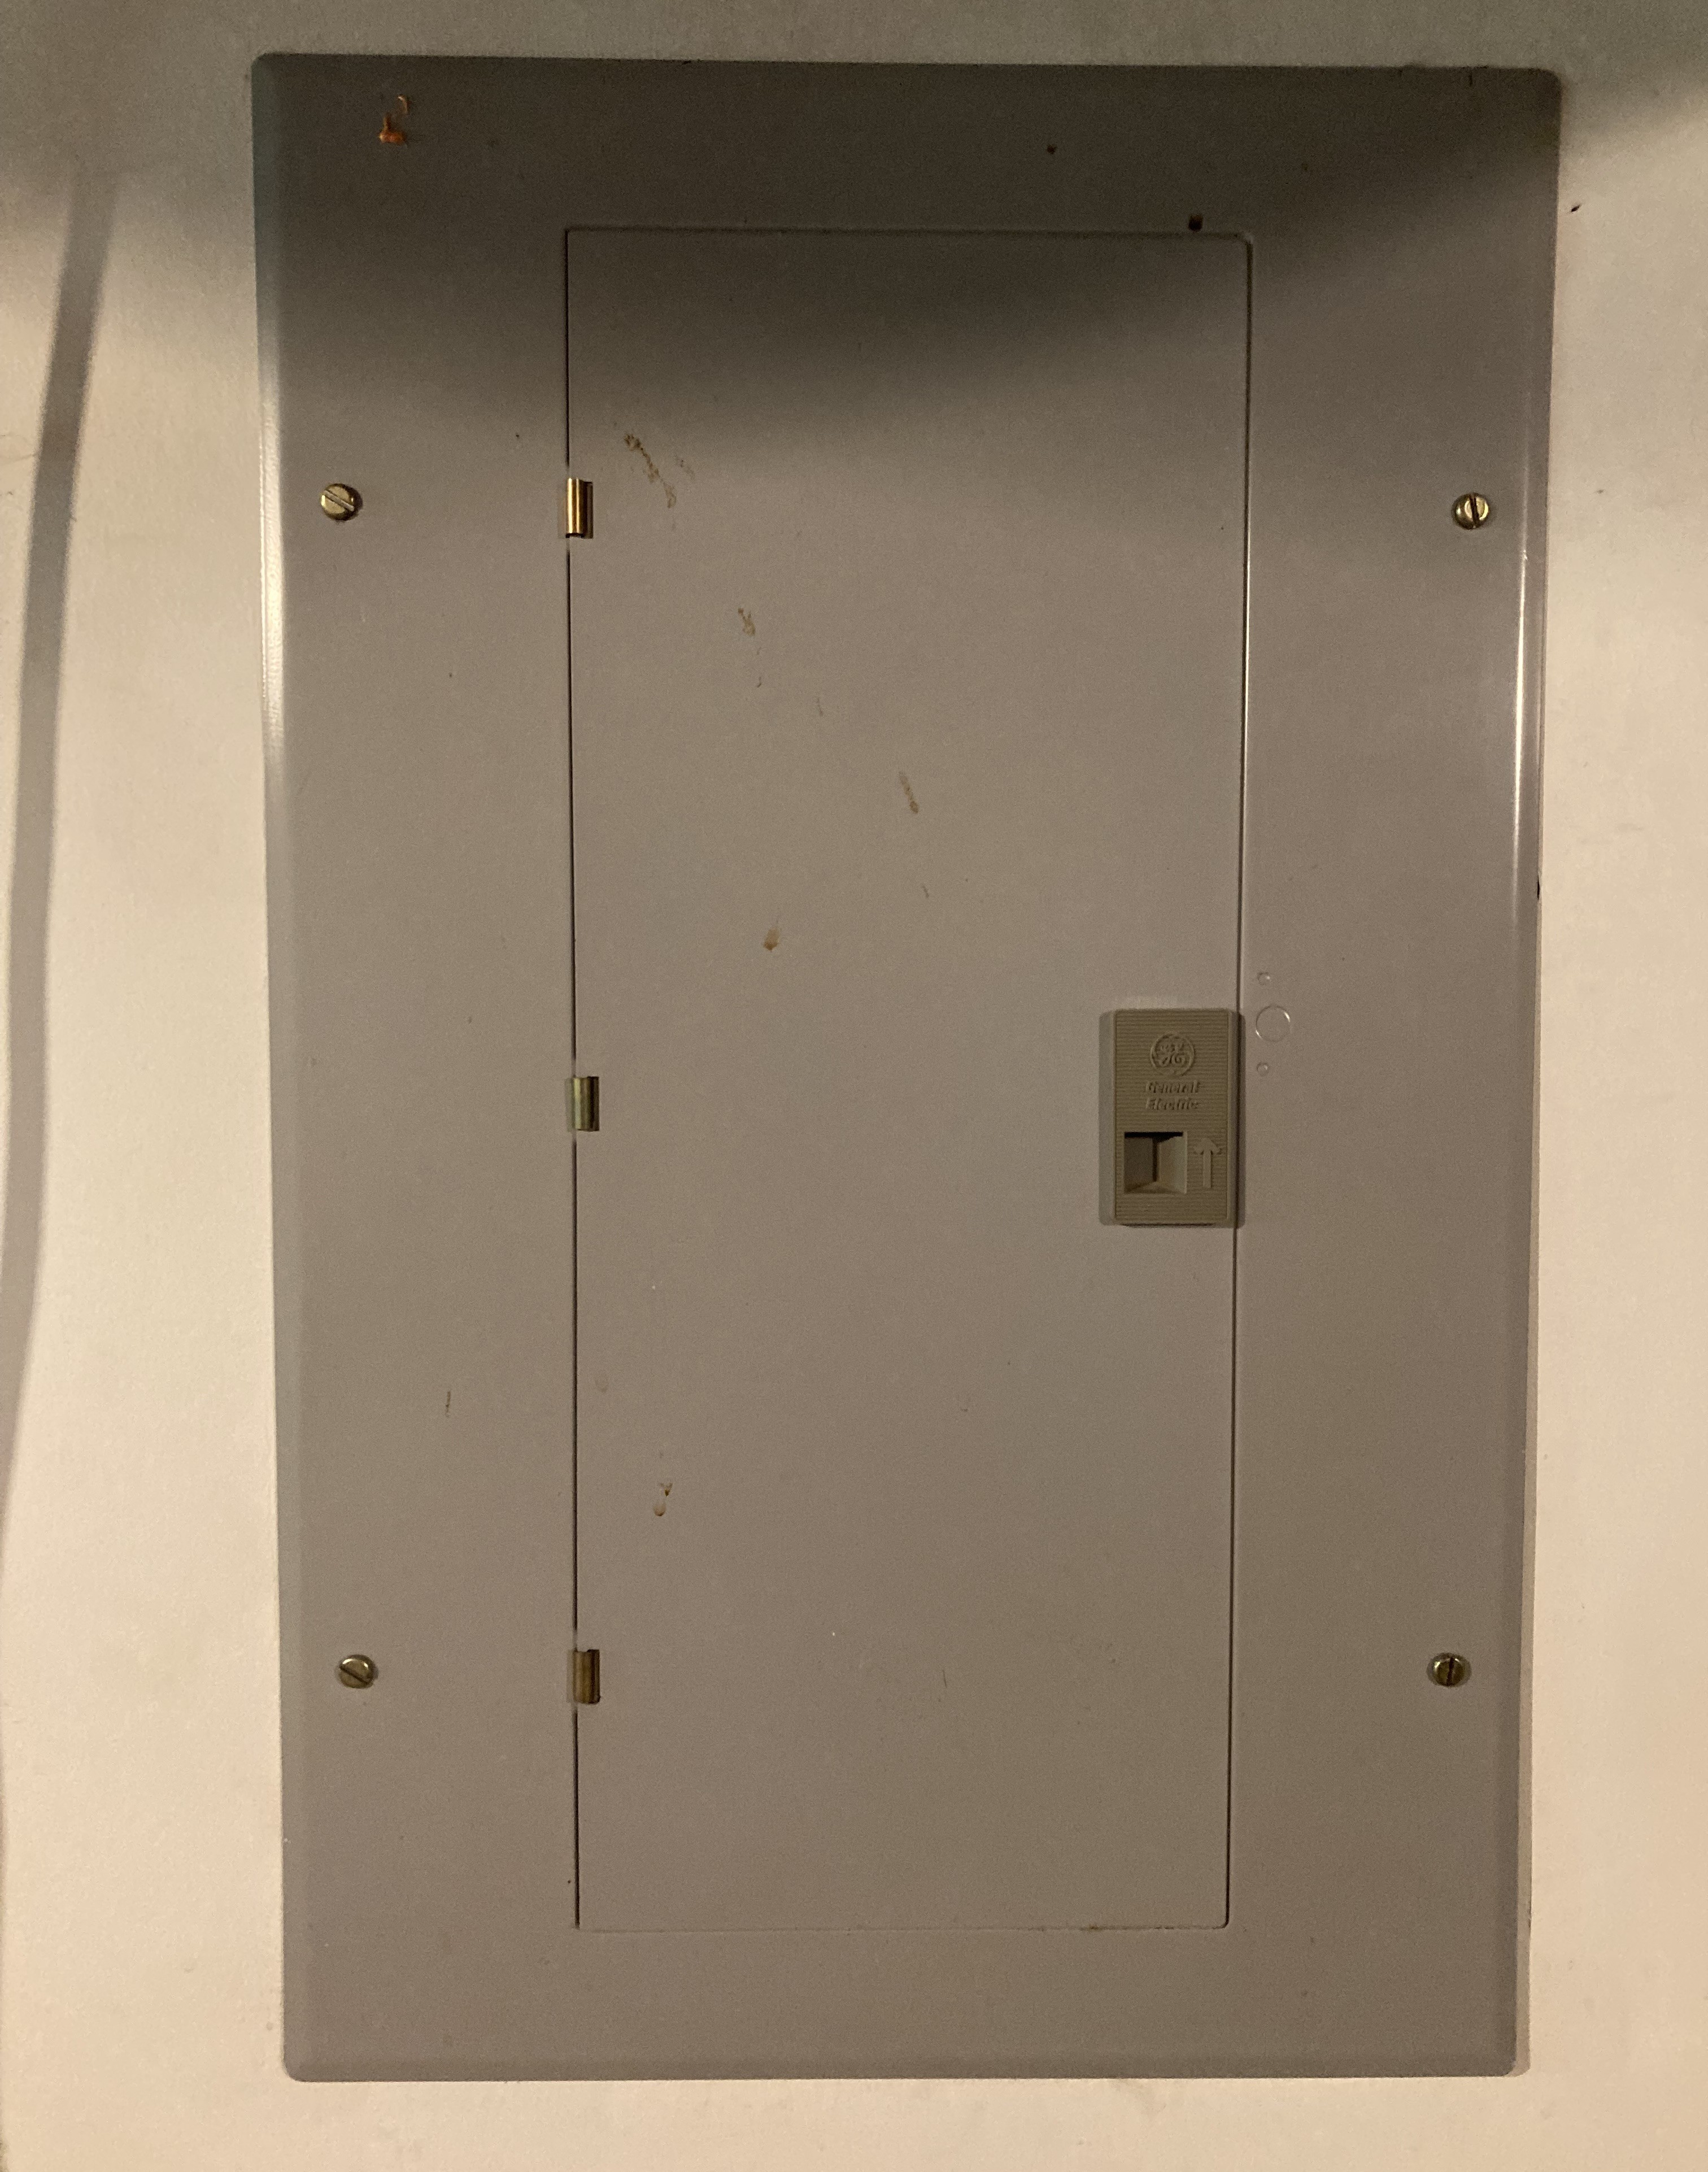
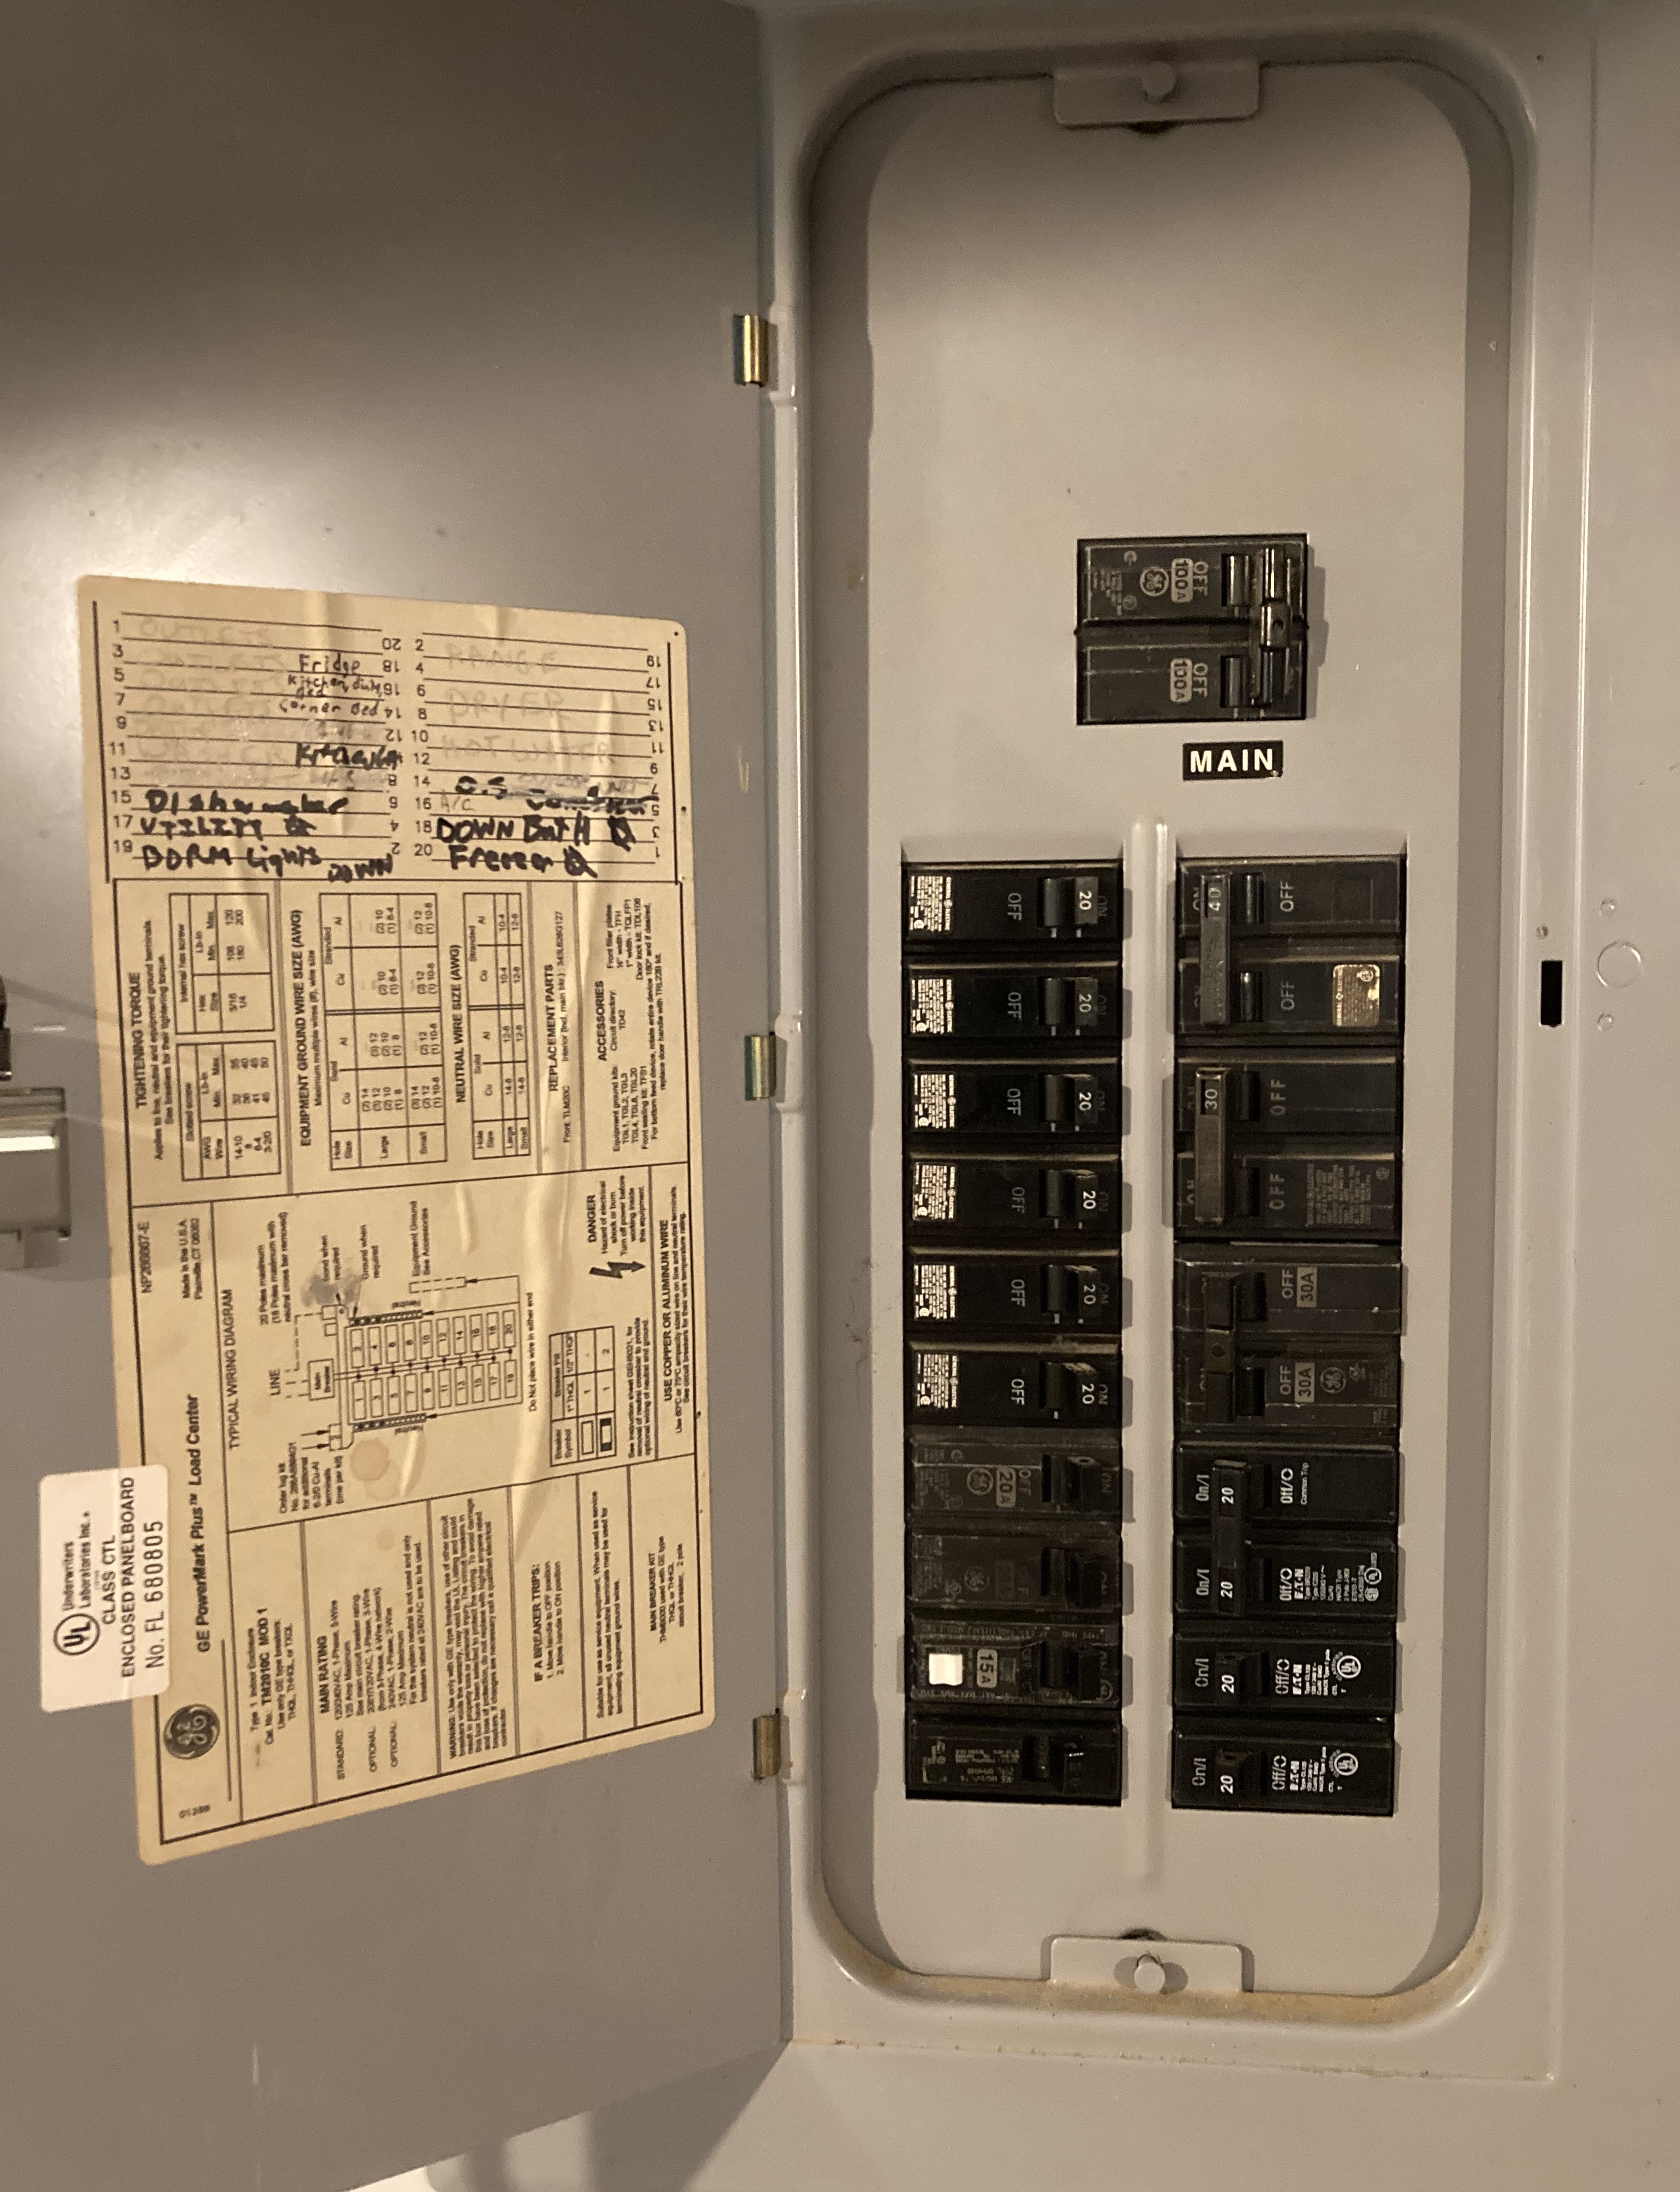
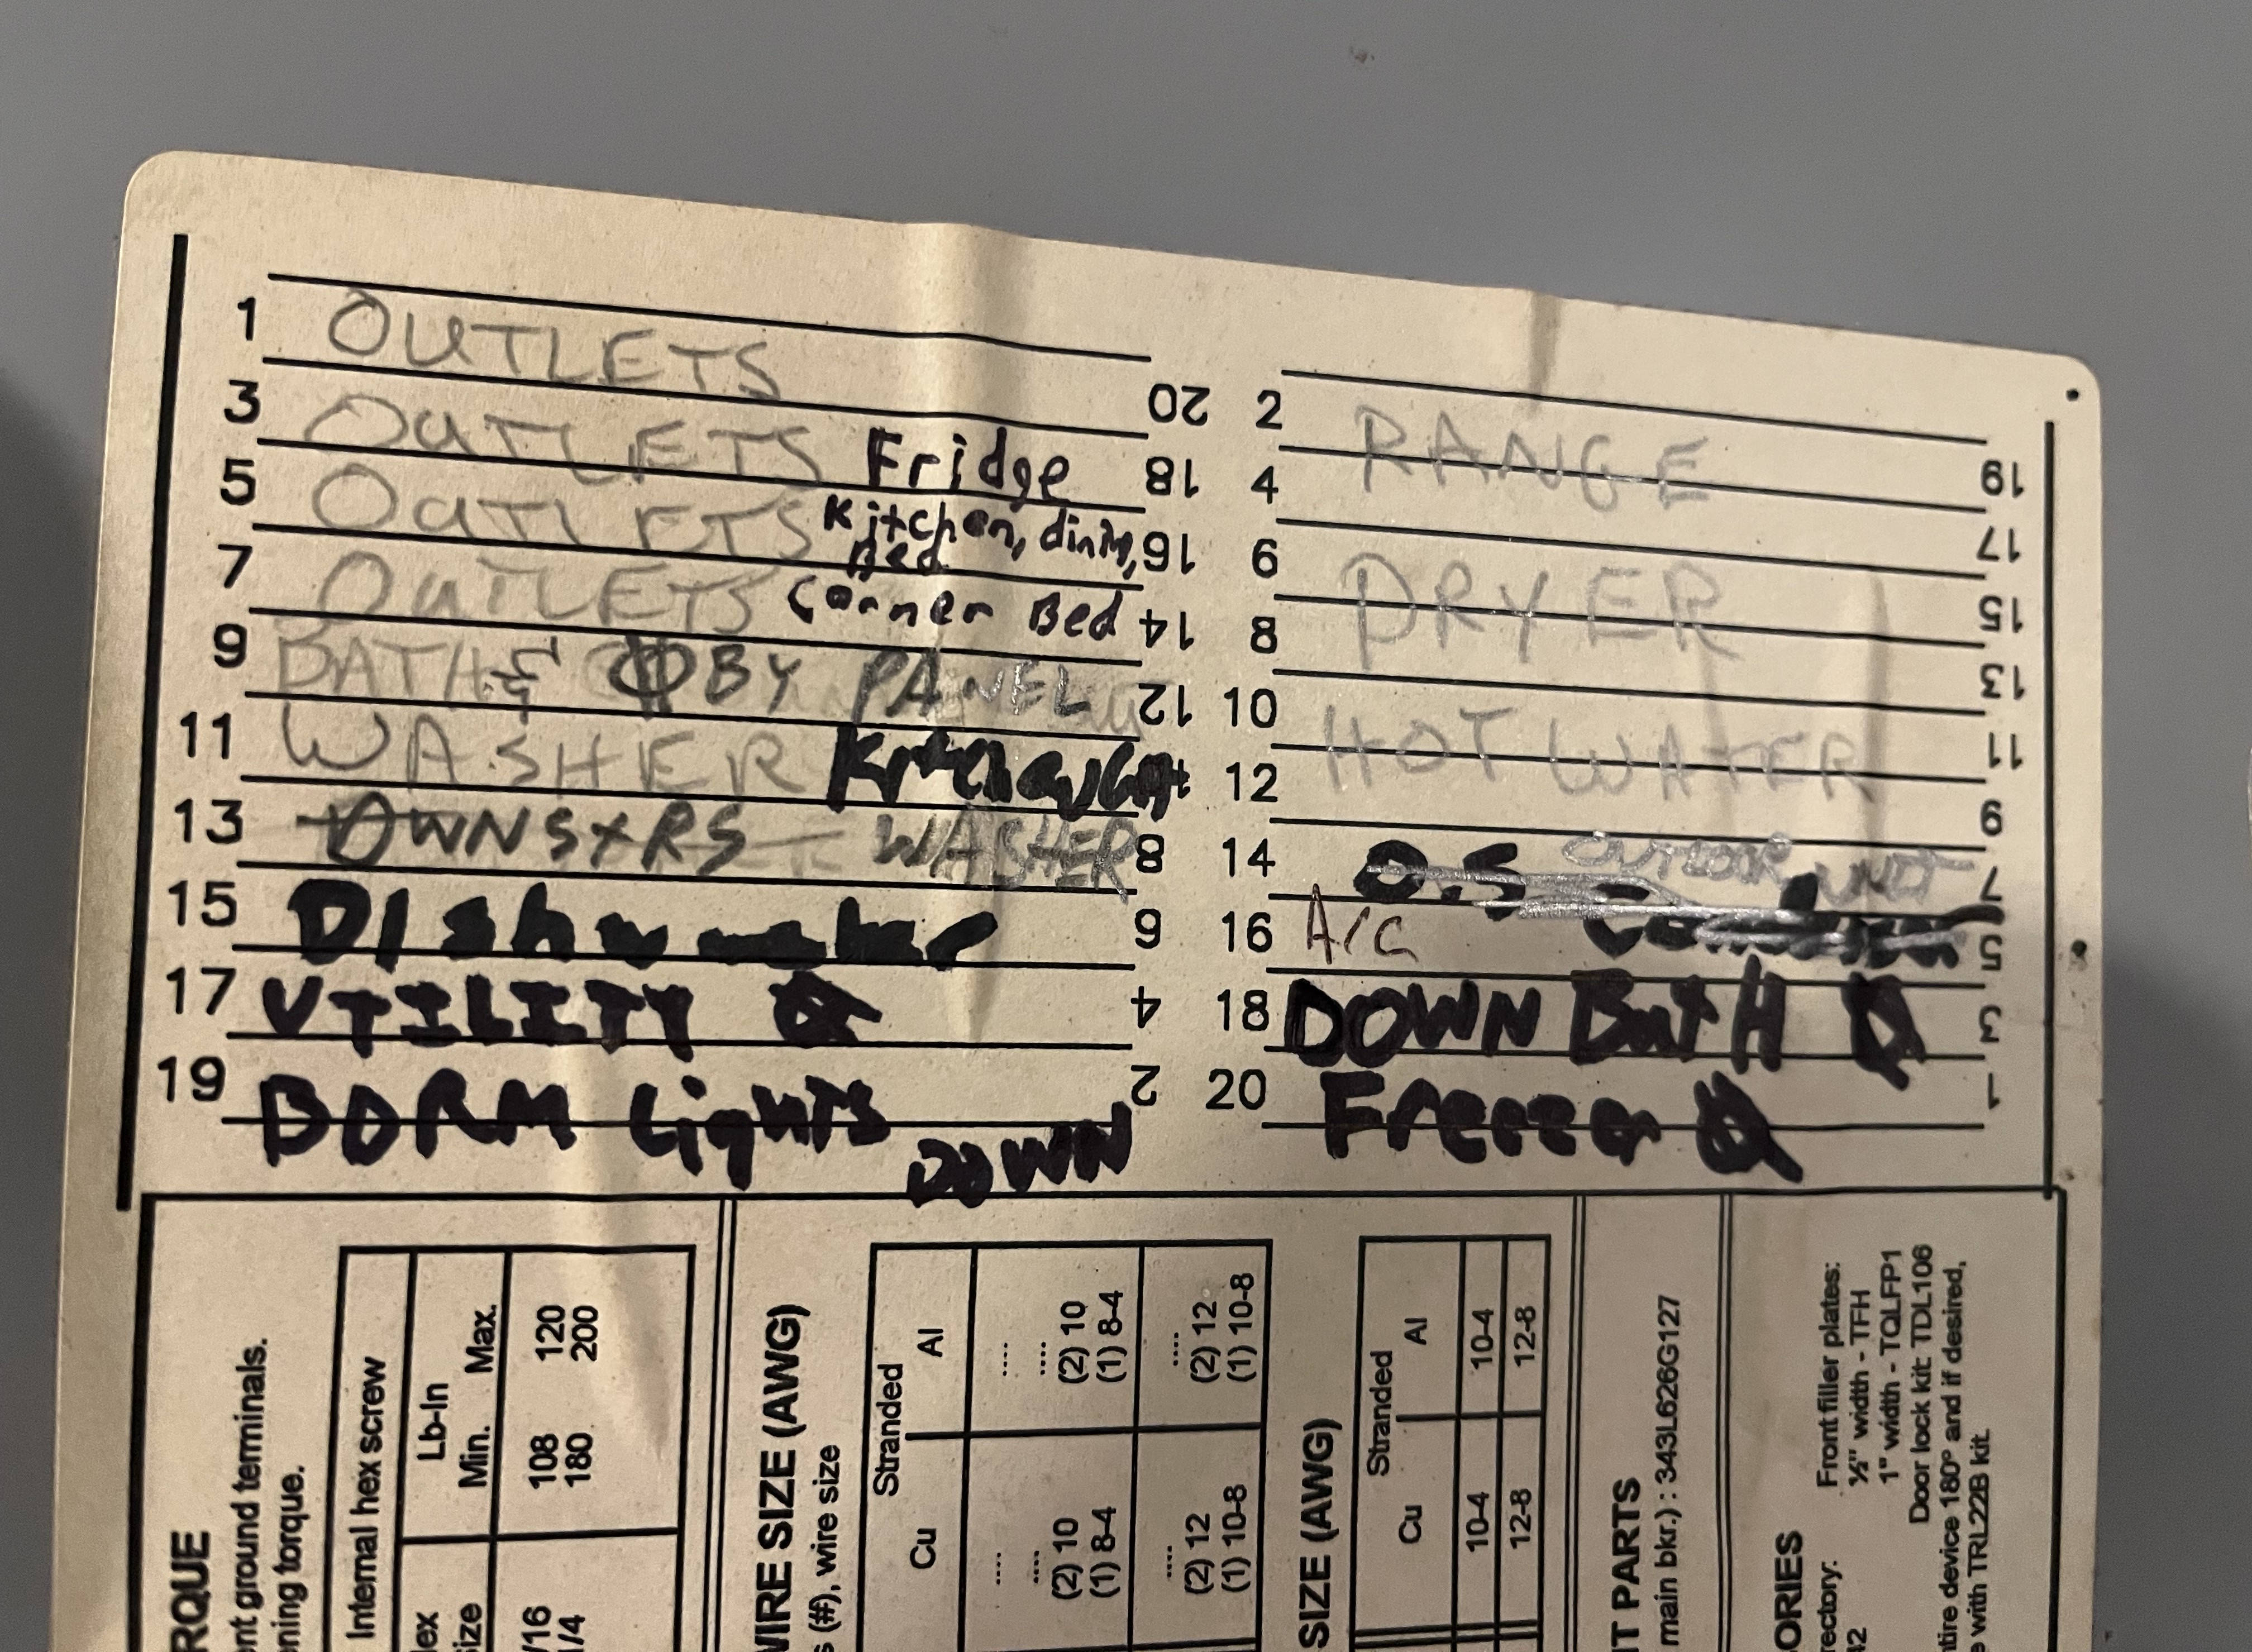
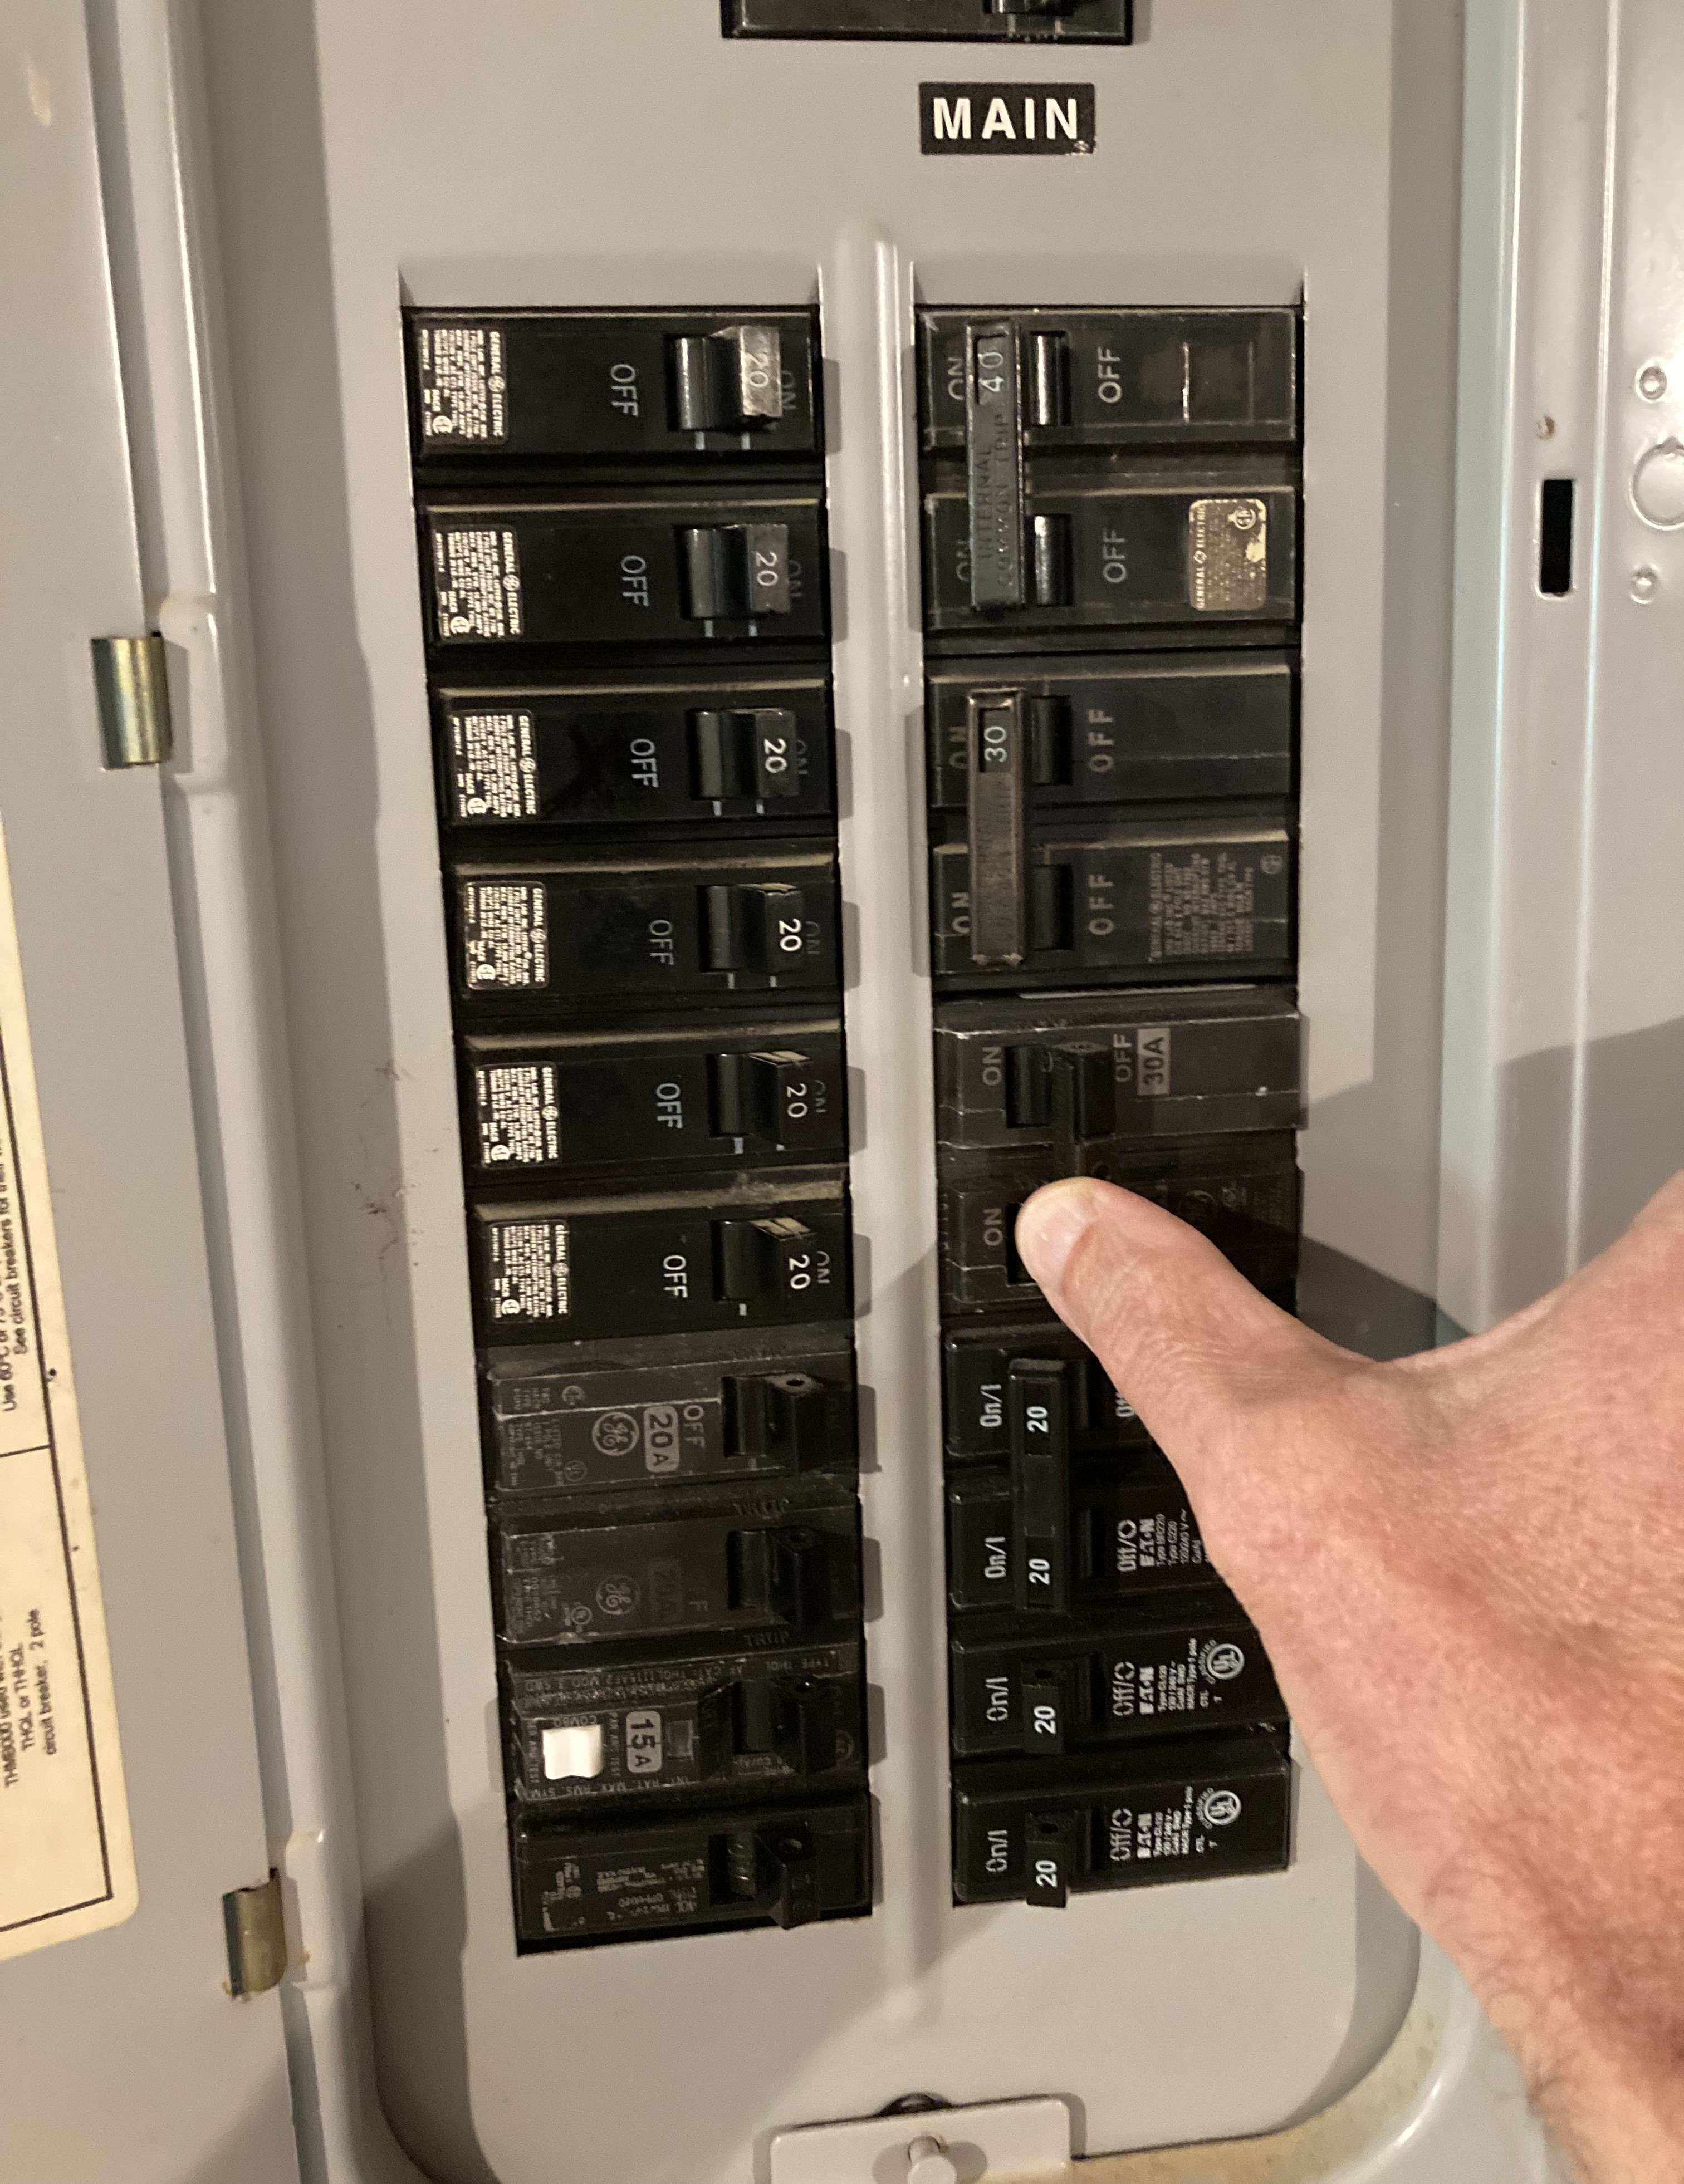
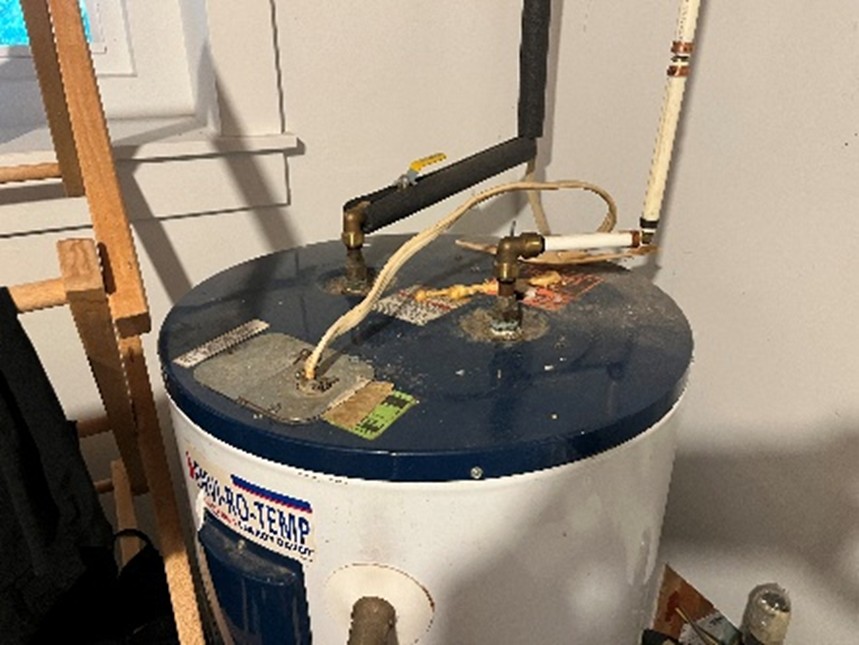
Electric water heaters: For an electric water heater, if your water heater plugs into the wall, simply unplug it. If it has a switch, control panel, or screen that has an “off” setting, you can turn it off there. A sure option is to flip the water heater breakers to “off” at the electrical panel. Most water heaters will take up two spaces on the list because they utilize two breakers (the breakers are usually connected by one switch). See Figures 1, 2, 3, and 4.
Source
Source
Source
Gas water heaters: For gas water heaters, consult the user’s manual and follow the manufacturer’s instructions. The manual may recommend shutting off the water heater’s gas valve, or it may recommend setting the valve to a different setting such as “pilot”.
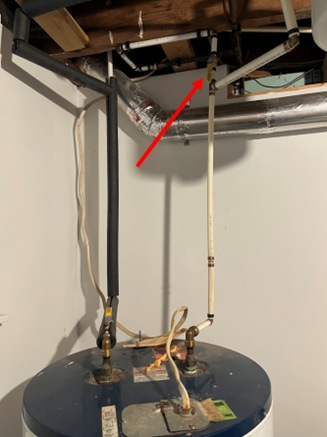
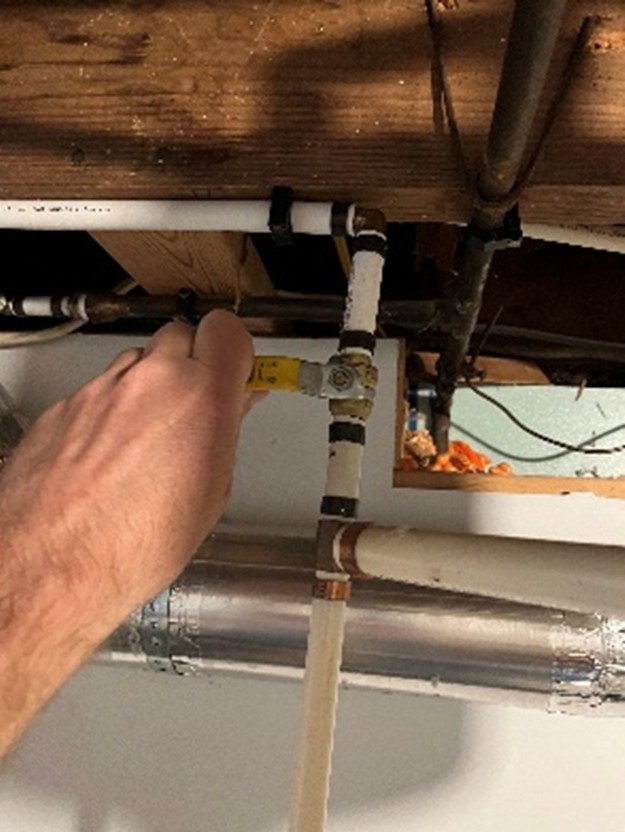
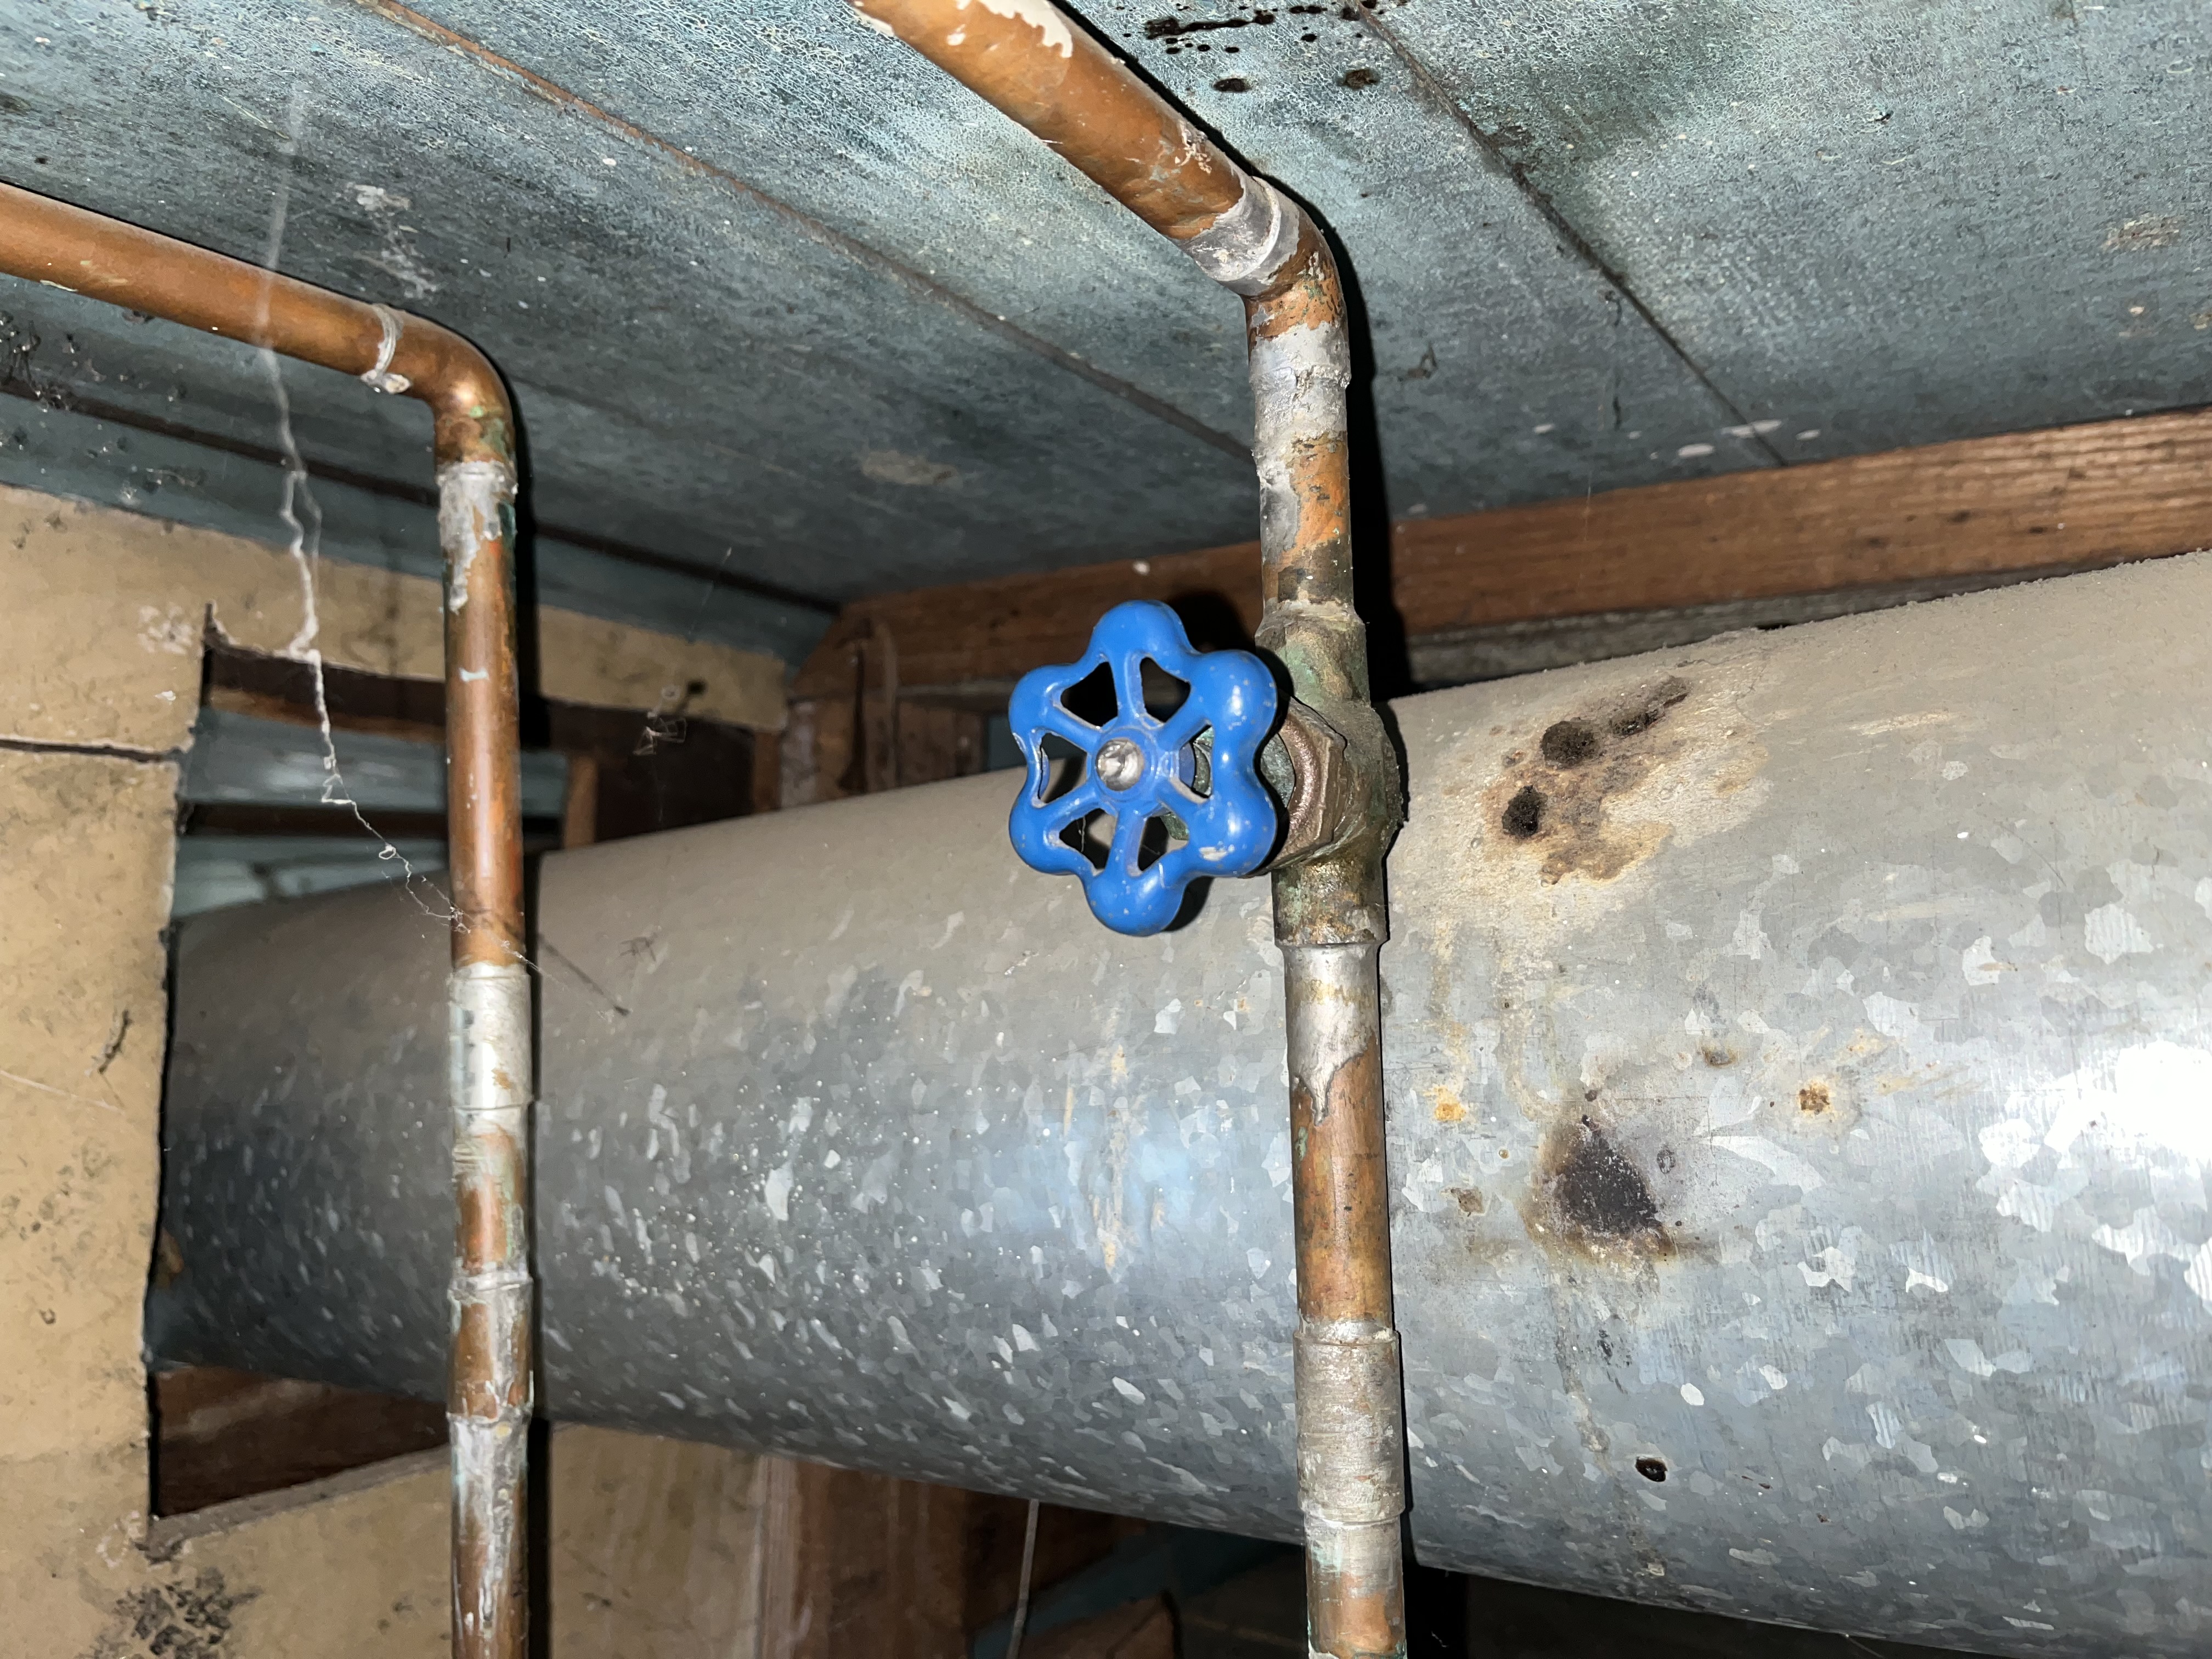
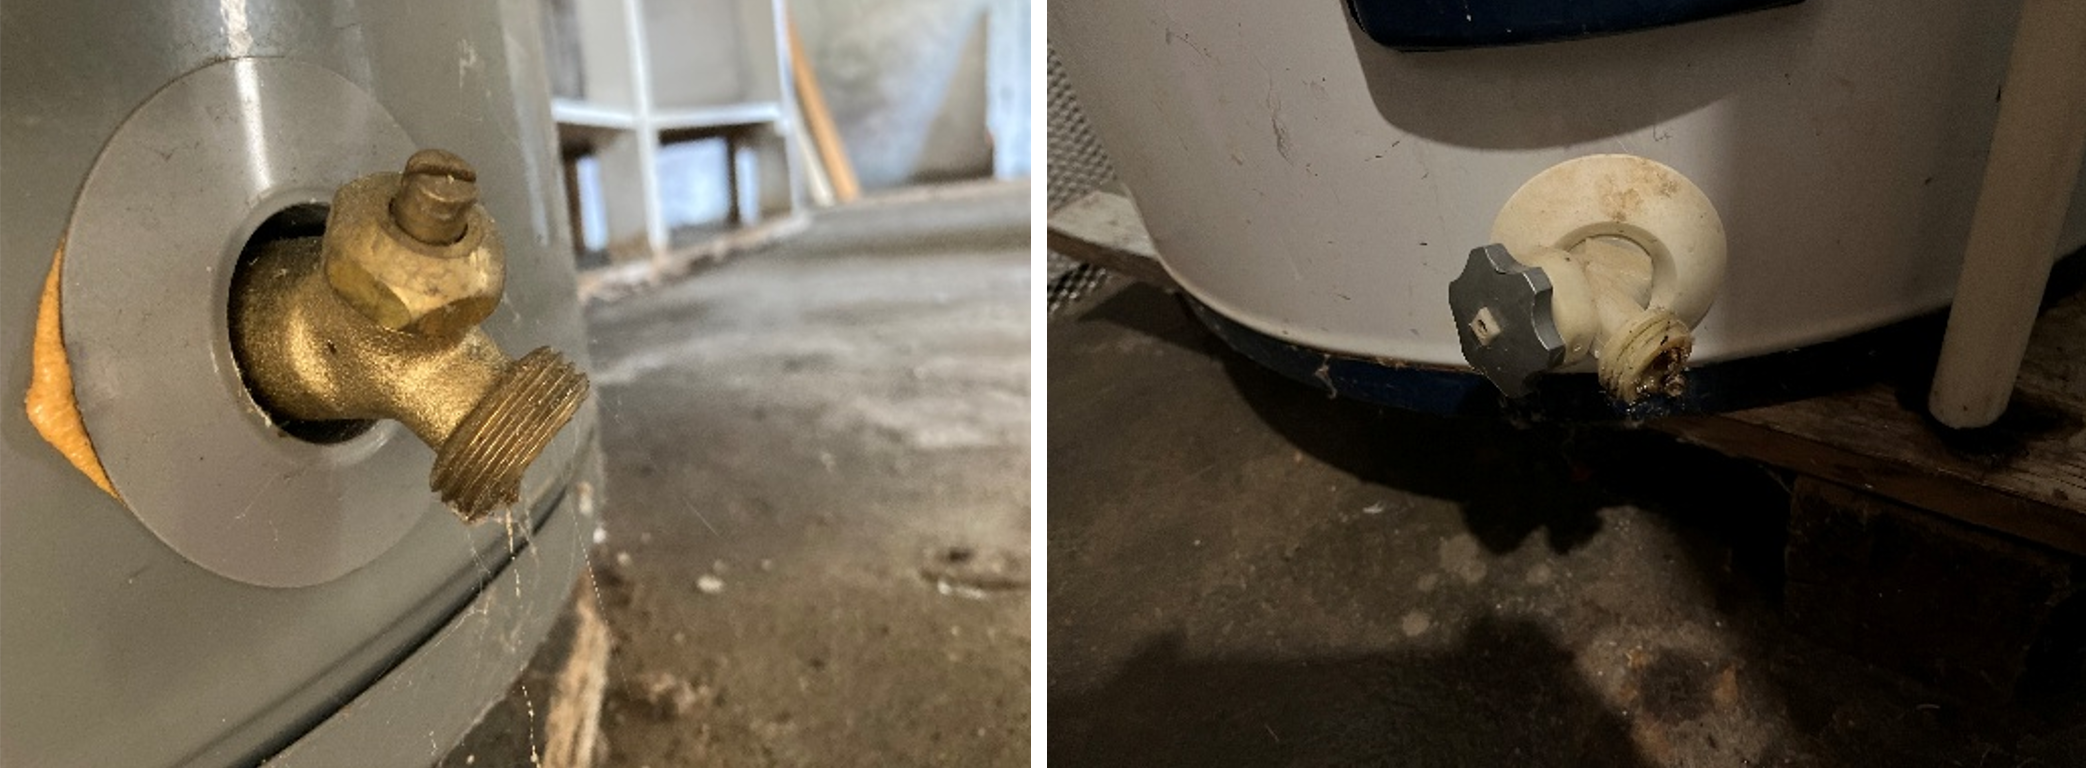
3. Close the water heater inlet valve.
Your water heater has an inlet pipe (cold water entering the water heater) and an outlet pipe (hot water leaving the water heater). Determine which pipe is which and close the valve on the cold-water inlet pipe (Figures 5, 6, 7, and 8).
There are several ways to determine which pipe is which. Two reliable methods are:
- Look for labeling on the water heater at the pipe connections.
- Run a hot water fixture for 30 seconds or more and feel both pipes. The cold water inlet pipe will be cold, the other hot.
Other indicators to notice, if one of the pipes is insulated, that will be the hot water line (Figure 5). The valve for the cold water line may be located up higher on the pipe than the valve for the hot water line. If there is an expansion tank, the cold water line will have a short pipe that feeds it doesn’t go to any fixtures in the house. It is common for the cold-water inlet shut-off valve to be located upstream of the expansion tank (Figure 7).
If there is no valve on the cold-water inlet pipe, turn off the water supply to the entire house.
Source
Source
Source
Source
4. Turn on a hot water fixture.
Identify a fixture that can be turned on in a hot water-only position, like in Figure 9 (ideally one that is higher than the water heater). If the water has been shut off, them when the fixture is turned on, it should only run for a short while before water stops flowing. When you start to drain the water heater, air will be pulled in through this fixture to replace the water that drains from the tank. You will likely be able to hear the air being pulled through the fixture.
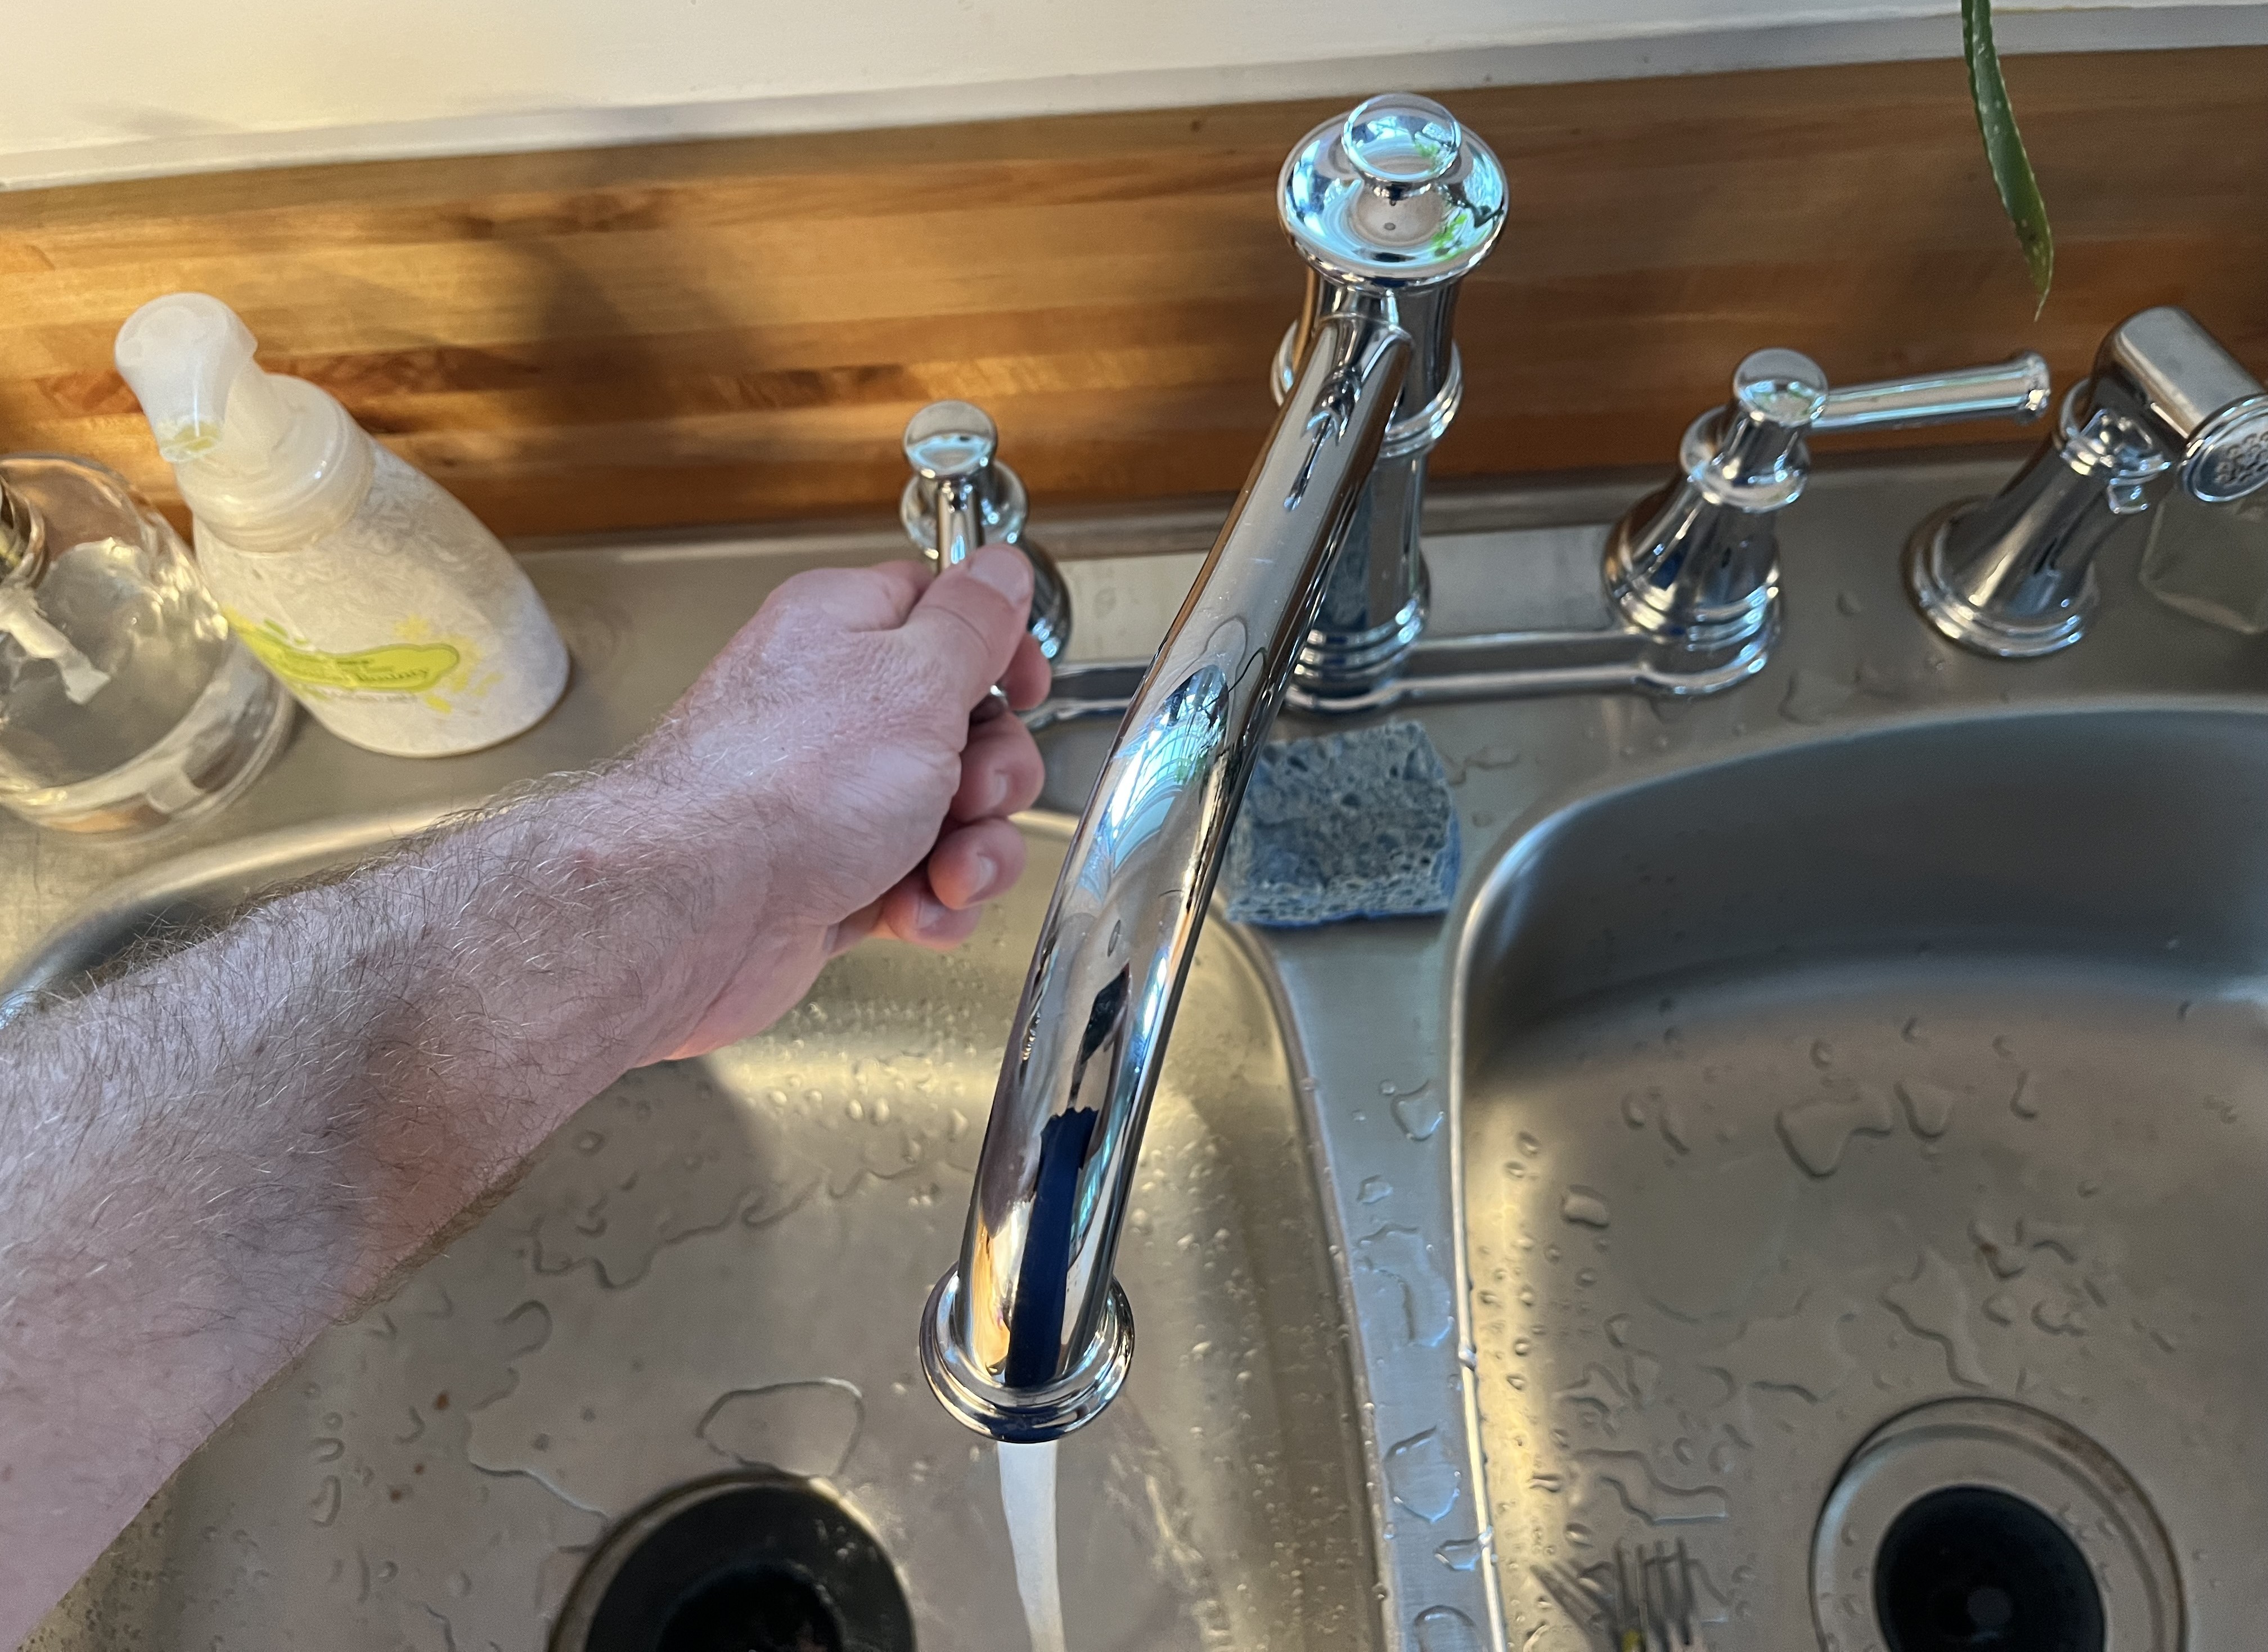
Source
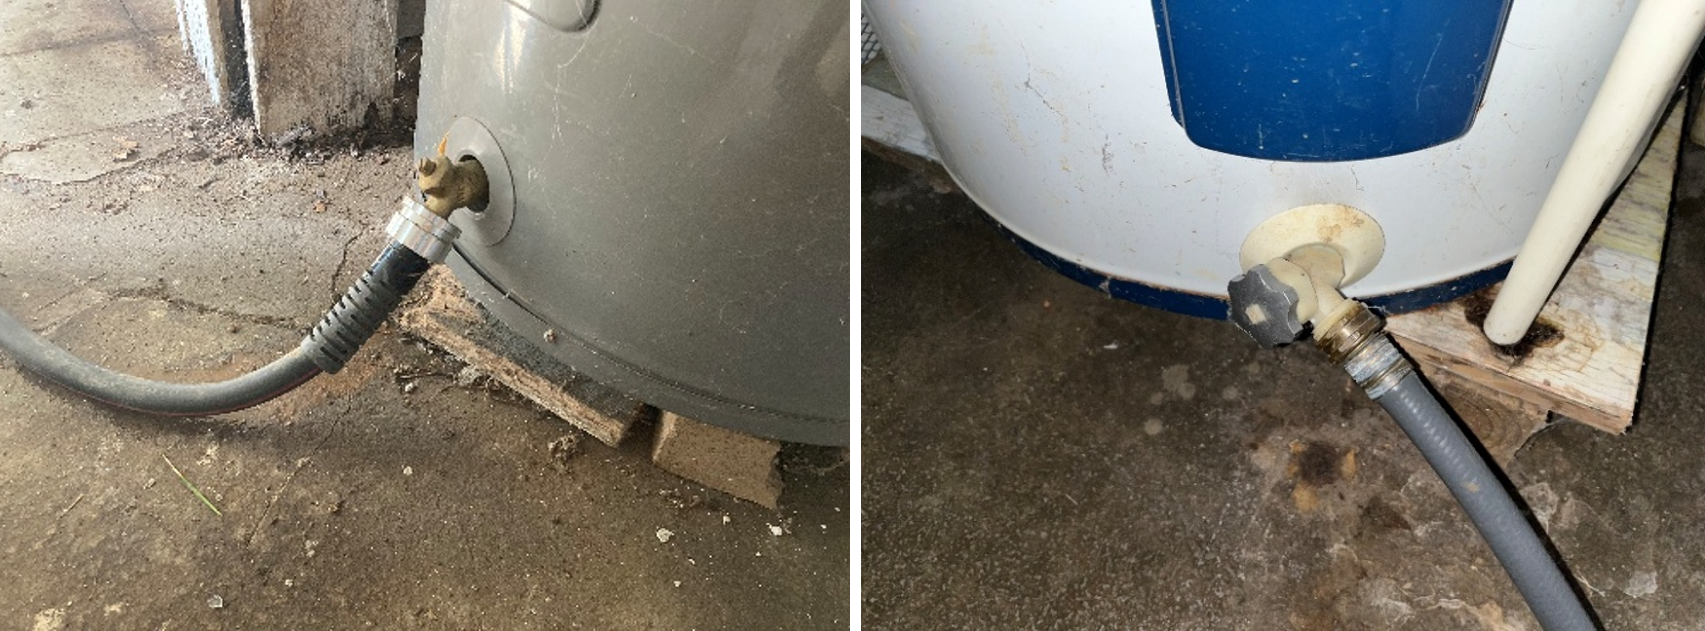
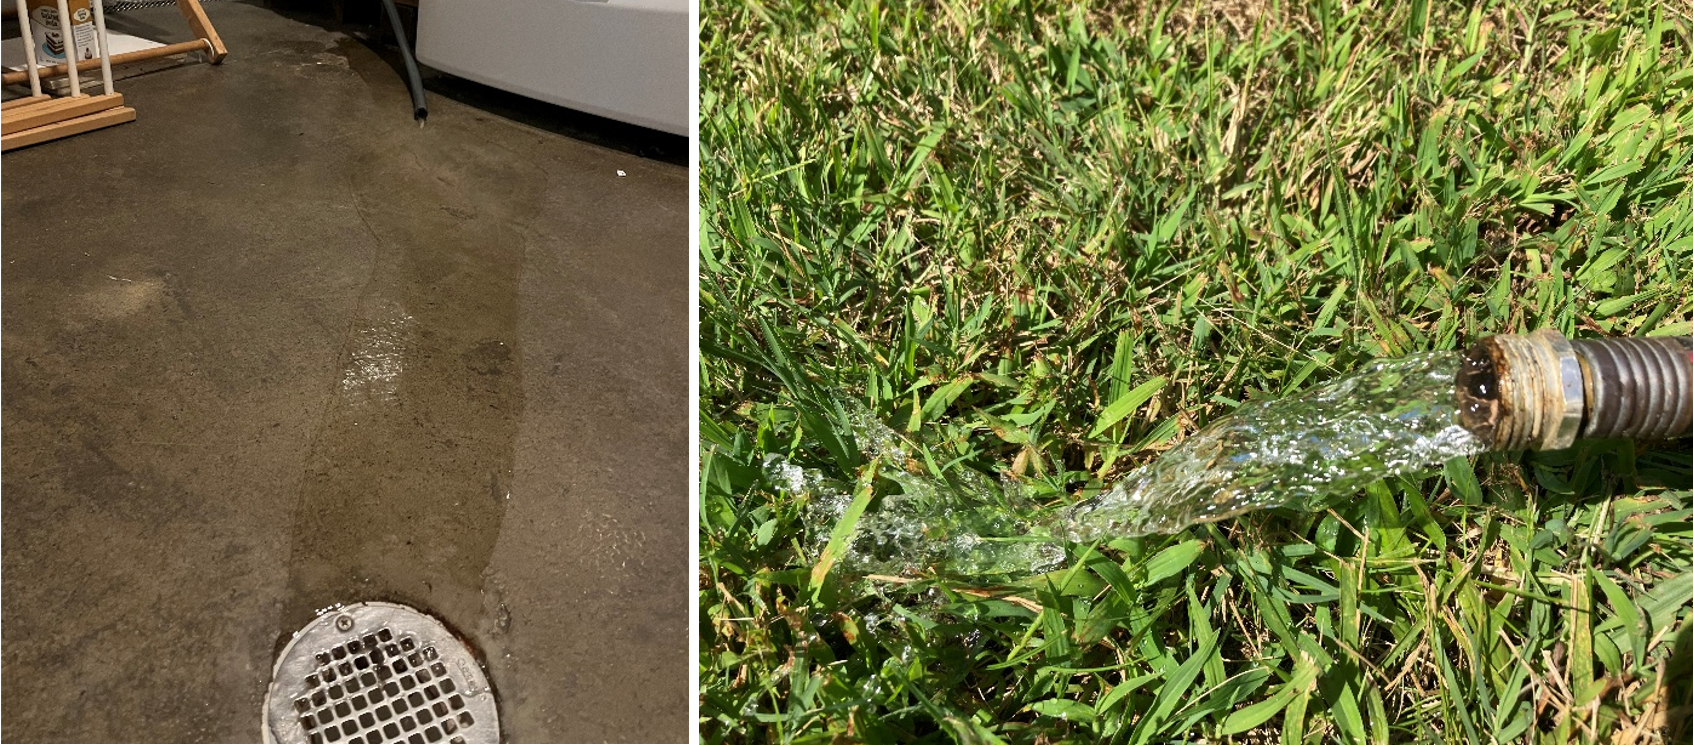
5. Attach a hose to the water heater drain valve.
Water
heaters typically have a drain valve located near the bottom of the tank (Figure 10). The valve usually has a standard threaded hose spigot where a garden hose can be attached (Figure 11). Attach a hose and run it outside or to a drain that is lower than the water heater that can handle water with sediment, like a floor drain. Whether outside or inside, the hose must discharge to a location that is lower than the bottom of the tank.
Source
Source
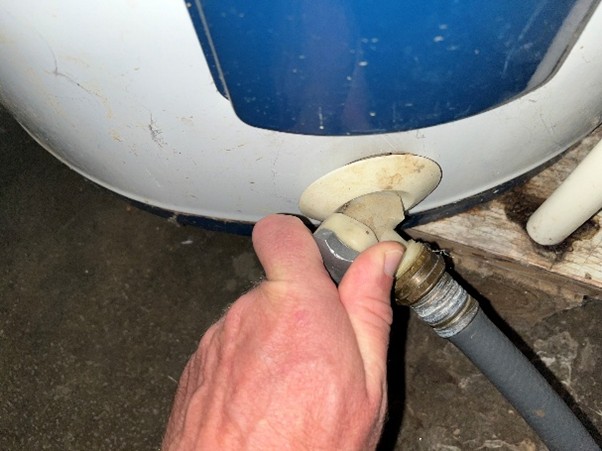
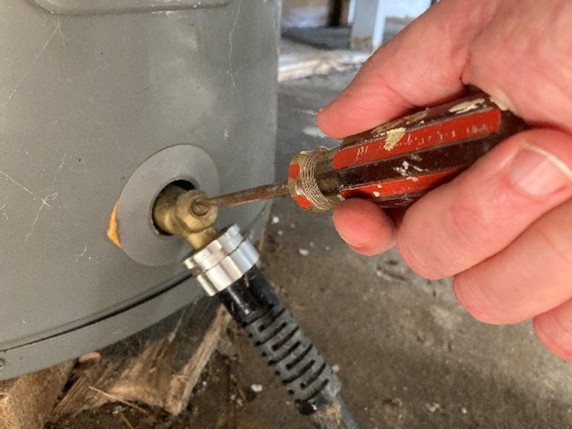
6. Open the drain valve.
Some valves operate by hand (Figure 12), others require a screwdriver (Figure 13). In either case, turning in the counterclockwise direction will open the valve (“lefty loosie”). Open the drain valve to allow water to flow out of the tank (Figure 14). Remember that the water coming out of the tank will be hot.
Source
Source
7. Open the water heater inlet valve to stir up sediment.
After the tank has been draining for 20 minutes or more (or has stopped draining), slowly open the cold-water inlet valve for about 10 seconds to stir up any sediment remaining in the tank. This can be done periodically throughout the draining process.
8. Once drained, close or turn off the hot water fixture(s).
To reduce the chance of cloudy water getting into your pipes and to increase the pressure of the water going through the drain valve, close or turn off the hot water fixtures before flushing the tank.
9. Flush the tank.
With the drain valve still open, slowly open the cold-water inlet valve and continue to drain the tank until the water runs clear. Any clogging can often be loosened simply by operating the drain valve open and closed a few times.
10. Perform a final flush and drain.
With the cold-water inlet and drain valve still open, turn on the hot water fixture. After a few minutes, turn off the cold-water inlet and allow the tank to drain completely.
11. Open water heater inlet valve.
With the drain valve still open and hot water fixture still on, slowly open the cold-water inlet valve again. The drain valve is open to allow any remaining sediment that is stirred up by the final opening of the water inlet valve to escape.
12. Close drain valve and allow the tank to fill up.
Close the drain valve after a minute or so to allow the tank to fill up. The hot water fixture will sputter as air from the tank is now being pushed out through the fixture.
13. Once flow through the hot water fixture is smooth, turn off the hot water fixture.
After a while, water will begin to come out of the hot water fixture. Once the flow is smooth, the tank should be full and you can turn off the fixture. Note, the water coming out of the hot water fixture will be cold at this time.
14. Turn on electricity or gas.
With the tank full, you may turn the water heater back on. If you have a gas water heater, be sure to follow the manufacturer’s instructions to avoid accidentally turning off the pilot light, which could allow gas to leak into your home.
15. Disconnect the drain hose.
Keep the discharge end of the hose pointed to the floor drain or outside. Unscrew the tank end of the hose from the tank and raise it up to drain any residual water out of the hose to the drain or outside. You may want to have some rags or an old towel nearby to catch drips as you unscrew the hose from the tank.
16. Wait for several hours before doing laundry.
The water in the water heater tank may still be cloudy. It is best to avoid doing the laundry for several hours. Note that it may also take several hours for the water in the tank to heat up.