Materials Cost: 1
Difficulty Level: 1

Introduction

Air sealing your bathroom exhaust fan can prevent attic air from leaking into the home and heated air from leaking into the attic, improving comfort and reducing energy bills. 

Why

Bathroom exhaust fans are critical for removing moisture from the home. Gaps around fan housings allows conditioned air and moisture to escape into building cavities and attics (Figure 1), increasing energy bills and potentially leading to mold issues over time. Air-sealing any gaps around the fan minimizes air and moisture leakage and improves the thermal efficiency of the house.
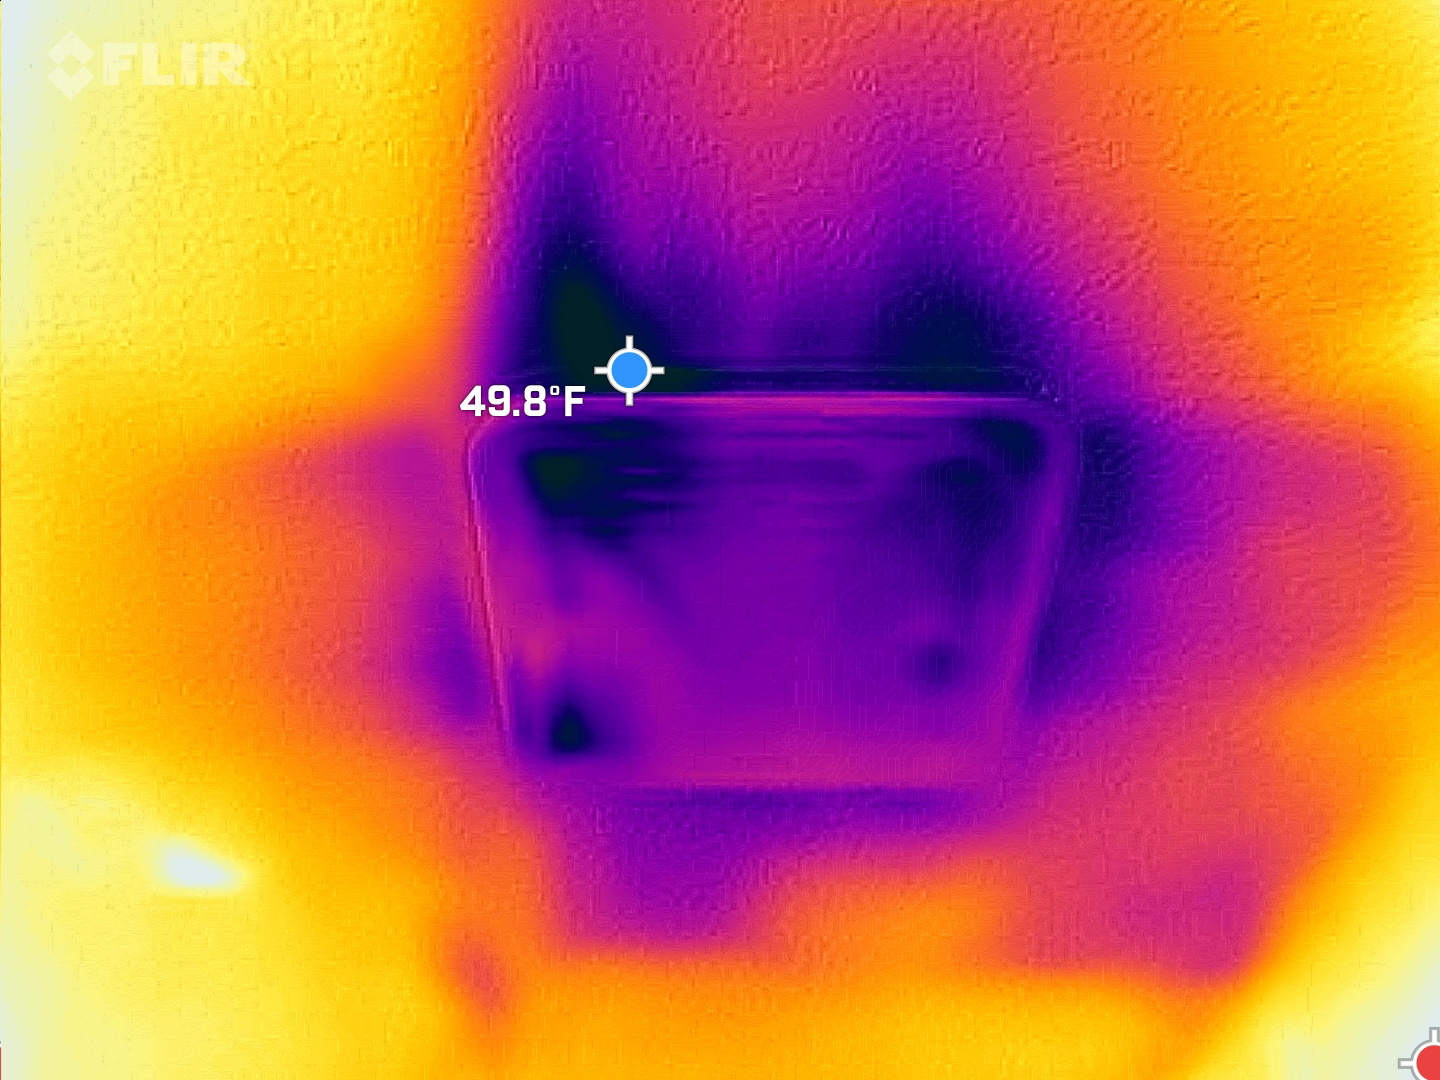
Figure 1. The dark spots and streaks on this infrared camera photo clearly show cold air leaking in through gaps around a bathroom exhaust fan (Source: PNNL).

What You'll Need

  • Step stool or ladder to reach the bath fan
  • Eye protection (optional) 
  • Headlamp or flashlight (optional)
  • Caulk or spray foam
  • Utility knife
  • UL 181b metal tape
  • Putty knife
  • Screwdriver

1. Get a step stool.

Get a ladder or step stool if needed to reach the bath fan (Figure 2). Place the step stool or ladder on an even surface on the floor. 
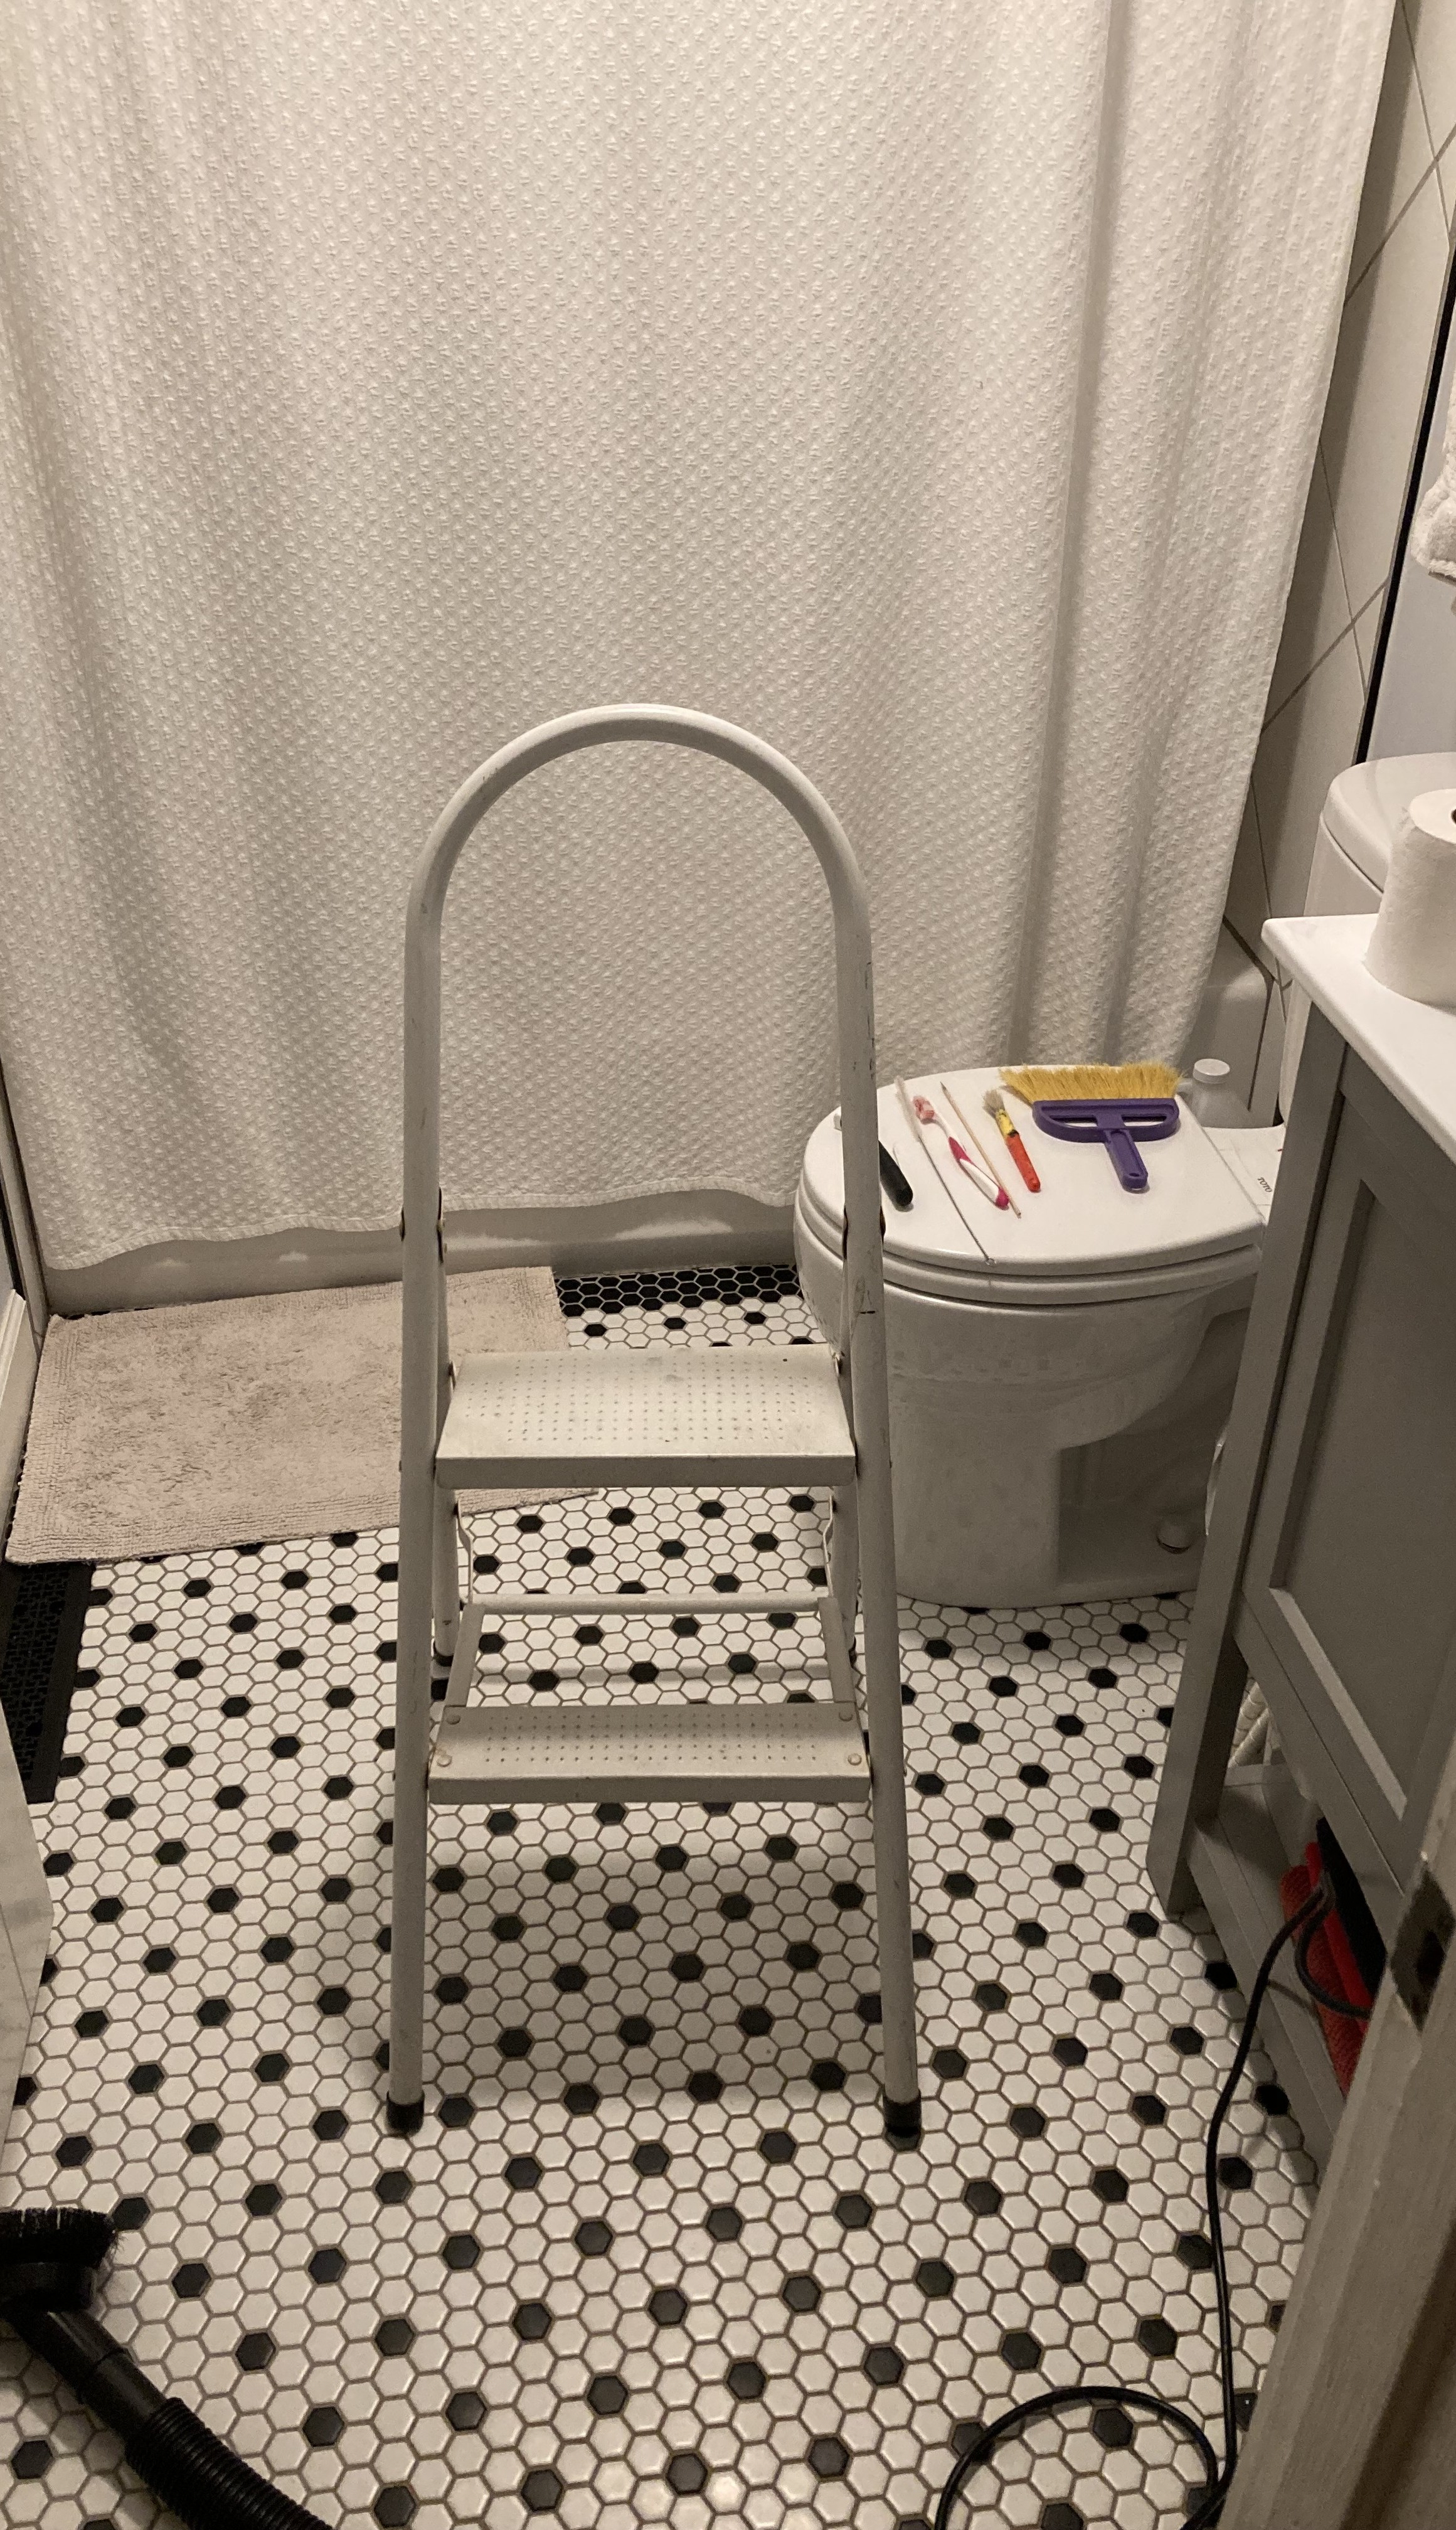
Figure 2. Use a step ladder to access the bathroom exhaust fan (Source: PNNL).

2. Turn off the power.

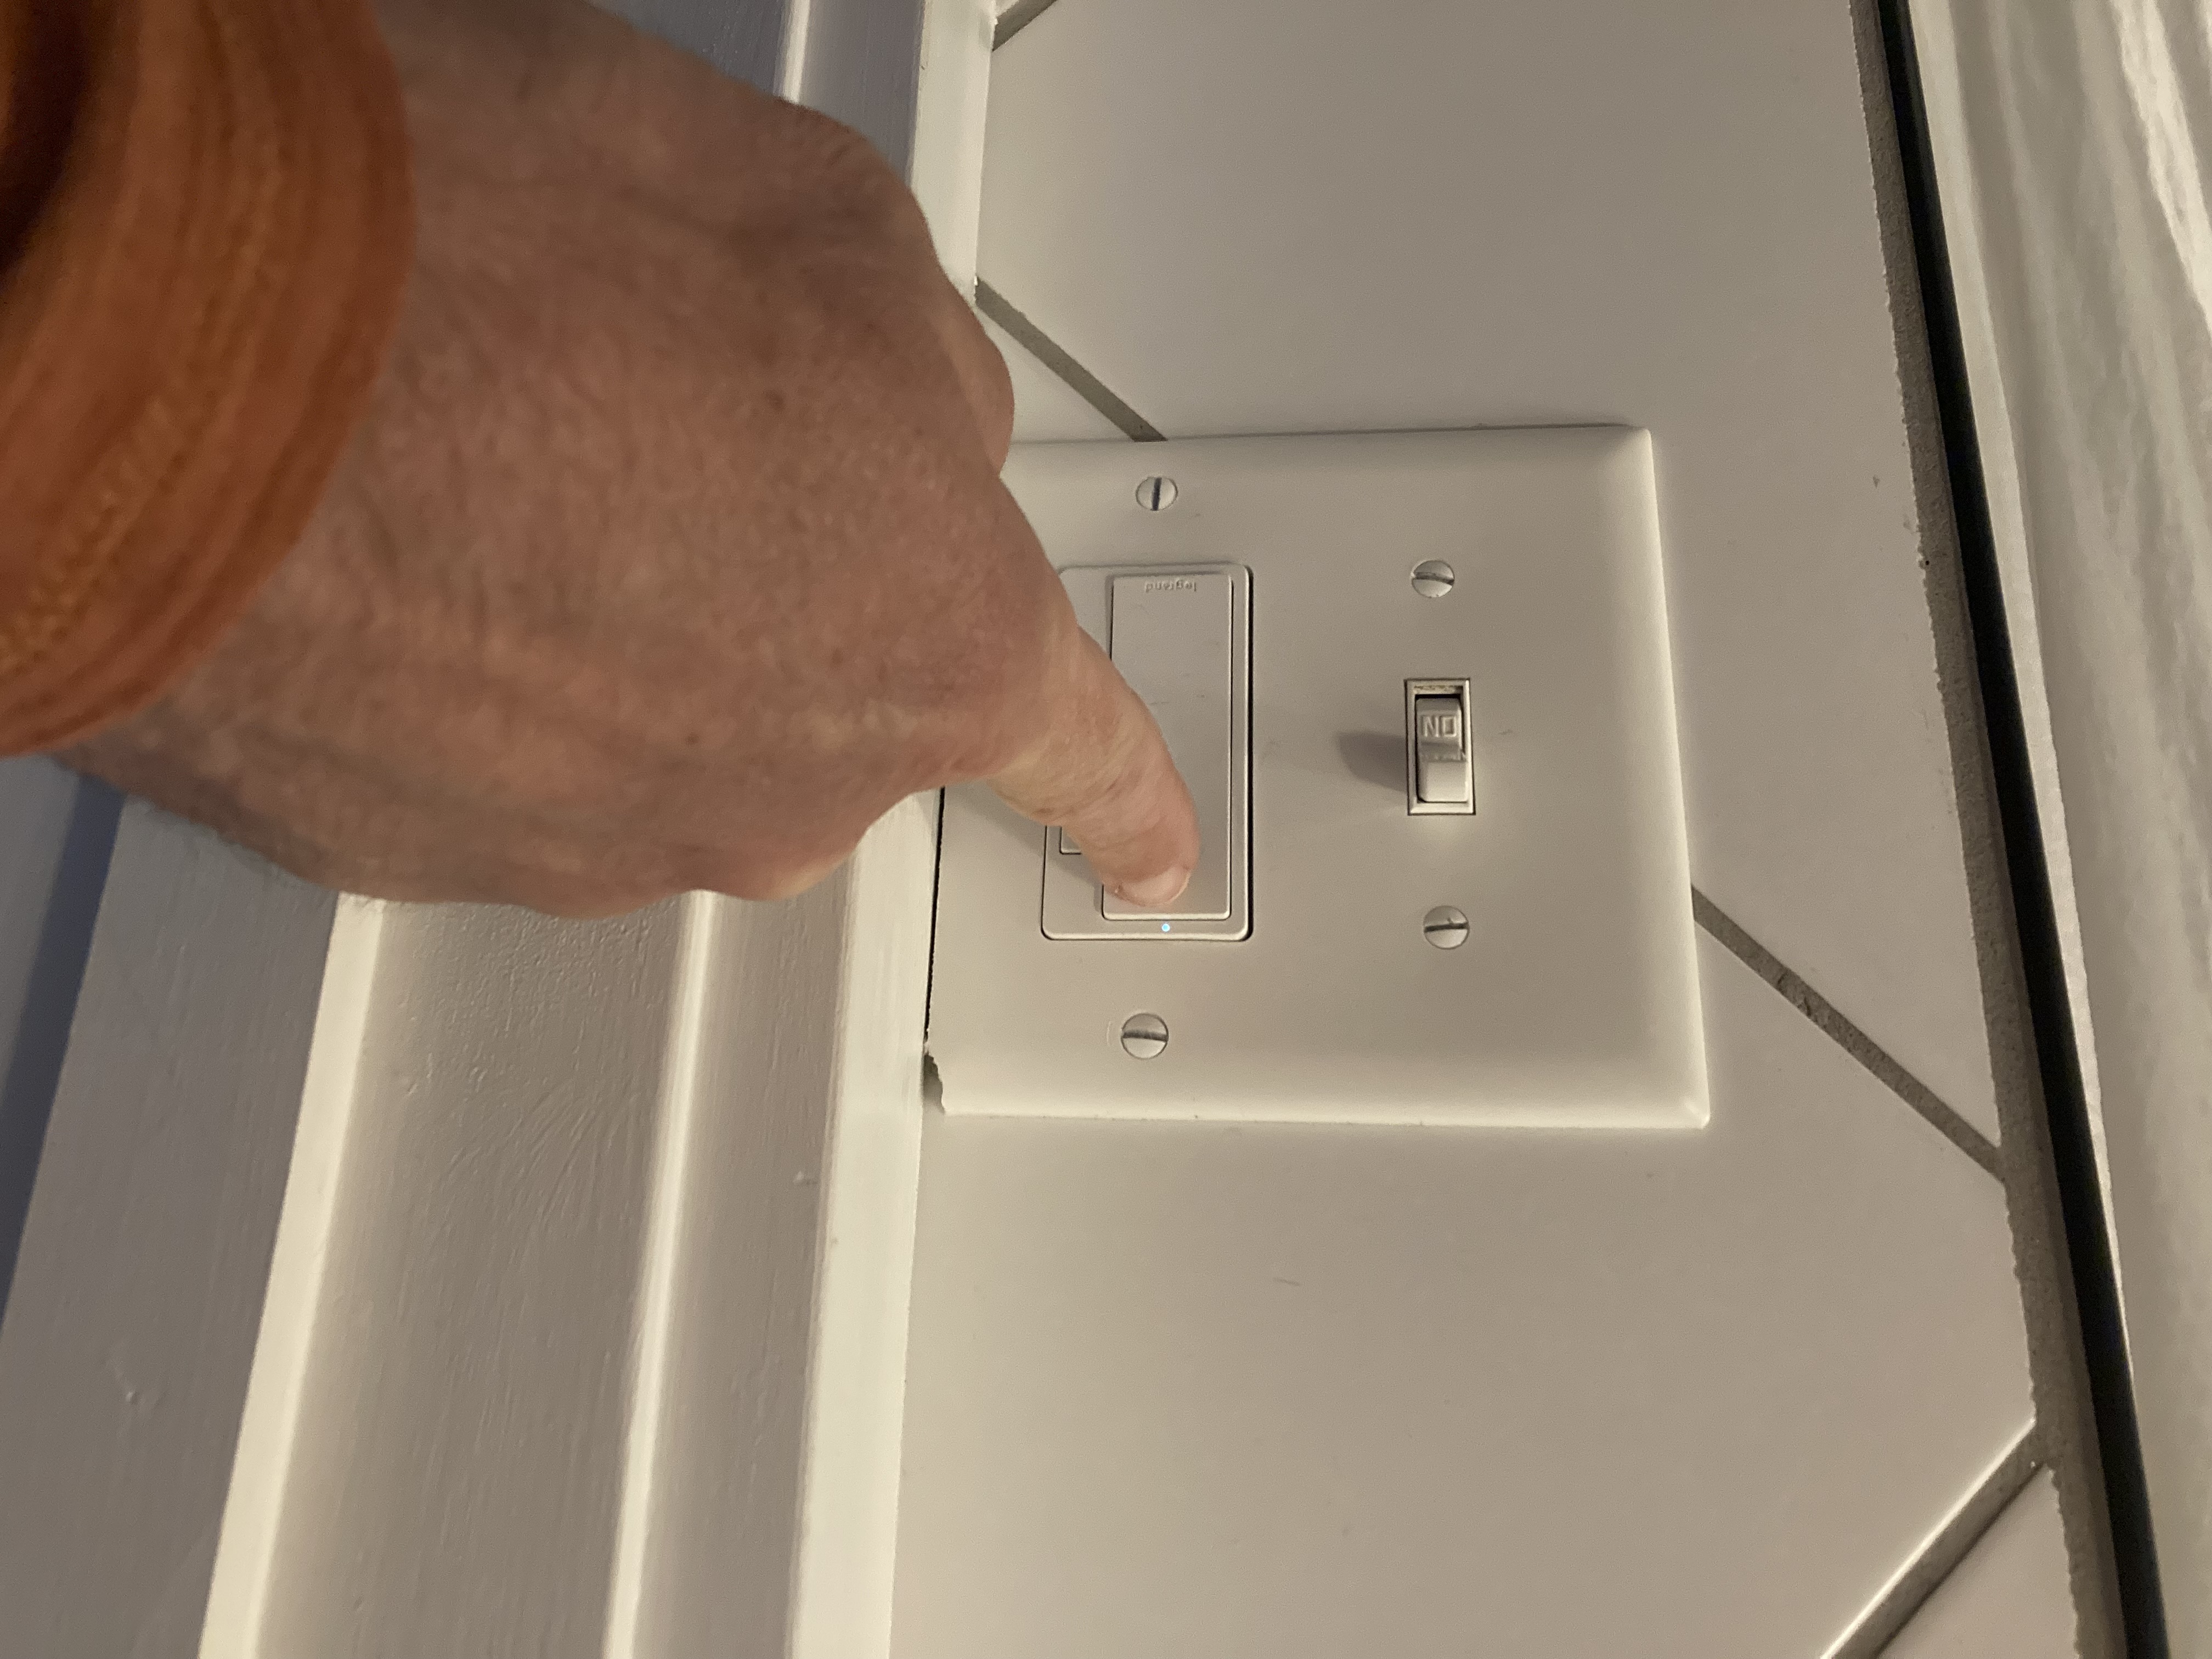
Turn off the exhaust fan at the switch. If your fan comes on automatically, turn off the fan at the breaker box. 


3. Remove the trim and fan cover.

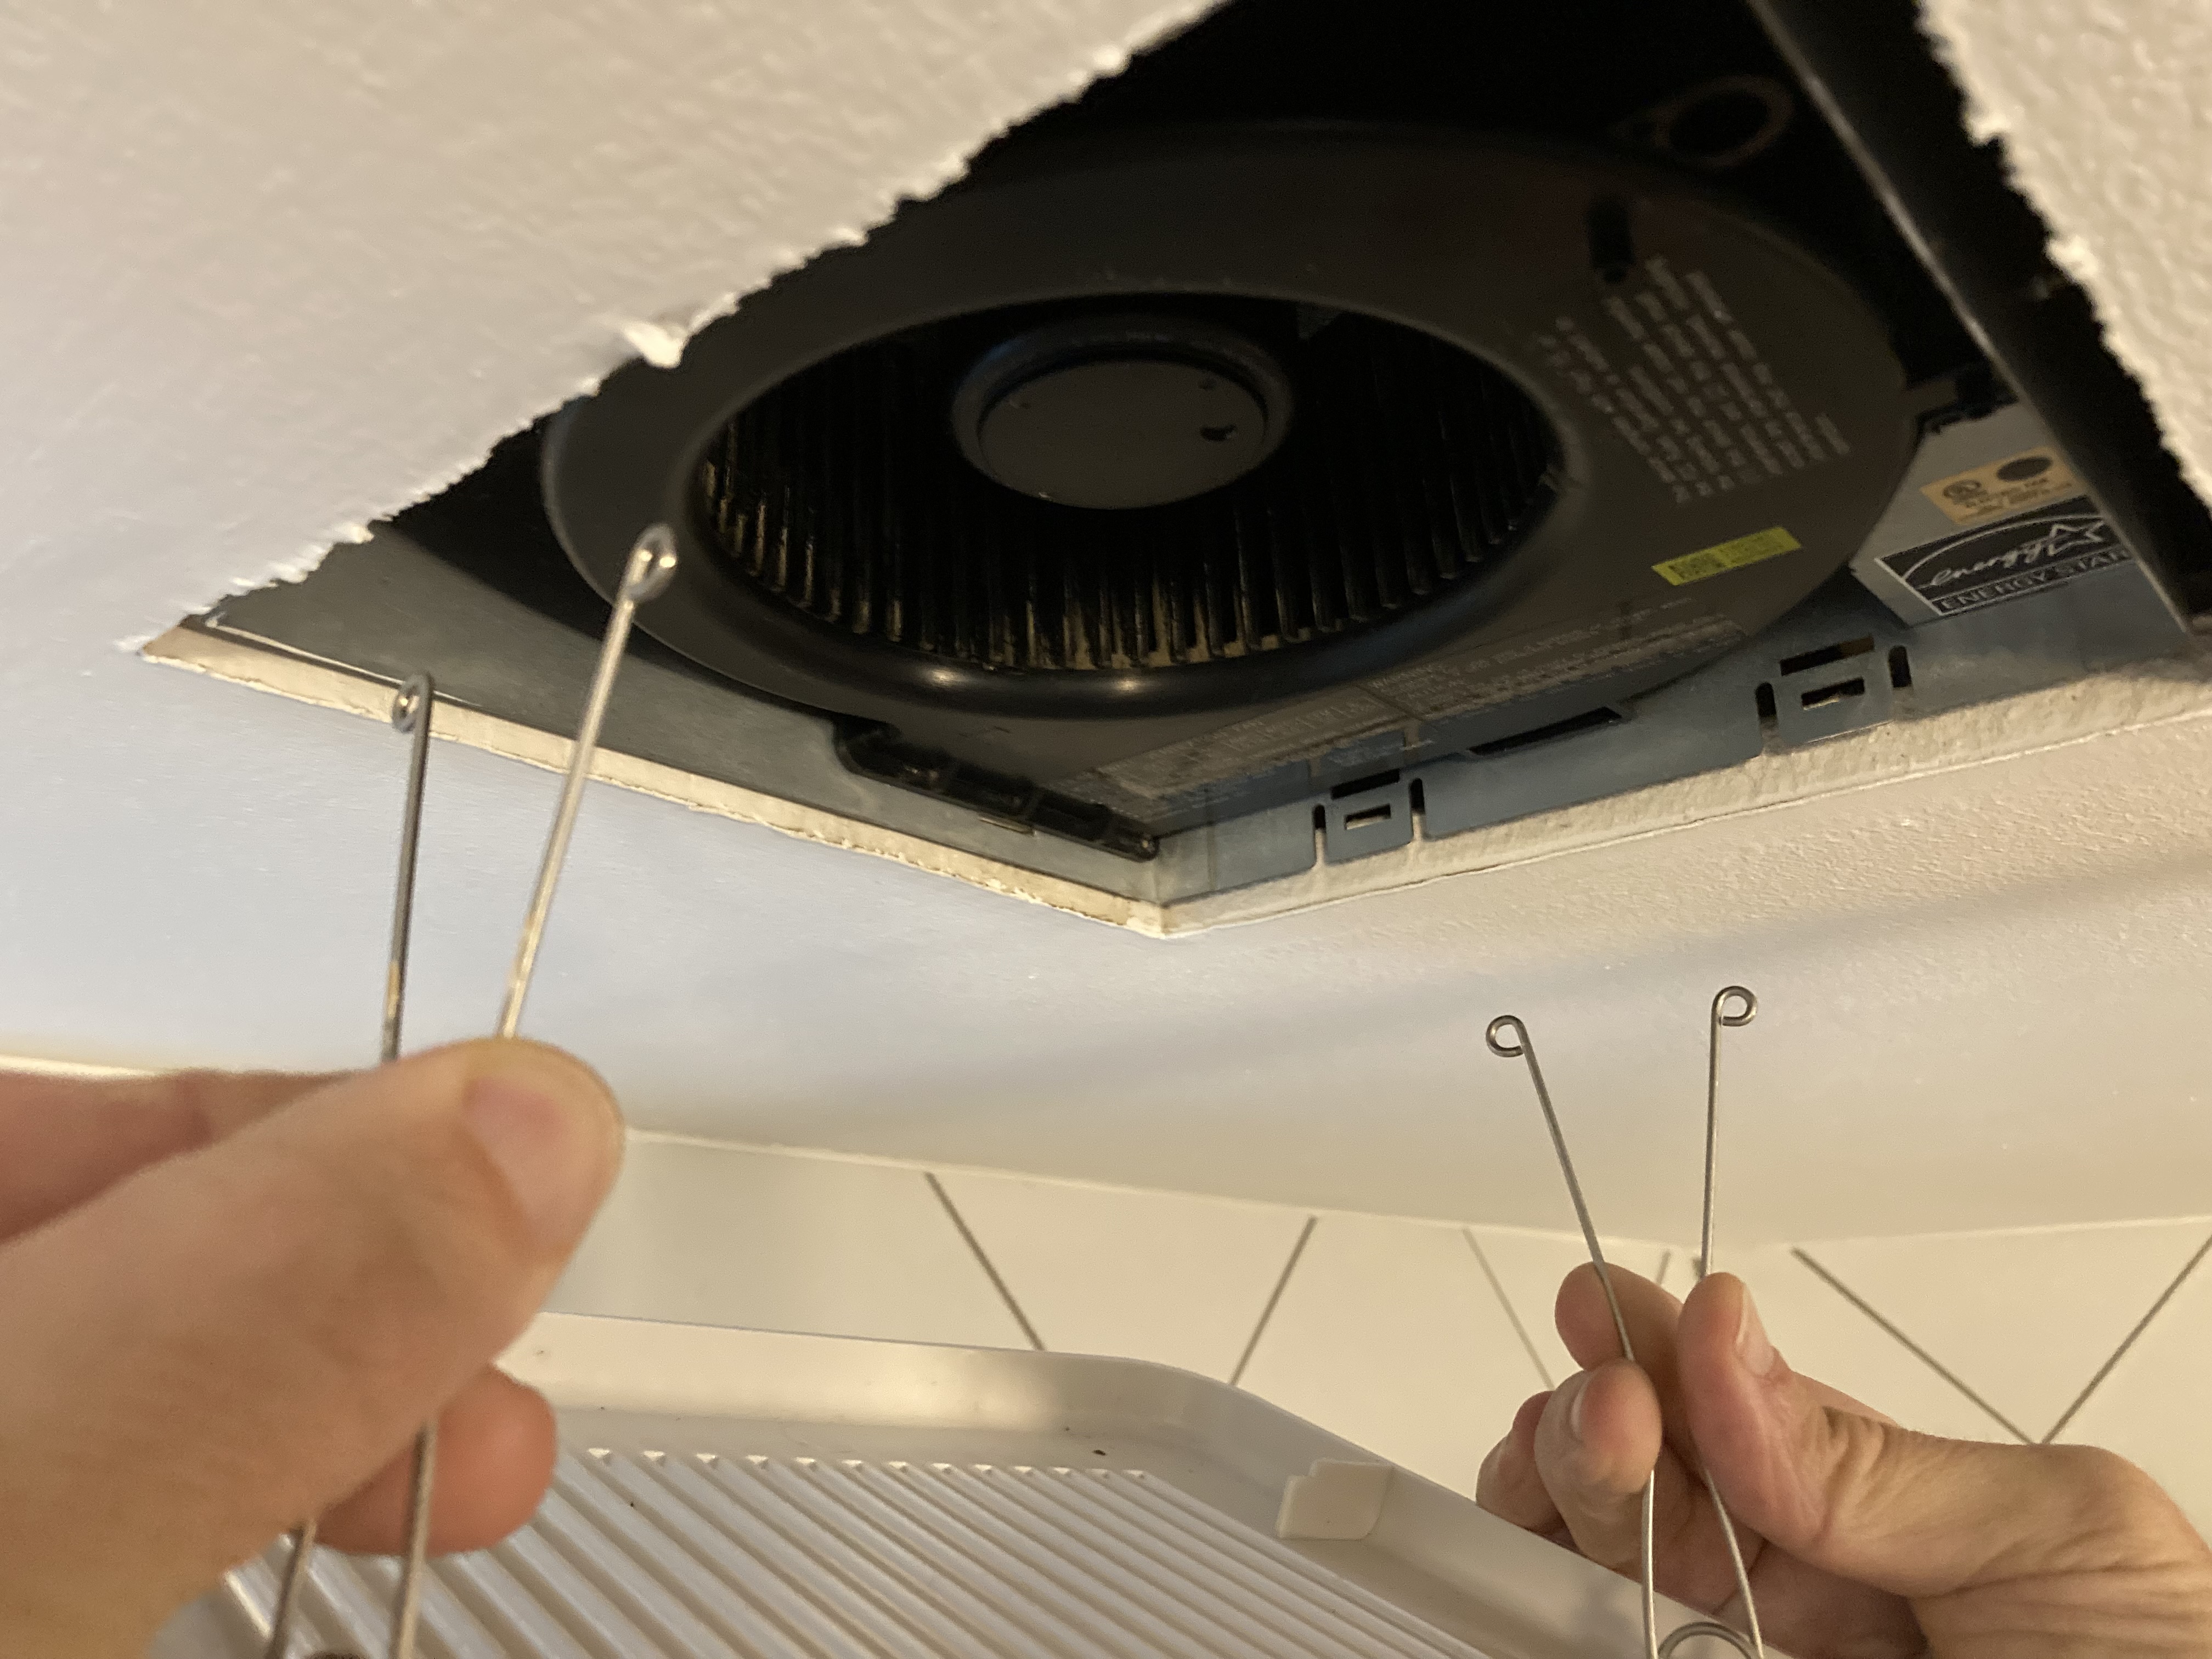
  1.  Open or remove the fan cover. You may want to wear eye protection to keep falling debris out of your eyes. Some bath fan vent covers are loosened by simply pulling the cover downward (Figures 3 and 4). If needed, reach up and squeeze together the metal mounting wires attached to the back side of the cover (Figure 5) while pulling down on the cover to slide the wires out of their slots and remove the cover from the housing. Some models use screws, levers, buttons, knobs, or nuts; disconnect these as necessary to remove the vent cover. 
  2. If the fan is dirty, this would be a good time to clean it as well. See the Building America Solution Center DIY guide Clean Bath Fan .
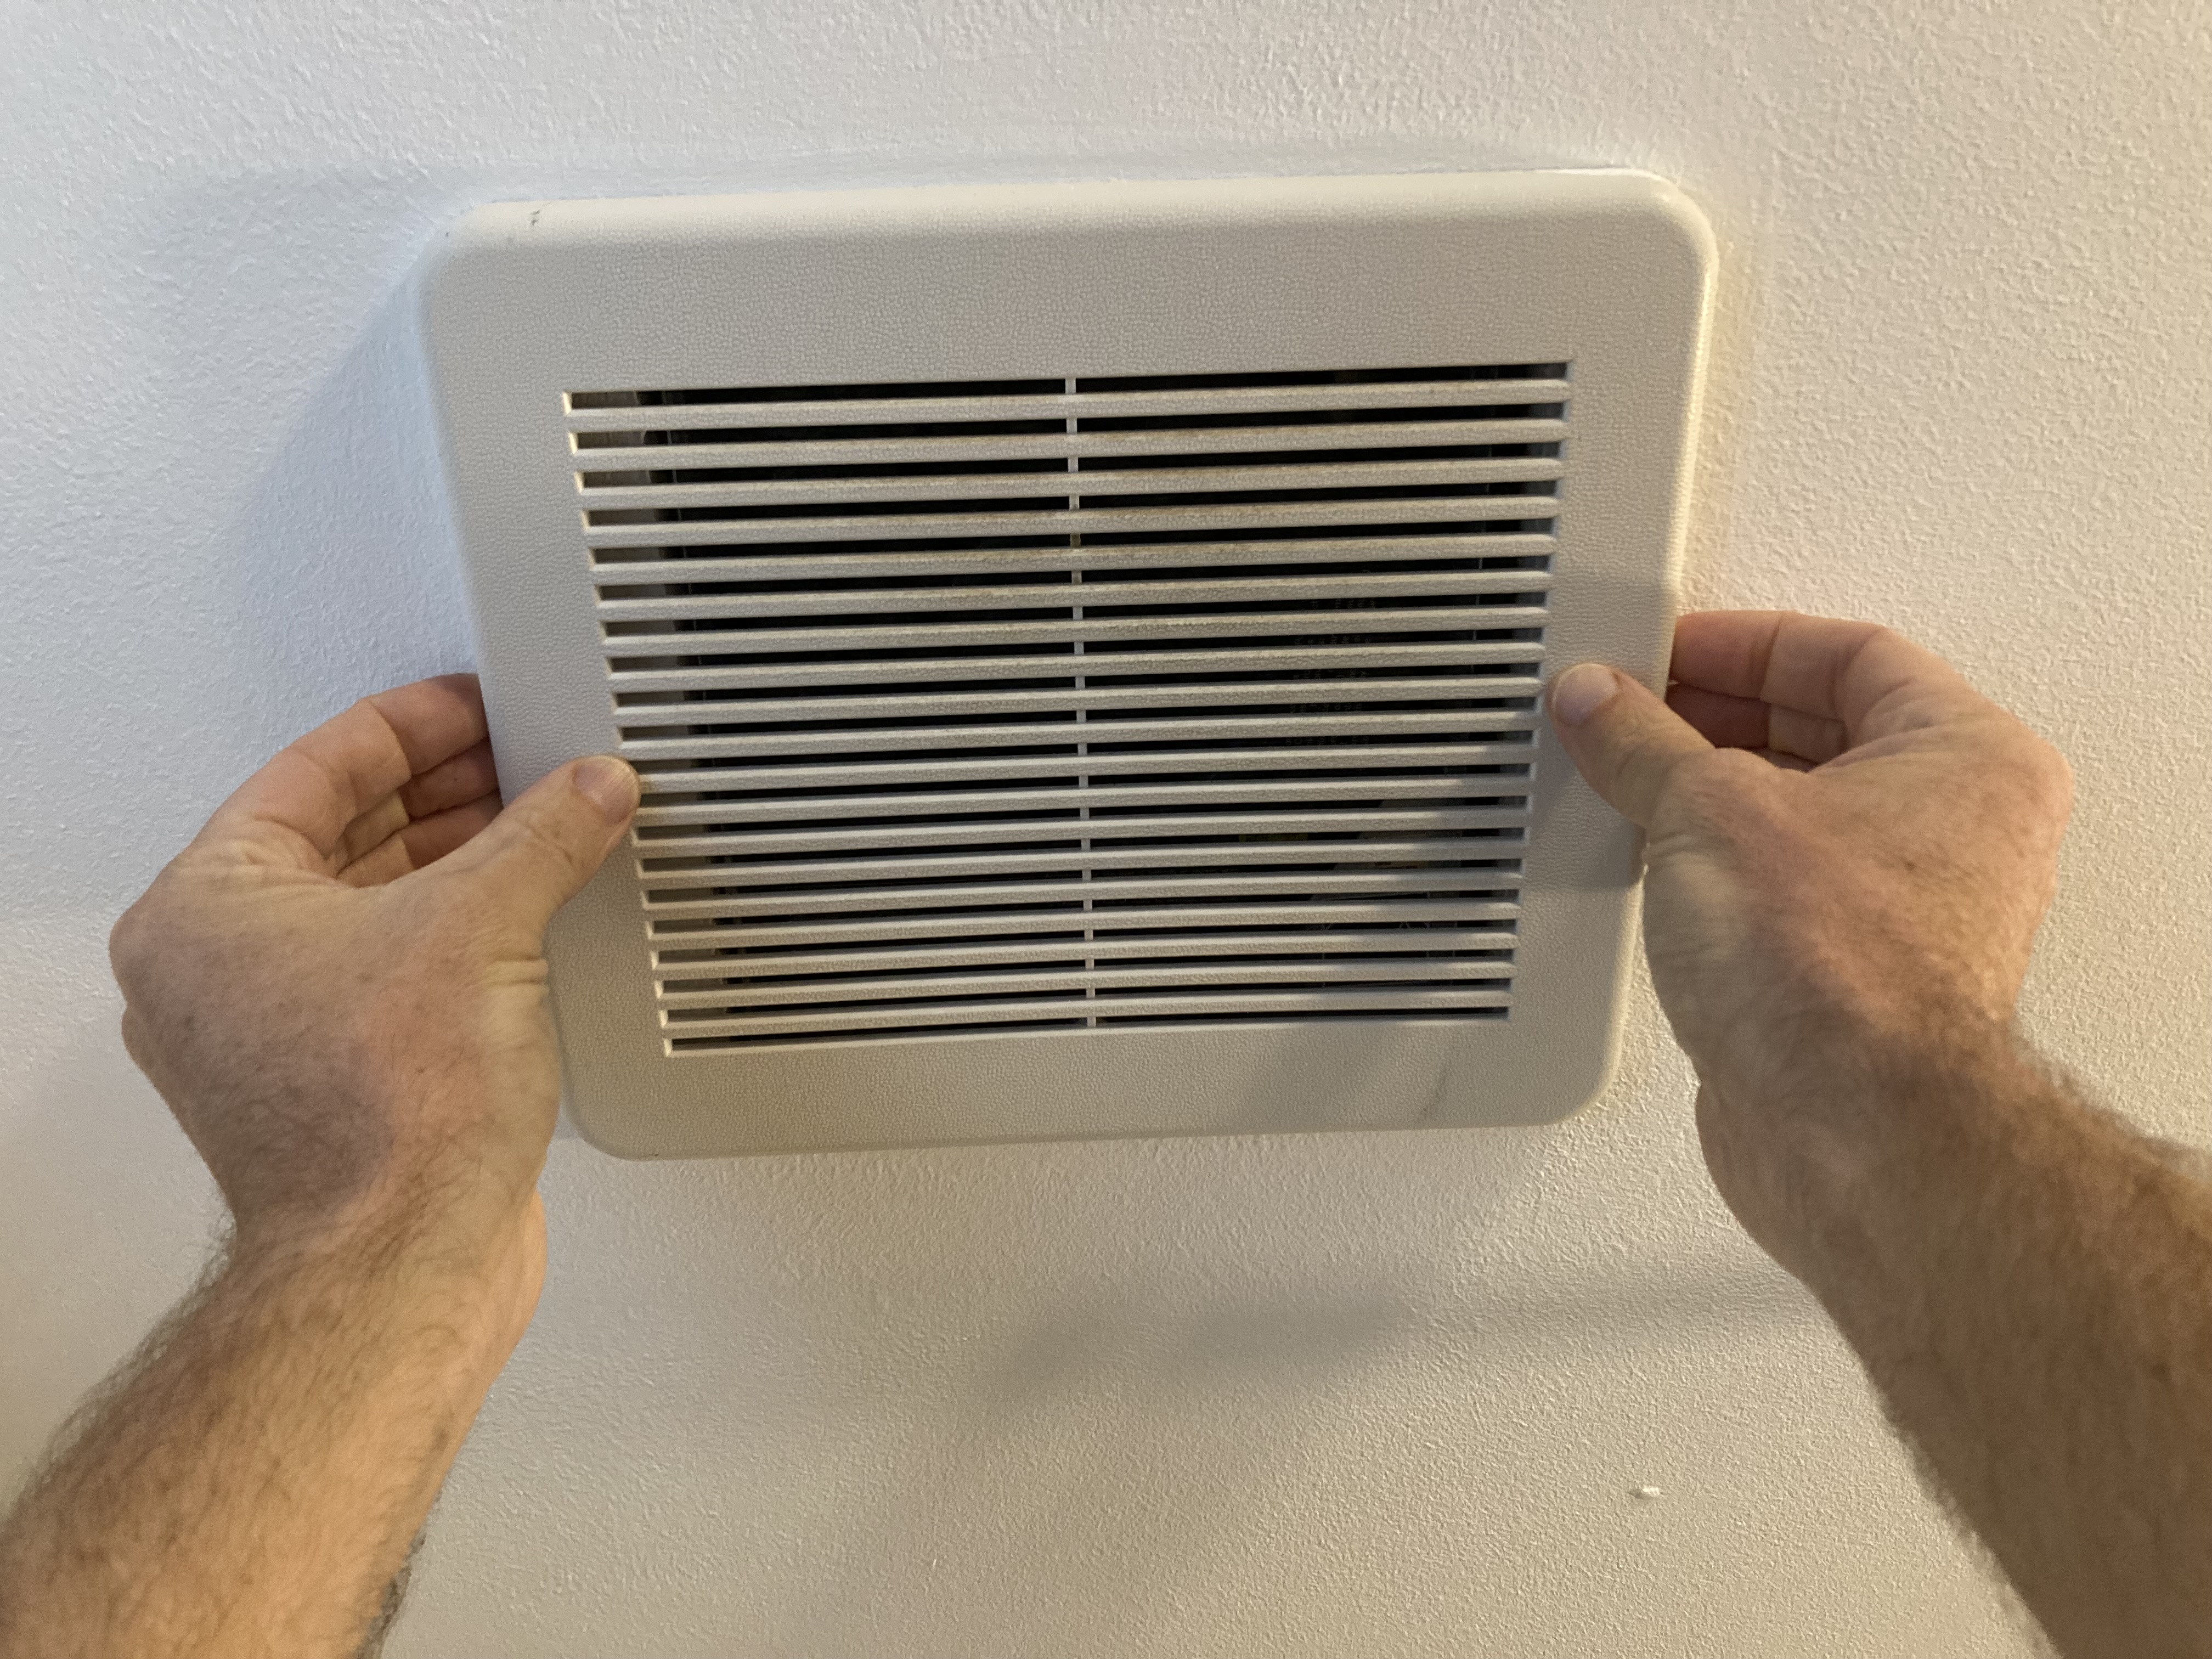
Figure 3. Pull the exhaust fan vent cover down gently to access the spring-loaded mounting wires (Source: PNNL).
Figure 4. The vented cover of this bathroom exhaust fan is held in place with spring-loaded mounting wires (Source: PNNL).
Figure 5. Pinch the spring-loaded mounting wires on either side of the fan to release them and remove the cover from the exhaust fan (Source: PNNL).

4. Remove Light to Access the Fan.

If the exhaust fan has a light, the light housing must be removed to access the fan itself. 

1. Unscrew or unclip the light fixture housing to remove it (Figures 6 and 7).
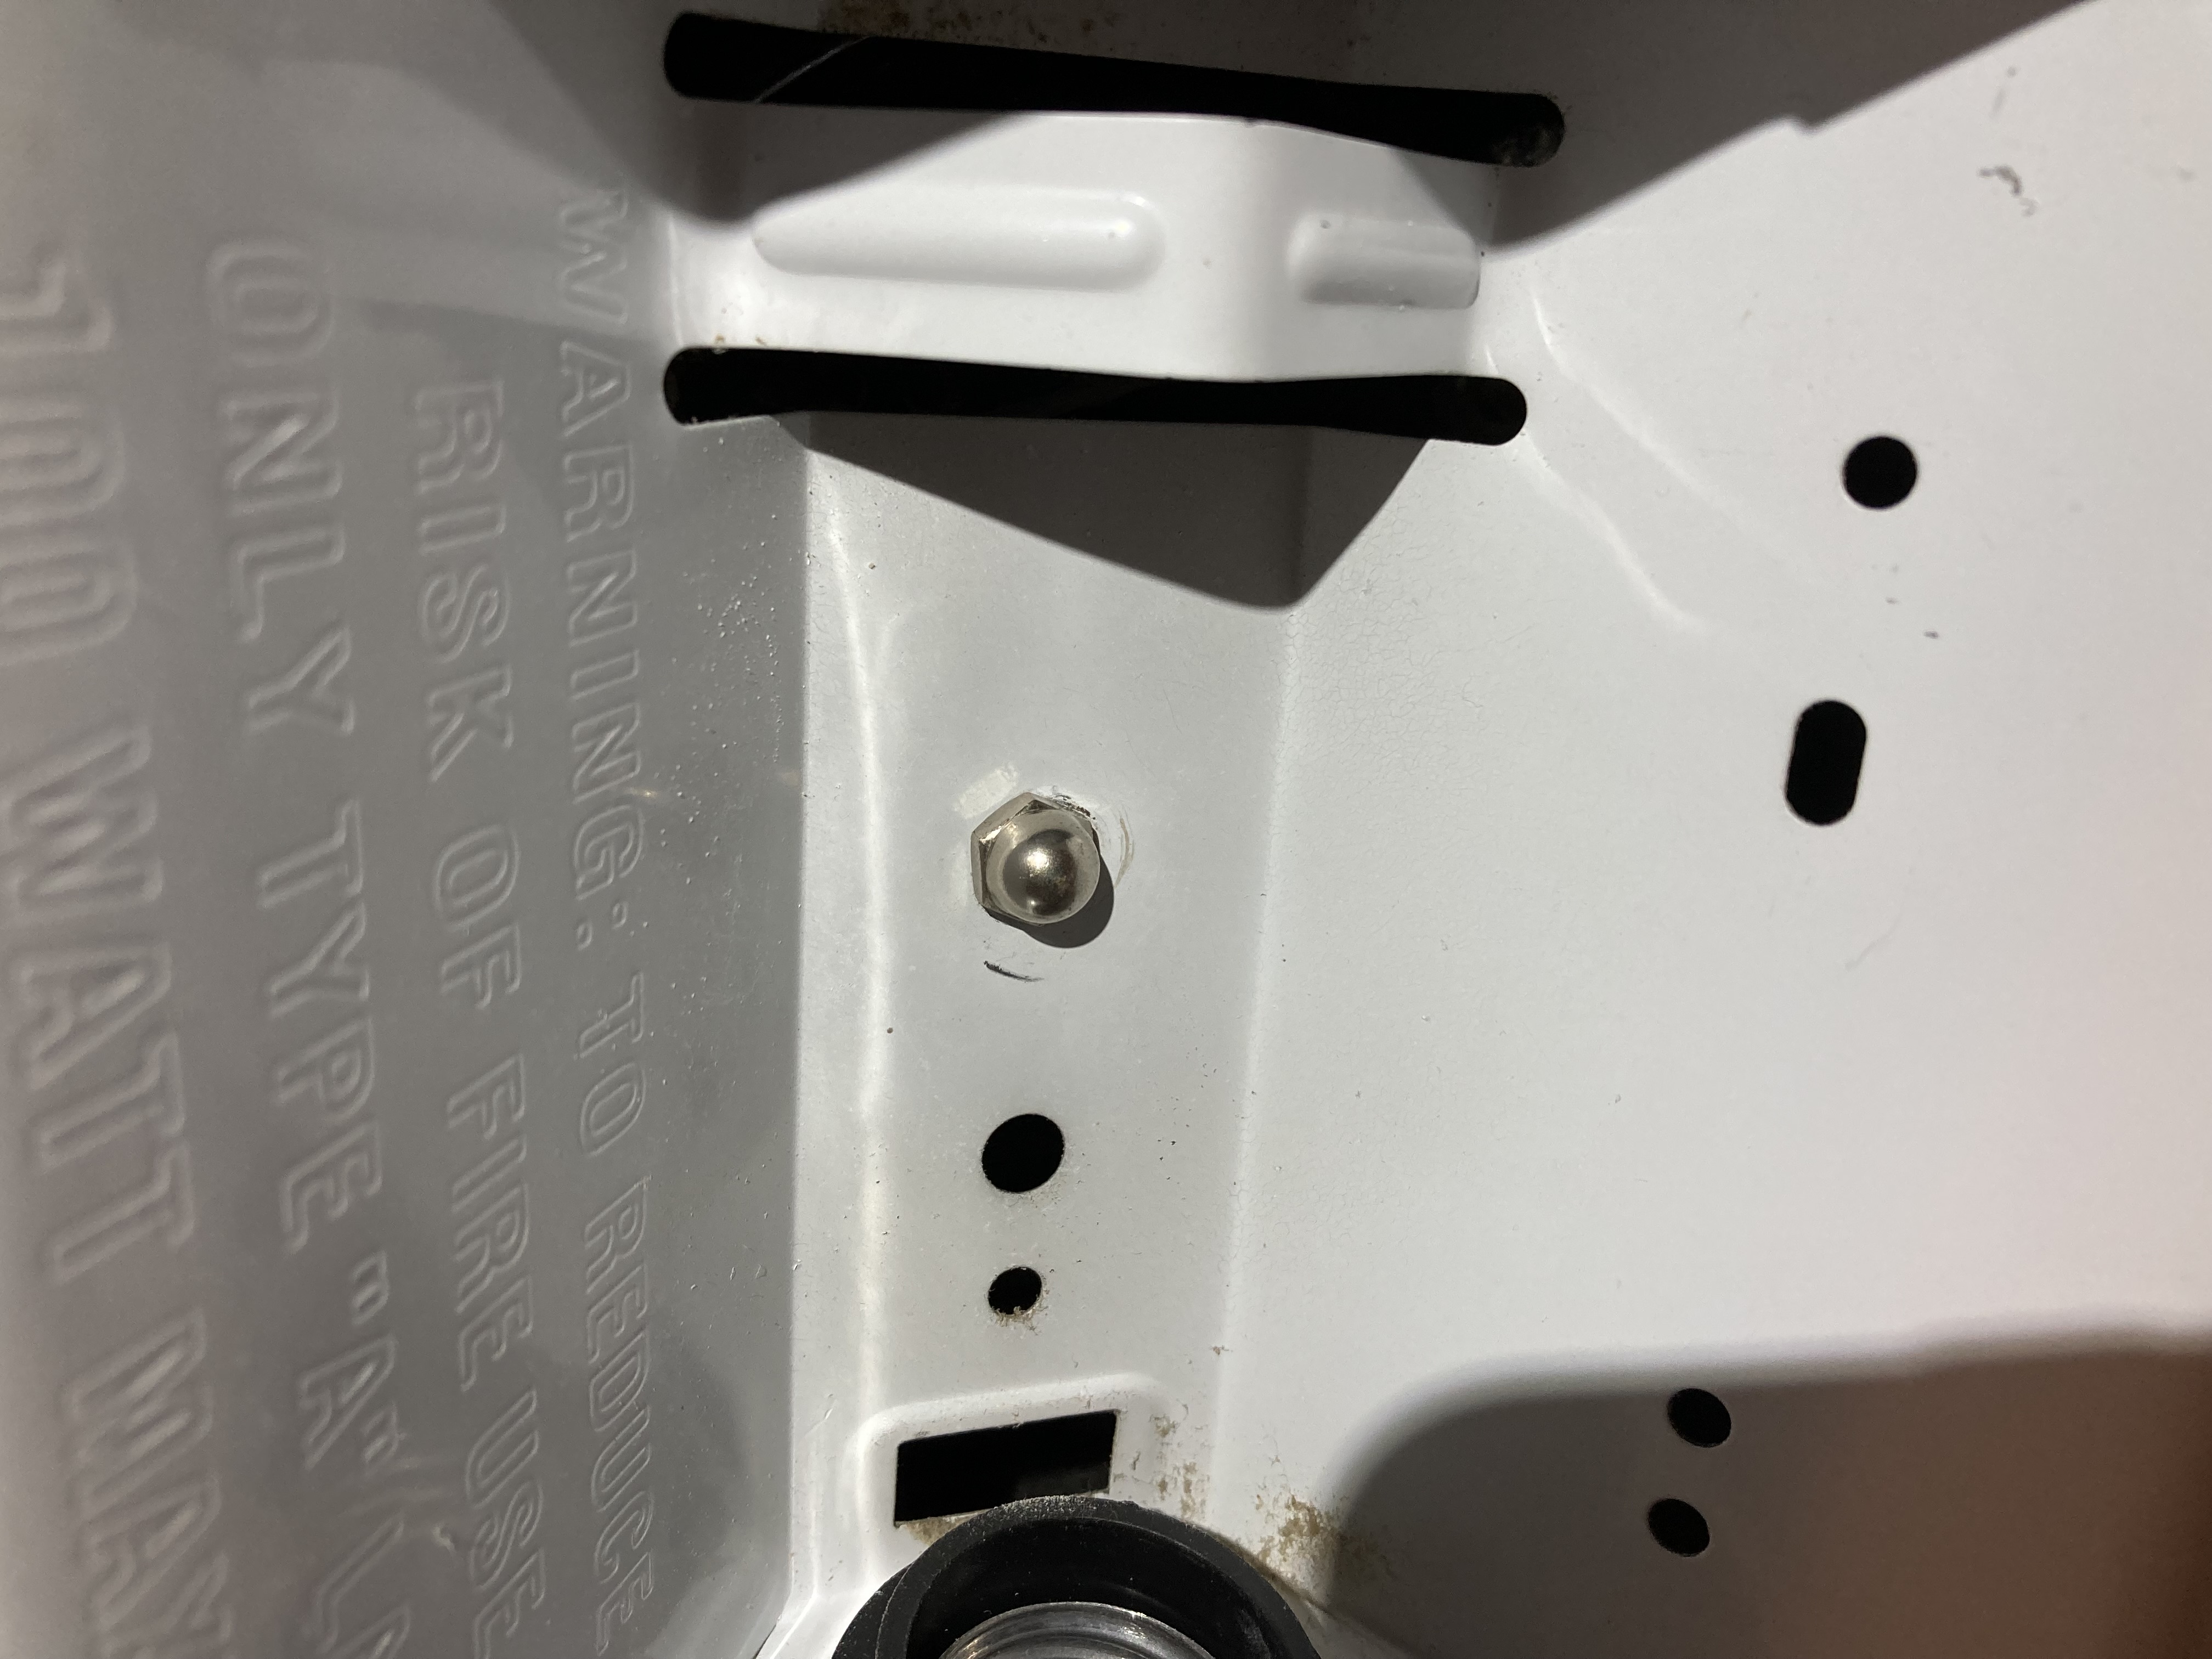
Figure 6. After removing the light bulb from this combination exhaust fan/light, the housing for the light can be removed by unscrewing this nut (Source: PNNL).
Figure 7. The nut holding the light housing in place in this combination exhaust fan/light can be unscrewed by hand (Source: PNNL).
  1. Move or remove the light fixture housing. It is not necessary to disconnect the light fixture, but it may provide better access for air-sealing. In some models, the electric wire from the light to the fan housing is plugged in and can simply be unplugged (Figures 8 and 9). If the light is hardwired, the fixture can be moved out of the way and held by masking tape.
Figure 8. The light fixture is connected to the exhaust fan with an electric wire which is sometimes hard wired but in this case is plugged in (Source: PNNL).
Figure 9. In this exhaust fan/light, both the light fixture and the fan are plugged in to the fan housing; unplug the light fixture if desired to provide better access (Source: PNNL).

5. Look for gaps around the fan housing.

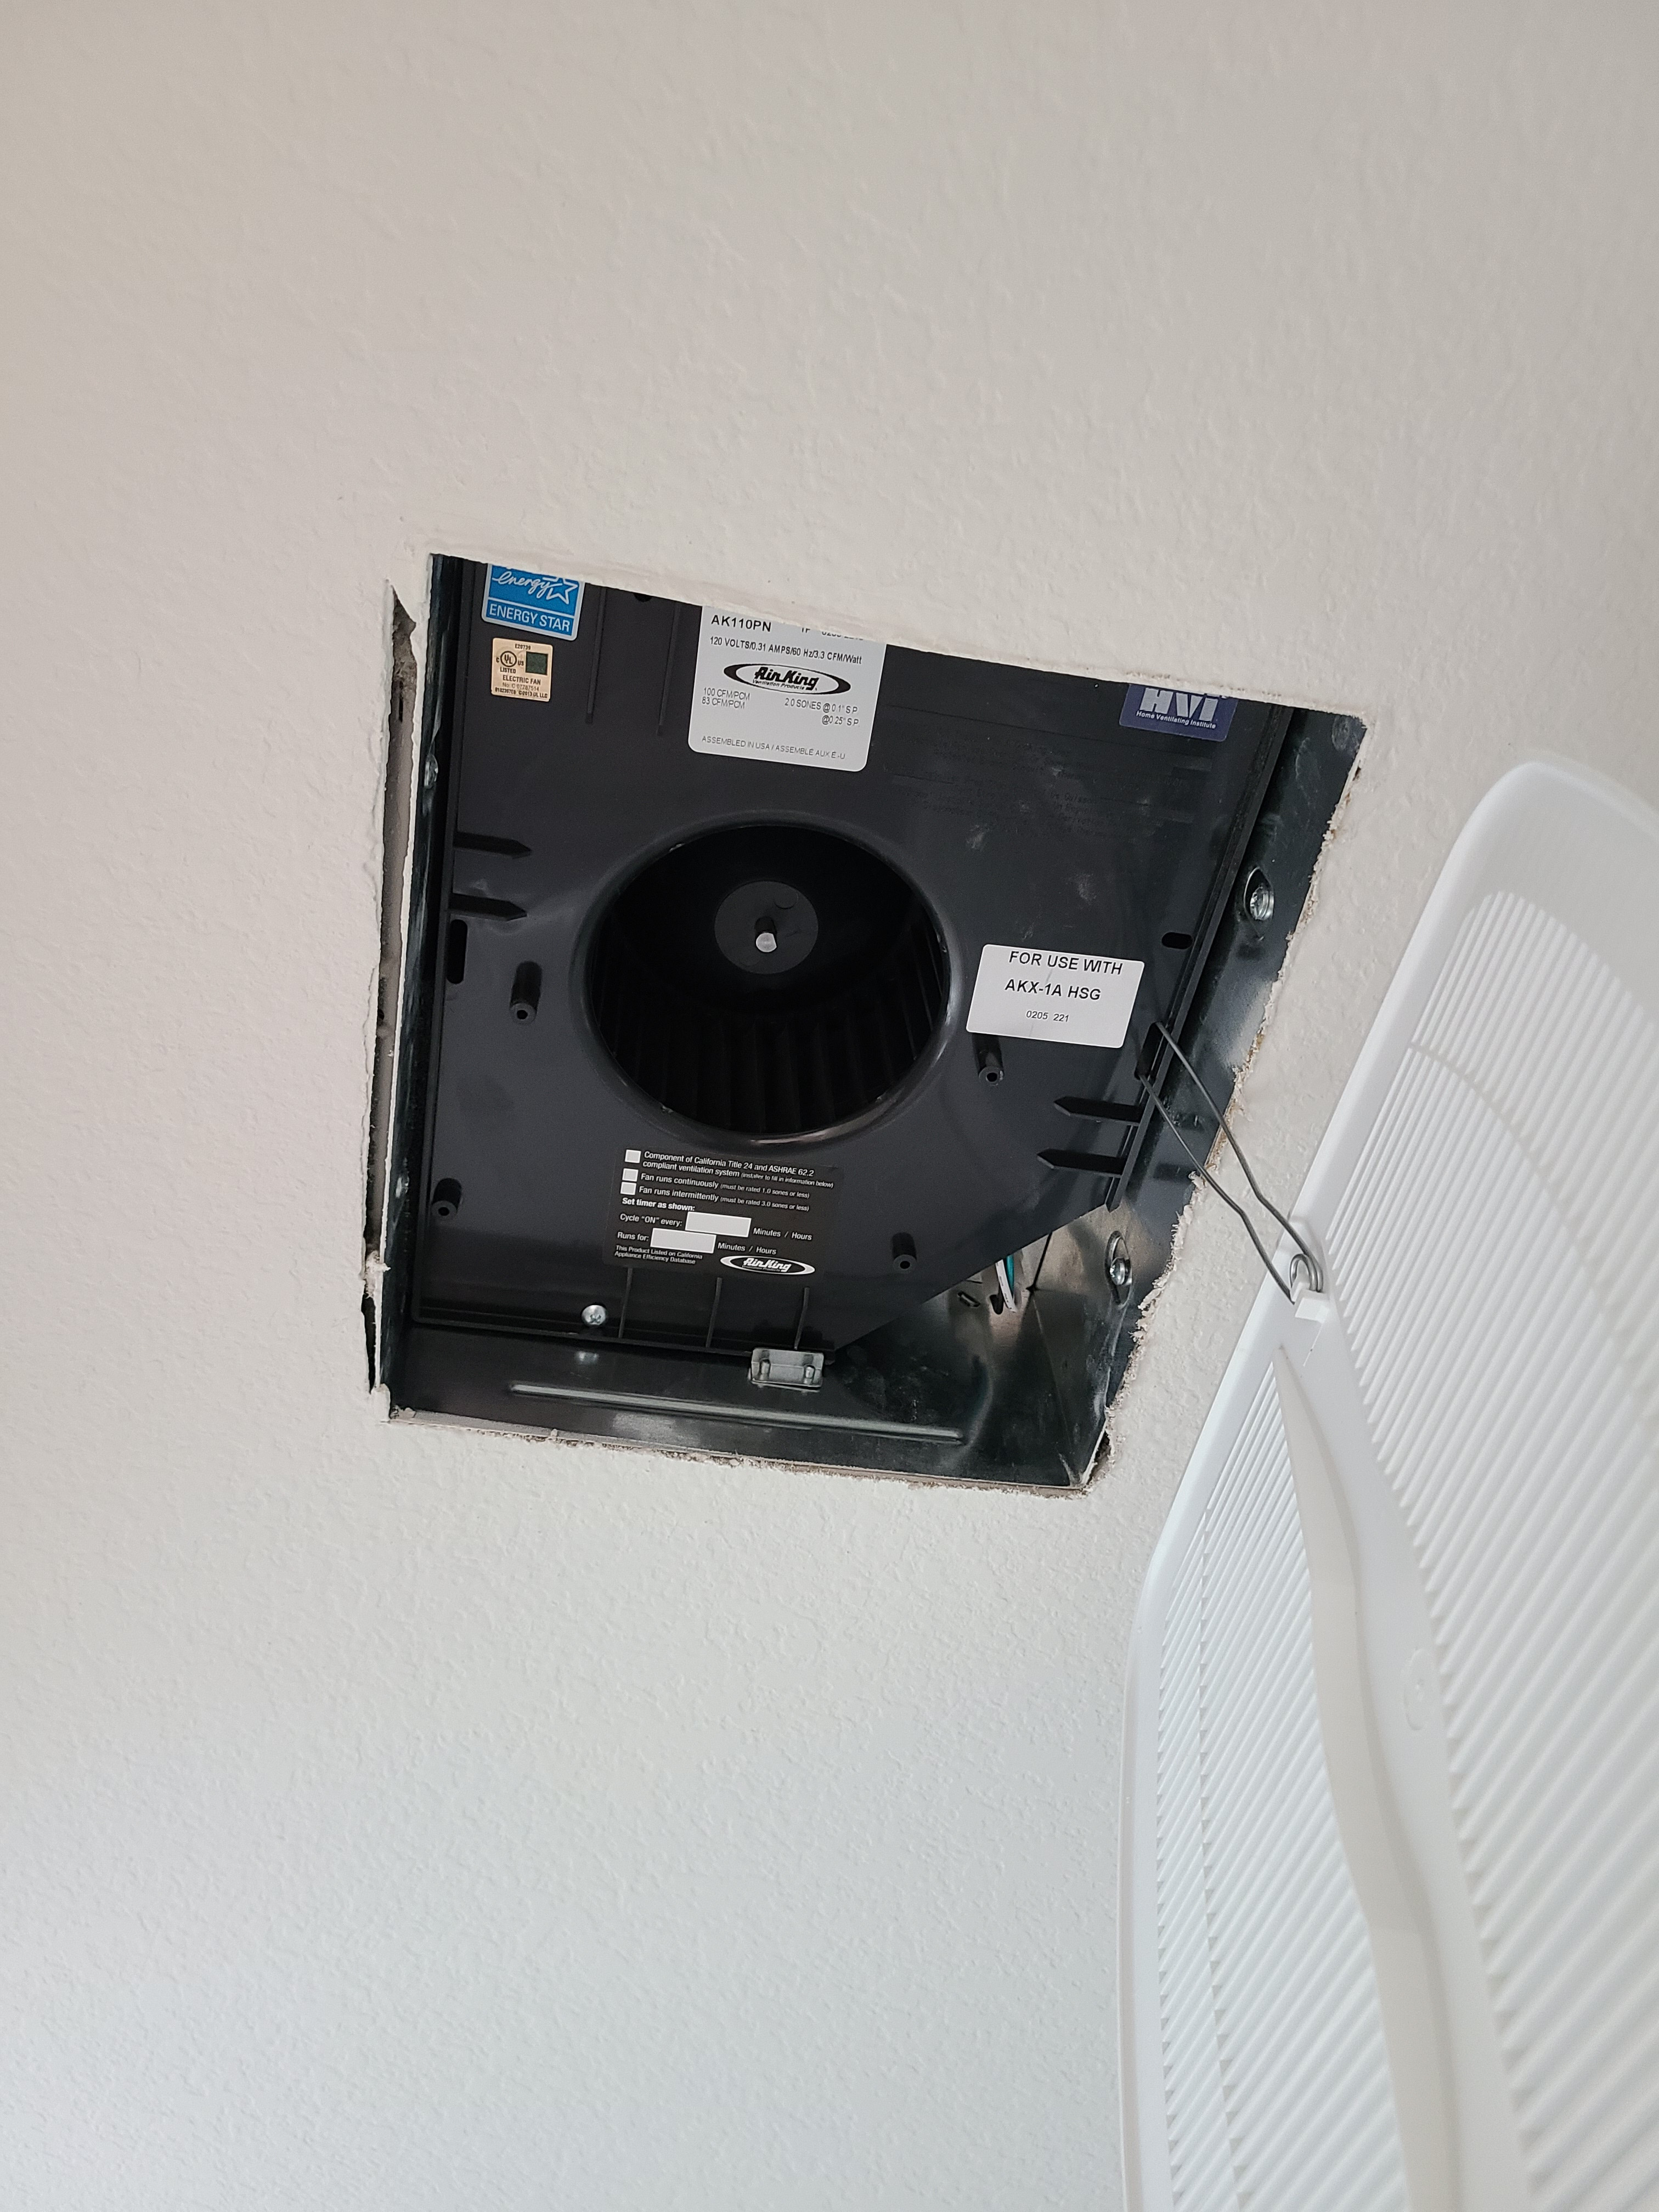
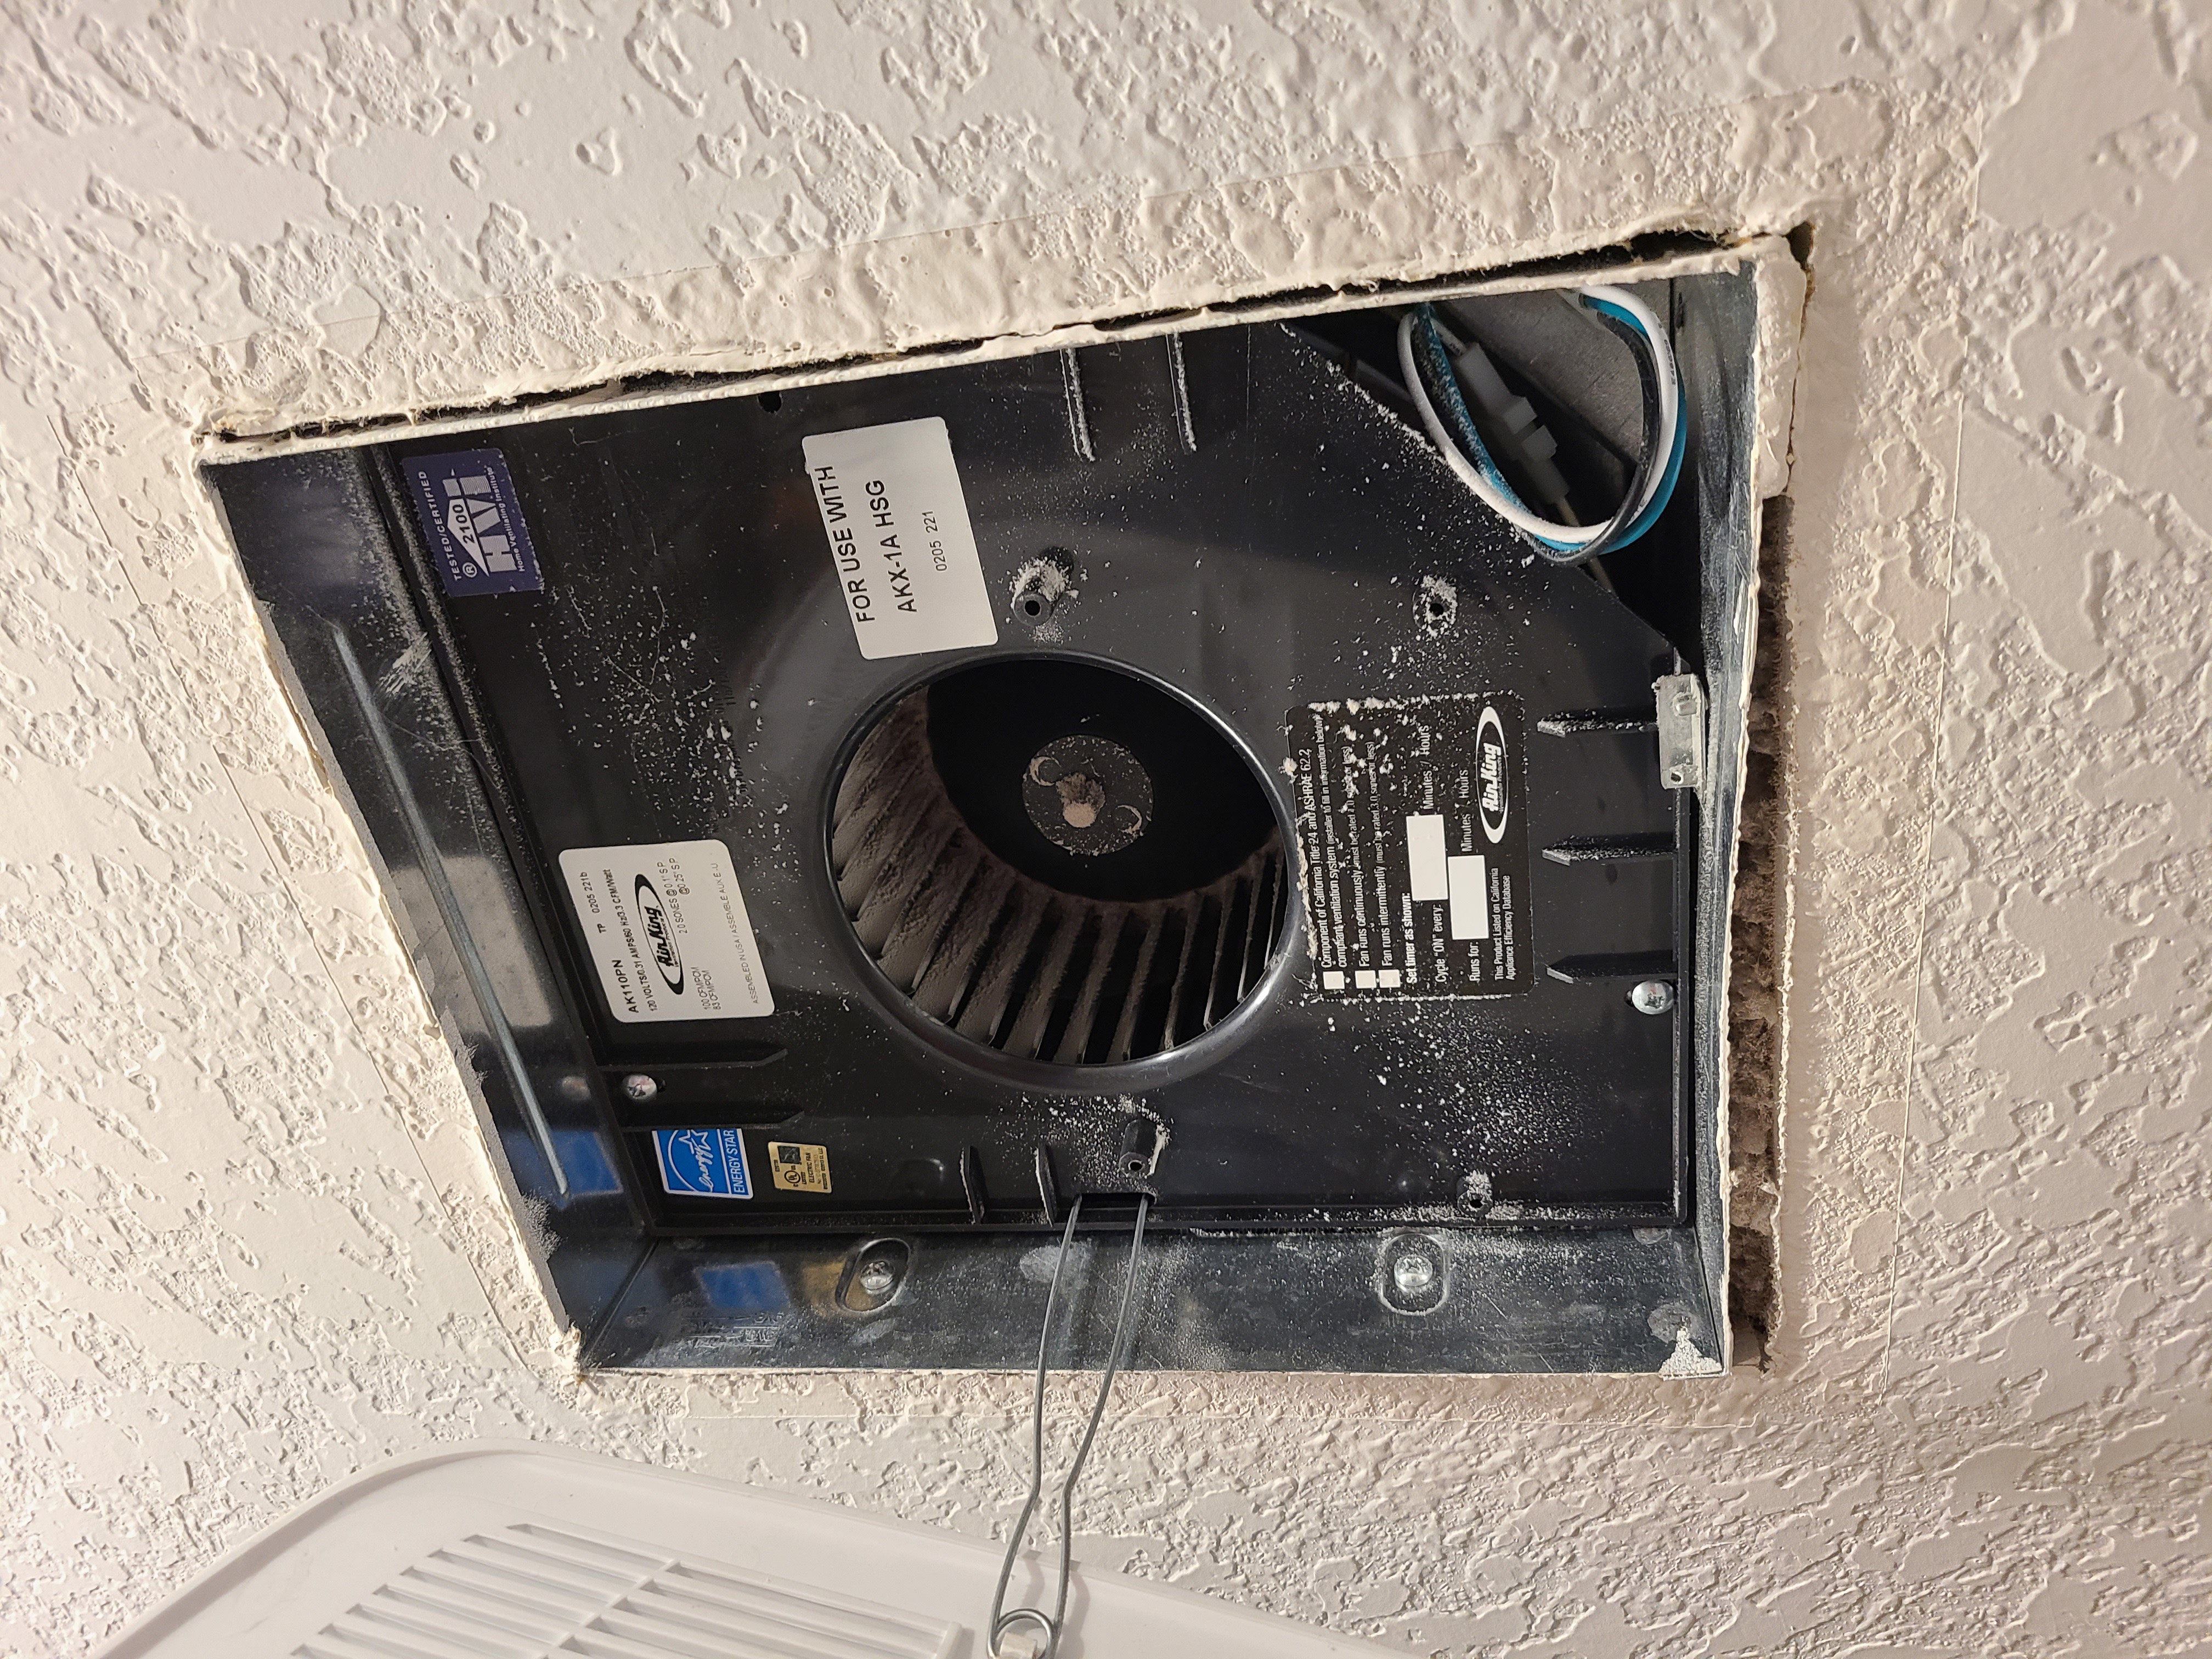
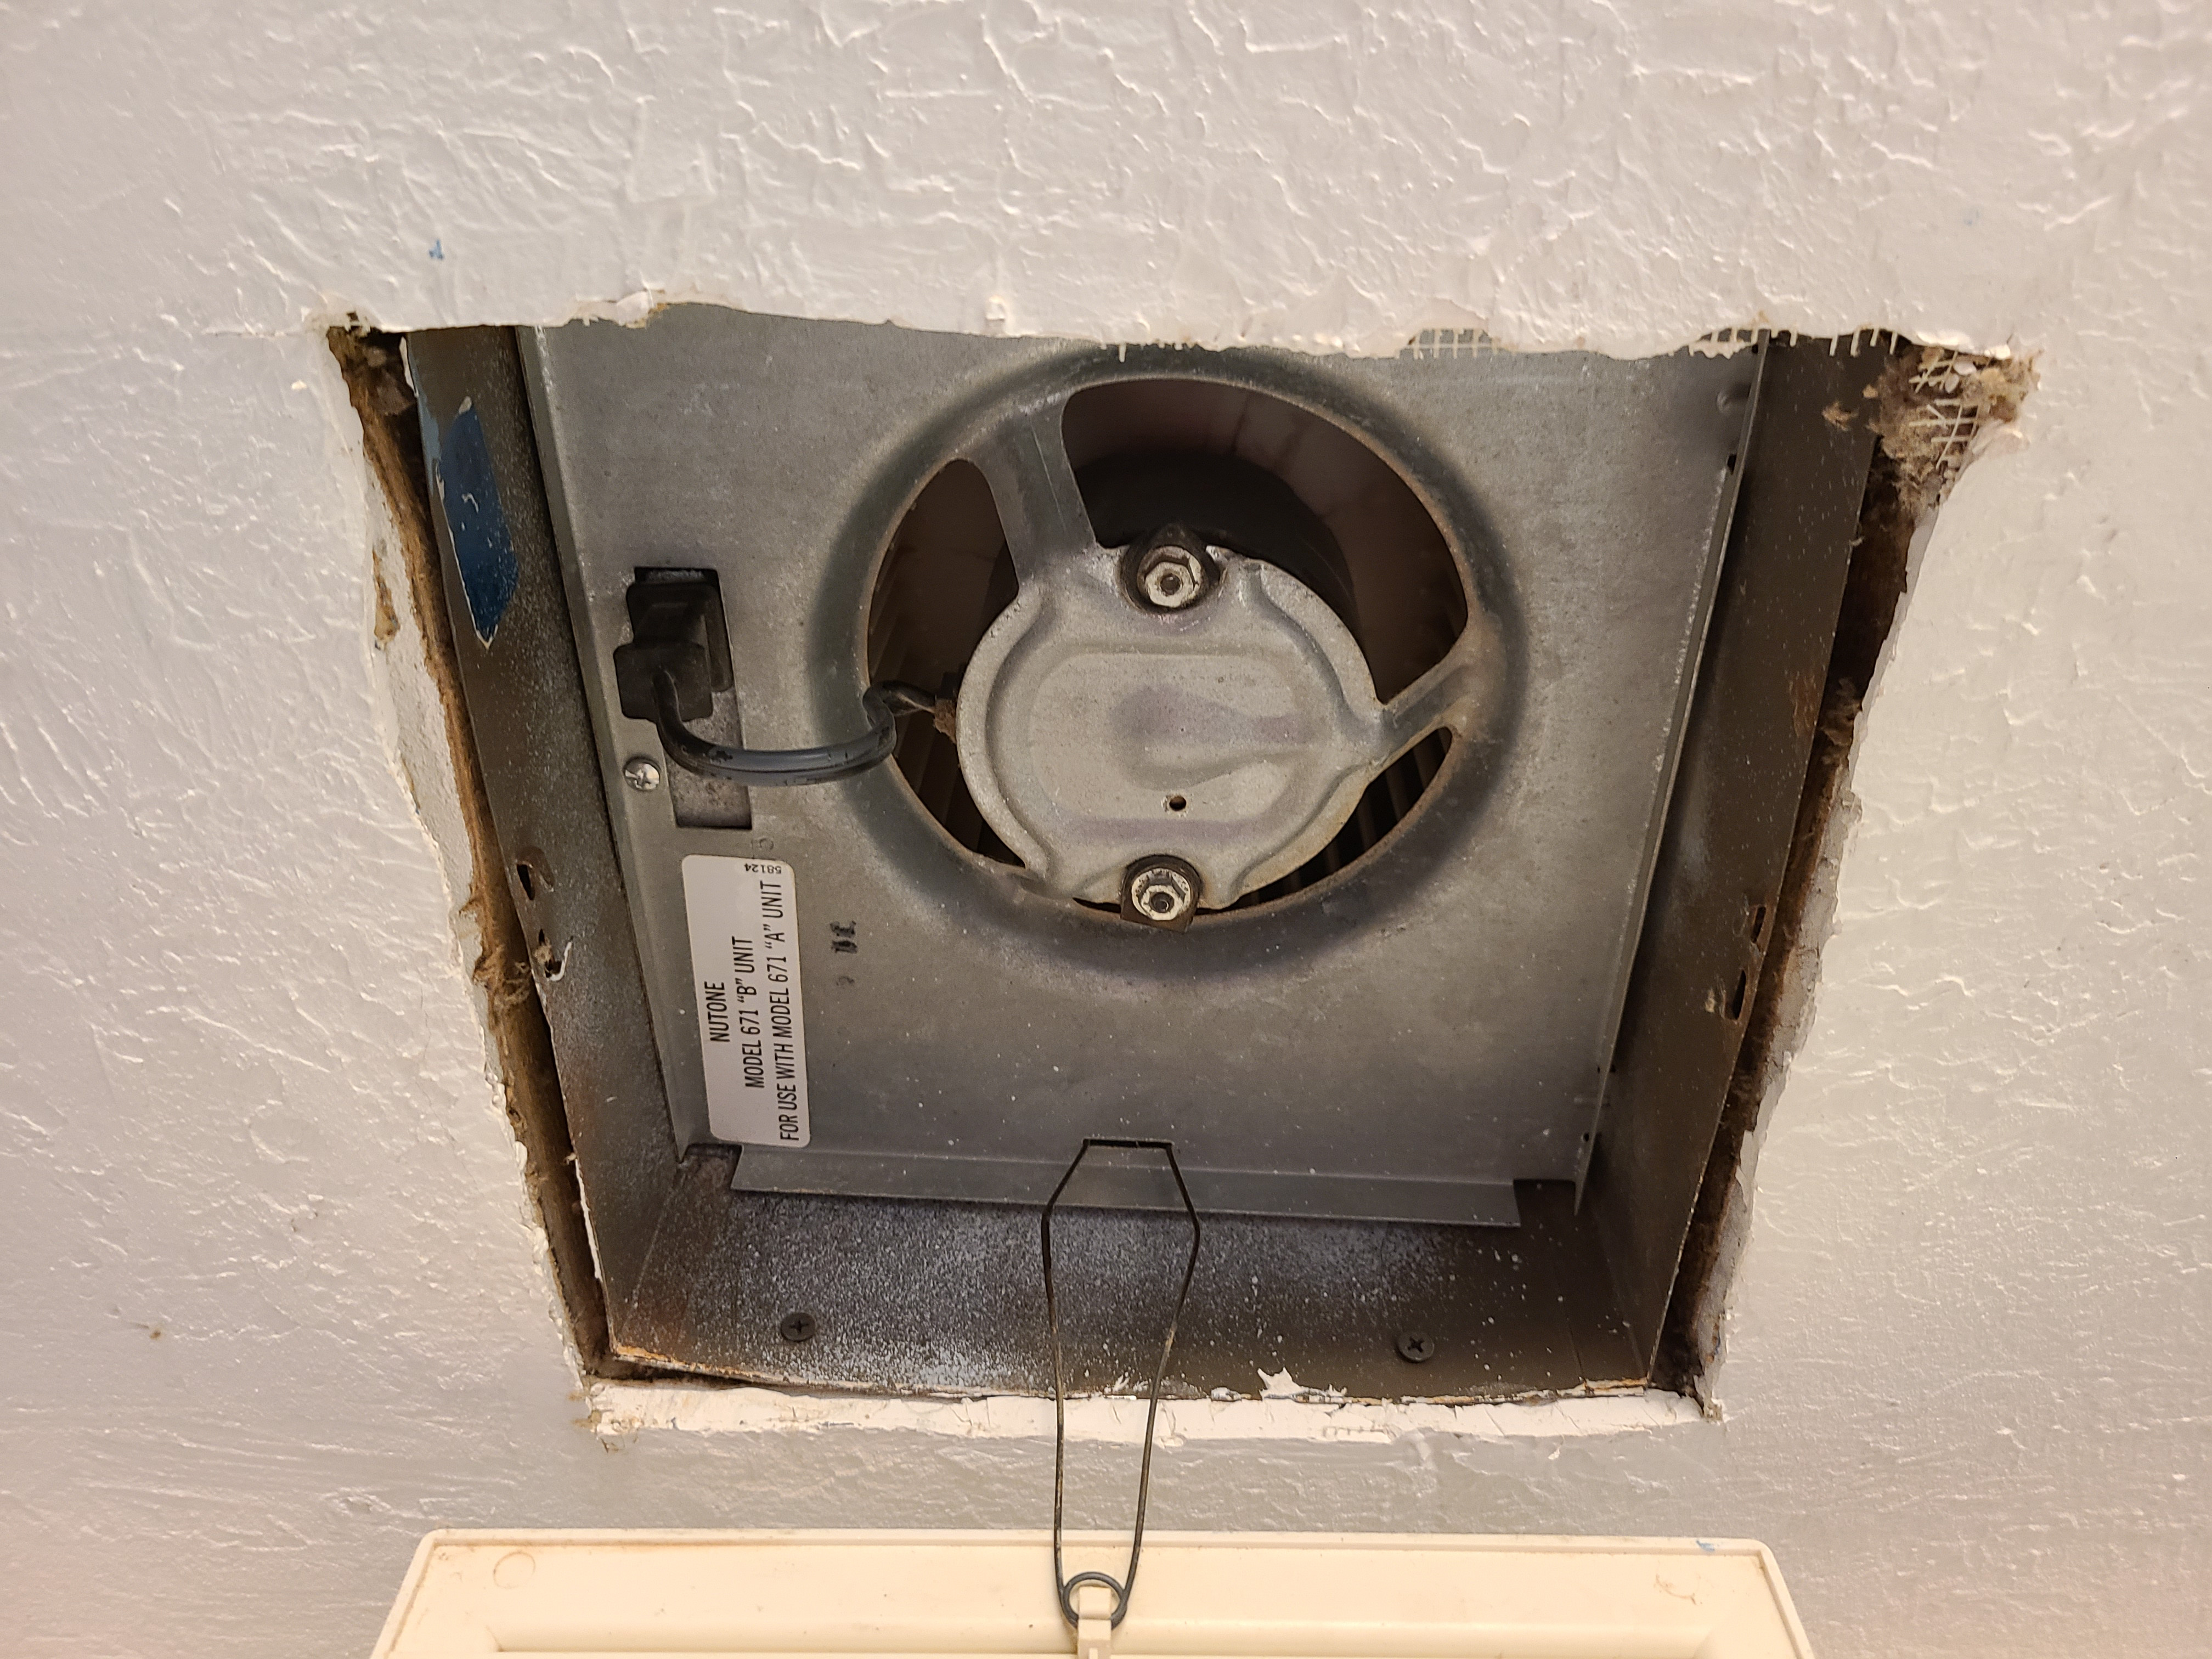
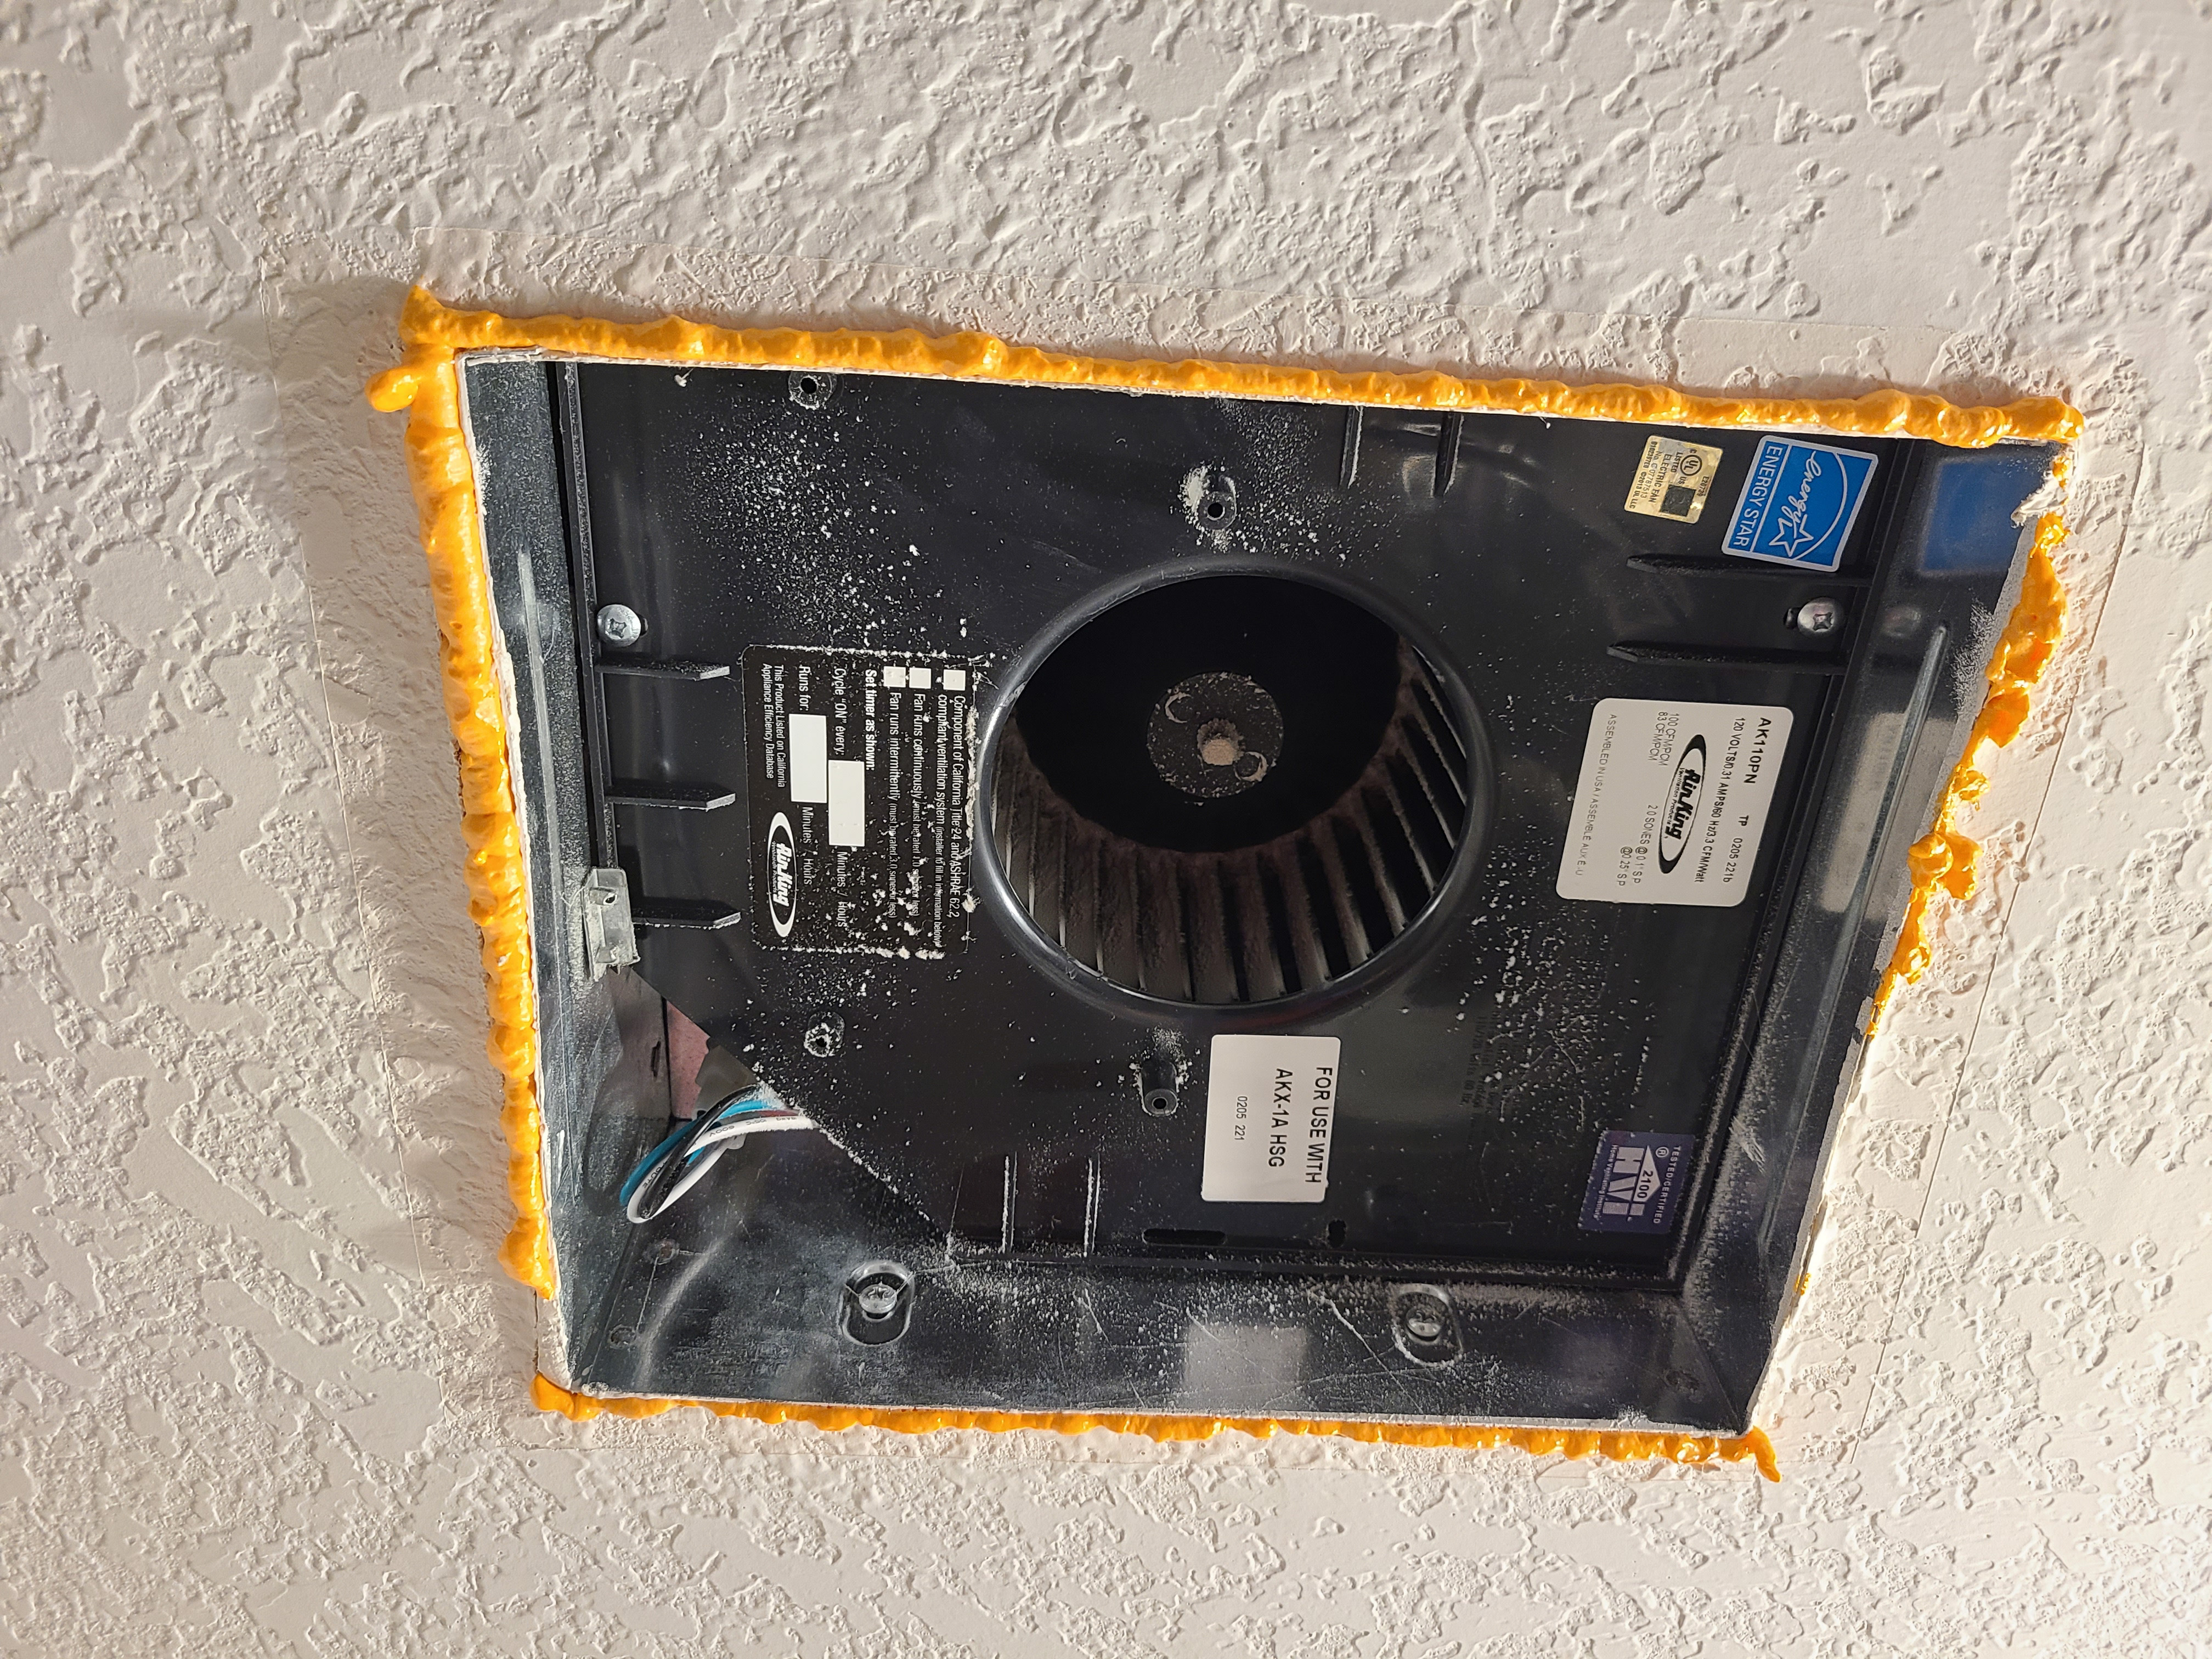
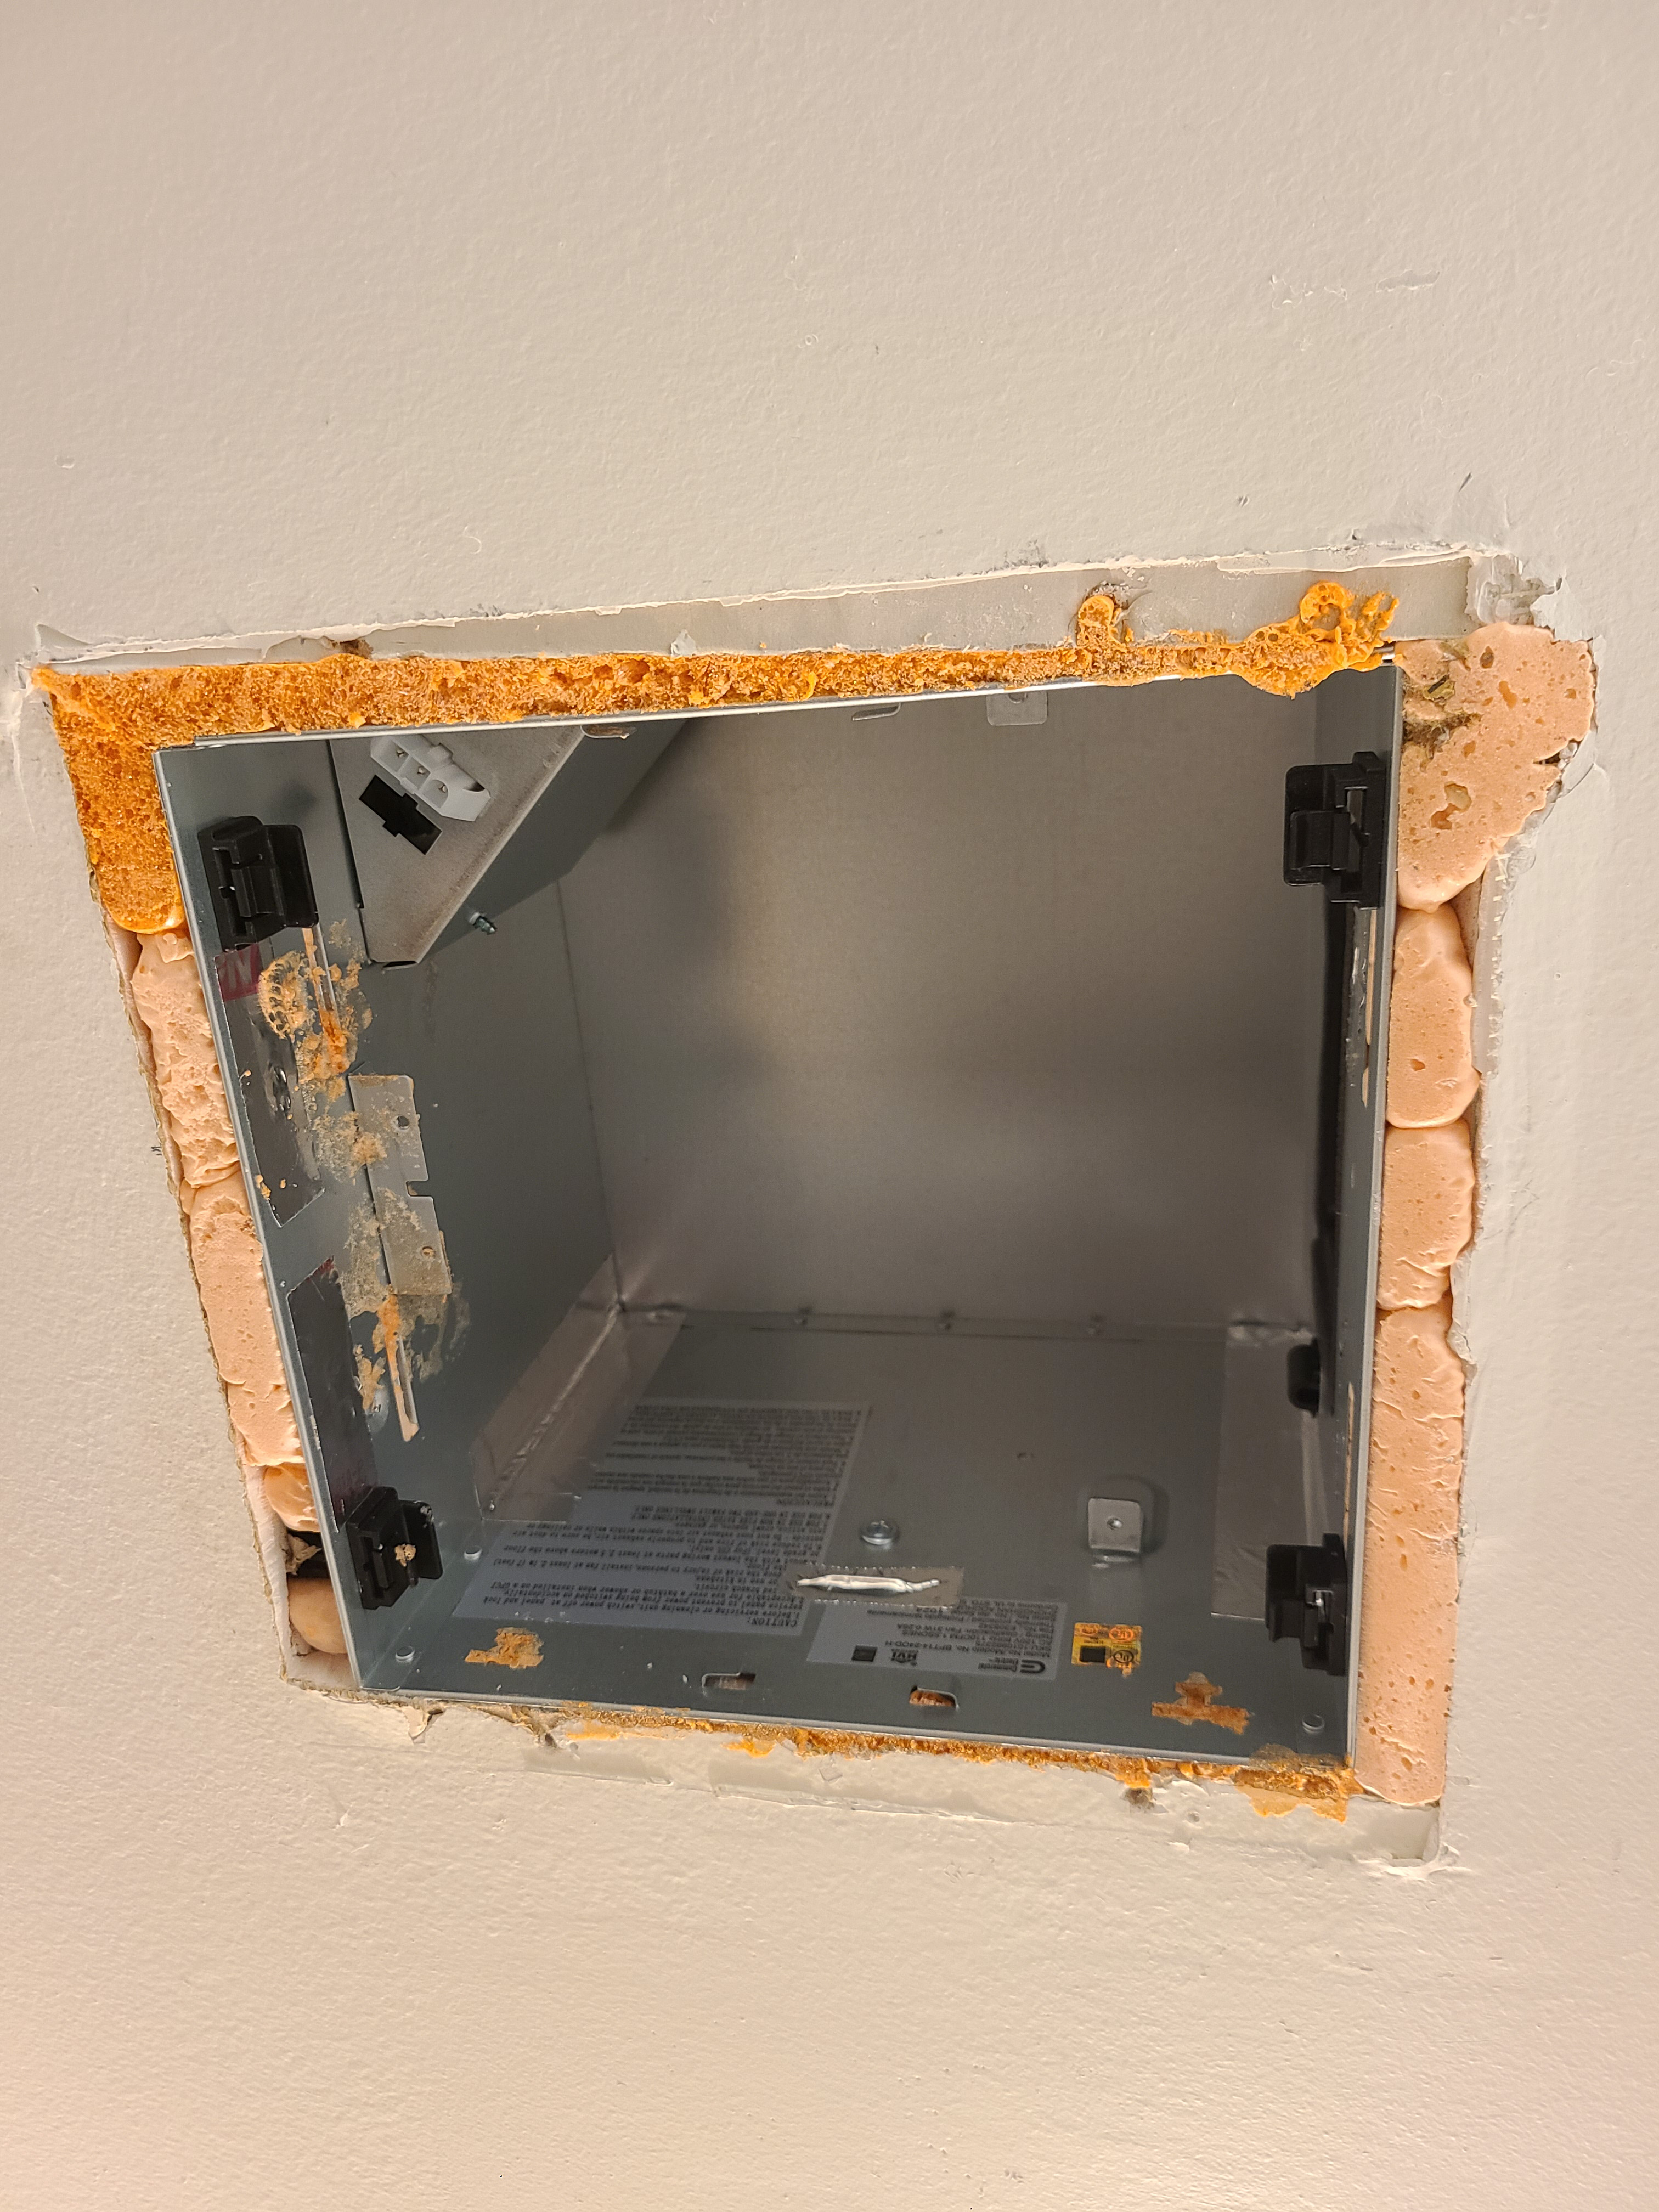
If the fan housing has not been air-sealed to the drywall (Figures 10, 11, and 12), you’ll need to fill the gaps around the fan between the fan box and the drywall. Gaps that are small can be caulked or spray foamed (Figure 13). For gaps that are larger than a half inch, use canned spray foam (Figure 14). Other options for sealing large gaps are metal tape, fiberglass mesh tape and mastic, or foam backer rod and caulk. You may be able to narrow the gap by installing one or two wood screws through the metal housing and into the framing behind the drywall to narrow the gap, then sealing it with caulk. Do not stuff fiberglass insulation into the gap as this does not air seal.
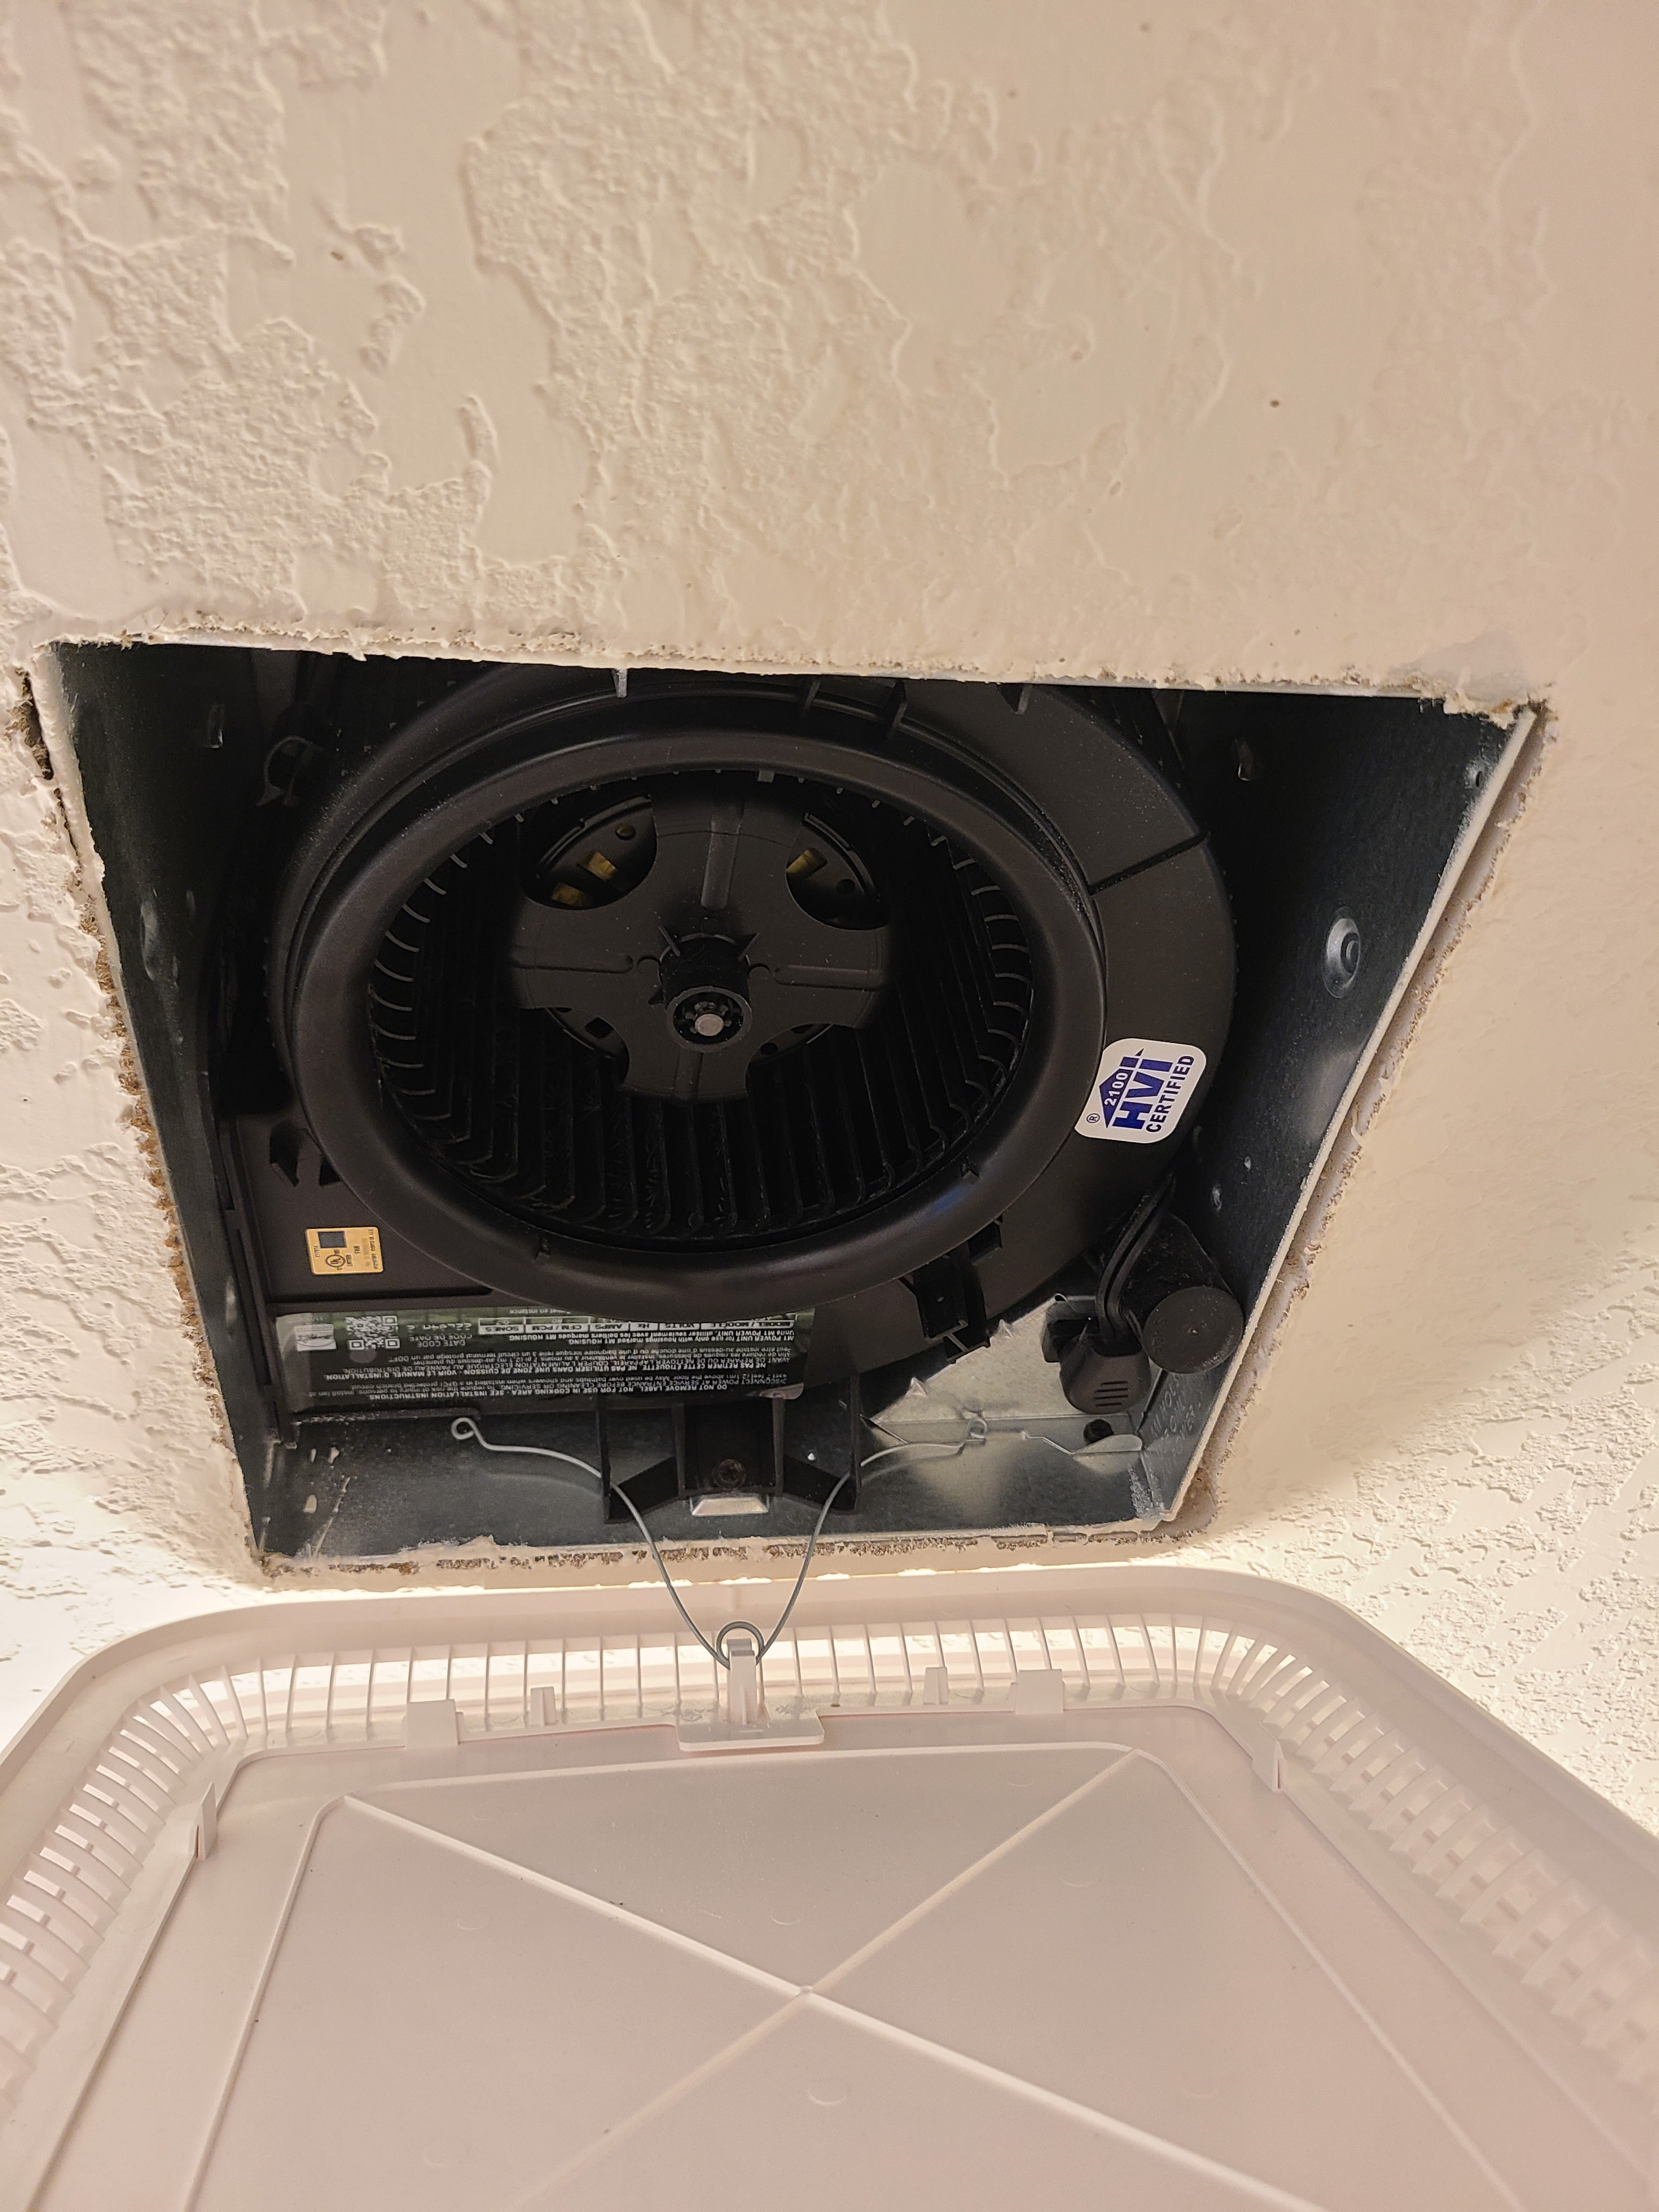
Figure 10. This fan was inserted into a cleanly cut hole in the ceiling so there is only a very narrow gap around the edges of the fan box that needs to be caulked or taped (Source: PNNL).
Figure 11. This fan has noticeable gaps between the fan box and the drywall that will need to be sealed with spray foam or caulk (Source: PNNL).
Figure 12. The jagged edges of the cutout around this ceiling exhaust fan require canned spray foam, metal tape, or fiberglass mesh tape and mastic to air seal the gaps and keep conditioned air from the home from escaping into the attic (Source: PNNL).
Figure 13. Spray foam is used to fill the small gaps around this bath fan (Source: PNNL).
Figure 14. Larger gaps can be filled with rigid foam which is spray foamed into place (Source: PNNL).

6. Seal holes in the fan housing with caulk, sealing putty, or metal tape.

If you feel comfortable doing so, you can remove the fan from its housing and seal the holes and seams in the fan housing with caulk or metal tape (Figure 15). Just don’t fill any screw holes you’ll need to reattach the fan! 
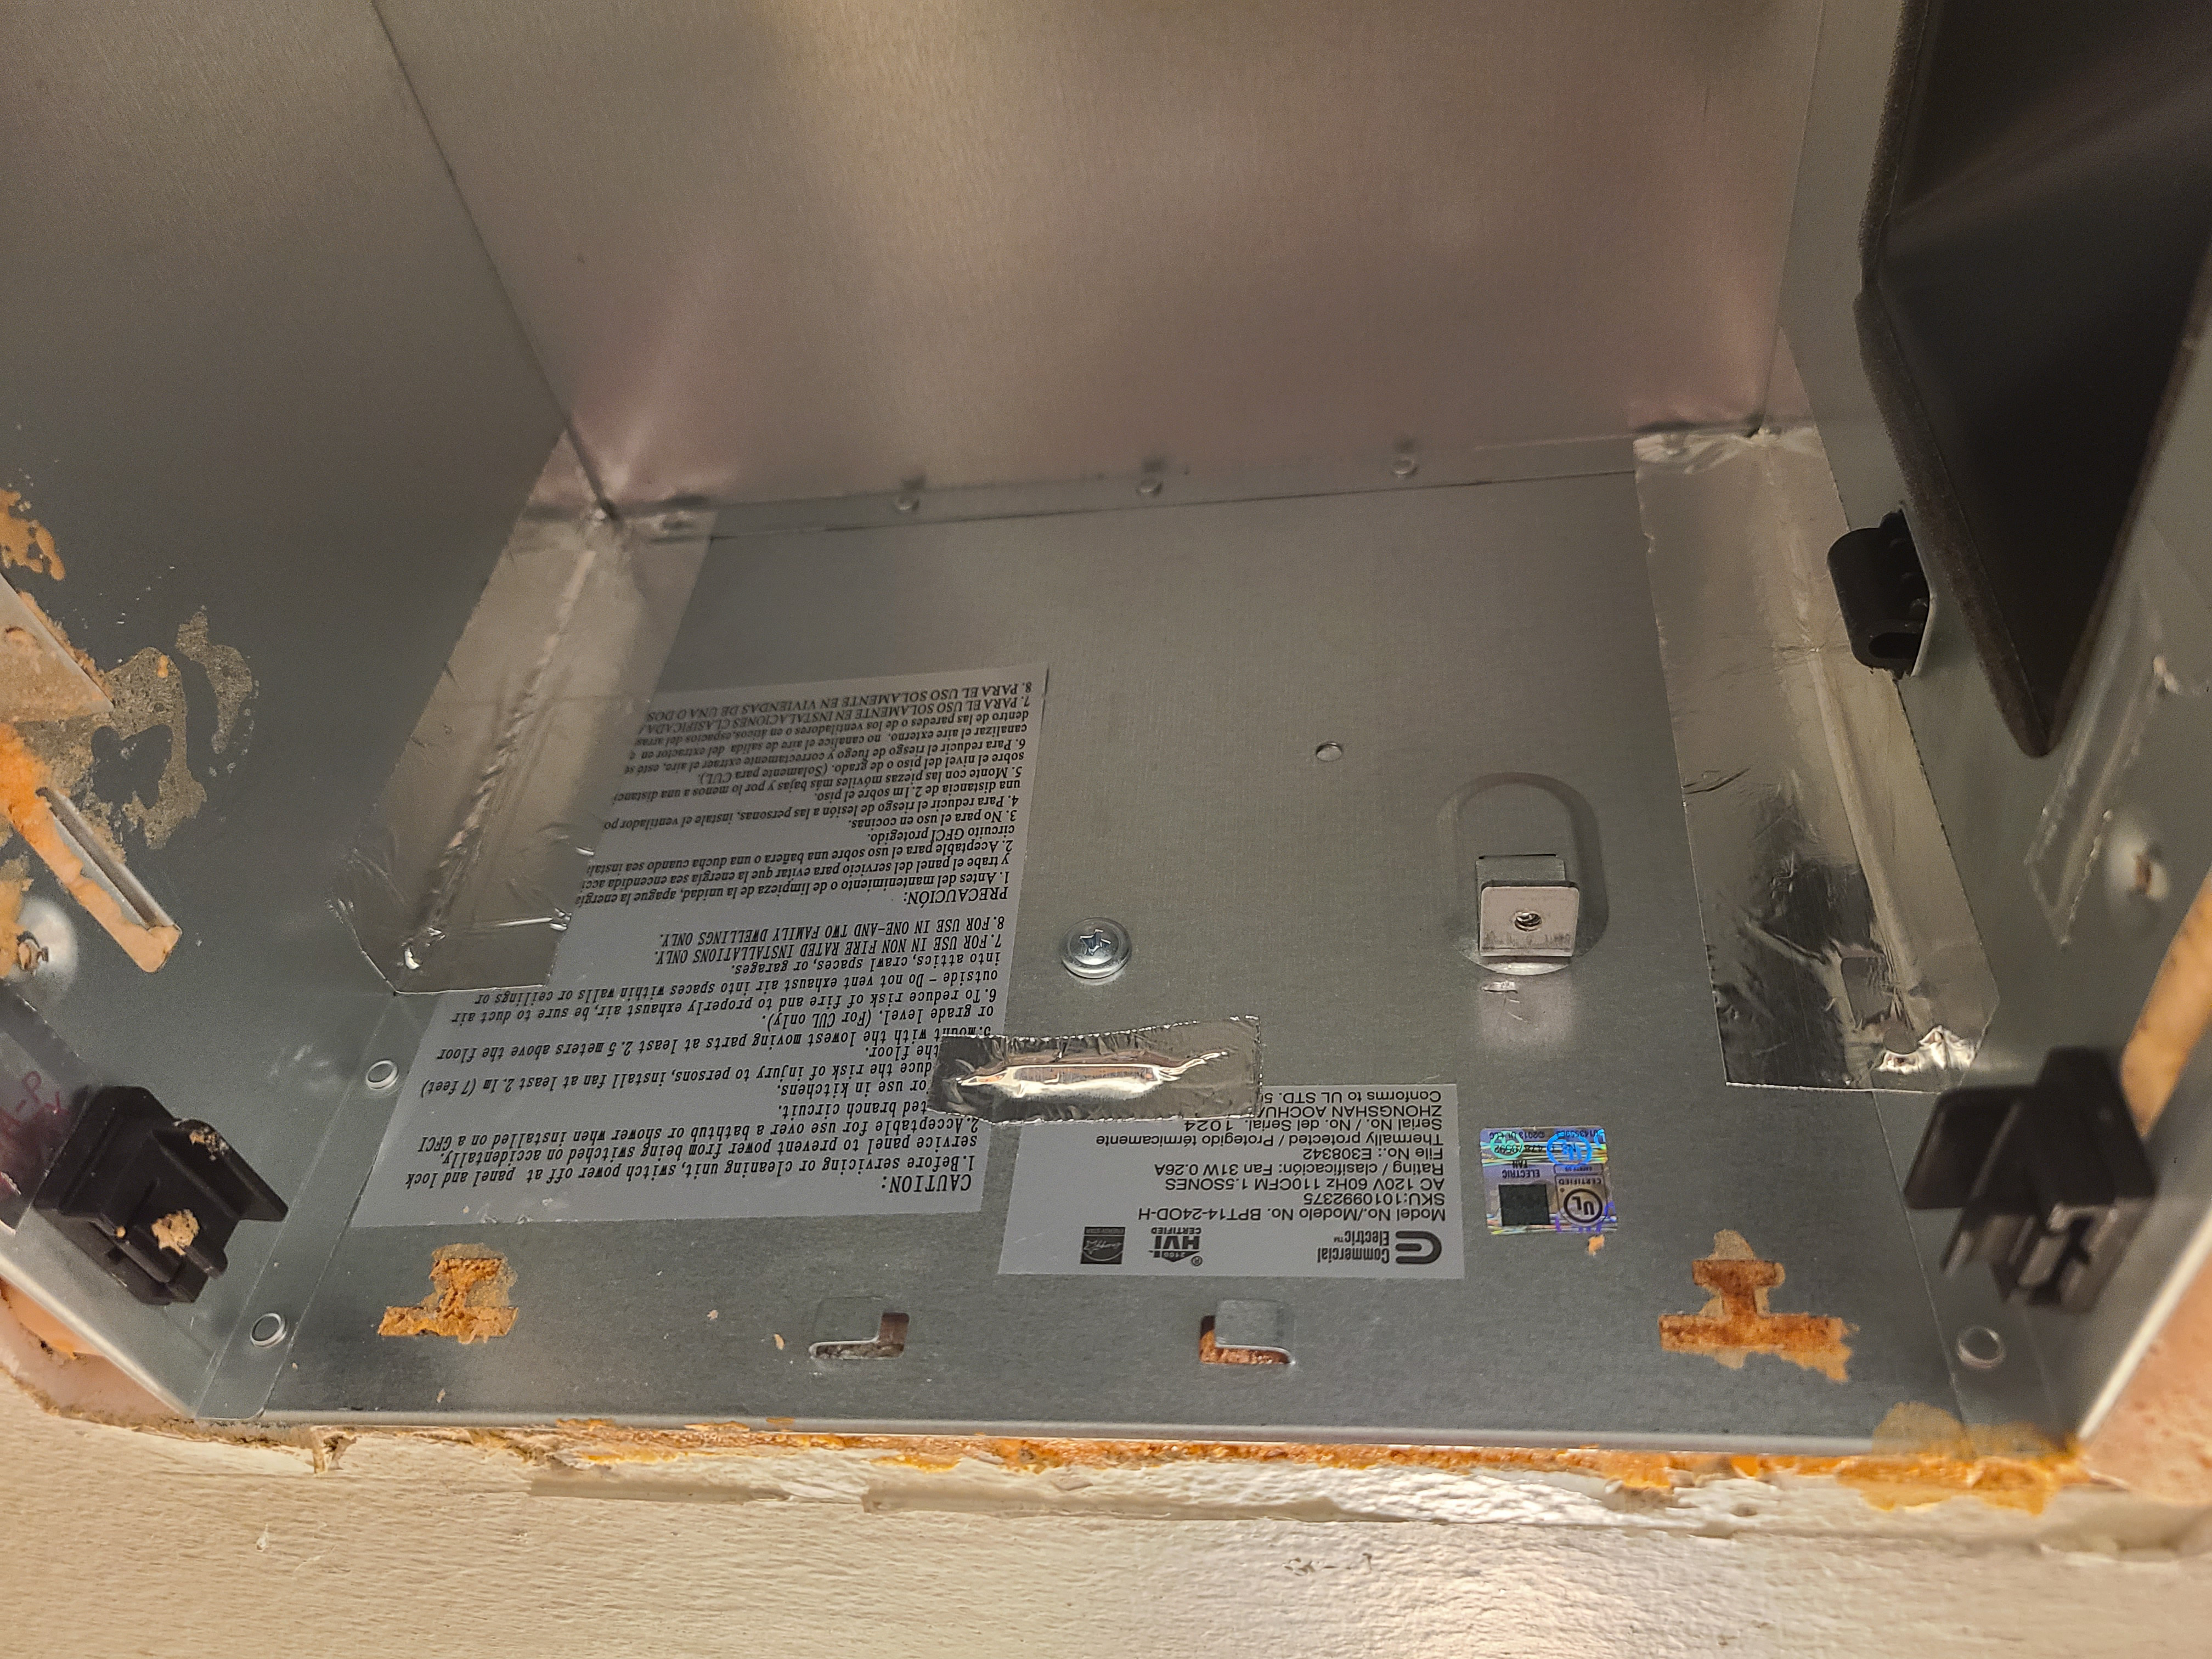
Figure 15. The fan was removed from this exhaust fan box to access and air seal the seams with metal tape and the holes in the housing with canned spray foam (Source: PNNL).

7. Trim foam.

After the canned spray foam has completely dried and hardened, trim it flush with the ceiling surface with a utility knife so that the trim and fan cover will fit back in place (Figure 16). Don’t attempt to cut or move the foam while it is still wet – it is very sticky and difficult to remove from tools, clothes, and fingers!
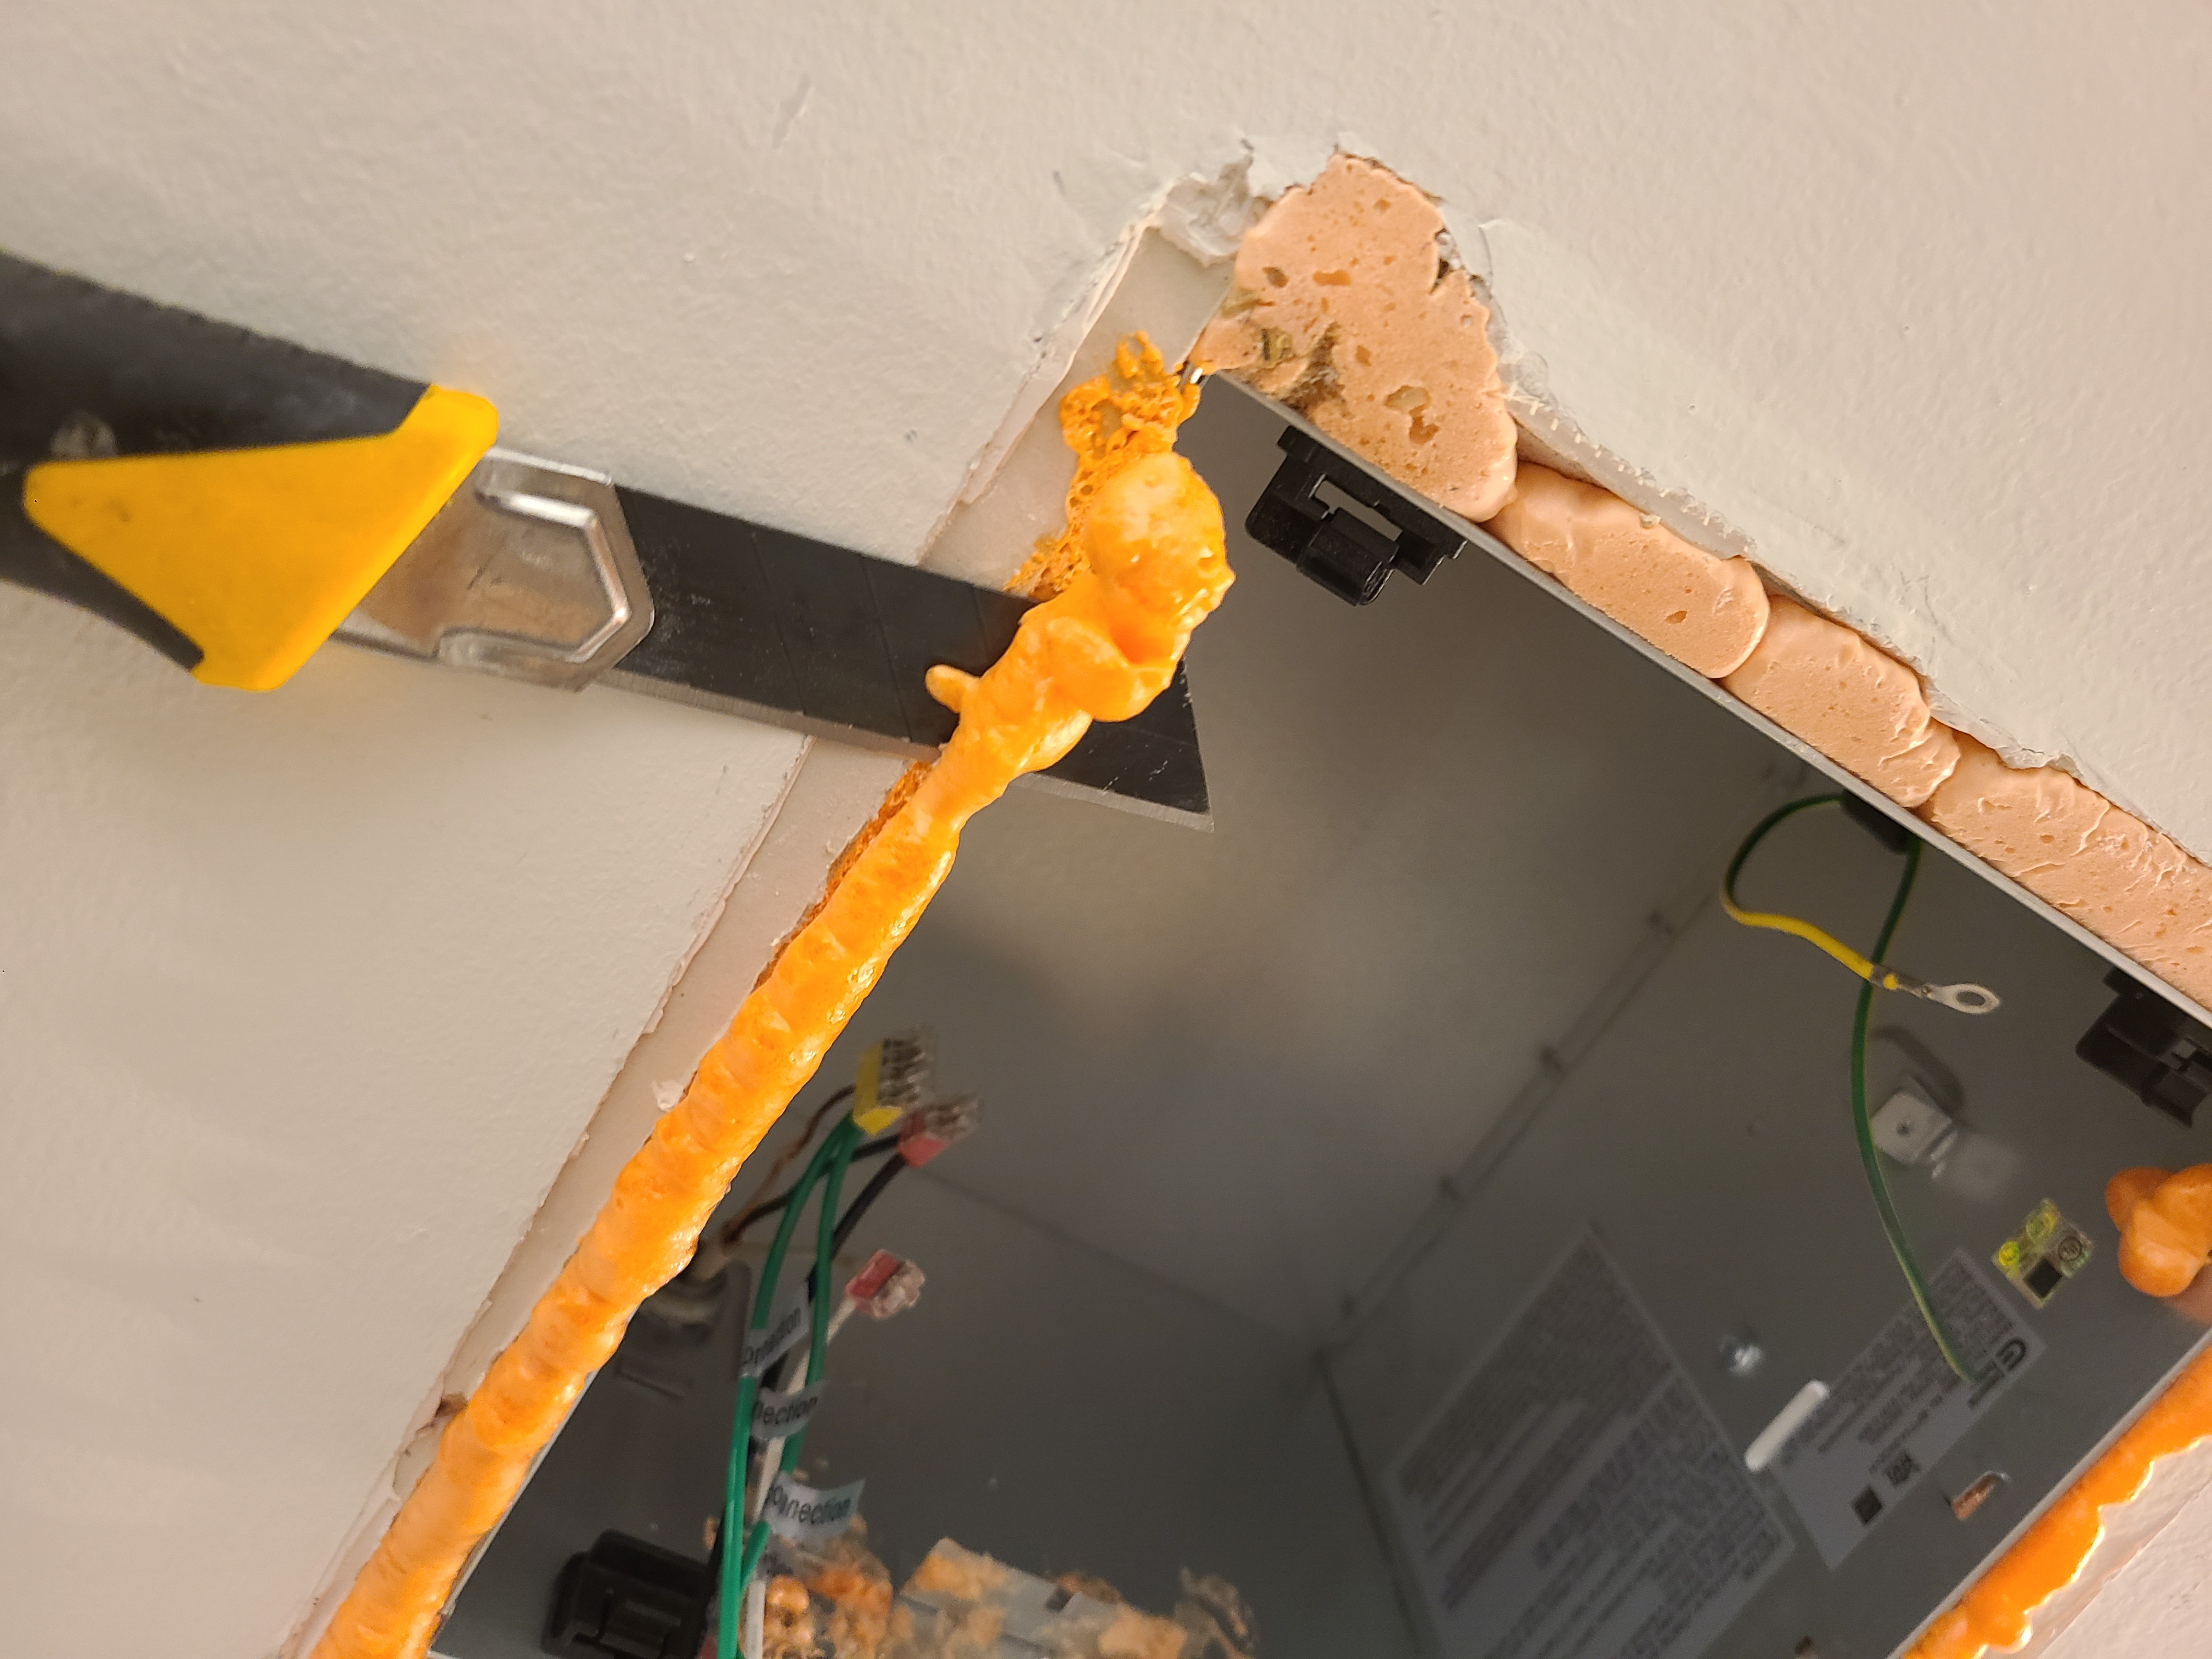
Figure 16. After spray foam dries, a utility knife can be used to carefully trim excess foam around the exhaust fan housing (Source: PNNL).

8. Replace the vent cover and turn on the fan.

  1. Replace the cover and reinstall the light fixture if there is one (Figure 17); plug in the fan and light and refasten fasteners. 
  2. Re-attach trim if it was removed.
  3. Turn on the electricity to the circuit at the breaker box.
  4. Switch on the fan at the wall switch (Figure 18).
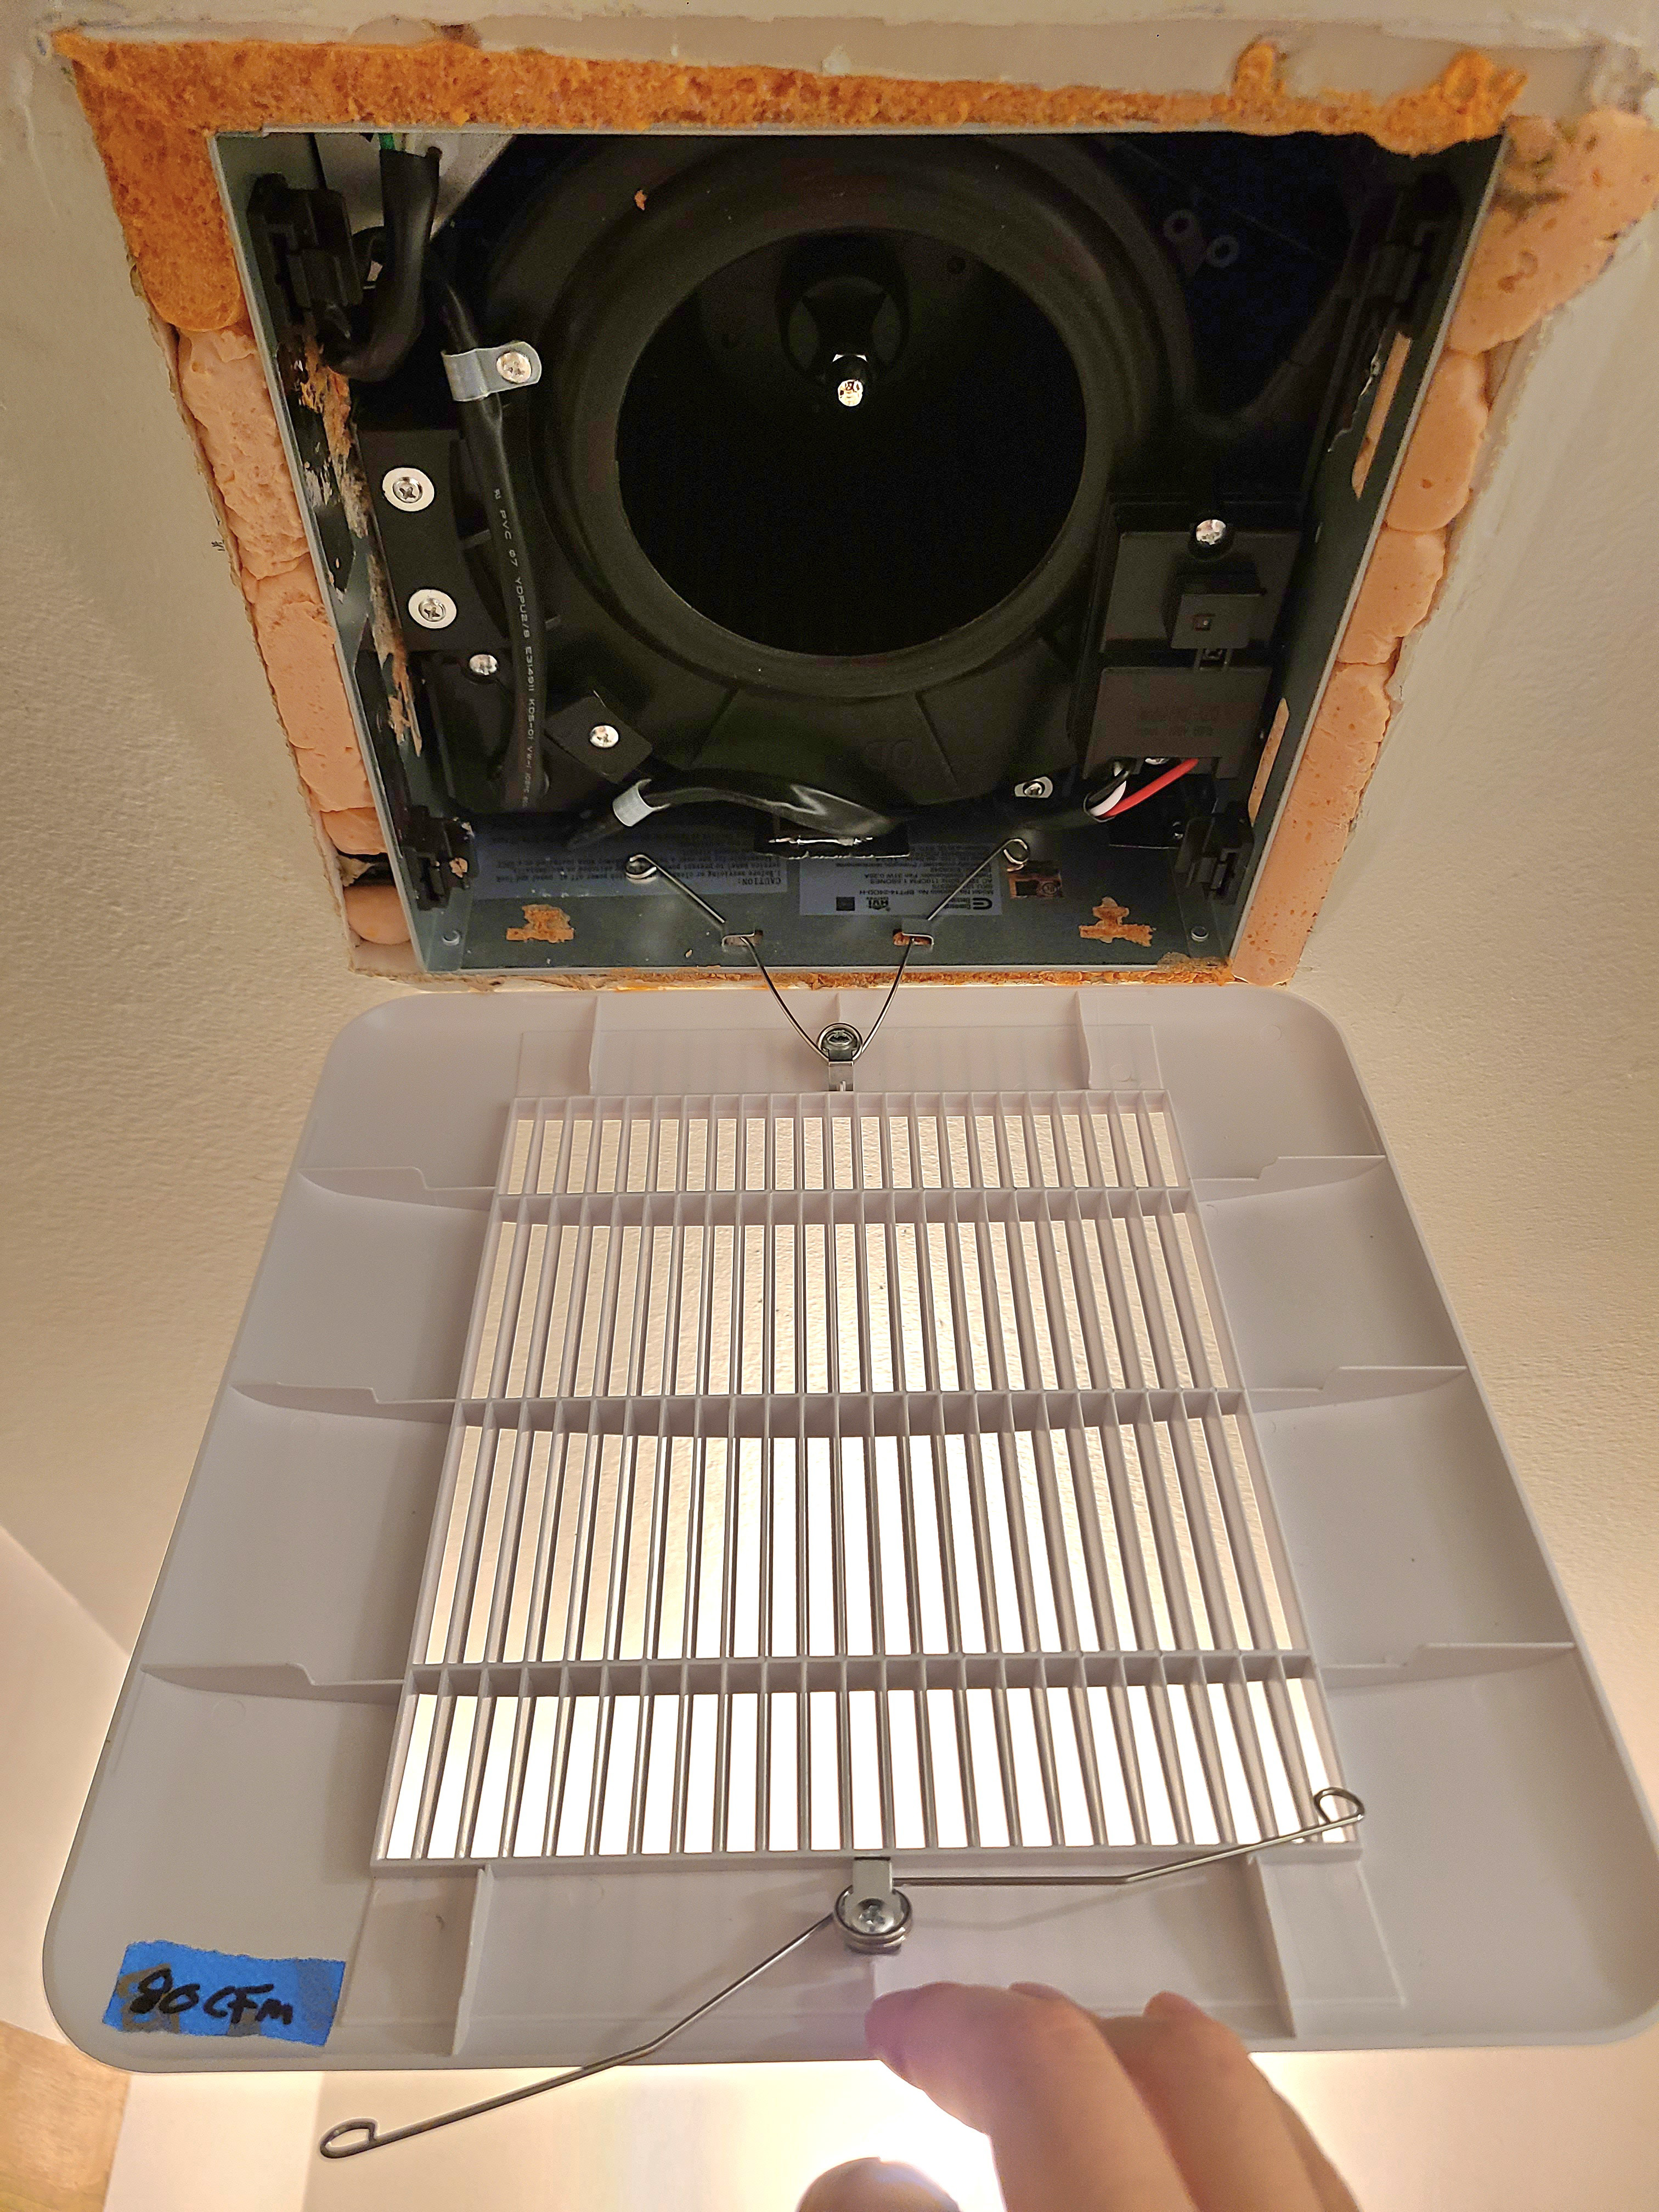
Figure 17. After air-sealing the exhaust fan box, re-install the fan, and lights if needed, and re-attach the cover (Source: PNNL).
Figure 18. Use the wall switch to turn on the bathroom exhaust fan (Source: PNNL).

Additional Info

Videos

References

Publication Date
·
Author(s)
Southface Energy Institute,
Oak Ridge National Laboratory,
U.S. Department of Energy
·
Organization(s)
DOE,
SEI
Description
Brochure describing the benefits of air-sealing for homeowners.
Last Updated

Disclaimer

This content is a work created with funding provided by the United States Department of Energy under Contract no DE-AC05-076RL01830 for the operation of Pacific Northwest National Laboratory. The information and guidance provided by Pacific Northwest National Laboratory (PNNL) in the content are intended solely for educational purposes only and do not constitute formal training or certification. It is provided with the explicit understanding that neither the United States Government nor the United States Department of Energy, nor the Contractor, nor any or their employees, nor any jurisdiction or organization that has cooperated in the development of these materials, makes any warranty, express or implied, or assumes any legal liability or responsibility for the accuracy, completeness, or usefulness or any information, apparatus, product, software, or process disclosed, or represents that its use would not infringe privately owned rights. Reference herein to any specific commercial product, process, or service by trade name, trademark, manufacturer, or otherwise does not constitute or imply its endorsement, recommendation, or favoring by the United States Government or any agency thereof, or Battelle Memorial Institute. The views and opinions of authors expressed herein do not necessarily state or reflect those of the United States Government or any agency thereof. Viewers assumes full responsibility for all actions that they may take from information provided in this content including ensuring the safety, code compliance, and proper functionality of any products they choose to install. Installation and use of such products should be performed in accordance with local regulations and manufacturer instructions.