Introduction
Openings used for access to the attic such as access panels, doors into knee walls, or dropdown stairs should be air-sealed and insulated.
Why
Good air-sealing and a continuous air barrier between the attic and the home’s conditioned (living) space are important, not only for energy efficiency and reducing fuel bills, but also to prevent moisture problems in the attic. Sealing holes in the attic reduces the house’s “suction” (or stack effect) so less contaminants are drawn up into attic from the house, and into the house from the ground such as radon and other soil gases. Because the attic access is like an exterior door into the attic, it’s important to air seal and insulate it.
What You'll Need
- Wood trim pieces
- Weatherstripping
- Rigid foam insulation
- Caulk
- Contact cement (optional)
- Utility knife or scissors
- Circular saw (optional)
- Latch (optional)
1. Examine the attic access.
Locate your attic access. It may be an access panel located in a bedroom closet or hallway, or a pull-down staircase located inside the home in a hallway or out in the garage, or it may be a small door on a wall of a room located on the second floor of your home. If your attic access is in the garage you may be tempted to think air-sealing the hatch isn’t important, but if the space over your garage is connected to the space over the rest of your home, air-sealing is important to keep garage fumes from spreading across your attic and entering your living space through unsealed cracks around flues or HVAC (heating, ventilation, and air conditioning) ducts.
2. Install an insulation dam.
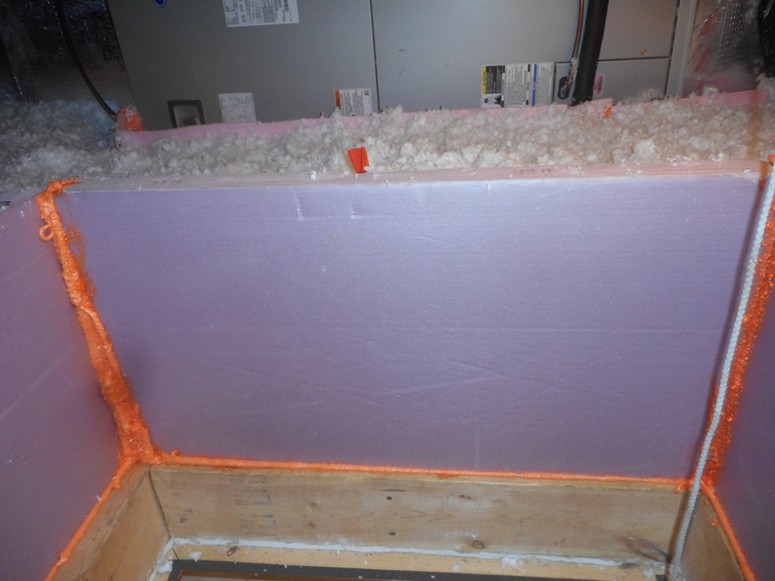
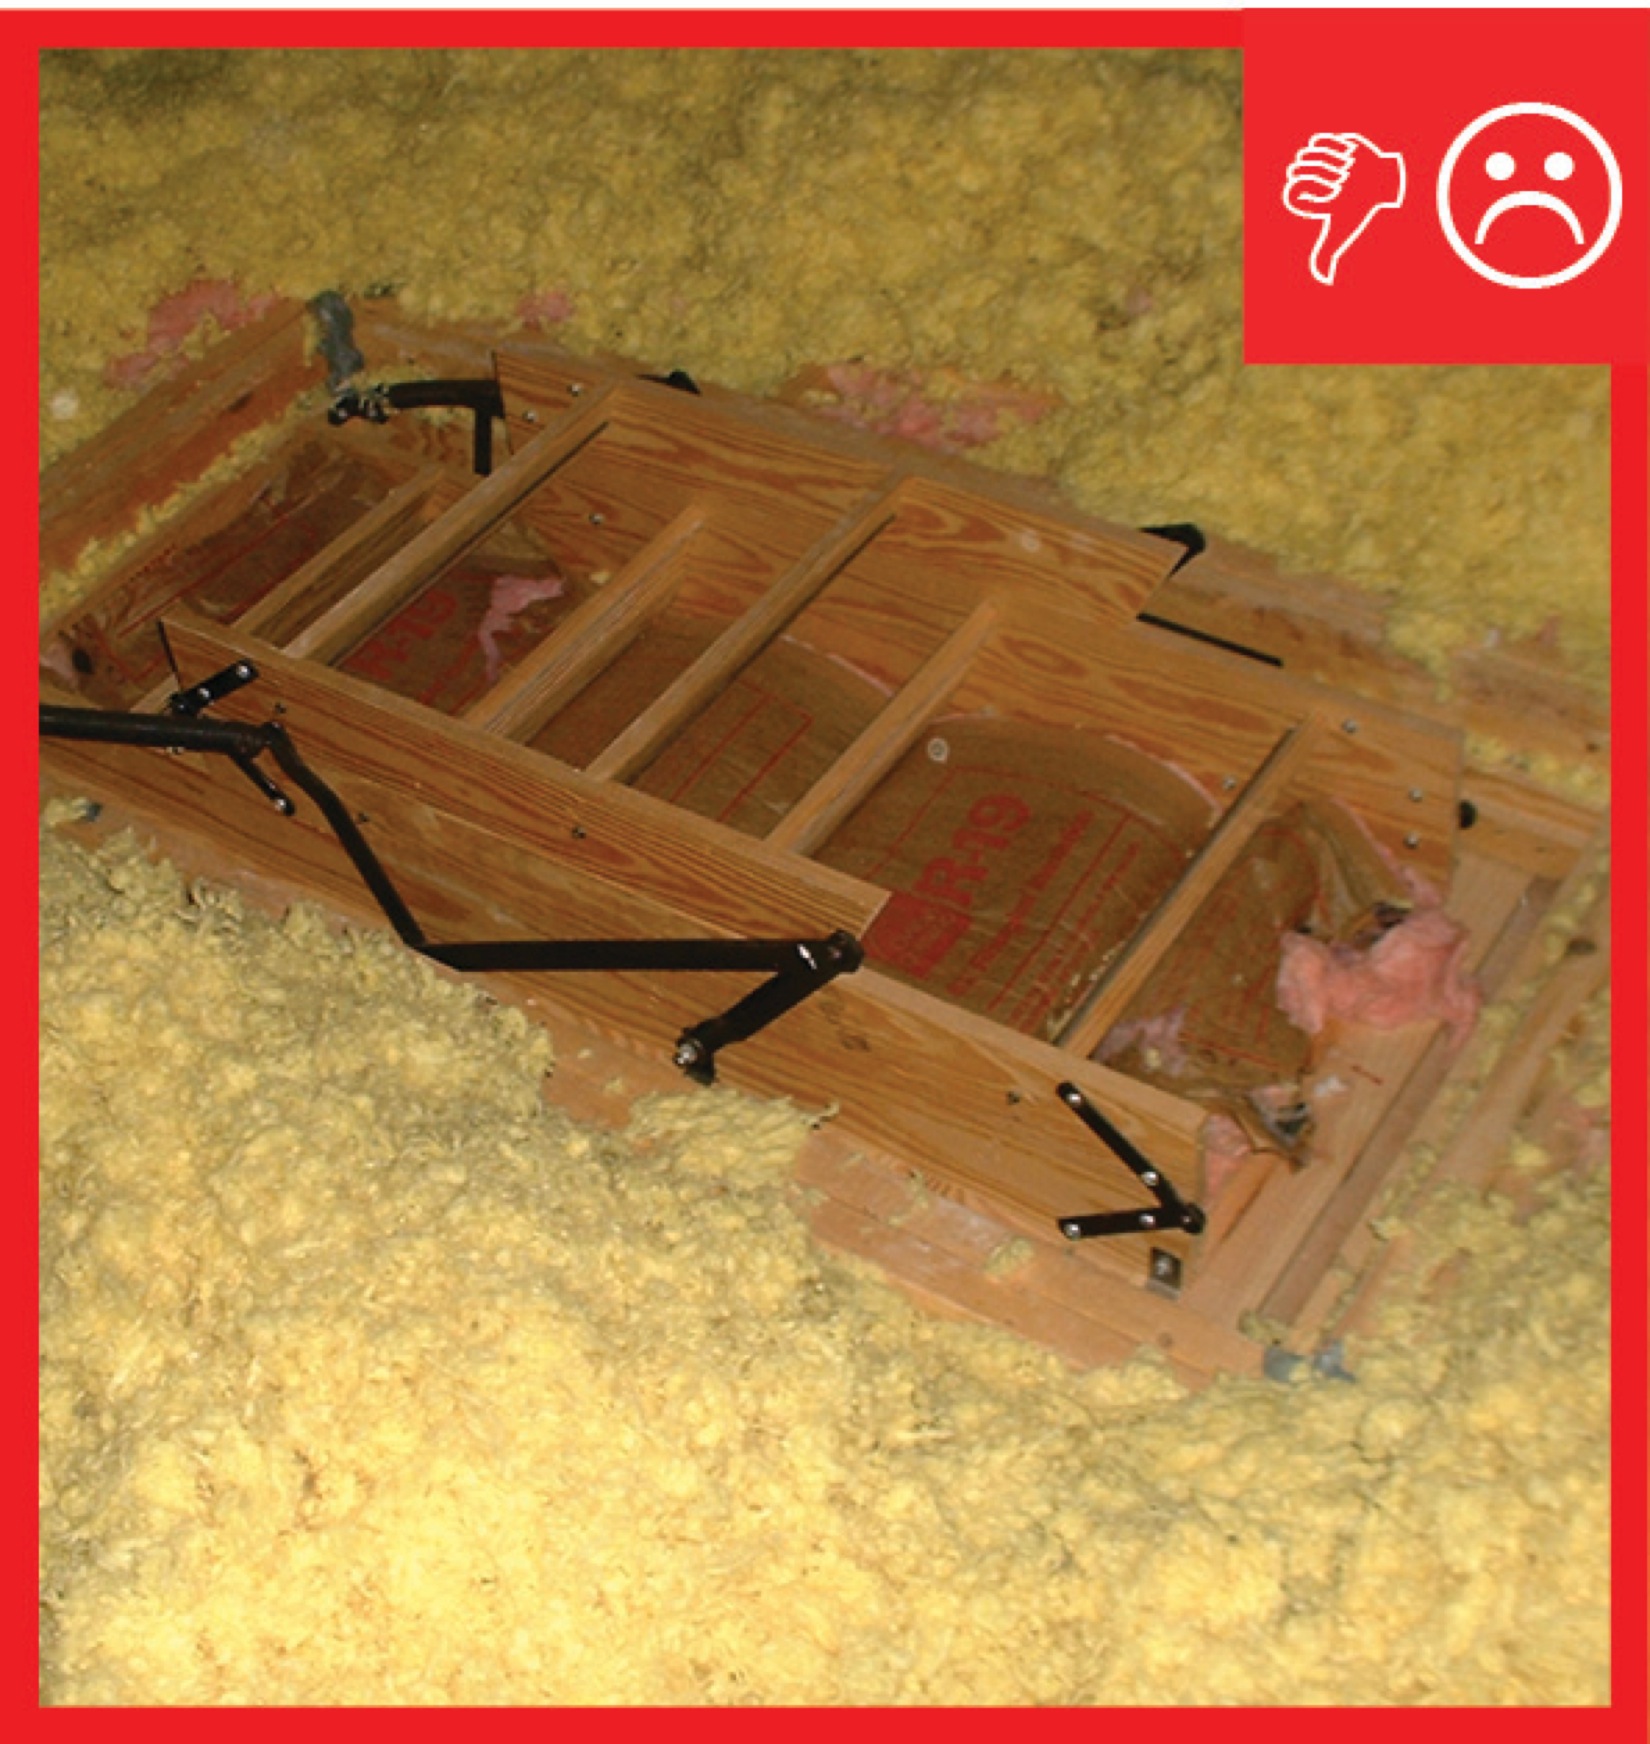
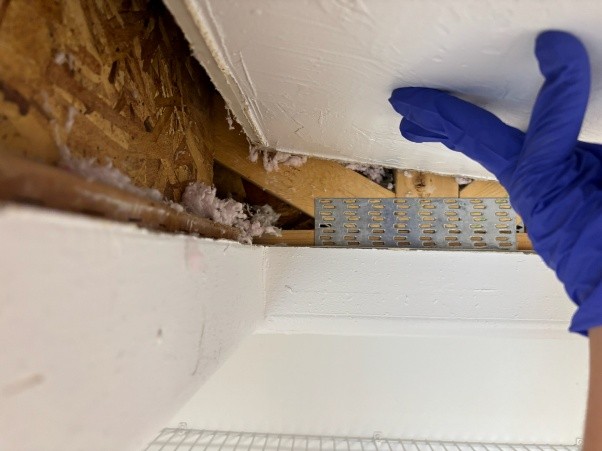
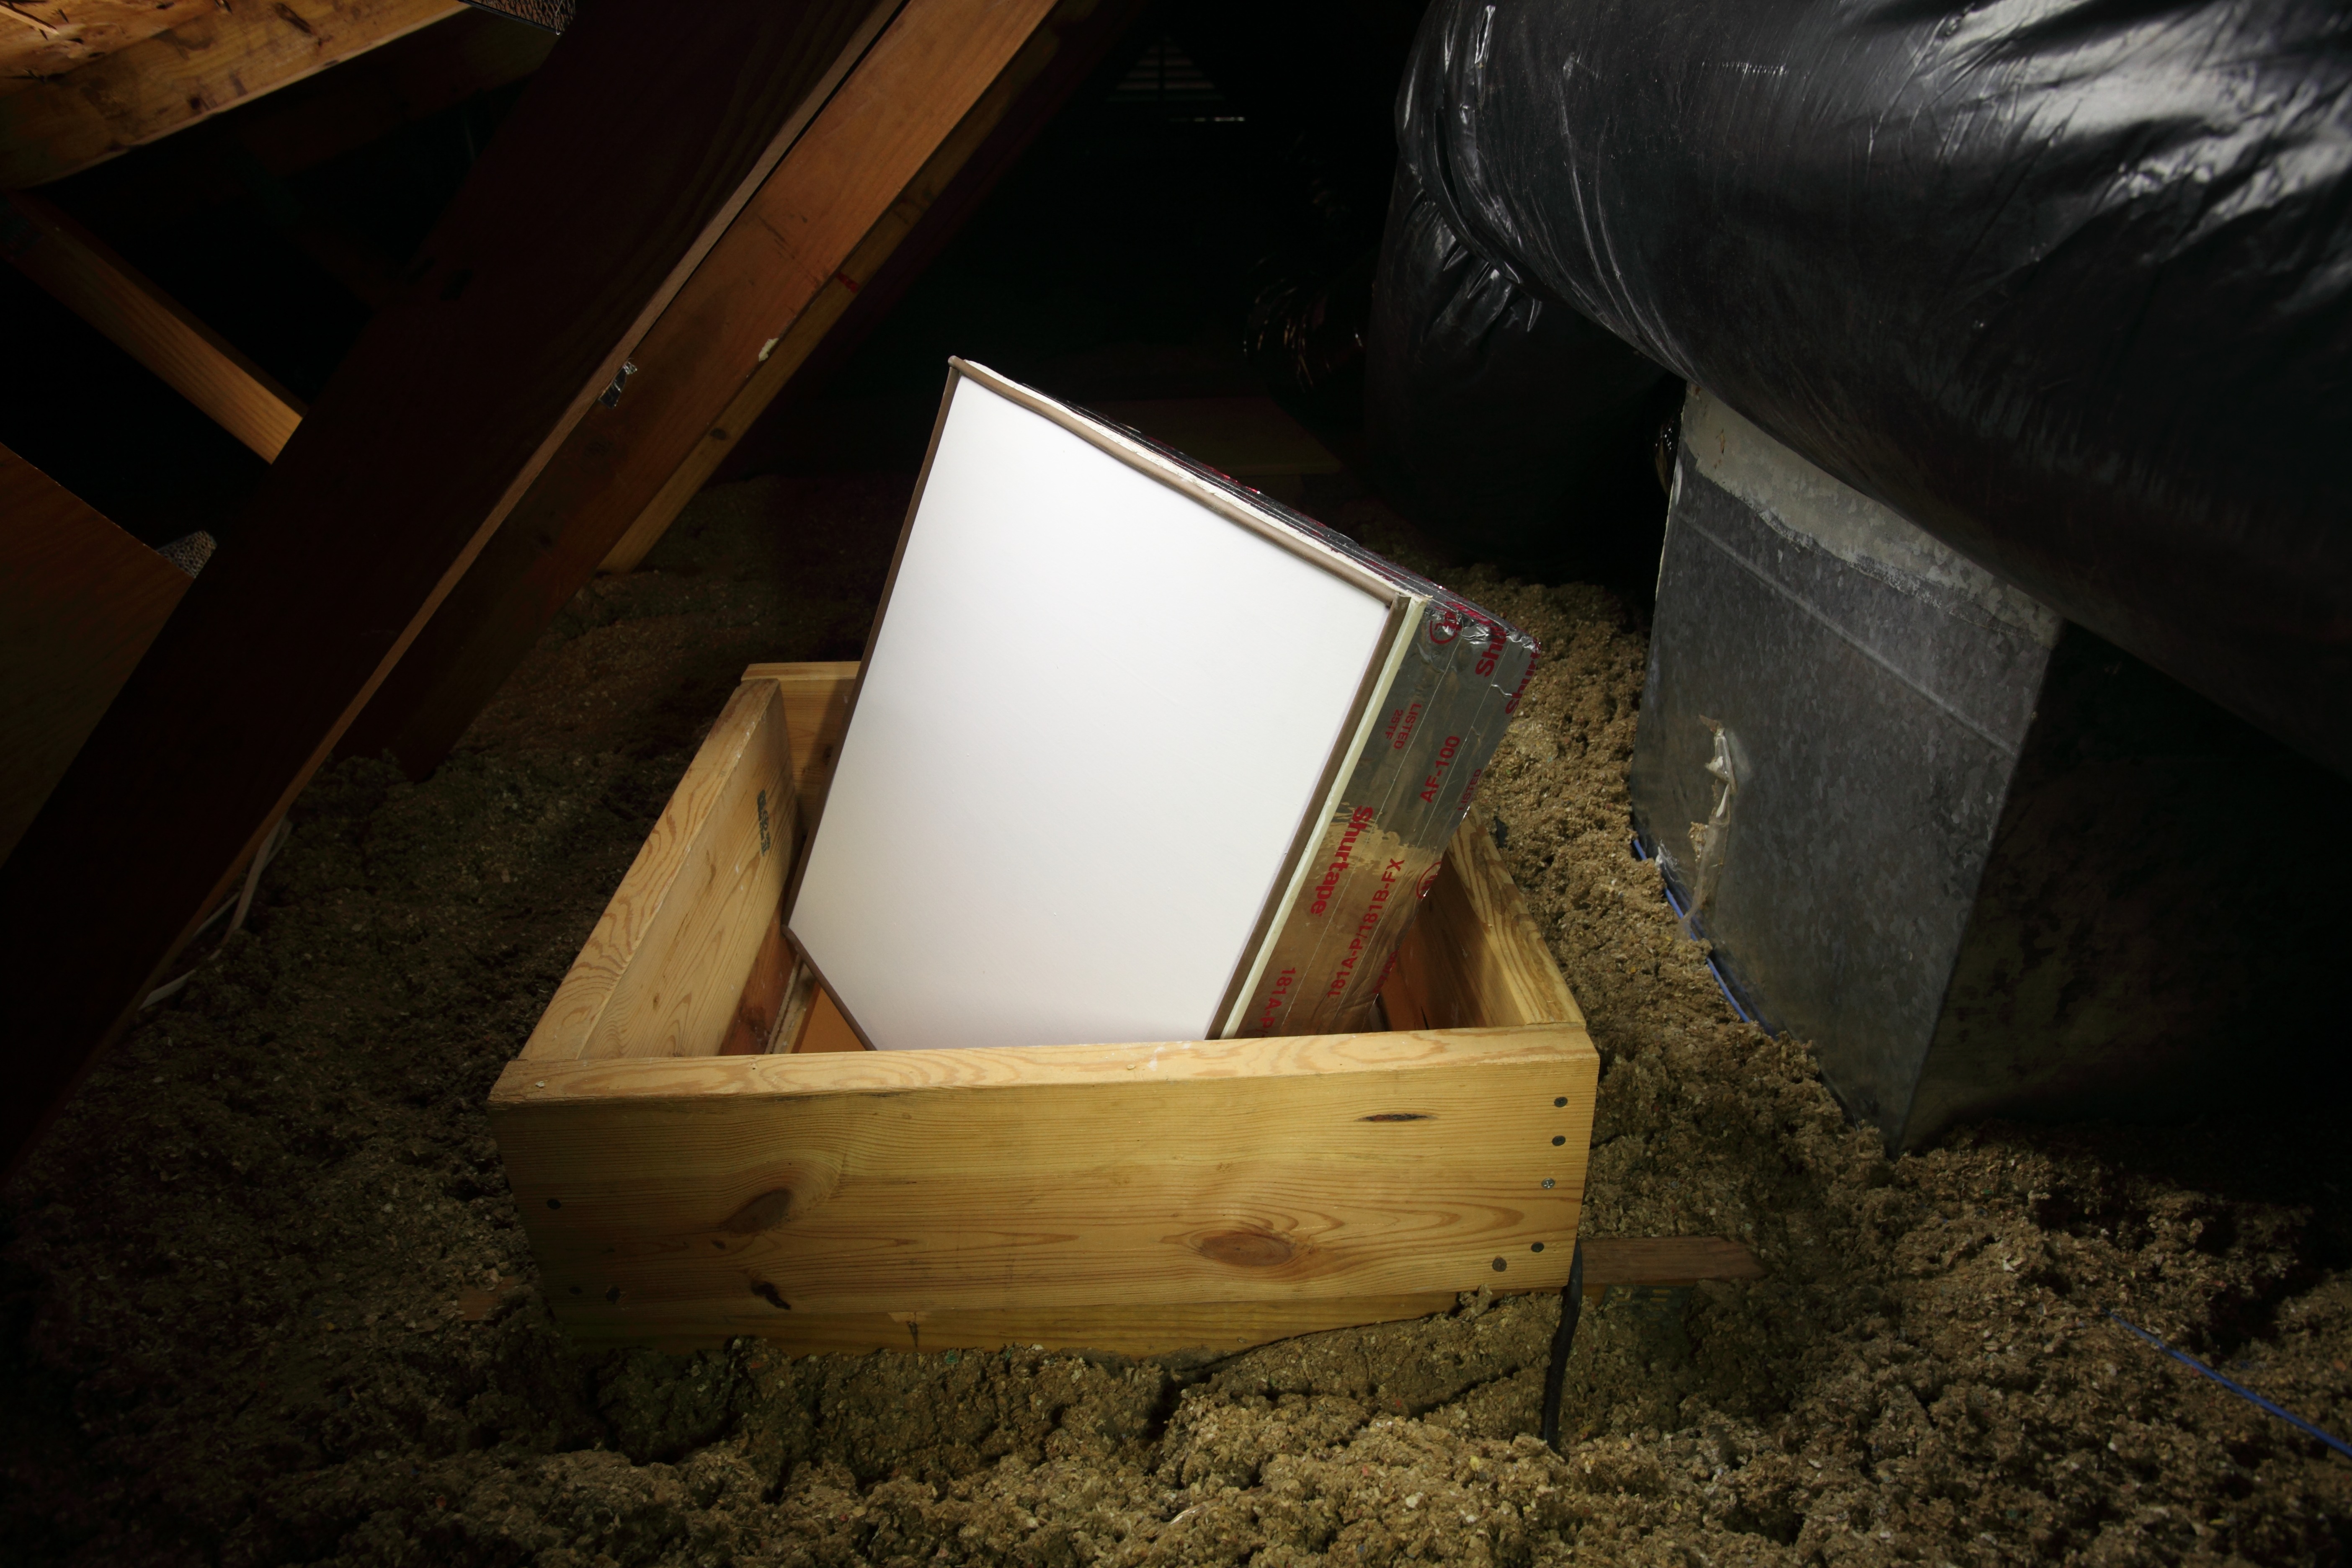
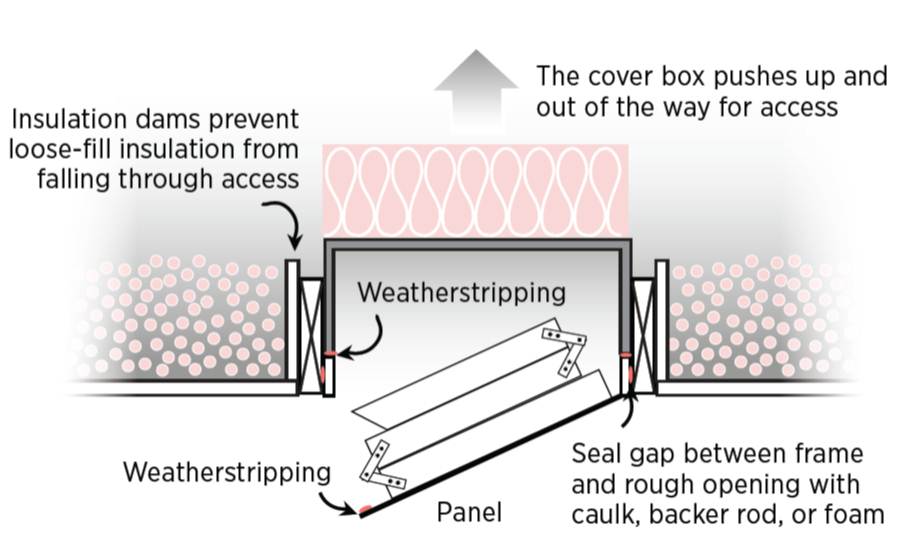
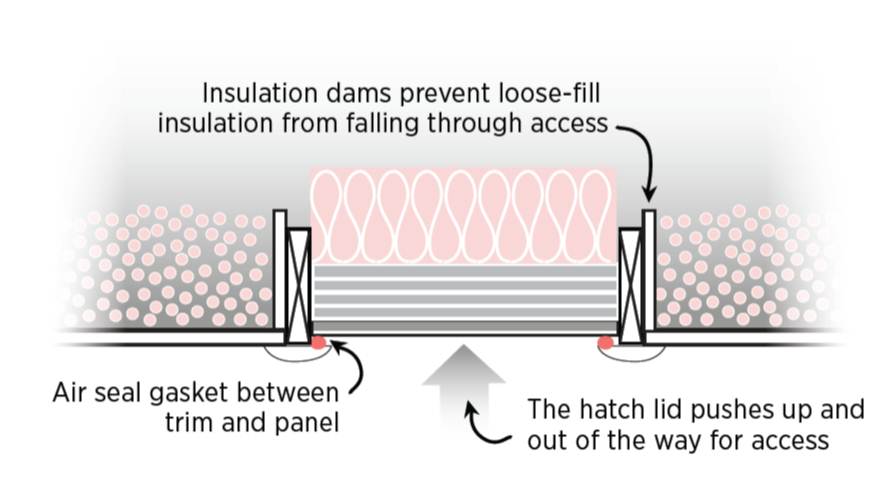
If your attic access is in the ceiling of your home, lay out a tarp before opening the hatch or pulling down the stairs. If the access is a hatch panel, get a ladder tall enough to comfortably lift the hatch panel. Wear eye protection and gloves. Slowly lift the hatch lid or pull down the stairs. If a lot of blown insulation falls down through the hatch opening, you may want to install an insulation dam around the opening (Figure 1). An attic insulation dam prevents loose-fill blown insulation from falling through the access. Figure 2 shows pull-down attic stairs without an insulation dam to prevent loose insulation from falling. Figure 3 shows an attic hatch without an insulation dam, allowing blown insulation to fall out when opened.
An attic dam can easily be constructed using framing lumber and rigid foam or cardboard for the sides; 16 inches or taller is the recommended height to accommodate current and future insulation. Seal the corners with tape or canned spray foam. Figure 4 shows another example of an insulation dam made from 2x8s.
Source
Source
Guide describing details that serve as a visual reference for each of the line items in the Thermal Enclosure System Rater Checklist.
Source
Source
3. Apply weatherstripping.
Regardless of the attic access method, weatherstripping will help create an airtight seal when the access is closed. The self-adhesive that comes with foam weatherstripping tape often doesn’t stick well to wood or drywall. To help it stick better, use a rag or dust brush to clean the surface, and then apply contact cement to the perimeter of the access hatch to the same width as the weatherstripping and wait for it to dry to a tacky consistency.
- For stairs:
- Install 1x2 or 1x3 or baseboard wood trim pieces to surround the inside edge of the access hole framing (Figure 5). When closed, the back panel of the stairs will rest up against this trim, so recess the trim enough to ensure the back panel will be flush with the ceiling.
- Install weatherstrip along the bottom edge of the trim where the hatch or panel will sit to act as a continuous gasket.
- For access panels:
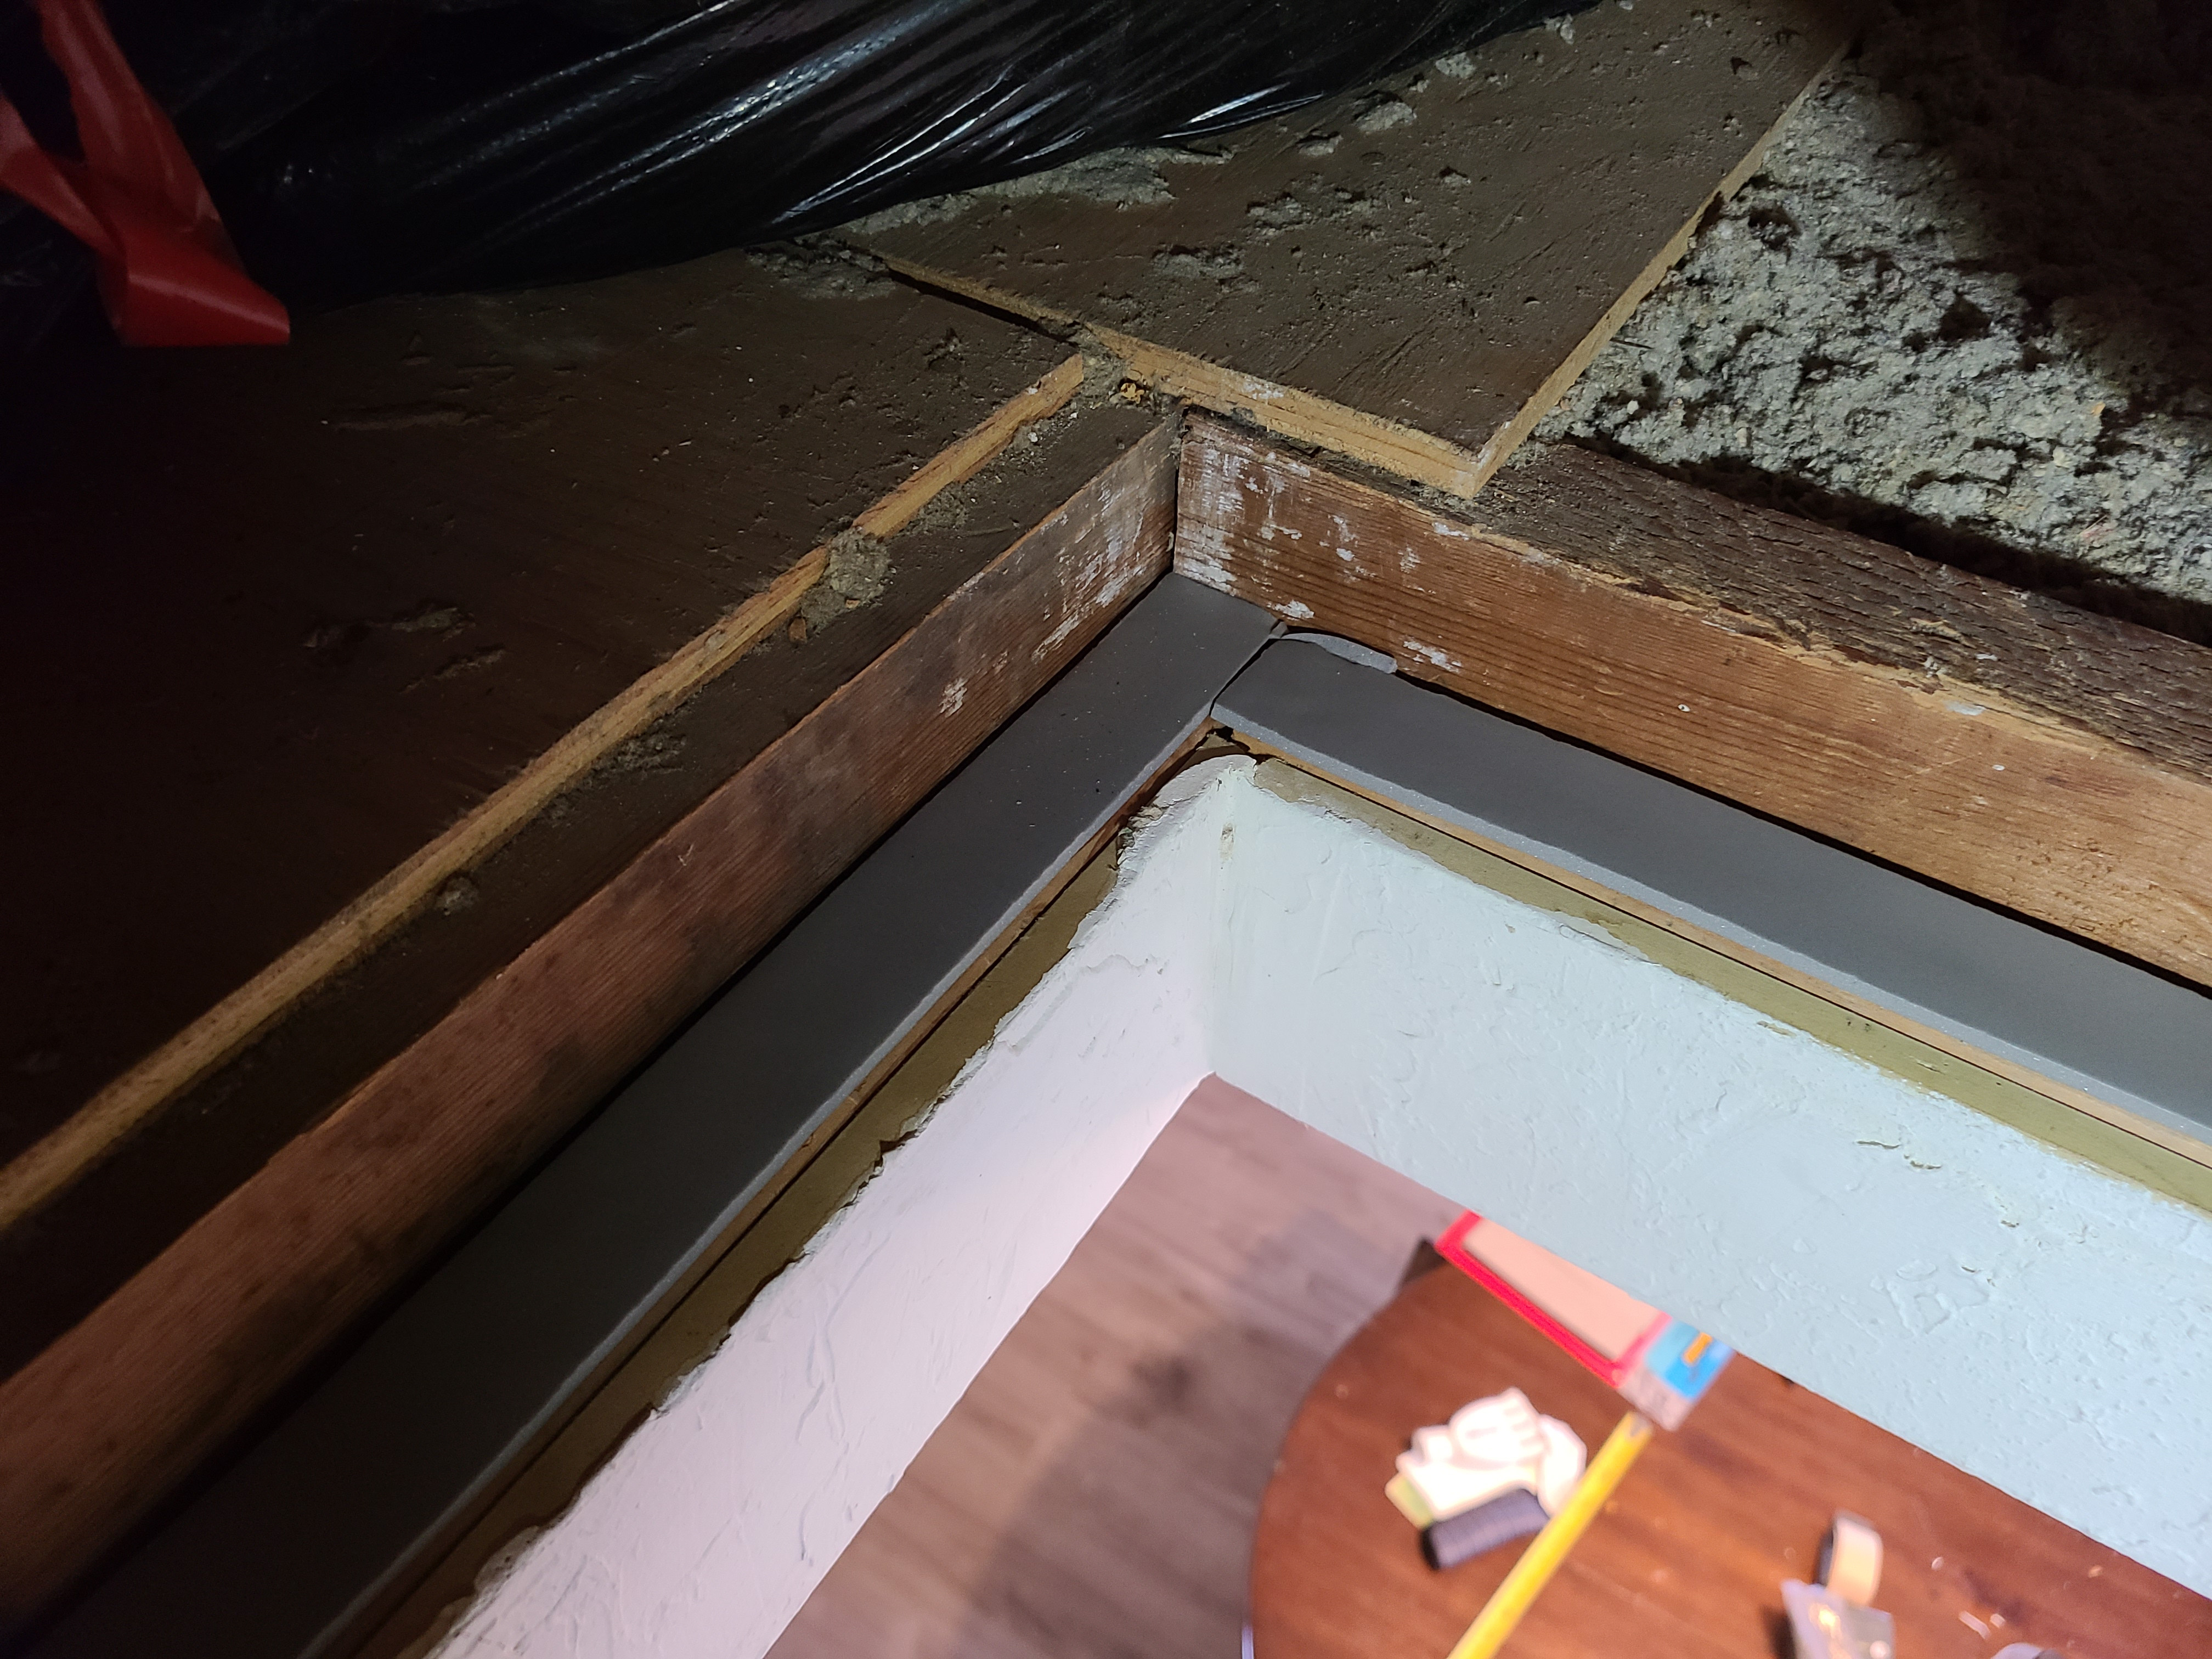
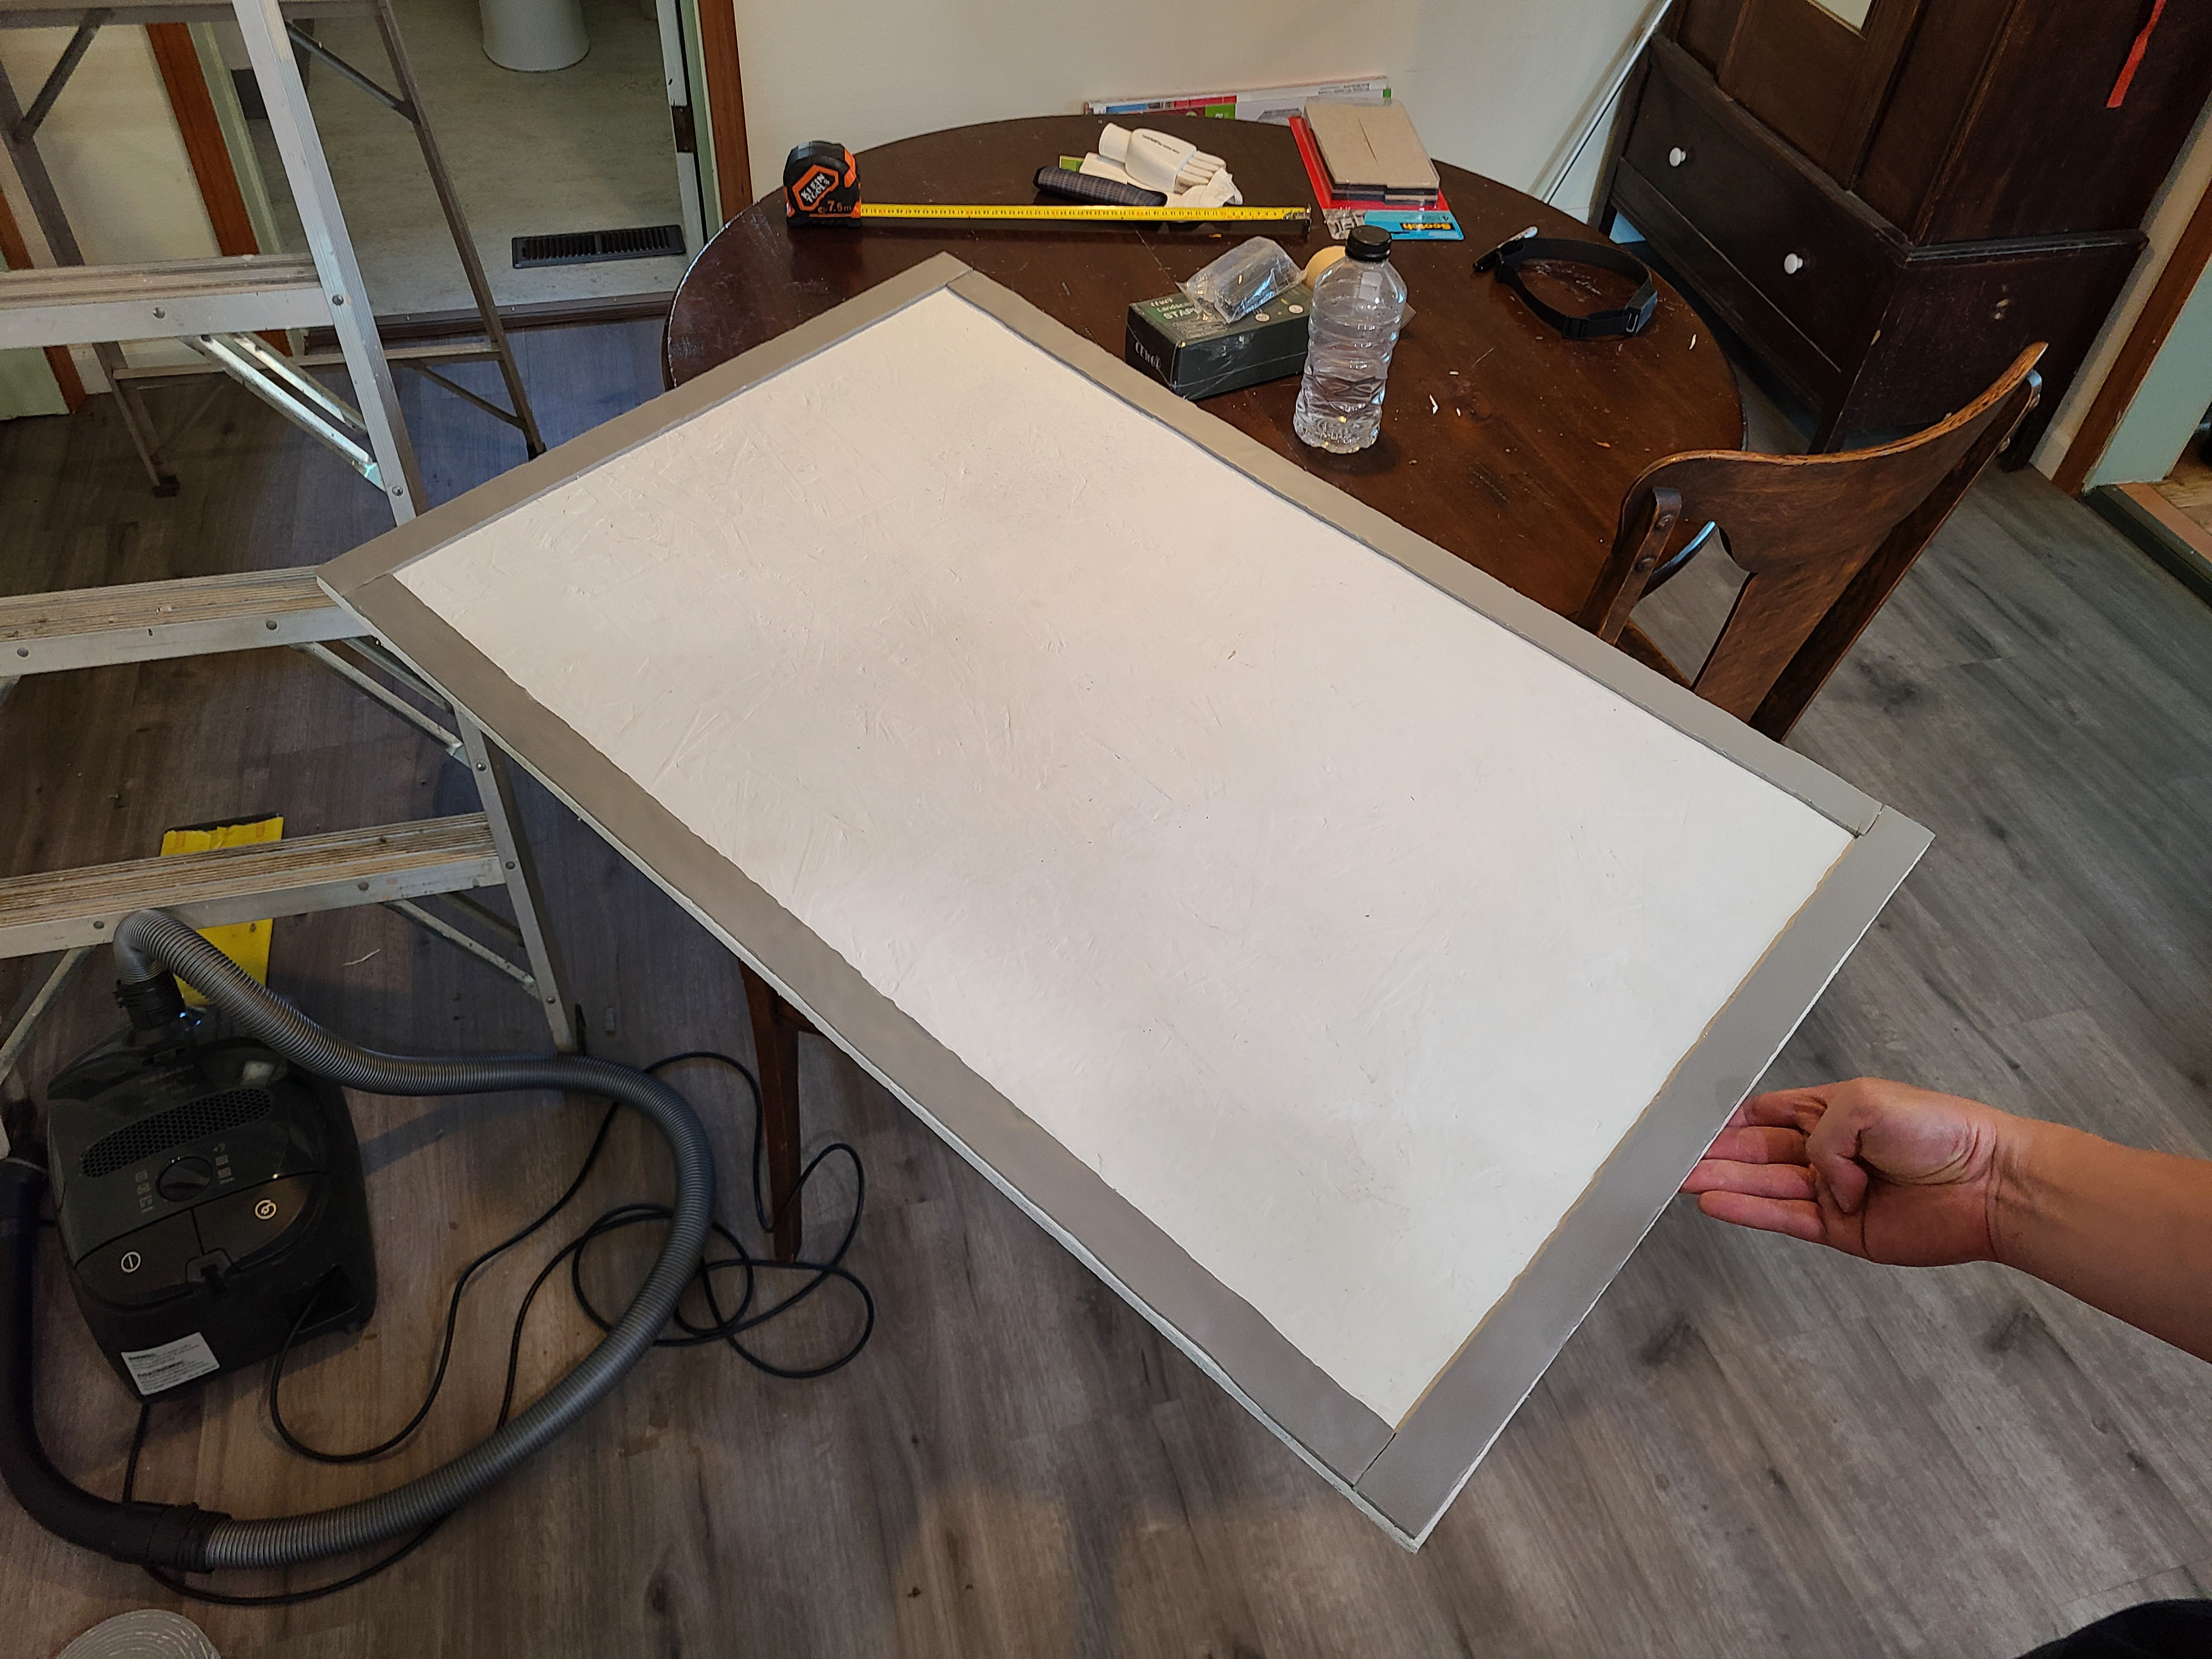
- Install wood trim pieces on the ceiling side of the attic access hole framing (Figure 6). The trim should extend by 1/2 inch around the inside edge of the access hole to form a ledge. The access panel will rest on this trim.
- Install weatherstripping
- along the top edge of the trim where the hatch or panel will sit to act as a continuous gasket (Figure 7)
OR - along the edges of the panel (Figure 8)
OR - along both the hatch framing and the panel. Secure the weatherstripping with rubber cement.
- along the top edge of the trim where the hatch or panel will sit to act as a continuous gasket (Figure 7)
- For access doors:
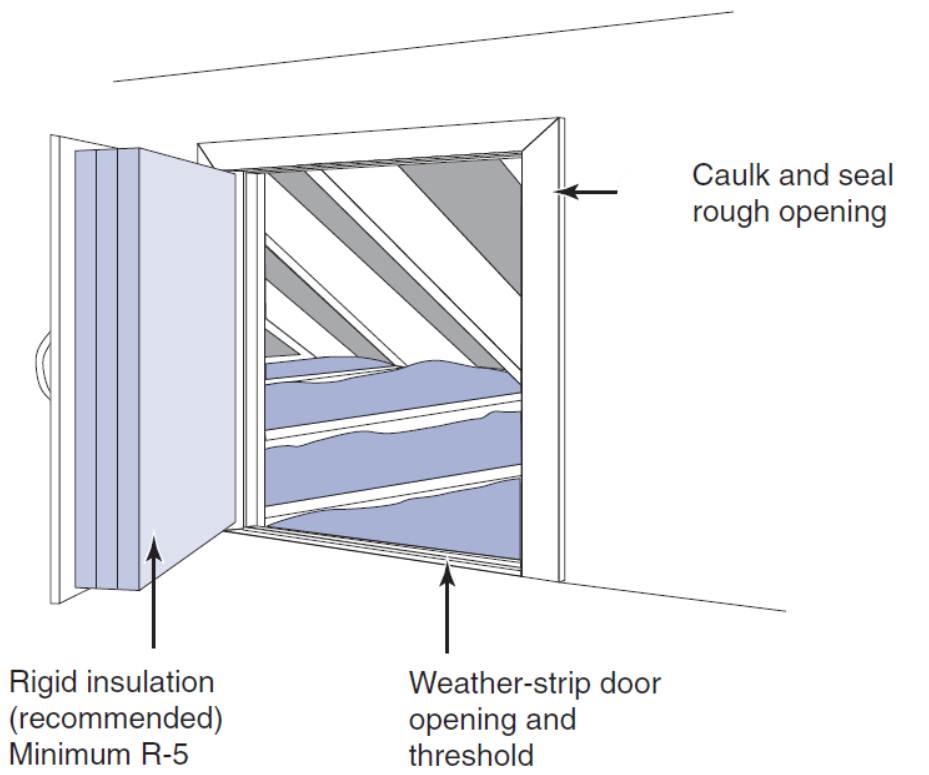
- Install foam weatherstripping along the inside door frame and install a threshold weatherstrip along the threshold of the door opening (Figure 9).
Also make sure to caulk any trim and framing seams. If it looks like additional weatherstripping will offer a better seal, then also apply weatherstripping to the edges of the door or panel where it will meet the opening.
Source
Report identifying the steps to take, with the help of a qualified home performance contractor, to seal unwanted air leaks while ensuring healthy levels of ventilation and avoiding sources of indoor air pollution.
Source
Report identifying the steps to take, with the help of a qualified home performance contractor, to seal unwanted air leaks while ensuring healthy levels of ventilation and avoiding sources of indoor air pollution.
Source
Source
Source
Document describing the air leakage provisions of Appendix RA of the 2015 IECC (prepared for the State of Georgia to assist with compliance with their 2019 Energy Code).
4. Install Insulation.
The attic access needs to be insulated to the same or nearly the same R-value as the rest of the attic. For all attic accesses, rigid foam is recommended. For ceiling access panels, batt insulation or rigid foam insulation may be used but rigid foam is more compact and durable, and often more insulating.
- For stairs, install additional weatherstripping along the top of the trim to provide air-sealing for a box-shaped cover that will insulate the stairs.
- Construct or purchase a box made of rigid foam insulation sized to fit the access stairs. This box can be lifted and placed out of the way when accessing the attic. Additional batt insulation can be attached to the top of this box if desired.
- Alternatively, some pull-down stair kits come with rigid insulation already attached to the inside of the back door panel, between the panel and the stairs.
- For access panels, insulate the attic-side of the panel with rigid foam or fiberglass batt insulation that is glued or fastened with bolts and wires to the panel.
- For access doors, insulate the attic side of the door by gluing rigid foam to it or attaching batt insulation with screws and wire.
5. Install a latch.
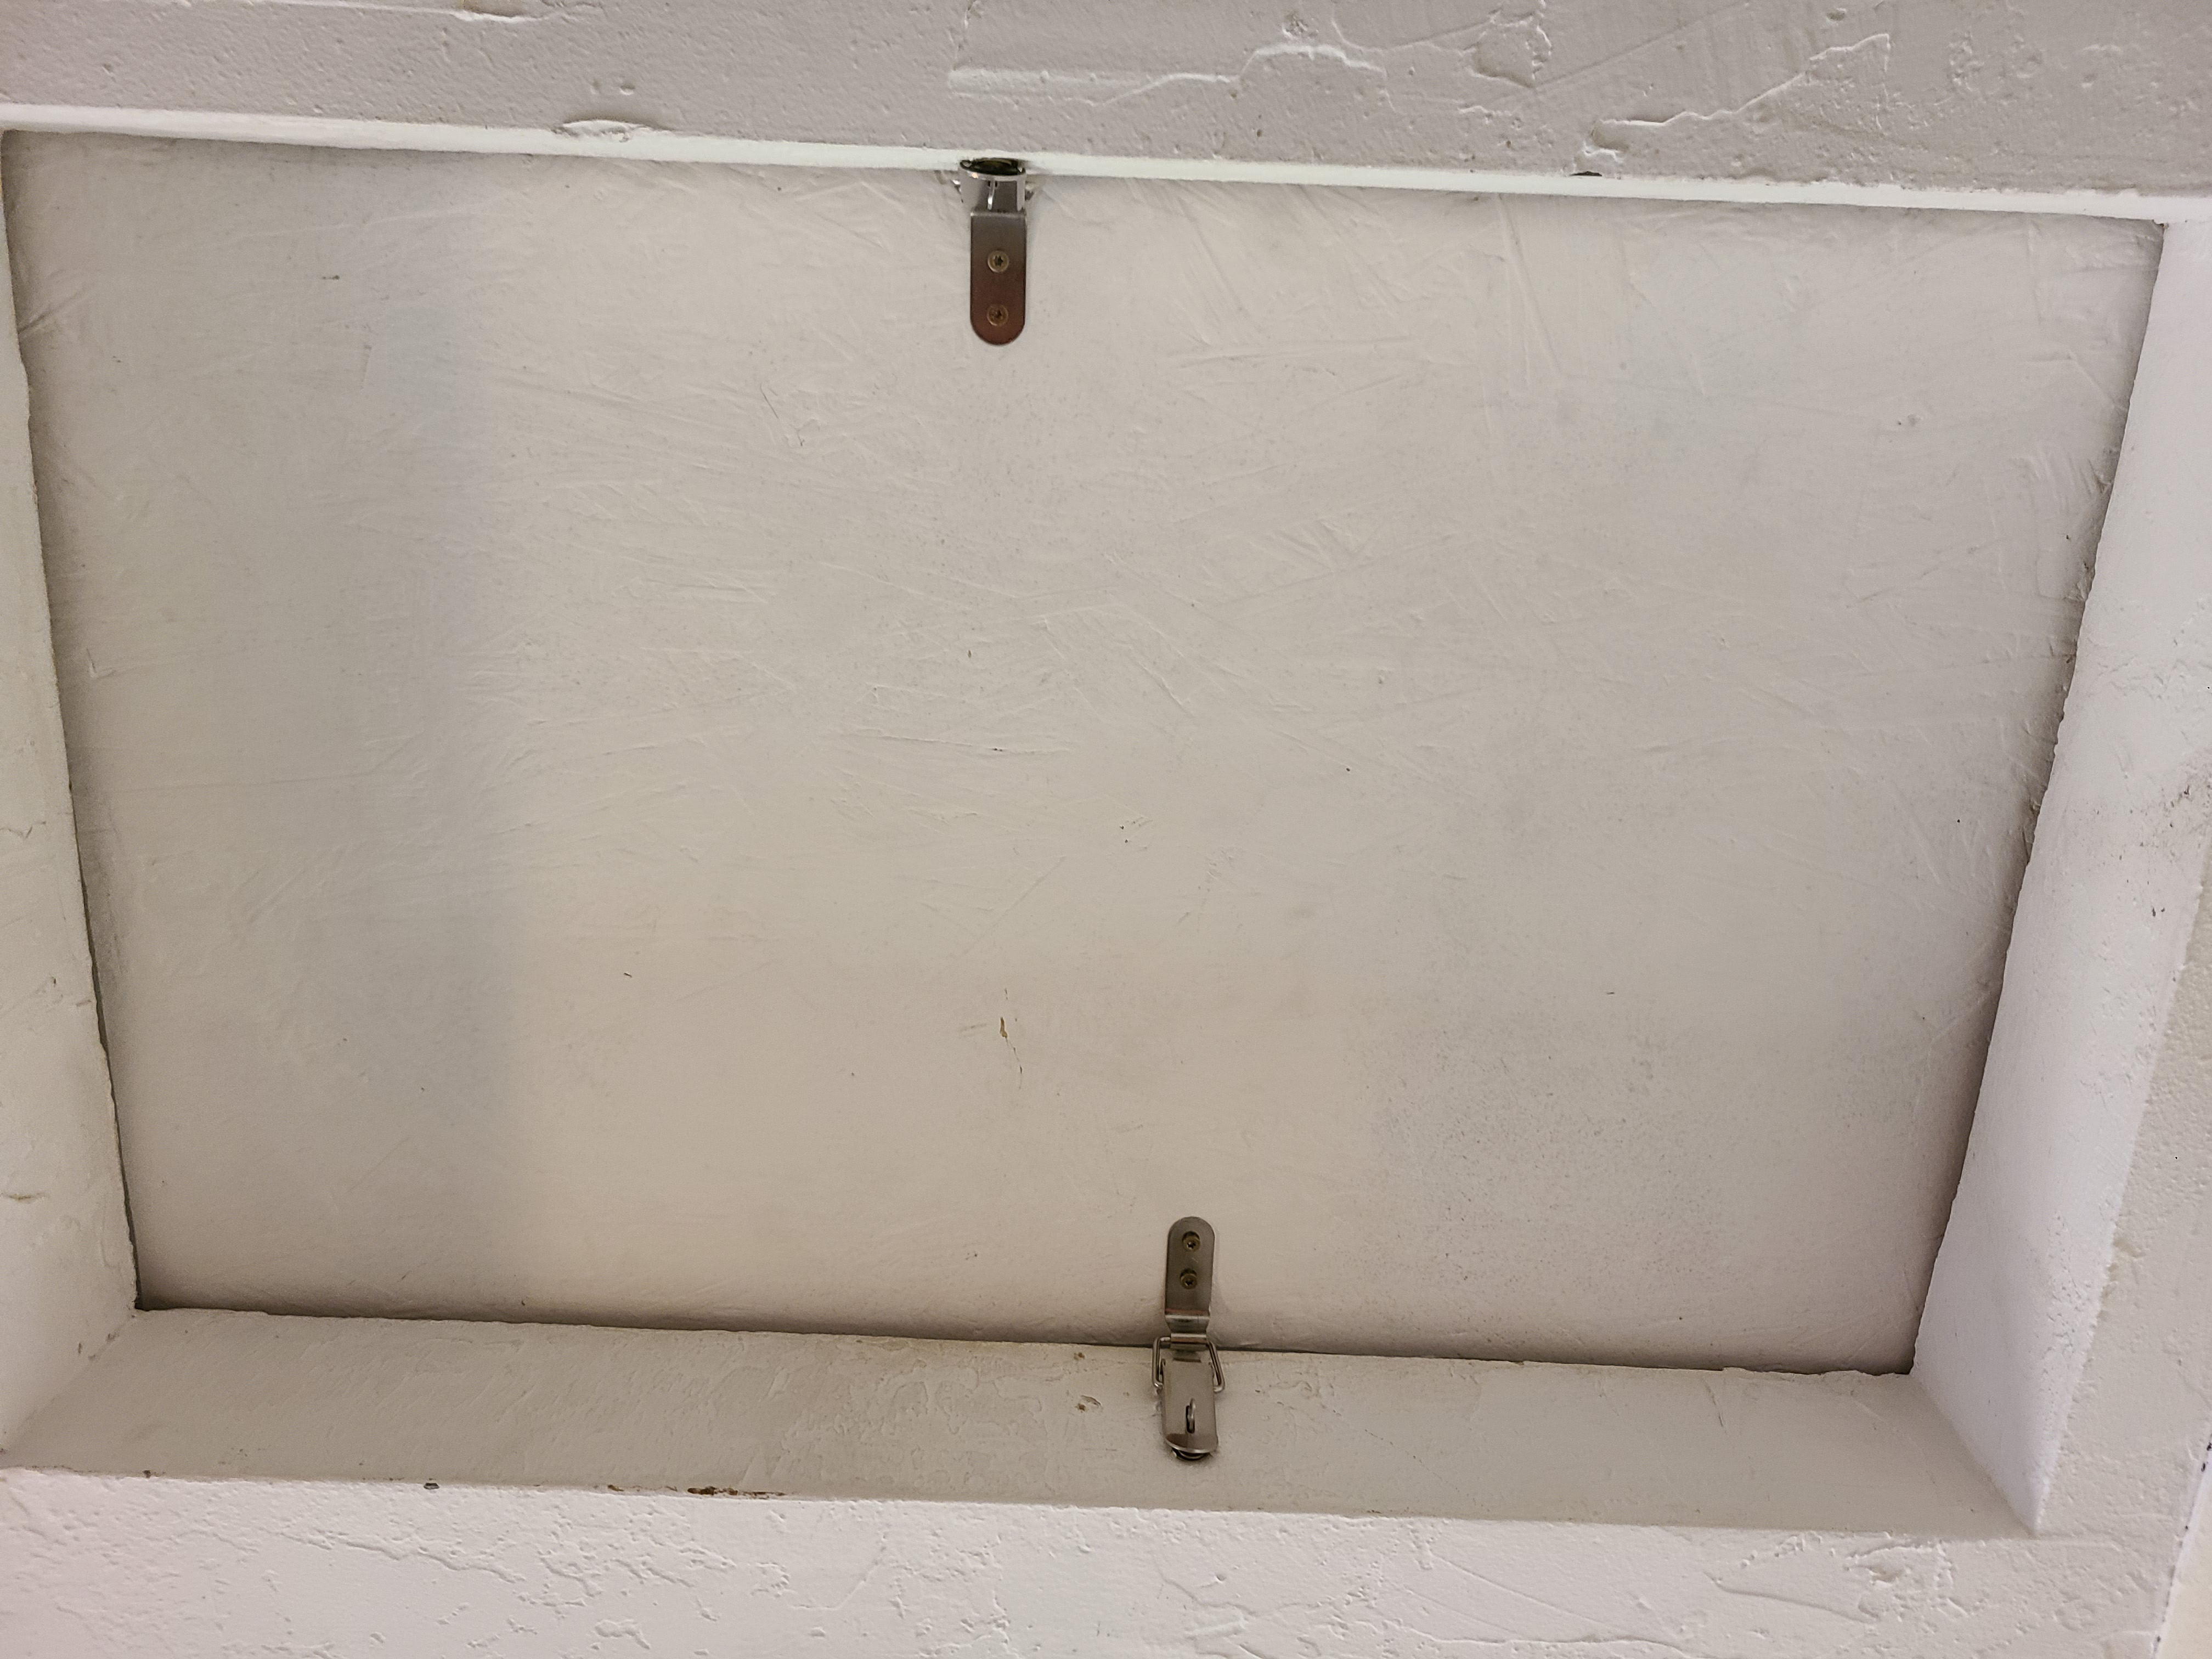
Adding a latch can help to pull the door or hatch into the weatherstripping for a more tight air seal (Figure 10). Ensure the latch is easy to operate but is secure and holds the access panel tightly when closed. A second latch on the opposite side of the panel may be desired for hatch panels to provide a secure hold.
Source
6. Caulk around the trim.
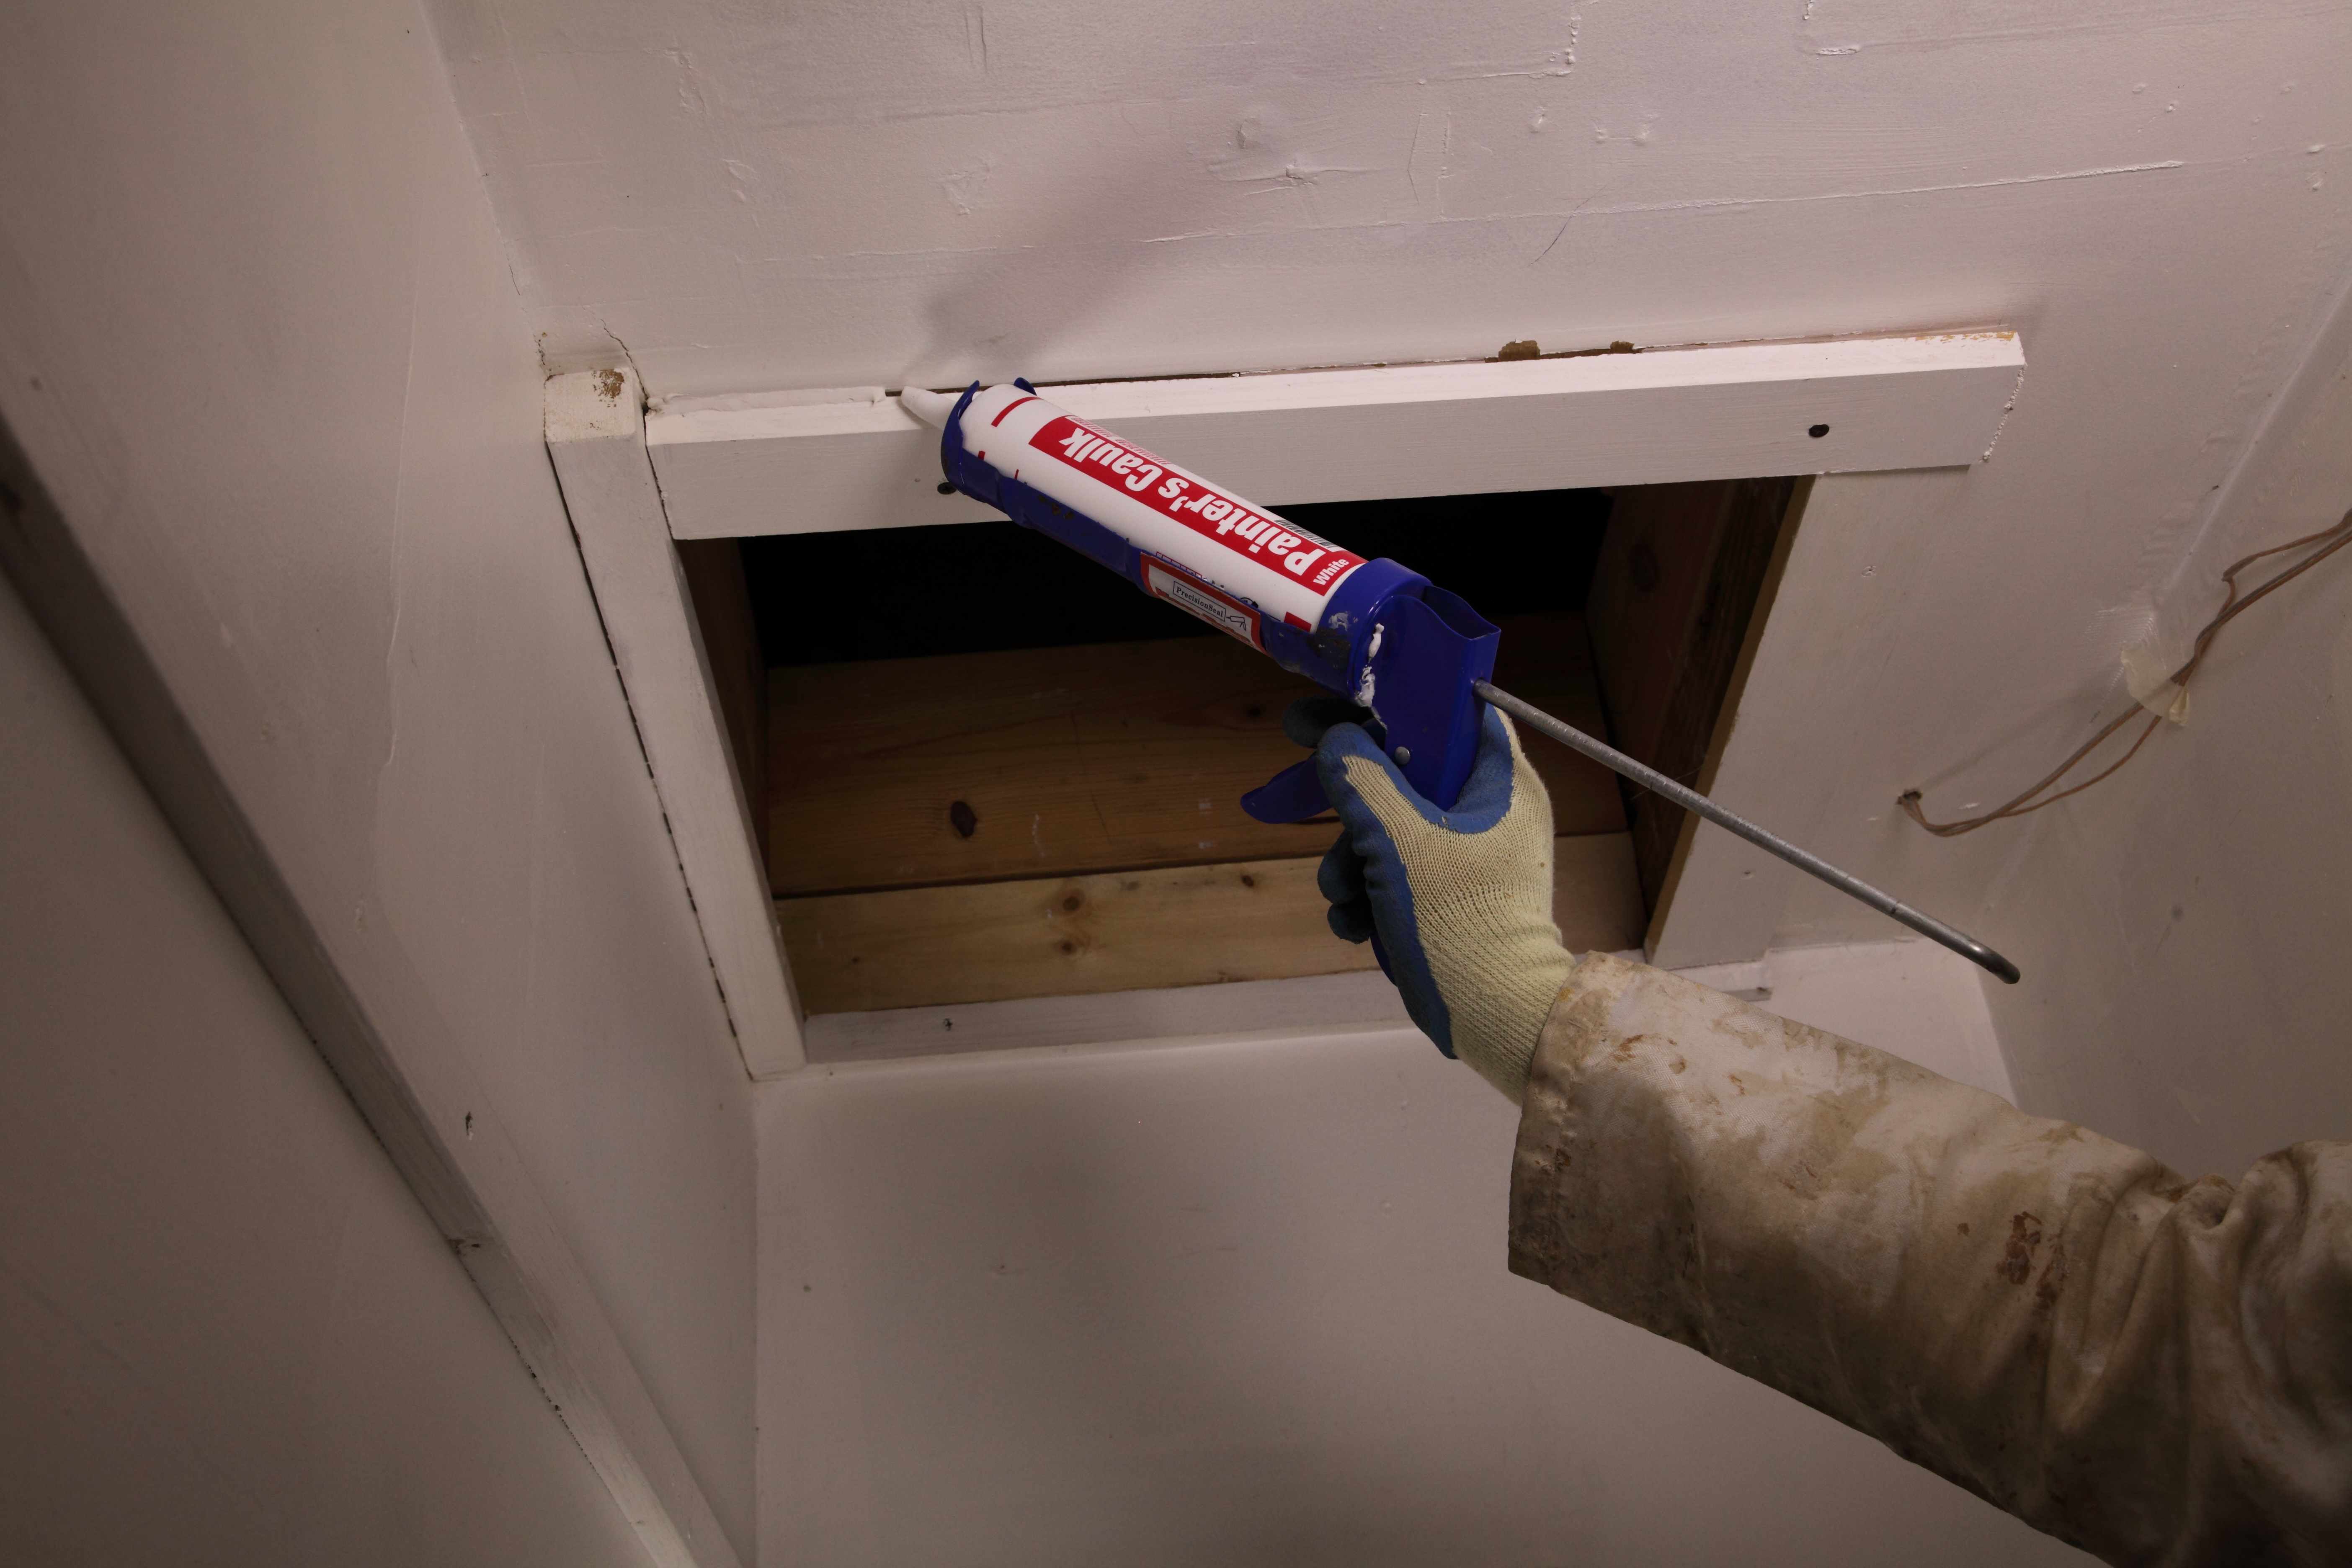
Caulk around the trim from the room side of the hatch or access door where the trim meets the drywall (Figure 11).